by
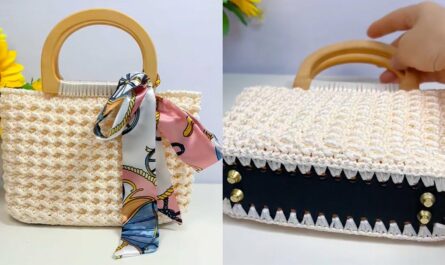
by A simple dress can be utterly transformed by the addition of the right belt. It can define a waist, add a pop of color, introduce texture, or simply elevate the entire outfit. While store-bought belts are an option, crocheting a belt for a dress offers unparalleled customization, allowing you to perfectly match colors, textures, and styles to create a truly unique accessory.
Whether you’re looking to give an old dress new life, complete a handmade garment, or simply use up some cherished yarn scraps, a crocheted belt is a rewarding and relatively quick project.
Why Crochet a Belt for a Dress?
- Perfect Match: Achieve an exact color or texture match to a dress, or create a stunning contrast that you can’t find off the rack.
- Custom Fit: No more struggling with belts that are too loose or too tight. Crochet allows you to make it the precise length you need.
- Personalized Style: From delicate and lacy to bold and chunky, you can create a belt that perfectly reflects your (or the wearer’s) unique style.
- Define the Waist: A belt is a fantastic tool for creating an hourglass silhouette or simply adding shape to a looser dress.
- Utilize Stash Yarn: Belts are often small enough to use up those beautiful single skeins or leftover bits of yarn you’ve been hoarding.
- Add Texture and Interest: Introduce a tactile element that can elevate a plain dress.
Planning Your Crocheted Belt
Before you pick up your hook, a little planning goes a long way to ensure your belt perfectly complements the dress.
- Consider the Dress Style:
- Flowy/Boho: A wider, perhaps lacy or textured belt, or a braided tie belt, would look lovely.
- Structured/Simple: A narrower, more defined belt with a clean stitch pattern might be best.
- Patterned: A solid color belt in one of the dress’s accent colors will tie it together.
- Solid: An opportunity to add texture, color, or even an intricate stitch pattern.
- Determine the Desired Look:
- Delicate & Subtle: A thin belt with fine yarn and an open stitch.
- Bold & Statement: A wider belt, chunky yarn, or a highly textured stitch.
- Intricate & Ornate: Complex stitches, beads, or layered elements.
- Simple & Everyday: Basic stitches with a clean finish.
- Measure for Length:
- For a Tie Belt: Wrap a measuring tape around the waist or where the belt will sit. Decide how much “tail” you want for tying. A good rule of thumb is waist circumference + 20-40 inches (50-100 cm) for a standard bow tie, or more for a long, flowing look.
- For a Buckle/Button/Hook-and-Eye Belt: Wrap the tape around the desired area. Add 2-4 inches (5-10 cm) for overlap for a buckle or button closure.
- Determine Desired Width:
- Consider the proportion to the dress and the wearer’s body. A very wide belt might overwhelm a petite frame or a delicate dress. A very thin belt might get lost on a large dress. Anywhere from 0.5 inches (1.25 cm) to 3 inches (7.5 cm) is common.
- Choose Your Closure Type:
- Tie Belt: The simplest, requiring no hardware. Ends can be simple, braided, or finished with tassels/pompoms.
- Buckle Belt: Requires a buckle to thread the belt through.
- Button/Buttonhole Belt: A button sewn to one end, with a crocheted buttonhole on the other.
- Hook-and-Eye/Snap Belt: A very discreet closure for a clean look.
- Crocheted Loop/Toggle: A loop crocheted on one end to hook over a large button or crocheted toggle on the other.
Materials You’ll Need
- Yarn: Your choice of yarn will dictate the belt’s final look, drape, and durability.
- Fiber:
- Cotton: Excellent for summer dresses, provides good stitch definition, minimal stretch, and is durable.
- Cotton Blends (e.g., Cotton/Linen, Cotton/Bamboo): Great drape, softness, and breathability.
- Acrylic: Versatile, wide color range, easy to care for, good for structure or softness depending on type.
- Wool/Wool Blends: Can add warmth and texture, but might be too warm for a summer dress.
- Weight:
- Fingering/Sport (Category 1-2): For delicate, thin belts, or lacy designs.
- DK/Worsted (Category 3-4): Most versatile, good for textured or solid belts.
- Bulky (Category 5): For very chunky, statement belts.
- Fiber:
- Crochet Hook: Choose a hook size appropriate for your chosen yarn weight. Refer to the yarn label, but adjust if necessary to achieve the desired density (tighter for more structure, looser for more drape).
- Notions:
- Scissors: Sharp and handy.
- Tapestry Needle: For weaving in yarn ends neatly.
- Measuring Tape: For accurate planning and checking length.
- Stitch Markers (Optional): Useful for marking rows or repeats.
- Belt Buckle (if using): Choose a size that matches your planned belt width.
- Buttons, Hook-and-Eyes, Snaps (if using): For chosen closure.
- Grosgrain Ribbon (Optional): For lining the back of the belt for added stability and to prevent stretching, especially for heavier or lacy belts.
- Fabric Glue or Needle/Thread (if lining): For attaching the ribbon.
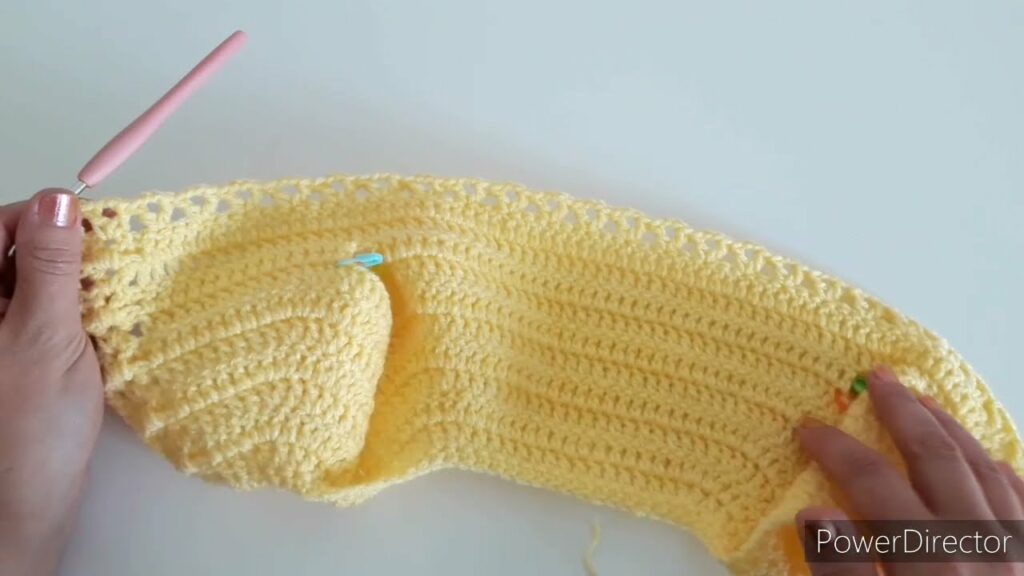
VIDEO TUTORIAL PART 1 ;
Stitch Patterns for Belts
Belts need a stitch pattern that is relatively sturdy, doesn’t stretch too much length-wise, and looks good on both sides (or has a clear front if it won’t twist).
- Solid & Sturdy:
- Single Crochet (sc): Creates a very dense, sturdy fabric. Excellent for a firm belt.
- Half Double Crochet (hdc): Slightly less dense than SC but still solid and works up faster.
- Double Crochet (dc): Works up quickly, more flexible/drapey than SC/HDC. Good for wider belts where drape is desired.
- Textured & Interesting:
- Moss Stitch (Linen Stitch): Alternating SC and chain spaces creates a dense, woven-like texture that is reversible and doesn’t stretch much.
- Ribbing (Front Post/Back Post Stitches or SC in BLO): Creates an elastic, textured fabric that is great for structure.
- Basketweave Stitch: Creates a beautiful, deep texture, but uses a fair amount of yarn.
- Grit Stitch: (SC, DC in same stitch, skip next) Creates a lovely subtle texture.
- Lacy & Delicate (Often Best Backed/Lined):
- V-Stitch: Simple and open.
- Shell Stitch: Creates beautiful scalloped edges or patterns.
- Filet Crochet: Can be used to create open mesh or simple designs.
- Note: Lacy belts may stretch more or not hold shape as well unless lined with ribbon.
Basic Construction Method (Most Common: Working in Rows)
- Foundation Chain: Based on your desired belt width, crochet a foundation chain that is slightly longer than your final desired width.
- Test Chain: Make a small test chain (e.g., 10-15 stitches) in your chosen stitch pattern (e.g., first row of SC or HDC) to see how many stitches it takes to achieve your desired width. This accounts for your tension and yarn thickness.
- Working the Body of the Belt:
- Row 1: Work your chosen stitch pattern across your foundation chain.
- Subsequent Rows: Continue working rows in your chosen stitch pattern until the belt reaches your desired length (measured from your planning stage).
- Keep Tension Consistent: This is crucial for an even belt. Practice if you’re using a new stitch.
- Creating Endings/Closures: This is where your chosen closure method comes in.
Finishing Touches and Closure Methods
1. Tie Belt
- Simple Ends: Just weave in your yarn ends securely.
- Braided Ends: Leave long tails (3-6 strands of yarn, 10-20 inches/25-50 cm long) from the beginning and end. Braid these tails for a decorative, sturdy finish. Knot and trim.
- Tassels/Pompoms: Create matching tassels or pompoms and securely attach one to each end of the belt.
2. Buckle Belt
- Crochet Around Buckle: When starting your belt, you can crochet directly around the buckle’s bar instead of making a foundation chain. Or, create a loop on one end of the belt (chain stitches, then SC around the loop to make it sturdy) that the buckle’s bar can slide through.
- Holes for Buckle Prong: To create the holes for the buckle prong, simply chain 1-2 stitches, skip the same number of stitches, and then continue your stitch pattern. On the next row, work into the chain space. Place these holes according to your measurement and the buckle’s size.
3. Button/Buttonhole Belt
- Buttonhole: On one end of the belt, create a simple buttonhole. For an SC belt, determine the button’s width, chain 2-4 stitches (depending on button size), skip the same number of SC stitches, and then SC to the end of the row. On the next row, work SC into the chain space. Work a few more rows around the buttonhole to solidify it.
- Button Placement: Sew your chosen button securely to the other end of the belt, aligning it with your buttonhole.
4. Hook-and-Eye/Snap Belt
- Simple Attachment: These closures are sewn discreetly to the ends of the belt. Work a few extra rows of SC on each end to make a sturdy base for sewing.
5. Crocheted Loop/Toggle
- Loop: On one end, create a chain loop (chain 5-10 stitches, slip stitch to join to the belt edge) large enough for your button/toggle. Work a few rows of SC around the chain loop to make it strong.
- Toggle/Large Button: On the other end, attach a large, decorative button or crochet a simple toggle (e.g., a stuffed cylinder of SC stitches, or a thick braided cord).
Optional: Adding a Lining for Stability
For heavier crocheted belts, or those made with lacy stitches, a fabric lining can prevent stretching and help the belt maintain its shape.
- Material: Grosgrain ribbon is excellent for this – it’s sturdy and comes in many colors.
- Attachment: Once your crocheted belt is complete and blocked, cut a piece of grosgrain ribbon slightly shorter than your belt’s finished length. Use fabric glue or a needle and thread (matching color) to carefully stitch or glue the ribbon to the wrong side of your crocheted belt.
Step-by-Step General Process
- Measure and Plan: Determine length, width, style, and closure.
- Choose Yarn and Hook: Select based on desired aesthetic and functionality.
- Make a Test Swatch (Optional but Helpful): Crochet a small piece in your chosen stitch pattern to confirm hook size, stitch definition, and density.
- Create Foundation Chain: Chain enough stitches to achieve your desired belt width.
- Crochet the Belt Body: Work in rows in your chosen stitch pattern until the belt reaches the desired length.
- Create Ends/Closures: Implement your chosen closure type at each end.
- Weave in Ends: Use a tapestry needle to securely weave in all loose yarn tails.
- Block (Optional): If your yarn benefits from it (e.g., cotton, linen), gently wet/steam and shape your belt, then allow it to dry. This helps even out stitches and can improve drape.
- Attach Lining (Optional): If using, adhere the grosgrain ribbon.
Tips for Success
- Consistent Tension: This is key for an even, professional-looking belt.
- Sturdy Start: A foundation single crochet (FSC) row or working into the back bump of the chain can create a neater, less stretchy starting edge.
- Yarn Choice Matters: A “stretchy” yarn (like some pure wools or highly elastic acrylics) might not be ideal for a belt that needs to hold shape, unless you plan to line it.
- Don’t Over-Block: If blocking, be gentle, especially with long pieces, to avoid overstretching.
- Experiment with Edging: A simple row of slip stitches or single crochet around the entire belt can give it a crisp, finished edge.
Caring for Your Crocheted Belt
Always refer to your chosen yarn’s label for specific care instructions. Generally:
- Hand wash in cool water with a mild detergent, or
- Machine wash on a gentle cycle (if suitable for your yarn).
- Reshape and lay flat to dry.
- Do not hang, as it may stretch.
VIDEO TUTORIAL PART 2 ;
Crocheting a belt for a dress is a delightful way to add a custom touch to your wardrobe. It’s an opportunity to experiment with stitches, colors, and textures, creating a functional piece of art that perfectly cinches your style. Happy crocheting!