by
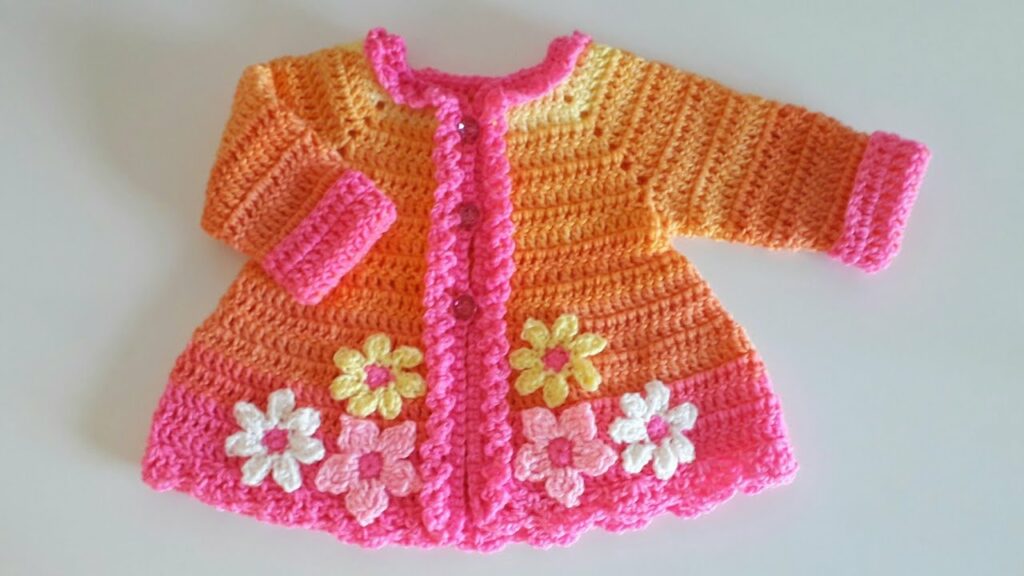
by There’s a special joy in creating something handmade for a little one, and a crocheted cardigan for a baby girl is a timeless and cherished gift. Perfect for layering, providing warmth, and adding an undeniable touch of sweetness, a simple cardigan is a rewarding project even for those relatively new to garment making.
This detailed guide will walk you through the process of crocheting a beautiful, soft, and practical cardigan for a baby girl, focusing on straightforward techniques that ensure a lovely finish.
Why Crochet a Simple Cardigan for a Baby Girl?
- Practical Layering: Babies need versatile layers to keep them comfortable in varying temperatures, whether indoors or out. A cardigan offers just the right amount of warmth.
- Comfort & Softness: When you crochet it yourself, you control the materials, ensuring the softest, most non-irritating yarn touches delicate baby skin.
- Easy to Wear: Cardigans, with their front opening, are much simpler to put on and take off a wiggling baby compared to pullovers.
- Adorable & Cherished: A classic design in gentle colors, a handmade cardigan often becomes a treasured keepsake, passed down or kept as a memento of those early days.
- Beginner-Friendly Garment: Many simple cardigan patterns are designed with beginners in mind, making them an ideal first foray into crocheting wearable items.
Planning Your Baby Cardigan Project
A successful and perfectly fitting garment starts with careful planning.
- Size Selection:
- Baby sizes are often indicated by age ranges (e.g., Newborn, 0-3 months, 3-6 months, 6-12 months, 12-18 months, 18-24 months).
- Always refer to the specific pattern’s measurements (chest circumference, arm length, overall length) rather than relying solely on age, as babies vary widely in size.
- If you want the cardigan to last longer, consider making one size up, as babies grow incredibly fast!
- Pattern Selection (Highly Recommended!):
- Essential for Beginners: While this guide covers general principles, a well-written pattern is crucial for your first garment. Look for patterns specifically labeled “beginner-friendly,” “easy,” or “simple” baby cardigans.
- What to Look For:
- Clear schematics and detailed sizing charts.
- Precise stitch counts for each row/round and each size.
- Simple stitch instructions (e.g., mostly single crochet, half double crochet, or double crochet).
- Detailed shaping instructions for armholes, neckline, and sleeves.
- CRUCIALLY, comprehensive gauge information.
- Construction Method:
- Top-Down (Seamless Raglan): This is often preferred for baby garments because it creates a seamless piece, meaning less bulk and more comfort against sensitive skin. You start at the neckline and work downwards, increasing stitches to form the shoulders and body in one piece. Sleeves are then worked directly from the armholes.
- Panel Construction (Bottom-Up, Seamed): This involves crocheting the back panel, two front panels, and two sleeves as separate flat pieces. These are then meticulously seamed together. This method can offer more defined structure but involves more finishing work.
- Gauge Swatch (NON-NEGOTIABLE!):
- Crucial for Fit: Before starting the actual cardigan, crochet a swatch (at least 4×4 inches / 10×10 cm) in the main stitch pattern of your chosen pattern.
- Wash and block your swatch exactly as you would the finished garment, then measure it meticulously.
- If your stitch count or row count per inch/cm doesn’t match the pattern’s gauge, adjust your hook size (go up for fewer stitches per inch, down for more) until it matches. Skipping this step is the primary reason for a garment not fitting correctly.
Materials You’ll Need
- Yarn:
- Weight: DK (Double Knitting / Category 3) or Worsted (Category 4) are the most common and versatile choices for baby cardigans. DK often results in a lighter, softer fabric, while Worsted works up quicker and offers more warmth.
- Fiber:
- Baby-Specific Acrylics: These are incredibly soft, often anti-pilling, hypoallergenic, widely available, and best of all, usually machine washable and dryable – essential for baby clothes!
- Superwash Merino Wool: Incredibly soft, breathable, warm, and often machine washable. Can be a bit pricier but offers luxurious comfort.
- Cotton/Cotton Blends: Good for warmer climates or very sensitive skin due to breathability. Less elastic than wool/acrylic and can be heavier when wet.
- Avoid: Mohair, regular wool (can be itchy), or any yarn with a coarse texture or animal fiber content that might cause irritation.
- Color: Traditional baby girl colors like soft pinks, gentle purples, sunny yellows, whites, and creams are always lovely. Gender-neutral pastels such as mint green, sky blue, lavender, peach, or soft grey are also beautiful choices.
- Quantity: Typically 1-3 skeins, depending on the cardigan size and yarn weight.
- Crochet Hook: The size recommended by your pattern, adjusted based on your gauge swatch.
- Notions:
- Stitch Markers: Absolutely essential! Use them to mark raglan increase points, buttonhole placement, and the beginning of rounds/rows.
- Tapestry Needle: For neatly weaving in all yarn ends.
- Scissors: Sharp and dedicated for yarn.
- Measuring Tape: For checking gauge and garment dimensions as you progress.
- Buttons: 3-5 small, flat, baby-safe buttons. Ensure they have no sharp edges and can be securely sewn to avoid choking hazards.
- Blocking Mats & T-pins (Optional but Recommended): For a professional and polished finish.
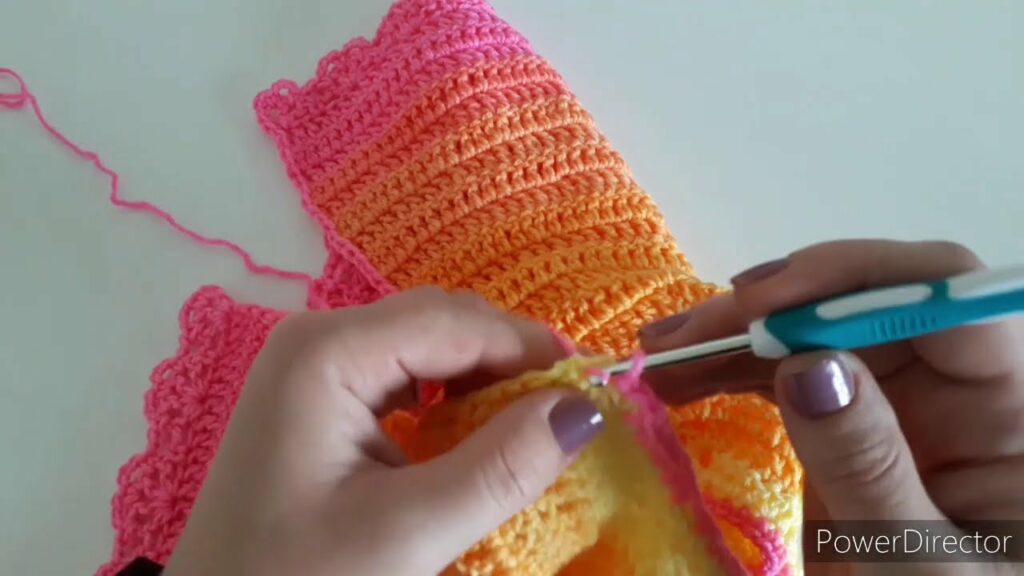
VIDEO TUTORIAL PART1 ;
Key Crochet Techniques for a Simple Baby Cardigan
You’ll utilize fundamental crochet stitches and basic garment shaping techniques:
- Basic Stitches:
- Chain (ch): The foundation for your work.
- Slip Stitch (sl st): For joining rounds or neat finishing.
- Single Crochet (sc): Creates a dense, sturdy fabric.
- Half Double Crochet (hdc): A good balance of speed and density.
- Double Crochet (dc): Works up quickly, creates a more open/drapey fabric.
- Your pattern will specify which of these stitches to use for the main body.
- Increasing/Decreasing: Essential for shaping the yoke, armholes, and sleeves. Your pattern will provide specific instructions (e.g., “2 dc in next st” for increase, “dc2tog” for decrease).
- Working in Rows: For the body of the cardigan, as you’ll be working back and forth to create the front opening.
- Working in Rounds: Typically for the sleeves (if working seamlessly from the armhole), where you join each round.
- Ribbing (Optional but Recommended): For cuffs and the bottom hem, ribbing provides a neat, snug fit and a polished look.
- Single Crochet in the Back Loop Only (SC in BLO): Creates a neat, dense, horizontal rib that’s relatively easy for beginners.
- Front Post/Back Post stitches (FPDC/BPDC): Creates a more elastic, knit-like vertical rib (can be slightly trickier for absolute beginners but worth learning).
- Buttonholes: Simple chain-space buttonholes are common. Your pattern will tell you where and how many stitches to skip to create the opening, then work into those chains on the next row.
- Edging: A simple border of single crochet around the front opening and neckline gives a clean, finished look.
- Seaming (if using panels): The Mattress Stitch creates neat, invisible joins if you opt for panel construction.
Step-by-Step Flow (Conceptual Guide – Assuming Top-Down Raglan Cardigan)
This method is highly recommended for beginners due to minimal seaming.
- Preparation:
- Thoroughly read your chosen pattern.
- Make that gauge swatch! Adjust your hook size if necessary.
- Gather all your yarn, hook, stitch markers, and other notions.
- Crochet the Yoke:
- Begin with the pattern’s specified foundation chain (this will be the back neck of the cardigan).
- Follow the pattern to work the first row, carefully placing your stitch markers at the designated “raglan points” (usually four points that form the corners of the yoke).
- Continue working rows back and forth. On most rows (or every other row, as per pattern), you will place increases at these raglan points. This will cause the yoke to expand and create the shaping for the shoulders and upper body.
- Divide for Body & Sleeves:
- Once the yoke reaches the correct size (measured around the baby’s chest, as per pattern instructions), you’ll “separate” the body from the sleeves.
- Your pattern will instruct you to chain a few stitches for the underarms.
- You will then skip the stitches designated for the sleeves (the stitches between the raglan points that form the armholes).
- Continue working in rows on the remaining stitches (which now form the two front panels and the back panel) to create the main body of the cardigan.
- Crochet the Body:
- Continue working in rows until the cardigan reaches the desired length from the underarms.
- Finish the bottom edge with your chosen ribbing or a simple border (e.g., a few rows of SC).
- Crochet the Sleeves:
- Join your yarn at one armhole opening (typically at the center of the underarm chains).
- Work the sleeve in the round, decreasing stitches periodically as instructed by the pattern to taper it down to the wrist.
- Finish the cuff with your chosen ribbing or a simple border. Repeat for the second sleeve.
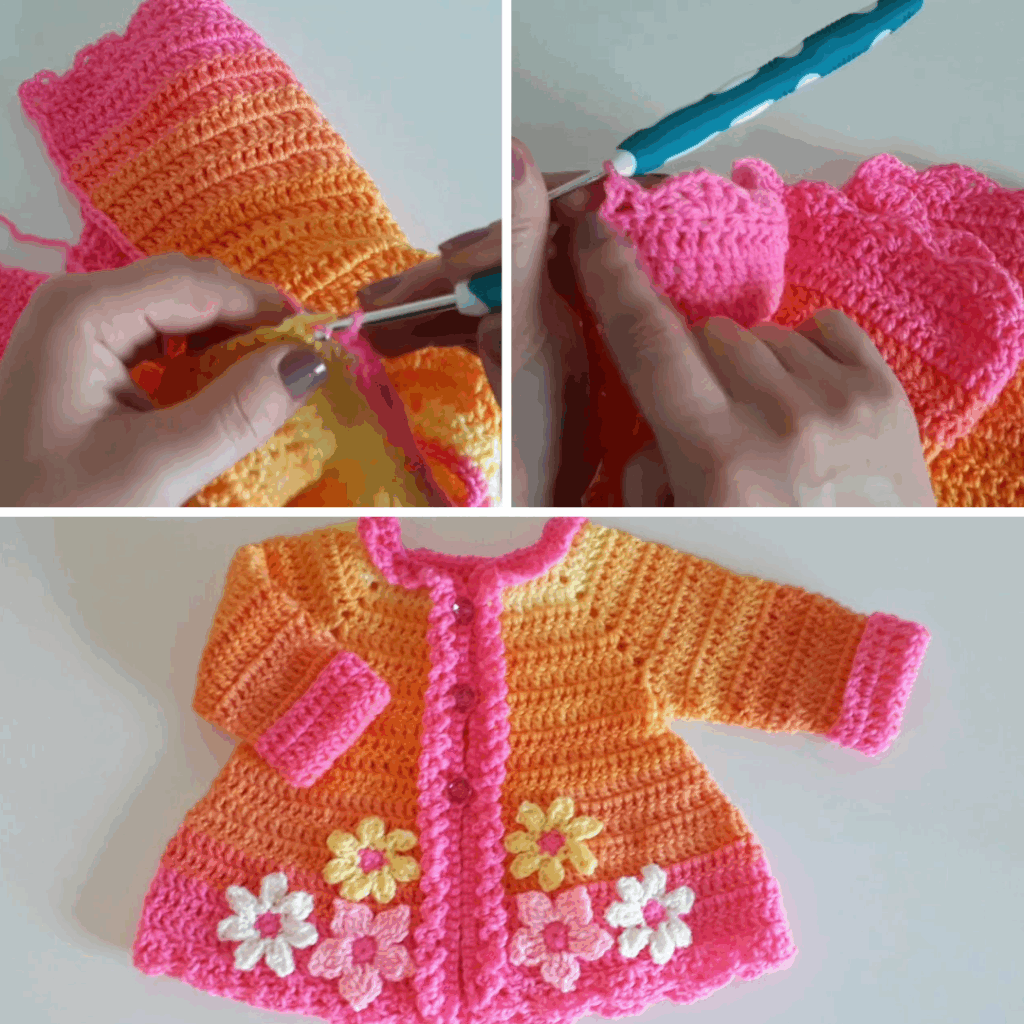
- Add Front Bands & Neckline Edging:
- Working along the entire front opening of the cardigan, crochet rows of single crochet or your chosen border. As you do this, create buttonholes as specified by the pattern on one of the front bands (e.g., chain 2, skip 2 stitches, work into the chain space on the next row).
- Continue this band around the entire neckline for a neat and finished look.
- Finishing Touches:
- Weave in all yarn ends meticulously using your tapestry needle. This is especially important for baby items to prevent loose threads from tangling or becoming a hazard.
- Sew on the baby-safe buttons securely, aligning them perfectly with your crocheted buttonholes. Double-stitch them for extra security.
- Blocking (Recommended):
- Gently wet or steam the finished cardigan.
- Carefully reshape it to the pattern’s dimensions, paying attention to the sleeves, body, and front opening.
- Pin it flat on blocking mats and allow it to dry completely.
- Blocking evens out your stitches, enhances drape, and sets the final, professional shape.
Tips for Success
- Read the Pattern Thoroughly: Before you even make your first chain, read the entire pattern through. Understand the construction, stitch abbreviations, and shaping instructions.
- Don’t Skip the Gauge Swatch! (Yes, it’s mentioned again because it’s that important for garments to fit).
- Use Stitch Markers! They are invaluable for marking raglan increases, the start of rounds, and the placement of buttonholes.
- Count Your Stitches! Regularly verify your stitch counts at the end of each row or round. This simple habit helps you catch errors early, preventing frustration and unraveling later.
- Choose Baby-Safe Yarn: Softness, washability, and hypoallergenic properties are paramount for infant wear.
- Secure Buttons: Double-stitch all buttons to ensure they are firmly attached and pose no choking hazard.
- Weave in Ends Meticulously: Loose ends are not just untidy; they can be a safety concern for babies.
- Blocking is Your Friend: It truly transforms the look of your crocheted garment, making stitches appear more even and giving it a professional finish.
Caring for Your Baby Cardigan
To ensure your handmade cardigan stays soft and beautiful for as long as possible:
- Follow Yarn Label Care Instructions Strictly: This is your primary guide.
- Gentle Washing: Machine wash on a gentle/delicate cycle with cold water, or hand wash in cool water with a mild, baby-friendly detergent.
- Reshape and Lay Flat to Dry: Gently squeeze out excess water (never wring or twist!). Reshape the cardigan back to its original dimensions and lay it flat on a clean towel or a mesh drying rack to air dry completely.
- Never Hang Wet: The weight of a wet crocheted garment can cause it to stretch and distort if hung.
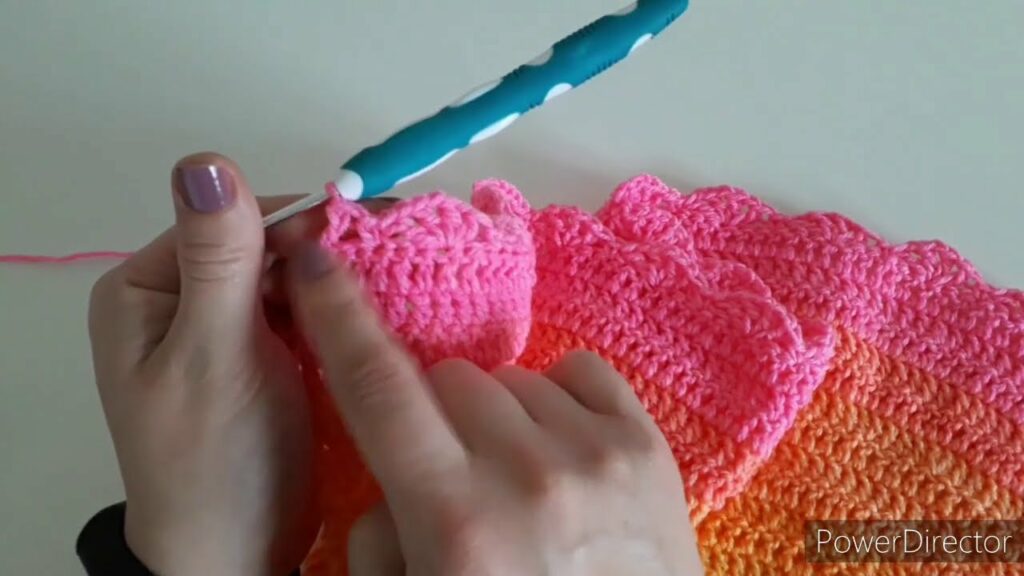
VIDEO TUTORIAL PART 2 ;
Crocheting a simple cardigan for a baby girl is a truly rewarding experience. With each stitch, you’re not just creating a garment, but weaving in love, care, and a personal touch that will be felt and cherished. Embrace the process, and enjoy creating a warm, beautiful piece for a special little one.