 by
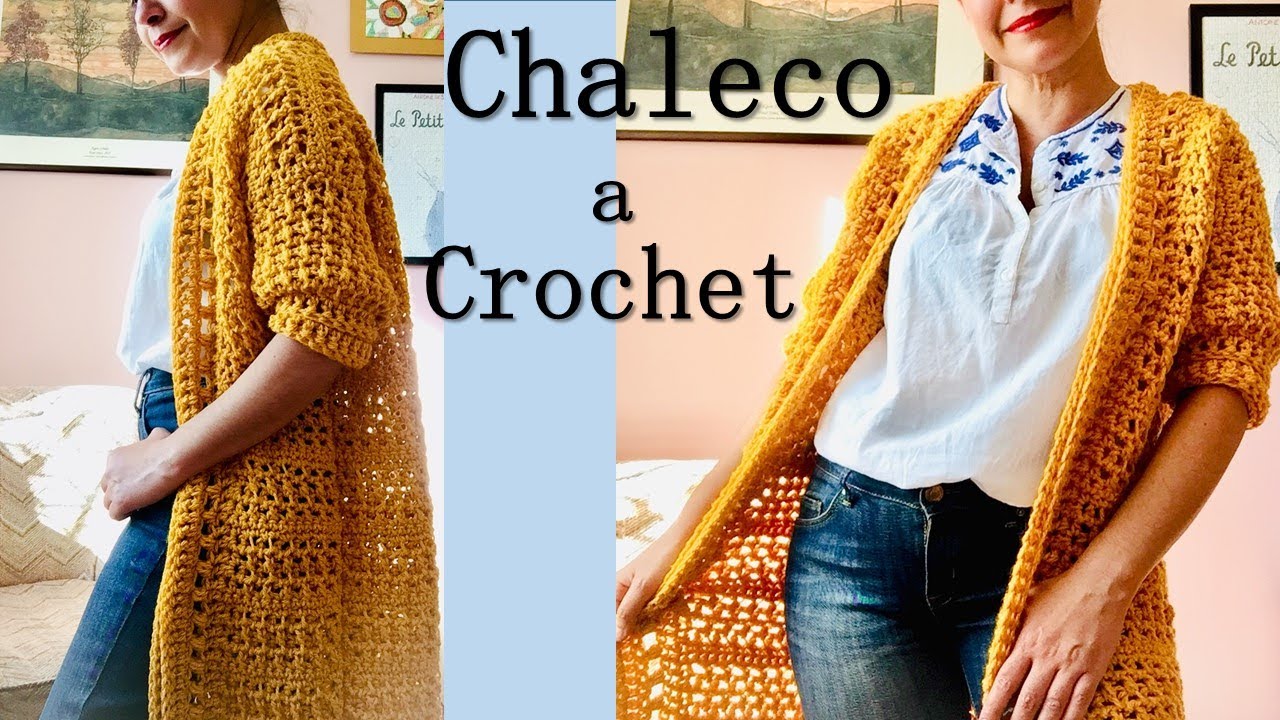
by The long vest has transcended fleeting trends to become a true wardrobe essential, celebrated for its versatility, comfort, and effortless ability to elevate any outfit. A handmade long crochet vest, in particular, offers a unique blend of personalized style, exquisite texture, and the undeniable charm of a lovingly crafted garment.
This detailed guide will take you through every step of crocheting a beautiful long vest for women, from planning your design to mastering the techniques and ensuring its lasting beauty.
Why Crochet a Long Vest?

Opting to crochet a long vest offers numerous advantages for both the maker and the wearer:
- Ultimate Layering Piece: A long vest is a chameleon in your wardrobe. It can instantly transform a simple jeans-and-tee combination, add a sophisticated touch over a dress or blouse, or provide an extra layer of warmth without the bulk of sleeves.
- Year-Round Versatility: Depending on your yarn choice, a long vest can be a breathable accessory for warmer months, layered over light tops or dresses, or a cozy addition over sweaters and long-sleeved shirts in cooler seasons.
- Flattering Silhouette: The extended length and vertical lines of a long vest create a visually elongating and slimming effect, enhancing most body types.
- Custom Fit & Length: Store-bought vests often fall short (literally!). Crocheting your own allows you to achieve the perfect length—whether hip-length, mid-thigh, knee-length, or even a dramatic duster—and a customized fit for your unique body shape.
- Unique & Personalized Style: This is your canvas! Experiment with a vast array of stitch patterns, colors, and yarn textures to create a truly one-of-a-kind garment that perfectly reflects your personal aesthetic.
- Satisfying Project: Often, a long vest works up faster than a full sweater or jacket because there are no sleeves to contend with. This offers a quicker sense of gratification for a substantial, wearable garment.
- Skill Building: It’s an excellent project for honing your garment construction skills, practicing shaping techniques for armholes and necklines, and mastering precise edging.
Understanding the Long Crochet Vest Aesthetic: Yarn & Stitch Choices
The drape, feel, and overall look of your long crochet vest will be largely determined by your yarn and the stitch patterns you choose.
Yarn Selection: Key to Drape and Feel
For a flattering long vest, prioritize yarns that offer excellent drape and comfort, allowing the garment to flow gracefully.
- Weight:
- DK (Category 3) or Worsted (Category 4): These are the most versatile choices, providing a good balance of warmth, stitch definition, and comfortable drape.
- Chunky (Category 5): If you’re looking for a quicker project, more warmth, or a bolder, statement-making piece, chunky yarns are fantastic.
- Fingering (Category 1) or Sport (Category 2): Opt for these finer weights if you desire a delicate, lacy, or airy vest perfect for warmer weather or very light layering.
- Fiber:
- Cotton/Linen Blends: Excellent choices for breathable, comfortable vests, particularly well-suited for spring and summer. They offer crisp stitch definition.
- Bamboo/Rayon Blends: Known for their beautiful, fluid drape, incredible softness, and often a subtle sheen, making for an elegant garment.
- Merino Wool/Alpaca Blends: For luxurious warmth, superior softness, and exceptional drape, these are ideal for vests meant for cooler weather. Look for superwash varieties for easier care.
- High-Quality Acrylics: Modern acrylics have significantly improved in softness, drape, and feel. They offer affordability, a vast color range, and are typically machine washable, making them a practical choice.
- Consider: How the yarn’s weight and fiber will contribute to the desired drape. A vest, especially a long one, needs to move with you rather than stand stiffly.
Stitch Patterns: Enhancing Drape & Texture
Select stitch patterns that emphasize flow and texture without creating an overly dense or rigid fabric.
- Openwork/Lace Stitches: V-stitch, shell stitch, fan stitch, filet crochet, or simple chain-and-skip patterns are perfect for creating beautiful, airy vests that add texture and visual interest without adding significant warmth.
- Textural Stitches with Good Drape:
- Moss Stitch (Granite Stitch): A simple alternation of single crochet and chain stitches, creating a dense yet flexible fabric with lovely texture.
- Half Double Crochet (HDC): A solid choice that provides a balance of speed, density, and comfortable drape.
- Extended Single/Double Crochet: These stitches are slightly taller than their standard counterparts, contributing to a looser fabric and better drape.
- Simple Combinations: Explore patterns that combine basic stitches in ways that allow the fabric to flow rather than being too stiff.
- Ribbing (for Borders): Essential for neat, stretchy hems, armholes, and front bands. Techniques like single crochet in the back loop only (SC in BLO) or front post/back post double crochet (FPDC/BPDC) are ideal.
- Avoid: Using very dense stitches like solid single crochet throughout the entire body if you desire significant drape, unless worked with a very fine yarn and large hook.
Design Elements
Consider these features to customize your long vest:
- Length: This is a primary defining feature. Will it be hip-length, tunic (mid-thigh), knee-length, or even a dramatic duster length?
- Fit: Do you prefer a relaxed, oversized fit, or something more fitted to your silhouette?
- Neckline & Front Opening: An open front is standard. Options include a simple straight opening, a V-neck, a rounded neck, or an elegant shawl collar.
- Armholes: Consider simple open armholes, slightly shaped armholes, or deep, dramatic openings.
- Hem: A straight hem is classic, but you could opt for split sides, a curved hem, or even a ruffled edge for added flair.
- Pockets (Optional): Patch pockets or integrated pockets can add both functionality and style.
Planning Your Long Vest Project
A meticulous planning phase is crucial for ensuring a successful and satisfying outcome.
- Size Selection & Measurements:
- Crucial: Take accurate body measurements: Full Bust/Chest, Waist, Hips, Shoulder-to-Shoulder width, and your Desired Vest Length (from the top of the shoulder to where you want the hem to fall).
- Compare to Pattern’s Finished Measurements: Pay very close attention to the “ease” specified in the pattern. Long vests typically have significant “positive ease” (the finished garment is larger than your body measurement) to achieve a relaxed, comfortable, and flowy layering fit.
- Pattern Selection (ESSENTIAL!):
- Highly Recommended: Always start with a clear, well-written crochet pattern specifically designed for a long vest.
- Look for:
- Clear sizing charts and schematics with finished garment dimensions for all sizes.
- Precise stitch counts for each row/round and each size.
- Detailed shaping instructions for shoulders, armholes, and the neckline/front opening.
- CRITICALLY, comprehensive gauge information and clear instructions on how to achieve it.
- Clear photos and diagrams to guide you through the process.
- Common Construction Methods for Long Vests:
- Panel Construction (Seamed): This is arguably the most common and straightforward method for long vests. You crochet the front and back panels flat, then seam them together. This allows for precise shaping and structured lines.
- Top-Down (Seamless): You start at the neckline/shoulders and work downwards. This method results in a seamless body and is excellent for continuous stitch patterns.
- Side-to-Side (Seamless or Minimal Seam): The garment is crocheted horizontally. This can create unique textures and drape, but requires careful attention to shaping.
- Gauge Swatch (NON-NEGOTIABLE!):
- This is the single most critical step in garment crocheting! It directly determines whether your finished vest will match the pattern’s intended size and drape.
- Crochet a large swatch (at least 6×6 inches / 15×15 cm) using your chosen yarn and hook in the main stitch pattern of the vest.
- Wash and block your swatch exactly as you intend to wash and block the finished vest. This is crucial to see how the yarn behaves (e.g., stretches, blooms, or slightly shrinks) after laundering, as this will affect the final fit and drape.
- Measure your stitches and rows per inch/cm accurately. If your gauge doesn’t match the pattern’s, adjust your hook size (go up for fewer stitches per inch, down for more stitches per inch) until it matches. A small discrepancy in gauge will lead to a significant sizing error in your final garment.
Materials You’ll Need
- Yarn: (As detailed in the “Aesthetic” section). The quantity will vary significantly based on your chosen size, the vest’s length, and the yarn weight (expect anywhere from 5-15 skeins for an adult women’s long vest).
- Crochet Hook(s): The size recommended by your pattern, adjusted based on your gauge swatch. You might need multiple hook sizes if the pattern calls for a smaller hook for ribbing or specific details.
- Notions:
- Stitch Markers: Essential for marking increase/decrease points, beginnings of rows/rounds, specific pattern repeats, and the start/end of armhole shaping.
- Tapestry Needle: For neatly weaving in all yarn ends and for seaming your panels (if applicable).
- Scissors.
- Measuring Tape: Absolutely crucial for checking gauge and garment dimensions as you progress.
- Blocking Mats & T-pins (Highly Recommended): For professional shaping and setting of your finished vest.
Key Crochet Techniques for a Long Vest
Beyond your basic crochet stitches (chain, slip stitch, single crochet, half double crochet, double crochet), you’ll focus on:
- Working in Rows: This is fundamental for crocheting the main body panels if you’re using a seamed construction. You’ll turn your work at the end of each row.
- Working in the Round: Used for seamless bodies if the vest is constructed top-down and closed in the front.
- Increasing Stitches: Used to shape shoulders, or to add width to the body if the pattern calls for an A-line shape.
- Decreasing Stitches: Essential for shaping armholes and necklines. Your pattern will specify the type of decrease (e.g.,
sc2tog– single crochet two together,dc2tog– double crochet two together). - Ribbing: Used for neat, stretchy hems, armholes, and front bands. Techniques like single crochet in the back loop only (SC in BLO) or front post/back post double crochet (FPDC/BPDC) are excellent for this.
- Edging: A final border to create a polished finish on all open edges (hem, armholes, and the entire front opening).
- Seaming (if using panels): The Mattress Stitch is highly recommended for creating neat, almost invisible vertical seams along the sides and shoulders.
- Picking Up Stitches: Used for adding neck/front bands if they are not worked simultaneously with the main body panels.
Step-by-Step Construction Flows (Conceptual Guides)
Here are conceptual guides for the most common methods for crocheting a long vest:
A. Panel Construction (Most Common for Long Vests)
This method is straightforward and excellent for creating defined shapes and clean lines.
- Preparation: Read your pattern thoroughly, make your gauge swatch (and wash/block it!), and gather all your materials.
- Crochet the Back Panel:
- Begin by casting on the specified number of stitches for the lower back hem.
- Work upwards in your chosen main stitch pattern until the panel reaches the desired length before the armholes begin.
- Shape Armholes: Follow your pattern’s instructions to decrease stitches or skip stitches at the beginning and end of rows to create the armhole shaping.
- Continue working straight (or as per pattern for subtle shoulder shaping) until the panel reaches the desired shoulder height. Bind off all stitches.
- Crochet the Front Panels (Two):
- Cast on the specified number of stitches for the lower front hem. This is often half the width of the back panel, or as per the pattern for specific overlaps or an open front design.
- Work upwards in your chosen main stitch pattern until the panel reaches the same length as the back panel before the armholes.
- Shape Armholes: Shape the armholes identically to the back panel.
- Neckline Shaping: Simultaneously with armhole shaping (or slightly after), begin shaping the front neckline (e.g., V-neck, rounded neck) by making symmetrical decreases at the front opening edge.
- Work each front shoulder section until it reaches the same height as the back shoulder. Bind off stitches for each shoulder.
- Seaming:
- Lay all finished panels flat.
- Shoulder Seams: Join the front and back panels together at the shoulders using the Mattress Stitch for an invisible vertical seam.
- Side Seams: Join the front and back panels along the sides, leaving open the sections designated for the armholes. Use the Mattress Stitch. If your pattern includes side splits, you will only seam up to the split.
- Add Edging/Bands:
- Work a continuous border (e.g., several rounds of ribbing, or a simple single crochet border) around the entire front opening, neckline, and armholes. This border often provides structure and a polished finish.
- If your vest has side splits, add a neat border along the edges of the splits.
- Pockets (Optional): If your design includes pockets, crochet them separately according to the pattern and securely sew them onto the finished vest in the designated locations.
- Weave in Ends & Block: Meticulously weave in all loose yarn ends using your tapestry needle. Gently wash/wet and block the finished vest to shape and set stitches.

B. Top-Down (Seamless)
This method results in a single, continuous piece, which can be appealing for certain stitch patterns.
- This approach typically involves starting at the neckline (or creating the initial V-neck opening directly).
- You then work outwards, increasing stitches to form the yoke (the upper part that covers shoulders and chest).
- Once the yoke reaches the desired size, you’ll separate the stitches for the body from the armholes. Since it’s a vest, there are no sleeves to work; you simply continue with the body stitches.
- The body then continues in rows (for an open front vest) or rounds (if the front is joined/closed) for the entire desired length.
- Finally, edging is added to the armholes and around the entire front opening/neckline for a neat finish.
- This method is excellent for continuous stitch patterns that you want to flow unbroken from top to bottom. It requires a pattern specifically designed for a top-down vest (i.e., it won’t have instructions for full sleeve development).
Tips for Success
- Read the Pattern Meticulously: Do not skim! Take the time to understand every instruction, abbreviation, and diagram, especially regarding shaping and the chosen construction method.
- Don’t Skip the Gauge Swatch! (It is the absolute key to achieving the correct drape and size for a beautiful, long garment.)
- Use Stitch Markers Religiously! They are invaluable for marking increase/decrease points, the beginning of rows/rounds, and crucial shaping sections like armholes and necklines.
- Count Your Stitches! Make it a habit to regularly verify your stitch counts at the end of each row or round, especially where shaping occurs. Catching errors early will save you significant time and frustration later.
- Choose Yarn Carefully: The yarn’s drape is paramount for a flattering long vest. Test how your chosen yarn behaves in your gauge swatch.
- Practice Seaming (if applicable): If your pattern uses seamed panels, practice your Mattress Stitch on scrap pieces to ensure you achieve invisible and strong joins.
- Blocking is Your Best Friend: It truly transforms crocheted fabric. Blocking evens out stitches, enhances drape, opens up lace patterns, and sets the final shape, making your vest look professional and polished.
Caring for Your Crocheted Vest

Proper care will ensure your handmade long vest remains beautiful and comfortable for years to come:
- Follow Yarn Label Instructions Strictly: This is your primary guide for appropriate washing and drying methods. Different fibers require different care.
- Gentle Washing: Most crochet garments will require hand washing in cool water with a mild, gentle detergent. If your yarn is machine washable, use a gentle or delicate cycle with a garment bag to protect it.
- Reshape and Lay Flat to Dry: Gently squeeze out excess water (never wring or twist!). Reshape the vest back to its original dimensions (referencing your pattern’s schematic and your blocking measurements if needed) and lay it flat on a clean towel or a mesh drying rack to air dry completely.
- Never Hang Wet: The weight of a wet crocheted garment will cause it to stretch and distort significantly if hung to dry, especially long vests due to their length.
Conclusion
Crocheting a long vest for women is a deeply satisfying and rewarding project. It allows you to create a custom-fit, stylish, and incredibly versatile layering piece that celebrates your craft and adds a unique touch to your wardrobe. By paying careful attention to planning, yarn choice, and the crucial techniques of shaping and finishing, you’ll be able to stitch a beautiful long vest that you’ll cherish for seasons to come, enjoying the perfect blend of warmth, style, and handmade artistry.
Video Tutorial ;