 by
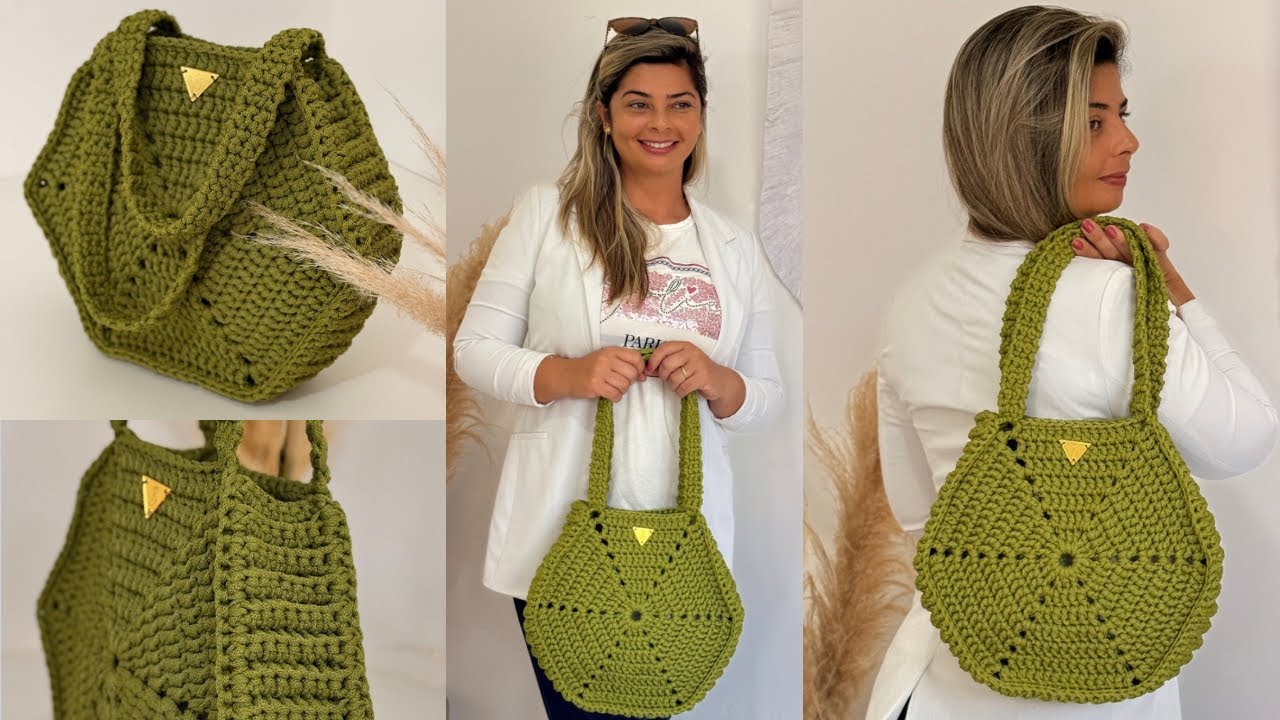
by The Hexagon Crochet Success Bag: Mastering Modular Design for a Stunning Accessory
The allure of the hexagon in crochet is undeniable. Its intricate yet geometric shape, with its six perfectly balanced sides, lends itself beautifully to modular designs. While “granny squares” often steal the spotlight, the hexagon offers a unique, almost honeycomb-like aesthetic that can transform a simple accessory into a true statement piece.
But how do you move beyond simply crocheting hexagons to creating a “Hexagon Crochet Success Bag”? It’s about more than just making the motifs; it’s about meticulous planning, impeccable joining, and thoughtful finishing touches that elevate your handmade item from “cute” to “professional.” This article will guide you through the process of crafting a truly successful hexagon bag – one that is durable, stylish, functional, and a testament to your crochet skills.
Why Choose a Hexagon Crochet Bag for Your Next Success?

Embracing the hexagon for your next bag project offers a multitude of benefits:
- Unique Aesthetic: Move beyond the traditional! Hexagon bags boast a modern, geometric charm that stands out from typical rectangular or circular designs.
- Modular Construction: The project is broken down into manageable, portable pieces. This makes it less intimidating than a large, continuous project and ideal for on-the-go crocheting.
- Creative Freedom: Hexagons are a playground for color. You can experiment with intricate color changes within each motif, create gradients, or piece together a vibrant kaleidoscope.
- Skill Enhancement: This project pushes you beyond basic stitches. You’ll master consistent motif creation, precise joining methods, and the art of professional finishing – all invaluable skills for future garment and accessory projects.
- Durable & Functional: With the right yarn and construction techniques, a hexagon bag is surprisingly sturdy and practical for everyday use.
- Impressive Gift: A well-made, thoughtfully designed hexagon bag is a unique and cherished handmade gift that truly showcases your talent.
Anatomy of a “Success Bag”: Design & Material Choices
The foundation of a successful bag lies in careful selection of materials and a clear vision for your design.
Yarn Selection: Structure, Durability, & Drape are Key
The right yarn will give your bag body, make it durable, and ensure it hangs beautifully.
- Weight:
- Worsted (Category 4) or Aran (Category 4/5): These are excellent choices. They work up quickly, provide good fabric density, and create a bag with satisfying body and structure.
- DK (Double Knitting, Category 3): Can be used for a lighter, more delicate bag, but may require a tighter gauge or a more robust lining to maintain shape.
- Fiber:
- Cotton or Cotton Blends: The absolute top choice for bags. Cotton is naturally sturdy, offers excellent stitch definition, holds its shape remarkably well, is durable, and has minimal stretch.
- High-Quality Acrylic: A good alternative for softness, washability, and a vast color range. Look for “anti-pilling” varieties or those marketed for durability, as some acrylics can be too floppy.
- Nylon or Polyester Blends: Yarns with these fibers can add extra strength, resilience, and even a degree of water resistance, perfect for a utility bag.
- Avoid: Very stretchy fibers (like pure superwash merino without a blend), slippery yarns (like silk or rayon), or very delicate/fine yarns unless you plan for heavy reinforcement.
- Color Play: Plan your color scheme in advance. Will each hexagon be a single color, or will you work in rounds of contrasting colors? Consider how the colors will interact when joined.
Hook Size: The Density Secret
Often, for bags, you’ll want to use a crochet hook that is one or even two sizes smaller than what the yarn label recommends for garments. This creates a denser fabric, reducing gaps and providing more structure. Your gauge swatch (more on this below!) will be crucial for determining the perfect hook size.
Stitch Patterns for Hexagons
While many stitches can form a hexagon, some are better suited for bag construction:
- Granny Hexagon: This classic motif, using groups of double crochets and chain spaces, works up quickly and is excellent for showcasing color changes. However, due to its inherent “holey” nature, a fabric lining is absolutely essential for a “Success Bag” to prevent items from falling out.
- Solid Hexagon (using Half Double Crochet or Single Crochet): This creates a much denser fabric with fewer gaps, offering more inherent structure and durability. For a truly successful and functional bag, a solid hexagon made with HDC or SC is often preferred for the main body.
- Recommendation: For maximum success, consider using a solid stitch (like HDC) for the majority of your hexagons to build a sturdy bag. You can use decorative stitches or a granny hexagon for a flap or external pocket if desired, provided it’s lined.
Bag Layouts: Visualizing Success
Before you even pick up your hook, visualize your bag. Common hexagon bag layouts include:
- The 13-Hexagon Bucket/Tote Bag: A very popular and approachable design. It typically involves 1 hexagon for the flat base, 6 hexagons for the side walls (joined around the base), and 6 hexagons for the top/upper body (joined above the side walls). This creates a structured, roomy bag.
- Tote Bag Variations: Using more hexagons for wider sides or creating a rectangular base from multiple hexagons before building up the sides.
- Crossbody/Satchel Styles: Might involve a specific number and arrangement of hexagons to form a flap.
- The Key: Sketch out your desired bag shape and map out where each hexagon will go. Numbering them can help immensely during the joining phase.
Precision Planning for Your Success Bag
The difference between a good bag and a “Success Bag” often comes down to the planning stage.
- Design Sketch/Layout: Don’t just wing it! Draw a simple diagram of your bag’s shape and carefully map out where each hexagon will be placed. This blueprint guides your joining.
- Yarn Calculation: Estimate the total yarn needed based on your chosen bag size, stitch pattern, and hook. It’s always better to overbuy slightly (especially if you can return unused skeins) to ensure you have enough yarn from the same dye lot. This prevents frustrating color discrepancies.
- Hardware & Strap Decisions: Decide if you’ll crochet a strap or use a purchased leather, fabric, or chain strap. What kind of closure will your bag have? (Zipper, magnetic snap, toggle, button, drawstring?) Plan for any D-rings, swivel clasps, or other hardware needed.
- Lining (HIGHLY Recommended for Success!): Decide if you’ll add a fabric lining (and you absolutely should for a “Success Bag”). Choose a sturdy fabric like cotton canvas, duck cloth, or a heavy drill in a coordinating color. The lining elevates the bag from a craft project to a professional-looking accessory.
- Gauge Swatch (ABSOLUTELY CRITICAL!):
- This is the single most important step for achieving a bag with consistent size and structure.
- Crochet a large swatch (at least 6×6 inches / 15×15 cm) using your chosen yarn and hook in the main stitch pattern you’ll use for your hexagons.
- Crucial Step: Wash and block your swatch exactly as you plan to wash and block your finished bag. Yarn can change after laundering, affecting size.
- Measure your stitches and rows/rounds per inch/cm accurately. If your gauge doesn’t match your pattern’s (or your desired dimensions), adjust your hook size. Inconsistent hexagons will lead to a wonky, ill-fitting bag.
Materials You’ll Need
- Yarn: Your chosen worsted/aran weight yarn (quantity based on calculations).
- Crochet Hook(s): The size determined by your gauge swatch.
- Notions:
- Stitch Markers: Essential for marking the beginning of rounds on your hexagons.
- Tapestry Needle (or blunt yarn needle): For weaving in ends and, most importantly, for seaming your hexagons.
- Scissors.
- Measuring Tape: For consistent motif size and final bag dimensions.
- Blocking Mats & T-pins: For professionally blocking individual hexagons.
- Hardware: D-rings, magnetic snap, zipper, swivel clasps, bag feet, etc., as per your design.
- Lining Fabric: Sturdy cotton, canvas, or similar (amount based on bag dimensions).
- Sewing Supplies: Matching thread, sewing machine (optional but recommended for lining), hand sewing needle.
Key Techniques for Hexagon Crochet Success
This section dives into the “how-to” for achieving that polished “Success Bag” look.
- Impeccable Hexagons:
- Magic Ring: Always start your hexagons with a magic ring for a tight, neat center that won’t leave a hole.
- Consistent Tension: Maintain even tension throughout each hexagon. This is crucial for uniform size and shape, which makes joining much easier.
- Accurate Stitch Counts: Double-check your stitch counts at the end of every single round for each hexagon. One missed stitch can throw off the entire shape.
- Perfect Corners: Ensure your corner increases are well-defined (e.g., for HDC: (2 HDC, ch 1, 2 HDC) into the corner space; for DC: (3 DC, ch 1, 3 DC)).
- Weave Ends As You Go: This is a non-negotiable step for a “Success Bag.” Weave in the starting tail and any color change tails immediately after completing each hexagon. It saves immense tedious work at the end and prevents bulky areas.
- Blocking Individual Hexagons: This is the secret sauce for a professional finish. After crocheting each hexagon, wash/wet it gently and pin it to its exact desired dimensions on blocking mats. Allow to dry completely. Blocking ensures all your motifs are the same size and lay perfectly flat, making the joining process nearly effortless and resulting in beautifully crisp seams.
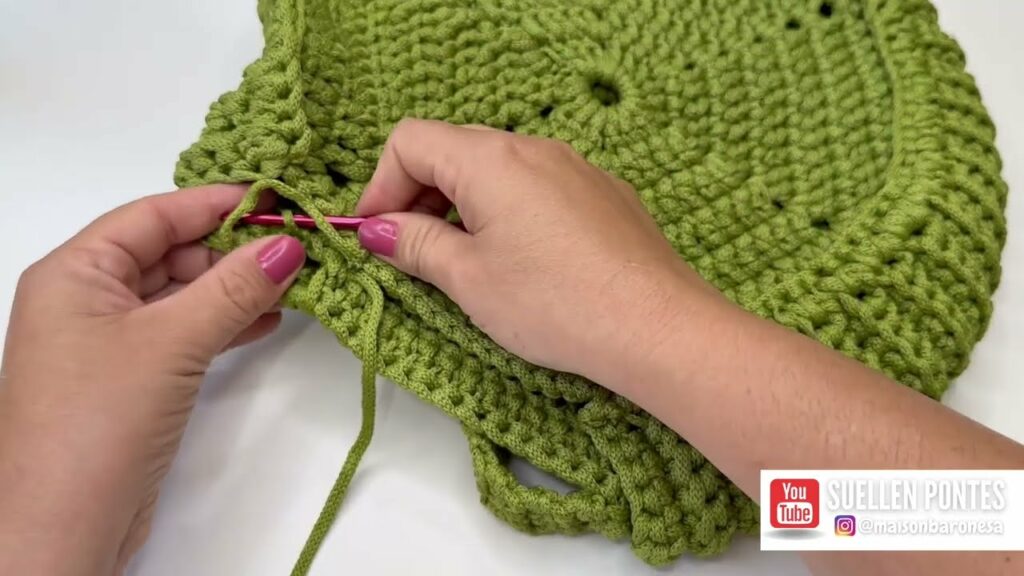
- Superior Joining Methods (The Heart of Success!): The method you choose for joining your hexagons drastically impacts the bag’s appearance and durability. Avoid haphazard joins.
- Why Good Joining Matters: Your seams will be visible and will define the bag’s structure. Neat joins are key to a professional outcome.
- Flat Slip Stitch Join (Invisible/Subtle): Works by slip stitching through the back loops or the “third loop” (the horizontal bar behind the V) of both motifs. This creates a very neat, almost invisible seam.
- Single Crochet Join (Defined/Sturdy): Creates a subtle, often decorative ridge on the right side of the work, and adds a lot of structure. You work single crochets through both loops of both motifs.
- Mattress Stitch (for Tapestry Needle Joins): This is often considered the gold standard for creating virtually invisible, flexible seams in knitted and crocheted pieces. You’ll use your tapestry needle to “sew” the edges together, picking up loops that run horizontally along the edges. This is excellent for a seamless look.
- Join-As-You-Go (JAYG): An advanced technique where you join motifs as you crochet the final round of the second motif. While incredibly neat and seamless, it’s more complex to learn initially and might not be suitable for a first “success bag.”
- Recommendation for “Success Bag”: Practice the Mattress Stitch or a very neat Slip Stitch/Single Crochet Join (worked with the right sides facing out for a decorative ridge, or right sides facing in for a more internal seam).
- Refined Finishing Touches:
- Edging: After joining all hexagons, work 1-2 rounds of single crochet (SC) or K1P1 ribbing evenly around the entire top opening of the bag. This provides crucial structure, prevents stretching, and creates a clean, polished edge.
- Strap Attachment: Securely attach your chosen strap. If crocheting, sew it firmly to the bag using a tapestry needle. If using a purchased strap with hardware (like D-rings), ensure the hardware is firmly sewn onto reinforced points of the bag.
- Lining (The Ultimate Success Factor!): This step takes your bag from handmade to professional.
- Measure: Carefully measure the circumference and height of your finished crochet bag.
- Cut & Sew: Cut your chosen lining fabric slightly larger (add seam allowances) and sew it into a bag shape that mirrors your crocheted bag.
- Insert & Attach: Insert the fabric lining into your crochet bag. Fold the top edge of the fabric under for a neat hem, and then hand-stitch or machine-stitch it securely to the inside top edge of the crochet bag.
- Hardware Attachment: If adding magnetic snaps, zippers, or toggle closures, securely sew them in place, often to the lining or reinforced points of the crochet fabric.
Step-by-Step Construction (Conceptual Guide for a 13-Hex Bag)
This outlines the typical process for a common 13-hexagon bucket/tote bag layout.
- Crochet All Hexagons: Work the total number of hexagons required for your bag (e.g., 13 hexagons) using your chosen solid or granny stitch pattern. Remember to be meticulous with stitch counts and tension.
- CRITICAL: Weave in all yarn ends as you finish each hexagon.
- CRITICAL: Wash and block each individual hexagon to a uniform size.
- Plan Your Layout: Lay out all your perfectly blocked hexagons on a flat surface according to your chosen bag design. This is your visual blueprint for joining.
- Join the Base:
- Take your designated base hexagon.
- Join the 6 side hexagons one by one to each edge of the base hexagon (6 seams in total). Use your chosen neat join method (e.g., Mattress Stitch or flat Slip Stitch/SC Join).
- Form the Sides:
- Now, join the vertical edges of the side hexagons to each other (6 seams in total). This will form the main cylindrical or prismatic body of the bag.
- Join the Top:
- Take the remaining 6 hexagons (for the top section).
- Join these 6 top hexagons to the top edges of the side hexagons (6 seams).
- Finally, join the top hexagons to each other along their vertical edges (6 seams). This completes the main crocheted bag structure.
- Create Bag Opening Edging: Work 1-2 rounds of single crochet (SC) (or ribbing) evenly around the entire top opening of the bag.
- Attach Strap: Securely attach your crocheted strap by sewing, or attach purchased strap hardware (D-rings, clasps) to the appropriate reinforced points on the bag.
- Add Lining (The ultimate success step!): Measure your finished crochet bag, cut and sew your chosen lining fabric to match its shape, and then securely hand-stitch or machine-stitch the lining to the inside top edge of the crochet bag.
- Attach Hardware (If applicable): If your design includes closures like magnetic snaps, a zipper, or toggles, sew them securely in place.
- Final Weave in Ends & Inspection: Do a thorough final check for any loose ends and reinforce any points that feel weak.
VIII. Tips for Success (Beyond the Basics)
- Practice Your Join: Before you start joining your actual bag, practice your chosen joining method on a few scrap hexagons. This builds confidence and perfects your technique.
- Use Good Lighting: Good lighting is essential for accurate stitch counting and for achieving precise, neat joins.
- Pins are Your Friend: Use sewing pins to secure two hexagons together along their edges before you start seaming them. This prevents shifting and ensures perfect alignment.
- Don’t Rush Seaming: This is where the “success” of your bag will be most visible. Take your time, pull your stitches evenly, and aim for consistency.
- Consider Bag Feet: For a heavier or more frequently used bag, consider adding small metal bag feet to the base to protect the fabric and help it stand upright.
- Interior Pockets: Before inserting your lining, sew simple fabric pockets to the lining for added organization.

IX. Caring for Your Success Bag
Proper care will ensure your meticulously crafted hexagon bag remains beautiful and functional for years.
- Follow Yarn Label Instructions: Always defer to the yarn manufacturer’s care instructions.
- Hand Wash Recommended: Even for machine-washable yarns, hand-washing is often recommended for items with multiple seams, complex shaping, or added hardware/linings, to preserve their structure.
- Reshape & Lay Flat to Dry: Never wring or hang a wet crocheted bag, as the weight of the water will cause it to stretch and distort. Gently squeeze out excess water, reshape the bag, and lay it flat on a clean towel or mesh drying rack to air dry completely.
- Protect Hardware: If your bag has metal hardware, consider wrapping it in a small cloth during washing to prevent scratching or tarnishing.
Conclusion
Creating a “Hexagon Crochet Success Bag” is a deeply rewarding journey. It takes you beyond the basics of crocheting individual motifs into the realm of thoughtful design, meticulous execution, and professional finishing. The result is not just a bag, but a statement piece – a beautifully structured, uniquely styled accessory that showcases your dedication and skill. Embrace the challenge, pay attention to the details, and take immense pride in the truly successful, handmade modular masterpiece you create!
Video Tutorial ;;