 by
by There’s a special kind of warmth that comes from a handmade gift, especially for a baby. As spring blossoms around us, with its gentle colors and fresh air, it’s the perfect season to pick up a crochet hook and create something beautifully soft and wonderfully practical for a 12-month-old little one. If you’re a beginner, don’t fret! “Soft Spring Crochet” is all about approachable projects that build confidence while creating charming, delicate pieces 🌷🌸.
This detailed guide will walk you through the essentials, from choosing the right yarn to simple step-by-step project ideas, empowering you to craft delightful items for a one-year-old, even if you’re just starting your crochet journey.
Why “Soft Spring Crochet” for Beginners (and for 12-Month-Olds)?
- Gentle Aesthetic 🌷🌸: Spring-inspired projects often feature soft pastels, airy stitches, and comfortable textures, perfectly embodying the light and fresh feel of the season. The delicate look is inherently forgiving for beginners.
- Manageable Size: Projects for 12-month-olds are smaller than adult garments, meaning they work up quicker, providing faster gratification and less chance of losing steam.
- Skill Building: You’ll master foundational stitches and basic shaping techniques crucial for more complex projects down the line.
- Tangible Results: There’s immense satisfaction in seeing your yarn transform into a beautiful, functional item for a baby.
- Perfect Gift: Handmade baby items are cherished keepsakes, filled with love and warmth.
Understanding Your Tools & Materials
Before you begin, gathering the right supplies is essential for a smooth and enjoyable experience.
- Yarn (The “Soft” Secret):
- Fiber: For babies, prioritize softness, breathability, and washability.
- Baby Acrylics: Often super soft, hypoallergenic, and machine washable/dryable – a great beginner-friendly choice.
- Cotton or Cotton Blends: Breathable, absorbent, durable, and lovely for warmer weather projects.
- Superwash Merino Wool: Incredibly soft and warm, plus it’s treated to be machine washable, making it practical for baby items.
- Weight: For spring baby items, DK (Double Knitting, Category 3) or Sport (Category 2) are often ideal. They create a fabric that’s neither too bulky nor too fine, working up at a comfortable pace.
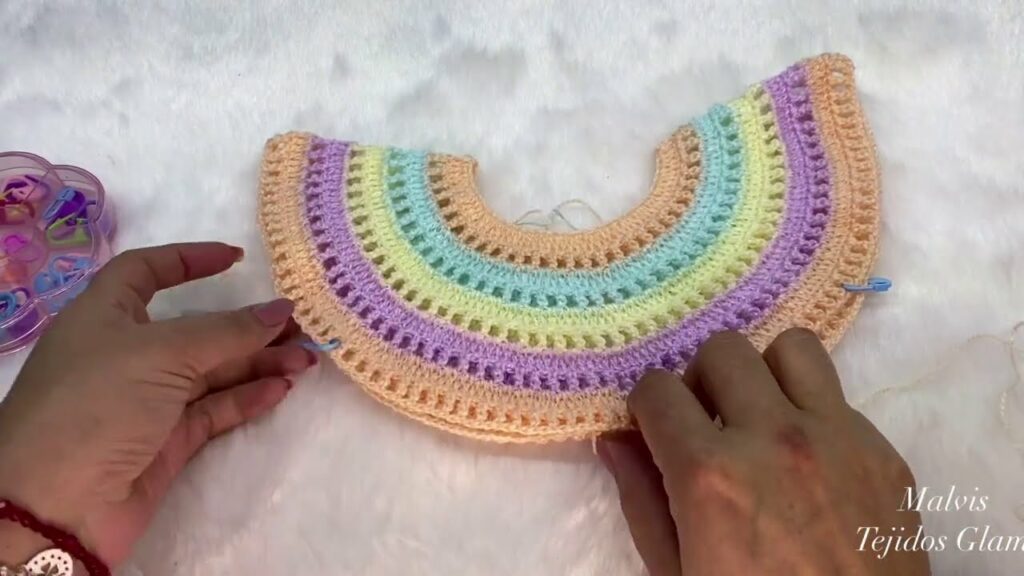
- Colors: Embrace the “Spring” theme with gentle pastels (mint green, baby blue, blush pink, lavender, creamy white), cheerful brights, or subtle variegated yarns that evoke blossoming flowers 🌷🌸.
- Fiber: For babies, prioritize softness, breathability, and washability.
- Crochet Hook:
- Choose a hook size appropriate for your chosen yarn weight (check the yarn label for recommendations). For DK/Sport weight, typically 3.5mm to 5.0mm (E to H) hooks are used.
- An ergonomic hook can make a big difference for comfort during longer sessions.
- Notions (Your Helpful Helpers):
- Scissors: For cutting yarn.
- Tapestry Needle (or Blunt Yarn Needle): Essential for weaving in ends, which gives your project a neat, finished look.
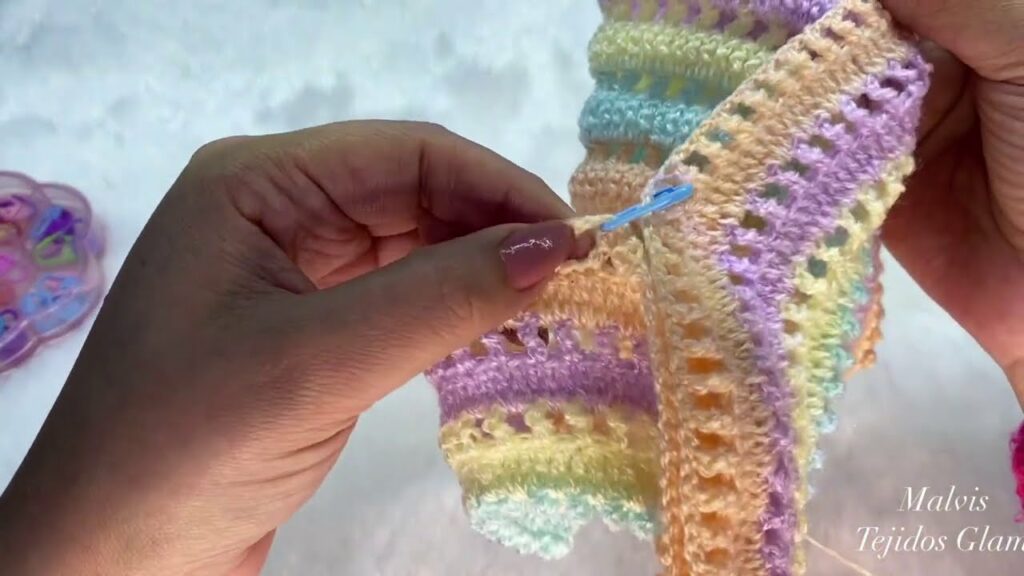
- Stitch Markers: Small clips or loops that help you keep track of stitches, especially important for beginners marking the beginning of rows/rounds or specific points.
- Measuring Tape/Ruler: For checking your gauge (more on this later!) and project dimensions.
Mastering the Basics: Your Foundation Stitches
Every crochet project starts with a few fundamental stitches. Practice these until you feel comfortable and your tension is relatively consistent.
- The Slip Knot: The very first loop on your hook.
- Chain (ch): The foundation row of most projects, a series of interconnected loops.
- Slip Stitch (sl st): A very flat stitch used to join rounds, move yarn without adding height, or create subtle details.
- Single Crochet (sc): The shortest and densest basic stitch.
- Half Double Crochet (hdc): A stitch taller than SC but shorter than DC, offering a nice balance of density and drape.
- Double Crochet (dc): A taller, looser stitch that works up quickly and creates a more open fabric.
Step-by-Step Guide: Your First “Soft Spring” Projects for a 12-Month-Old
We’ll start with a super simple project to get you comfortable, then move to a slightly more involved (but still beginner-friendly) garment.
Project 1: The “Soft Spring Square” (A Practical Washcloth or Lovey)
This is the perfect way to practice your basic stitches and get a feel for yarn and hook. You can use it as a baby washcloth, a small comfort blanket (“lovey”), or even join several squares later for a larger blanket.
- Goal: Create a simple square of fabric.
- Key Stitches: Chain (ch), Half Double Crochet (hdc) or Double Crochet (dc).
- Instructions:
- Gather Materials: Your chosen soft spring yarn, crochet hook, scissors, tapestry needle.
- Make a Slip Knot: Place it on your hook.
- Chain (ch) Your Foundation Row: Chain 21 stitches (or any number to create your desired width, remembering that hdc/dc stitches are wider than sc). This will be the starting edge of your square.
- Tip for Beginners: Don’t chain too tightly!
- Work Your First Row:
- For HDC: Skip the first 2 chains from the hook (these count as a turning chain), then yarn over, insert your hook into the 3rd chain from the hook. Yarn over, pull up a loop (3 loops on hook). Yarn over, pull through all 3 loops. This is your first hdc.
- For DC: Skip the first 3 chains from the hook (these count as a turning chain), then yarn over, insert your hook into the 4th chain from the hook. Yarn over, pull up a loop (3 loops on hook). Yarn over, pull through 2 loops (2 loops on hook). Yarn over, pull through remaining 2 loops. This is your first dc.
- Continue working one hdc (or dc) into each remaining chain across the row. You should have 19 hdc (or 18 dc) stitches.
- Turn Your Work: At the end of the row, turn your piece over.
- Work Remaining Rows:
- For HDC: Chain 2 (counts as first hdc). Work one hdc into the top of each stitch across the row. Make sure to work into the top of the turning chain from the previous row as your last stitch.
- For DC: Chain 3 (counts as first dc). Work one dc into the top of each stitch across the row. Make sure to work into the top of the turning chain from the previous row as your last stitch.
- Repeat this step until your square is the desired height (e.g., 8×8 inches or 20×20 cm, or until it looks square).
- Finish Off: Cut your yarn, leaving a tail about 6 inches long. Yarn over with this tail, and pull it completely through the loop on your hook. Pull tight to secure.
- Weave in Ends: Use your tapestry needle to carefully weave both the starting tail and the finishing tail into your crocheted fabric. This makes them invisible and secure.
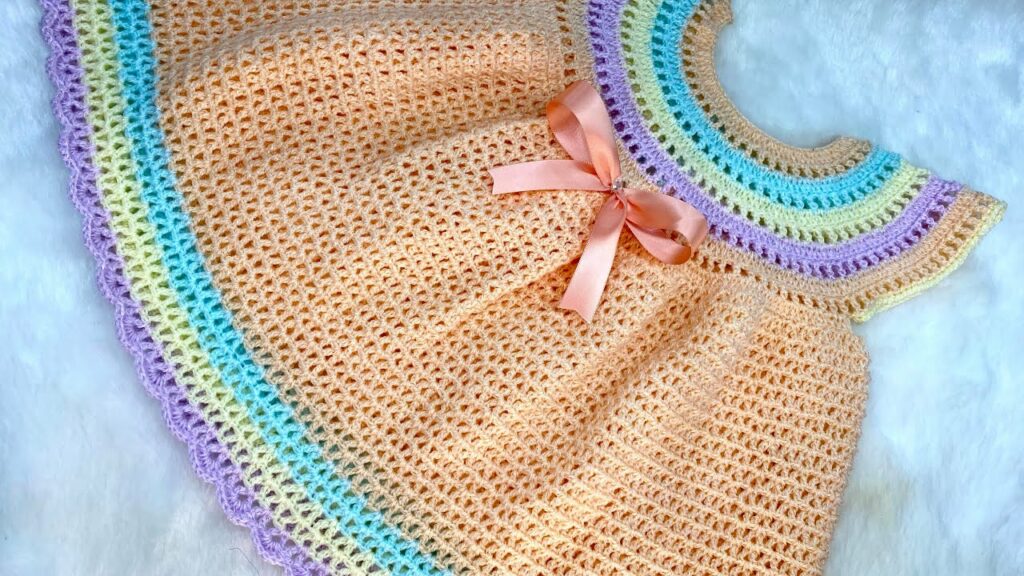
Project 2 (Next Step): Simple Baby Gilet/Vest (12-Month Size)
Once you’re comfortable with basic stitches, a simple baby gilet (a vest without sleeves) is an excellent first garment. It’s constructed from simple flat panels, with minimal shaping, making it perfect for a beginner.
- Goal: Create a simple sleeveless vest for a 12-month-old.
- Key Stitches: Chain (ch), Half Double Crochet (hdc) or Double Crochet (dc), Slip Stitch (sl st) for joining.
- Concept: You’ll crochet three rectangular/square-ish pieces (one back, two fronts) and then sew them together.
- Instructions (Conceptual Steps):
- Understand Your Panels:
- Back Panel: A large rectangle.
- Front Panels (2): Two smaller rectangles, each about half the width of the back. You’ll make a small V-shape or straight opening at the top for the neck.
- Make a Gauge Swatch: Before starting the actual garment, make a gauge swatch (like your “Soft Spring Square”) in your chosen main stitch (hdc or dc). Wash and block it. Measure how many stitches and rows you have per inch/cm. This ensures your vest will be the correct size.
- Crochet the Back Panel:
- Chain enough stitches for the width of the back (e.g., about 10-12 inches for a 12-month size, check a reliable pattern for exact numbers).
- Work in hdc (or dc) rows until the panel reaches the height of the armholes (e.g., 6-7 inches).
- For the shoulders/neckline, you’ll simply work fewer stitches on the top few rows, or bind off a few stitches at the center for the back neck opening, leaving “shoulder” straps.
- Crochet the Two Front Panels:
- For each front panel, chain half the width of the back panel.
- Work in hdc (or dc) rows until it reaches the same height as the back panel’s armholes.
- For the neck opening, you’ll start shaping a “V” or straight line by decreasing stitches towards the center front, or simply binding off stitches in the middle, leaving shoulder straps similar to the back. You might also create simple buttonholes on one front panel edge if it’s designed to close.
- Crochet Simple Edgings (Optional but Recommended):
- For a polished look, you can work a row or two of single crochet (sc) around the edges of the armholes, neckline, and outer edges of the front panels. This cleans up the edges nicely.
- Assemble Your Vest:
- Shoulder Seams: Lay your back panel flat. Align the shoulders of the front panels with the shoulders of the back panel. Use your tapestry needle and a mattress stitch (or simple whip stitch) to sew these seams together.
- Side Seams: Align the side edges of the front and back panels. Sew from the bottom hem up to the armhole using the mattress stitch.
- Finish Off: Weave in all remaining ends securely.
- Block Your Vest: Gently wet the finished vest. Lay it flat on blocking mats, shaping it to the correct dimensions. Pin it in place with T-pins and let it dry completely. Blocking makes your stitches even, softens the fabric, and gives your vest a professional finish.
- Understand Your Panels:
Tips for Beginner Success
- Practice Consistently: The more you crochet, the more even your stitches will become.
- Don’t Crochet Too Tightly: This is a common beginner mistake. Aim for a relaxed tension so your fabric has good drape and isn’t stiff.
- Use Stitch Markers: Mark the first and last stitch of each row to help keep your edges straight. Mark increase/decrease points.
- Count Your Stitches: Regularly count your stitches at the end of each row to ensure you’re not accidentally adding or losing stitches.
- Don’t Fear Frogging! “Frogging” is unraveling your work. Everyone does it! It’s better to undo a mistake than to have a finished project you’re not happy with.
- Watch Video Tutorials: Visual learners will benefit greatly from watching videos on how to perform basic stitches and techniques.
- Enjoy the Process: Crochet is a calming, creative hobby. Savor each stitch!
Caring for Your Soft Spring Creations
Proper care will ensure your handmade items remain soft and beautiful:
- Read Your Yarn Label: Always follow the specific care instructions on your yarn label.
- Gentle Wash: Most baby yarns are machine washable on a gentle cycle with cool water. For best results, place your crocheted item in a mesh laundry bag.
- Hand Wash (Recommended): For very delicate stitches or natural fibers like wool, hand washing gently in cool water with a mild, baby-friendly detergent is best.
- Reshape and Lay Flat to Dry: Never wring, twist, or hang a wet crocheted item. Gently squeeze out excess water (you can roll it in a clean towel), reshape it to its original dimensions, and lay it flat on a clean towel or a mesh drying rack to air dry completely.
Embracing “Soft Spring Crochet” is a delightful journey for any beginner. With these step-by-step concepts and a little practice, you’ll soon be creating beautiful, cherished pieces for the 12-month-old in your life, infused with all the warmth and beauty of the season 🌷🌸. Happy hooking!
Video Tutorial ;