 by
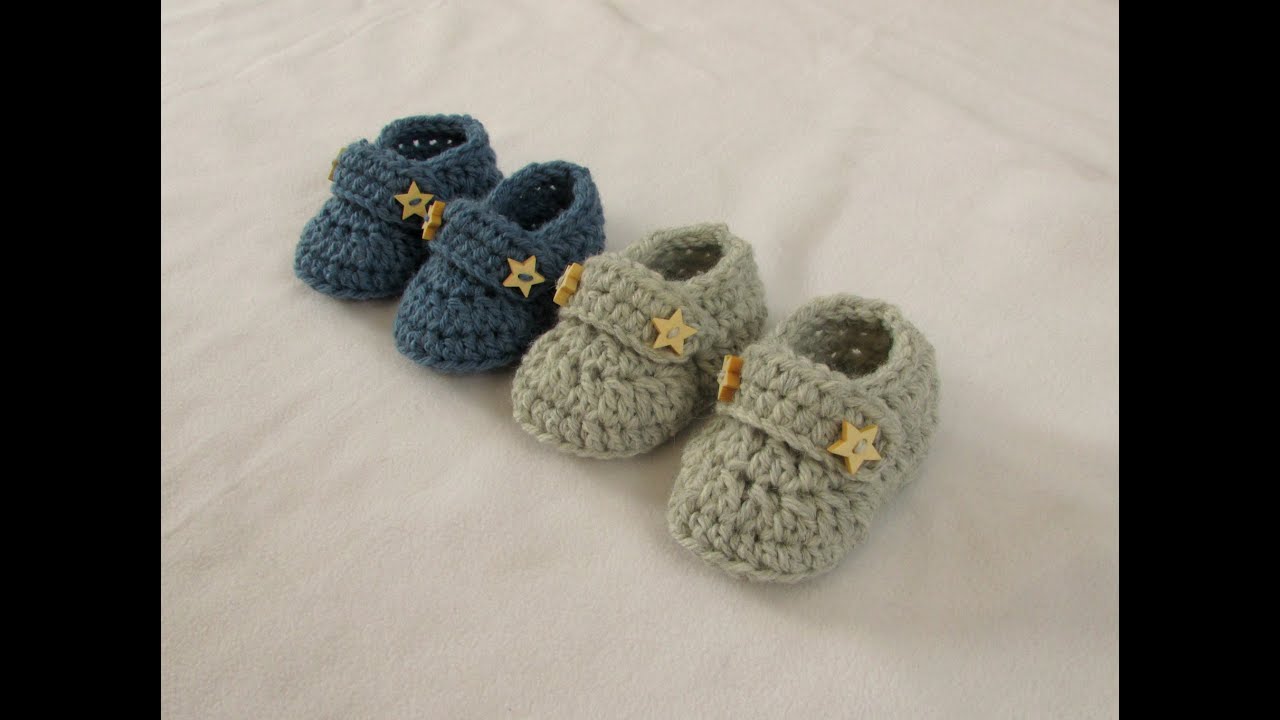
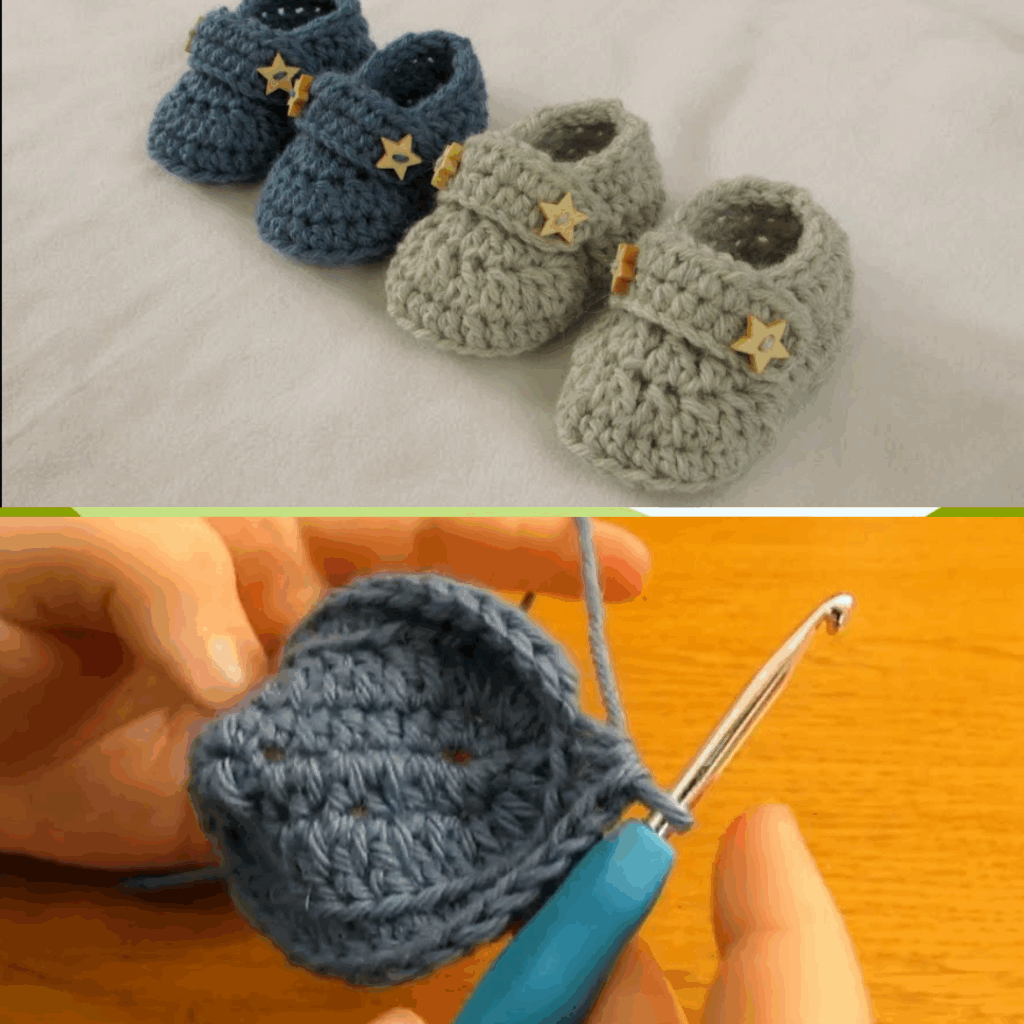
by Crocheting baby booties is a beloved project for many crafters — it’s quick, practical, and incredibly heartwarming. These tiny shoes not only keep baby toes warm but also make for charming gifts at baby showers, birthdays, or holidays.
This guide will show you how to make a pair of classic baby boy booties, with clear instructions, helpful tips, and options to customize the design to match any style.
🧵 Why Crochet Baby Booties?

- They use very little yarn — perfect for scraps.
- Fast project: can be completed in an hour or two.
- Great handmade gift idea.
- Customizable with different styles, stitches, and colors.
📏 Skill Level:
Beginner to Intermediate
If you know basic stitches like chain, single crochet, double crochet, and how to increase/decrease, you’re ready to begin.
📋 Materials You’ll Need
| Item | Details |
|---|---|
| Yarn | Soft DK or light worsted weight (Category 3 or 4) – 100% cotton or baby acrylic blend |
| Hook | 3.5 mm (E) or 4 mm (G), depending on your tension and yarn |
| Tapestry Needle | For sewing and weaving in ends |
| Scissors | Small and sharp |
| Stitch Marker | Optional, to mark the start of rounds |
| Buttons/Laces | Optional for decoration or fastening |
✅ Yarn Tips: Choose soft, breathable, washable yarn that is gentle on baby skin. Avoid anything scratchy or synthetic with poor airflow.
🧶 Stitches & Abbreviations Used
- Ch – Chain
- Sc – Single Crochet
- Hdc – Half Double Crochet
- Dc – Double Crochet
- Sl St – Slip Stitch
- Inc – Increase (2 stitches in the same stitch)
- Dec – Decrease (sc2tog: single crochet two together)
🍼 Sizing Guide
This pattern is designed for 0–3 months. To make larger sizes (3–6 or 6–9 months), simply go up a hook size or use slightly thicker yarn.
| Age | Sole Length |
|---|---|
| 0–3 months | ~3.5 inches (9 cm) |
| 3–6 months | ~4 inches (10 cm) |
| 6–9 months | ~4.5 inches (11.5 cm) |
👟 Pattern: Classic Crochet Baby Boy Booties
This pattern is worked in three parts:
- The sole
- The sides
- The top/instep
Let’s begin!
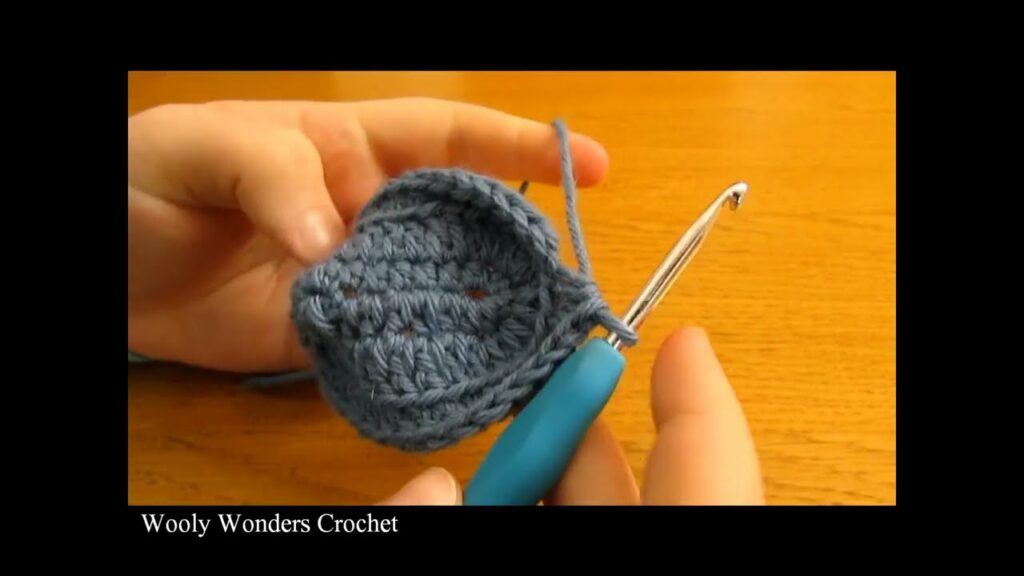
🧶 PART 1: Crochet the Sole
Round 1:
Ch 10.
In 2nd ch from hook: 2 sc.
Sc in next 7 ch.
5 sc in last ch.
Now continue working along the other side of the chain:
Sc in next 7 ch.
2 sc in last ch (same as first stitch). Join with sl st. (24 sts)
Round 2:
Ch 1.
2 sc in first st, sc in next 7, 2 sc in next 5 sts (around the toe), sc in next 7, 2 sc in last 2 sts. Join. (32 sts)
Round 3:
Ch 1.
Sc in next st, 2 sc in next – repeat around the rounded ends, sc evenly on straight sides. You should now have approx. 40–42 stitches, depending on tension.
Join with sl st.
✔️ Your sole should now be oval-shaped, flat, and the length appropriate for a 0–3 month baby.
🧶 PART 2: Build the Sides
Round 4:
Ch 1.
Work sc in back loops only (BLO) around the entire sole. Join with sl st. This helps form a sharp edge between the sole and upper bootie.
Rounds 5–6:
Ch 1. Sc in each st around through both loops. Join. (No increases.)
✔️ At this point, you’ll see a shoe “bowl” forming. Now it’s time to shape the top.

🧶 PART 3: Create the Top (Instep)
Round 7:
Sc in next 13 sts.
Then, work a sc2tog (decrease) 6 times across the toe (12 sts).
Sc in remaining sts to end. Join.
Round 8:
Sc in next 11 sts.
Then, work sc2tog 5 times.
Sc in remaining sts. Join.
Round 9:
Sc in next 10 sts.
Then, work sc2tog 3 times.
Sc to end. Join.
✔️ Your bootie should now have a snug, rounded toe.
🧣 Optional: Ankle Cuff
You can finish here, or add a cuff or fastening.
Cuff (Ribbed):
- Work 3–4 rounds of sc in back loops only (sc-blo).
- Fasten off and weave in ends.
Buttoned Strap:
- Ch 14, sl st into opposite side to form a strap across the ankle.
- Sew a small button on the side of the bootie.
- Use one of the chain spaces as a buttonhole.
🪡 Finishing Touches
- Weave in all yarn tails with a tapestry needle.
- Lightly block the booties (optional) by stuffing them with tissue and steaming them lightly.
- Make the second bootie the same way.
🎨 Customization Ideas
- Add stripes in a contrasting color.
- Attach a crochet appliqué (star, car, teddy bear).
- Use faux leather soles or add non-slip dots for older babies.
- Try two-tone color combinations for heel and toe.
✅ Tips for Success
- Check your gauge! Even a small change affects fit at this tiny size.
- Keep stitches tight and even, especially at the toe.
- Use stitch markers to keep track of rounds.
- Make sure both booties are symmetrical — count your stitches!
👶 Conclusion
Crocheting a pair of baby boy booties is a heartfelt way to celebrate new life. With just a small amount of yarn and a little time, you can create something precious that will be treasured for years to come.
These booties are great for everyday wear, photo props, or keepsakes. And once you’ve mastered the basic pattern, you can modify and decorate them to match any outfit or occasion.
Video Tutorial: