 by
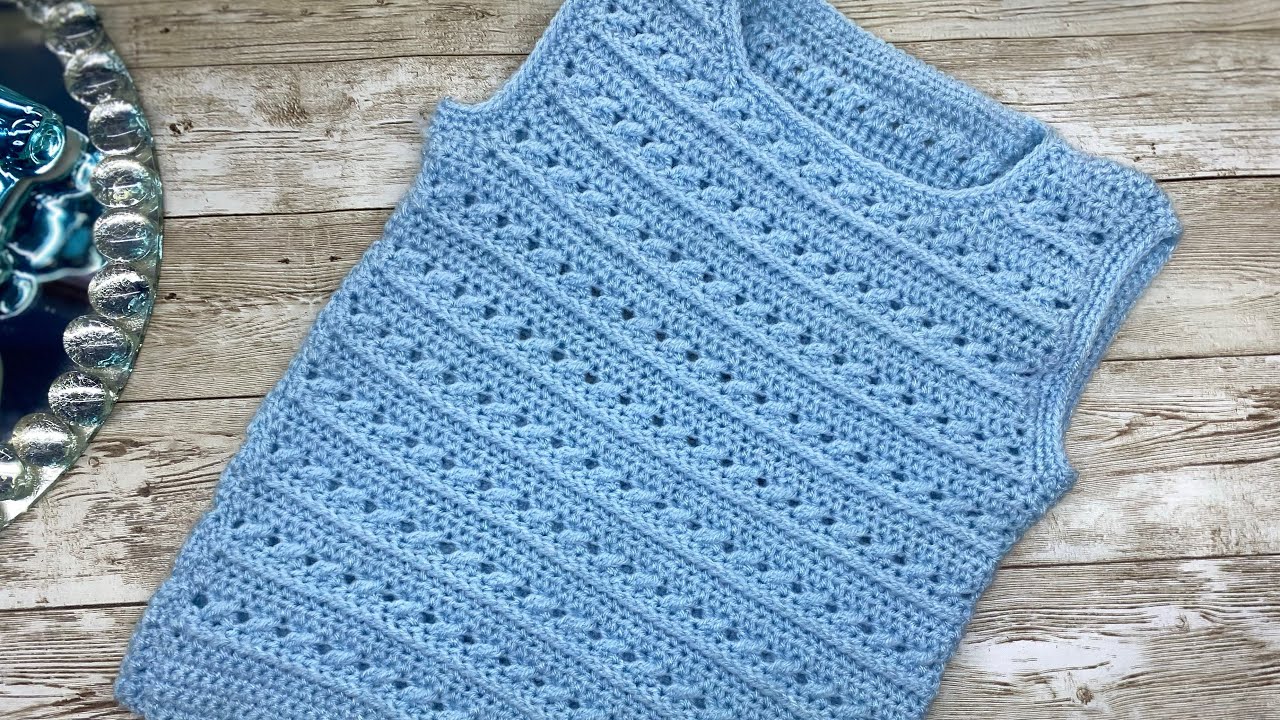
by The Irresistible Appeal of a Sky Blue Crocheted Vest
- Color Symbolism: Sky blue is universally associated with peace, tranquility, openness, and vastness. Wearing it can evoke feelings of calm and freshness, making it a soothing addition to any outfit.
- Versatile Layering Piece: Vests are incredibly adaptable. A sky blue version can be worn over a simple t-shirt, a long-sleeved top, a dress, or even a button-down shirt, instantly adding texture, warmth, or a pop of color.
- Seasonal Adaptability: Depending on the yarn and stitch pattern, a sky blue vest can be light and airy for spring and summer, or cozy and warm for autumn and winter.
- Handmade Charm: A crocheted vest carries the unique beauty and personal touch of a handmade item, showcasing your skill and creativity.
- Wardrobe Staple: Its classic color and functional design make it a piece you’ll reach for again and again.
Designing Your Sky Blue Vest: Key Considerations
Crafting a vest allows for significant design freedom. Here’s what to think about when planning your sky blue creation:
1. The Perfect Shade of Sky Blue
“Sky blue” isn’t just one color! Consider these variations to match your vision:
- Pale Baby Blue: Soft, ethereal, and often chosen for delicate or vintage-inspired designs.
- Classic Azure/Cerulean: The quintessential mid-range sky blue – vibrant and clear.
- Powder Blue: A slightly muted, chalkier blue that can feel sophisticated.
- Periwinkle: A blue with a hint of purple, adding a touch of whimsy.
- Light Teal/Aqua: Blues with a subtle green undertone, offering a refreshing twist. Think about how the specific shade will complement your skin tone and other colors in your wardrobe.
2. Yarn Choice (Drape & Feel are Key!)
The yarn you choose will significantly impact the vest’s drape, texture, and suitability for different seasons.
- For Spring/Summer (Lightweight & Breathable):
- Cotton/Cotton Blends: Excellent breathability, good stitch definition, and a crisp drape. Perfect for lighter, airy vests. Mercerized cottons have a lovely sheen.
- Bamboo/Rayon/Linen Blends: Offer beautiful drape, softness, and a subtle sheen, making them ideal for elegant, flowing vests. Linen softens wonderfully with wear.
- For Autumn/Winter (Warmth & Texture):
- Wool/Merino Wool: Provides warmth, elasticity, and excellent stitch definition. Great for cozy, textured vests. Superwash merino is easy to care for.
- Acrylic/Acrylic Blends: Versatile, affordable, wide color range, and often machine washable. Modern acrylics can be surprisingly soft and drape well, especially in lighter weights.
- Weight: Fingering (Category 1), Sport (Category 2), DK (Double Knitting, Category 3), or Worsted (Category 4) are commonly used. Heavier weights (Bulky, Super Bulky) can create a very quick, oversized, and chunky vest for colder weather.
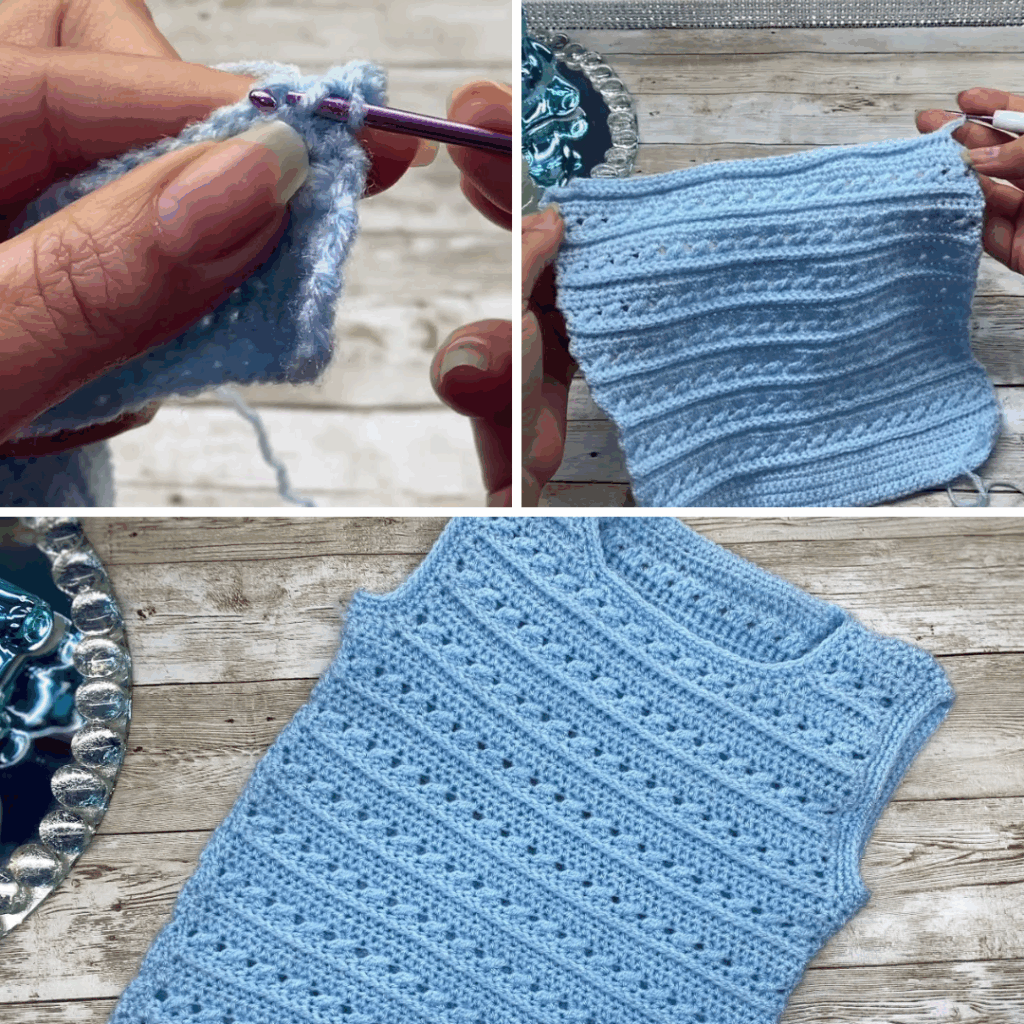
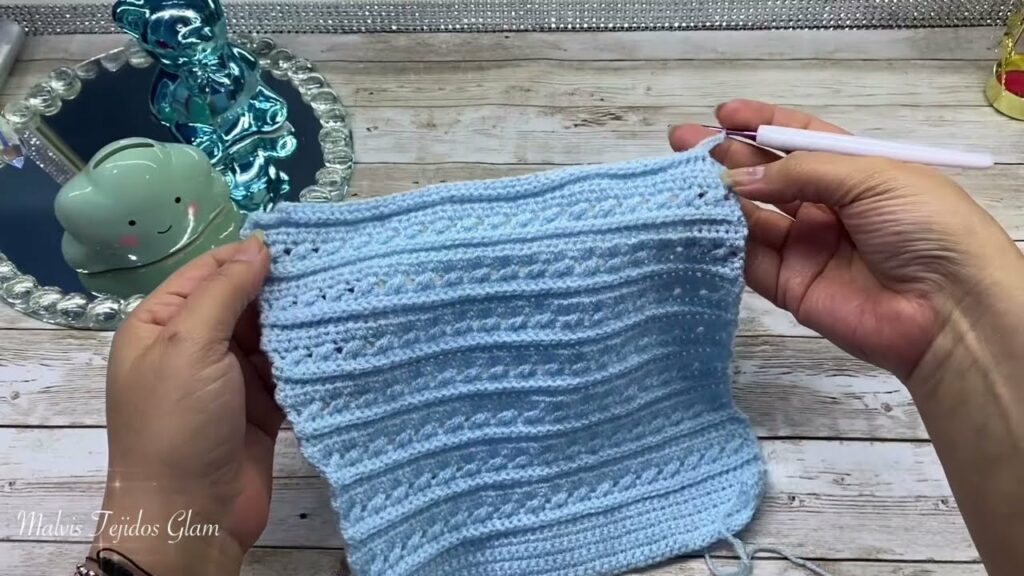
3. Stitch Pattern
Your chosen stitch pattern will dictate the texture, drape, and overall aesthetic.
- Lace Stitches: Shells, V-stitches, fan patterns, or open mesh for a delicate, airy, and elegant vest. These are perfect for warm weather.
- Textured Stitches: Bobbles, puffs, cables (using post stitches), or basketweave patterns for a more tactile, dimensional, and cozy vest.
- Basic Repeats: Simple combinations of single crochet (sc), half double crochet (hdc), or double crochet (dc) for a clean, classic look. These are often quicker to work up.
- Ribbing: Used for edgings at the hem, armholes, and neckline for elasticity and a neat finish (e.g., using back loop only or front post/back post stitches).
4. Construction Method
- Seamed Panels:
- Typically involves crocheting a separate back panel and two front panels.
- These are then sewn together at the shoulders and side seams.
- Pros: Can be simpler for beginners who prefer working flat, allows for precise shaping.
- Seamless (Top-Down or Bottom-Up):
- Top-Down: Often starts with a round yoke or a simple rectangular back/front from the shoulders down. The garment grows from the top, allowing for easy try-on and length adjustments.
- Bottom-Up: Starts with the hem and works upwards, joining seams as you go or at the end.
- Pros: Fewer seams mean a cleaner finish and often better drape and comfort.
5. Style & Fit
- Length: Cropped, hip-length, or longline.
- Closure: Open front, button-front, tie-front, or a single button at the top.
- Neckline: V-neck, crew neck, scoop neck, or a collar.
- Armholes: Standard, slightly oversized, or minimal sleeves (cap sleeves).
- Fit: Fitted, relaxed, or oversized/boxy.
Materials You’ll Need
- Yarn: Your chosen sky blue shade(s) in the desired fiber and weight. Consult your pattern for recommended yardage.
- Crochet Hook: The size recommended by your pattern for your chosen yarn, to achieve the correct gauge.
- Stitch Markers: Invaluable for marking armholes, neck shaping, or the beginning of rounds.
- Tapestry Needle (Yarn Needle): Essential for weaving in ends and seaming panels (if applicable).
- Scissors.
- Measuring Tape: Crucial for taking body measurements and checking your gauge as you go.
- Buttons (Optional): If your design includes a button-front closure.
Essential Crochet Techniques for a Vest
You’ll utilize a range of fundamental crochet skills:
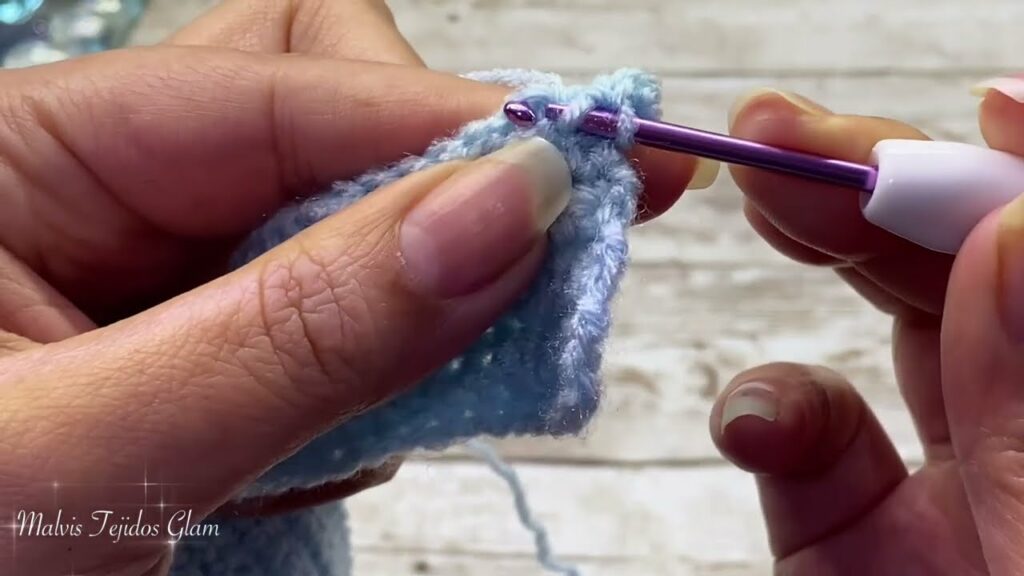
- Foundation Chain & Slip Knot: The starting point for any project.
- Basic Stitches: Chain (ch), Slip Stitch (sl st), Single Crochet (sc), Half Double Crochet (hdc), Double Crochet (dc).
- Working in Rows & Rounds: Depending on your chosen construction method.
- Increasing & Decreasing: Essential for shaping armholes, necklines, shoulders, and any specific waist shaping.
- Working Ribbing (Optional): Techniques like working in back loops only (BLO) or front post/back post stitches for stretchy edges.
- Seaming (if applicable): How to neatly join crocheted pieces together.
- Weaving in Ends: Meticulously hiding all yarn tails for a polished and durable finish.
- Blocking: Absolutely crucial for any garment. It evens out stitches, enhances drape, opens up lace patterns, and sets the final shape and dimensions of your vest.
Planning Your Sky Blue Vest Project
- Sizing & Measurements:
- Take accurate body measurements: full bust, waist (if shaping), hip (if relevant to length), and desired length from shoulder to hem.
- Choose a pattern size that corresponds to your bust measurement, keeping in mind the desired “ease” (amount of extra room) for your preferred fit.
- Gauge Swatch (Non-Negotiable!):
- This is the most critical step for any garment. Crochet a substantial swatch (at least 4×4 inches / 10×10 cm) in your chosen yarn and hook, using the primary stitch pattern of your vest.
- Wash and block your swatch exactly as you plan to wash and block the finished vest. This is vital, as yarn can behave differently after laundering.
- Measure your stitches and rows per inch/cm accurately. Adjust your hook size if your gauge doesn’t match the pattern’s recommendation.
- Yarn Quantity: Consult your chosen pattern’s yardage requirements for your specific size. It’s always wise to purchase an extra skein just in case.
- Pattern Selection: Choose a well-written pattern specifically for a crocheted vest. Look for clear instructions, sizing options, stitch diagrams, and positive reviews.
Construction Journey: Bringing the Vest to Life (Conceptual Guide)
The steps will vary based on your chosen pattern and construction method.
If Crocheting Seamed Panels:
- Back Panel: Crochet a rectangle to your desired width and length, incorporating any subtle shaping.
- Front Panels (2): Crochet two mirror-image panels, shaping the armholes and neckline (V-neck, scoop, etc.).
- Assembly:
- Sew shoulder seams.
- Sew side seams, leaving openings for armholes.
- Add Edgings: Crochet ribbing or a decorative border around the armholes, neckline, and bottom hem.
If Crocheting Top-Down (Seamless):
- Yoke: Start at the neckline (e.g., with a foundation chain joined in a circle, or a magic ring for a circular yoke). Work outwards, incorporating increases evenly to form the yoke to the desired depth.
- Divide for Body: Place stitch markers to separate front, back, and armholes. You’ll typically chain a few stitches under the armpits to connect the front and back.
- Body: Continue working in rounds on the body stitches until the desired length is reached.
- Add Edgings: Finish the bottom hem. Then, attach yarn to the armholes and work edgings around them. Finally, work an edging around the neckline.

Finishing Touches: The Polish of a Pro
- Weave in All Ends: Meticulously hide every yarn tail. For a wearable garment, neatness and security are paramount.
- Add Fastenings (if applicable): If your design includes a button band, sew on buttons securely.
- Blocking (The Ultimate Transformation): Gently wet the finished vest, carefully shape it to its intended dimensions on blocking mats, and pin it securely. Allow it to dry completely. Blocking opens up lace patterns, evens out stitches, and sets the beautiful drape and fit, truly transforming your handmade garment.
A sky blue crocheted vest is a rewarding project that allows you to infuse your wardrobe with a touch of handmade serenity and versatile style. By paying attention to yarn choice, stitch pattern, and the crucial step of blocking, you’ll create a beautiful piece that you’ll love to wear.
Are you leaning towards a light, lacy vest for summer, or a cozier, textured one for cooler weather?
Video Tutorial ;