 by
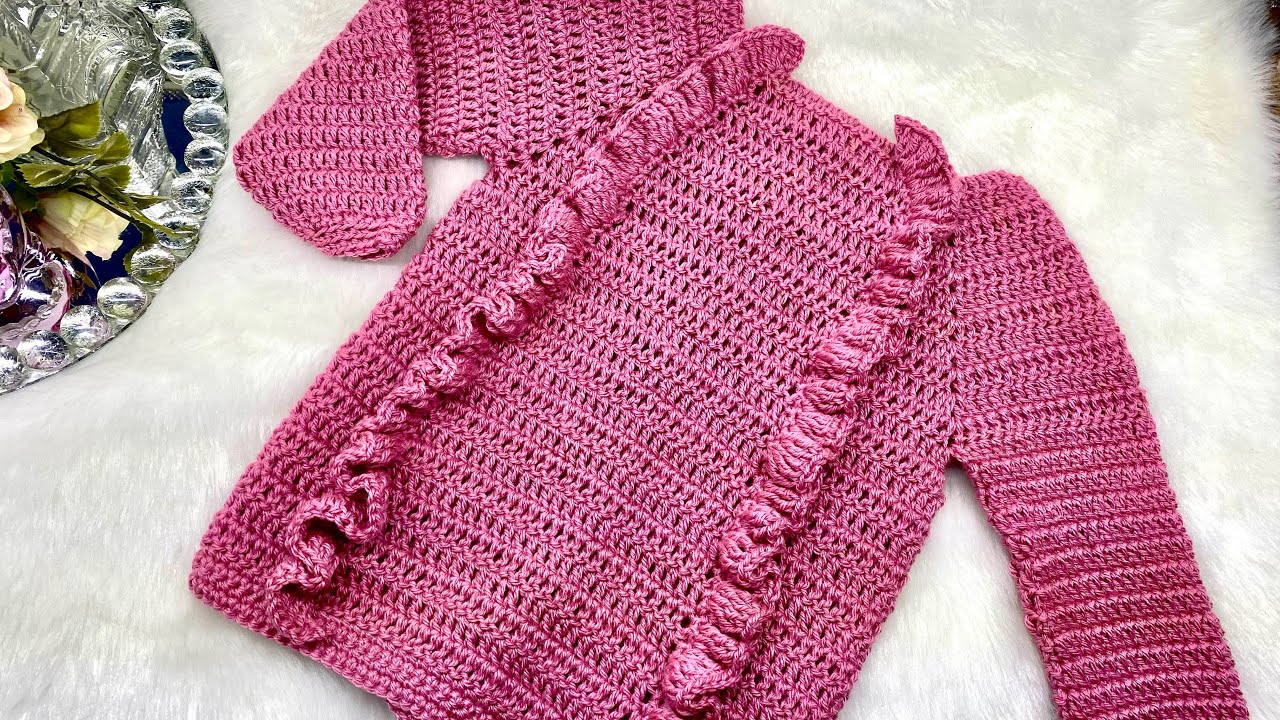
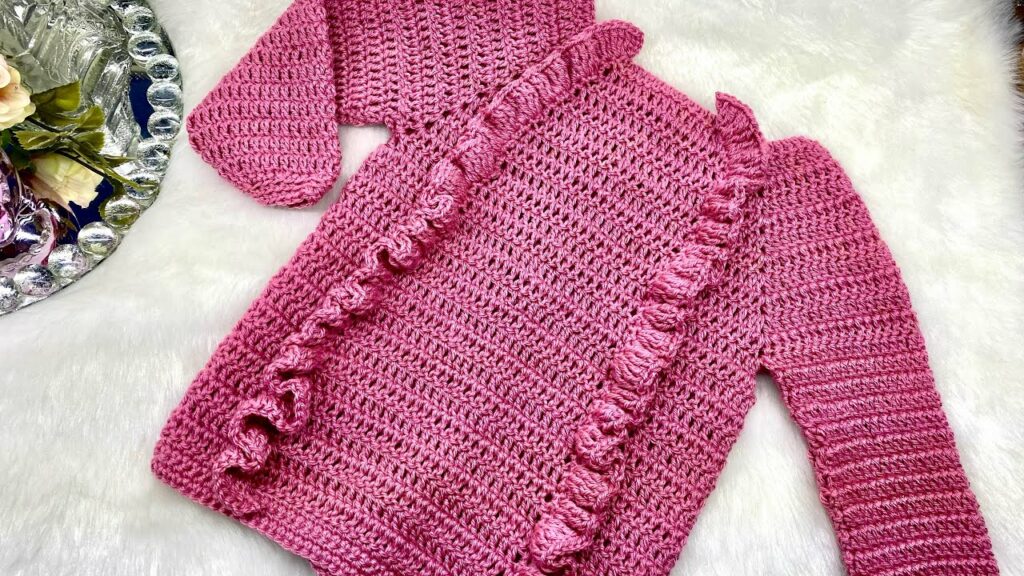
by The Irresistible Allure of a Ruffled Crochet Sweater
- Texture and Dimension: Ruffles add incredible three-dimensional texture, creating visual interest and a dynamic silhouette that flat stitches simply can’t achieve.
- Playful Elegance: Depending on their placement and size, ruffles can be sweetly whimsical, dramatically romantic, or subtly sophisticated, adapting to various styles.
- Customization: You have complete control over the size, density, and placement of your ruffles, allowing for endless personalization. From a delicate ruffle on a cuff to a full cascade down the front, the possibilities are vast.
- Unique Statement Piece: A crocheted ruffled sweater stands out from the crowd. It’s a testament to handmade artistry and personal style.
- Flattering Details: Strategically placed ruffles can enhance features, add volume where desired, or create flattering lines.
Designing Your Ruffled Masterpiece: Key Considerations
Adding ruffles requires careful thought to ensure they complement the sweater’s overall design.
1. Ruffle Placement
Where do you want the ruffles to live?
- Cuffs: A popular and elegant choice, adding a delicate finish to sleeves.
- Hemline: A full ruffle around the bottom of the sweater for a playful, skirt-like effect.
- Neckline/Collar: A subtle ruffle along the neckline can soften the face, while a larger, more dramatic ruffle can act as a built-in necklace.
- Shoulders/Yoke: Ruffles extending from the shoulders or around a yoke can create a romantic, almost cape-like effect.
- Down the Front/Back: Vertical ruffles can add length and visual interest.
- Tiered Ruffles: Multiple rows of ruffles cascading down the body or sleeves for maximum drama.
2. Ruffle Density & Volume
This is determined by the “increase rate” of your ruffle rows.
- Subtle Wave: A smaller increase ratio (e.g., increase every 2-3 stitches) will create a gentle ripple.
- Dramatic Cascade: A higher increase ratio (e.g., increase in every stitch, or 2-3 stitches per stitch) will create a very full, dense ruffle with significant volume.
- Yarn Weight: Thicker yarns will create bolder, more pronounced ruffles, while finer yarns will result in delicate, airy ruffles.
3. Yarn Choice (Drape is Crucial!)
The yarn you choose will profoundly affect how your ruffles drape and move.
- For Flowing Ruffles:
- Cotton, Bamboo, Linen, or Silk Blends: These fibers typically have good drape and less elasticity than wool, allowing ruffles to cascade fluidly. Mercerized cotton can have a lovely sheen.
- Lightweight Acrylics: Many modern acrylics are soft, lightweight, and drape well, offering an easy-care and affordable option.
- Yarn Weight: Sport (Category 2) or DK (Double Knitting, Category 3) are excellent for graceful ruffles. Fingering (Category 1) can create very delicate, almost ethereal ruffles.
- For Stiffer, More Defined Ruffles:
- Worsted (Category 4) or even Chunky (Category 5) Yarns: These will produce more structured, pronounced ruffles that stand out.
- Wool/Wool Blends: Can hold their shape well, especially if blocking is done carefully.
4. Stitch Pattern for Ruffles
The simplest way to create a ruffle is to work a significantly increased number of stitches into a single row or round.
- Basic Stitches for Ruffles:
- Double Crochet (dc): A very common choice for ruffles, as the height of the stitch combined with numerous increases creates a lovely ripple.
- Half Double Crochet (hdc): Creates a slightly denser, shorter ruffle.
- Shell Stitch: Working multiple dc stitches into one stitch or space in a single row can create a ready-made, fanned ruffle effect.
- Combining Ruffles with Main Fabric: Choose a stitch for the main sweater body that complements the ruffle. Often, a simpler stitch (like sc, hdc, or dc rows) allows the ruffles to be the star.
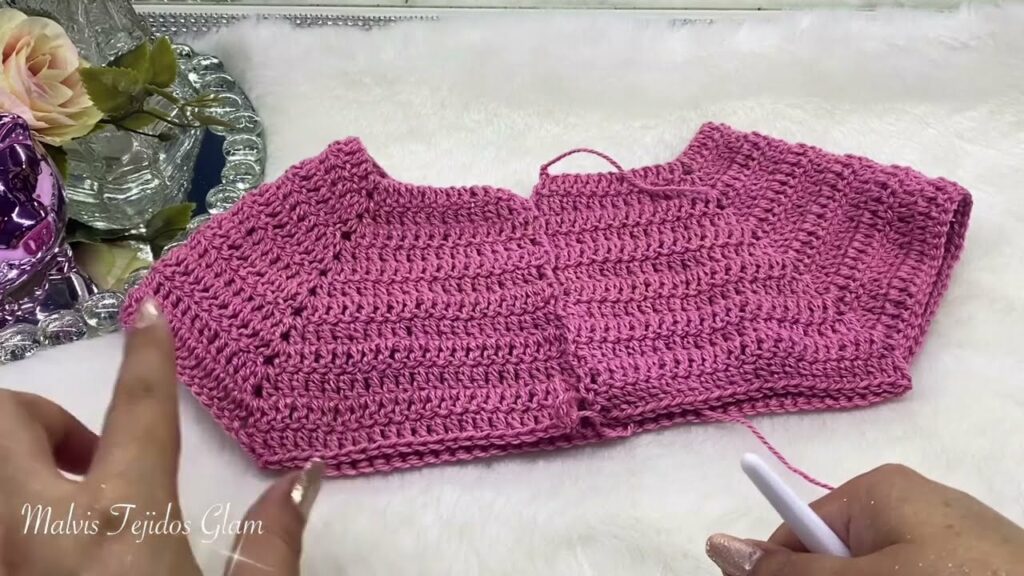
5. Sweater Construction
- Top-Down (Seamless): A popular method, as you can easily add ruffles as you go (e.g., around the yoke or at sleeve divisions) and adjust length.
- Bottom-Up (Seamed or Seamless): You’d complete the body and sleeves, then add ruffles by working into the edge stitches or attaching them.
- Panel Construction: Crochet separate front, back, and sleeve panels, then seam, and finally add ruffles to the desired edges.
Materials You’ll Need
- Yarn: Your chosen fiber, weight, and color(s). Consult your pattern for yardage. You might need slightly more yarn for ruffles than a plain sweater.
- Crochet Hook: The size(s) recommended by your pattern to achieve the correct gauge and fabric density.
- Stitch Markers: Useful for marking rows/rounds, shaping points, and ruffle placement.
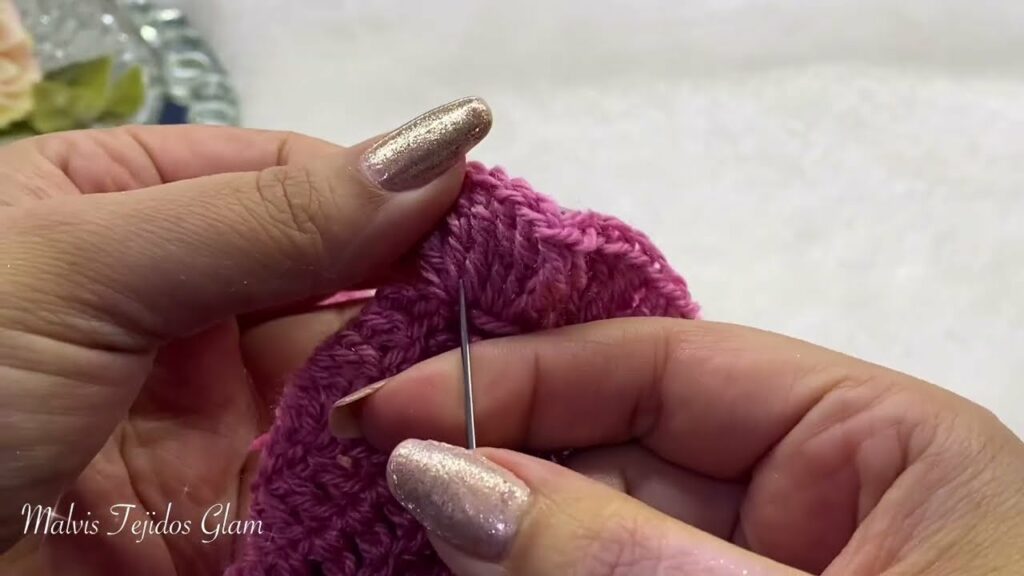
- Tapestry Needle (or Yarn Needle): Essential for weaving in ends and seaming.
- Scissors.
- Measuring Tape: Crucial for checking gauge and garment dimensions.
- Buttons/Closures (Optional): If your design includes them.
Essential Crochet Techniques for a Ruffled Sweater
This project will allow you to practice and refine key garment-making skills:
- Foundation Chain & Slip Knot: Your starting point.
- Basic Stitches: Chain (ch), Slip Stitch (sl st), Single Crochet (sc), Half Double Crochet (hdc), Double Crochet (dc).
- Working in Rows & Rounds: Depending on construction.
- Increases & Decreases: Crucial for shaping the sweater body, sleeves, and especially for creating the ruffles (by rapidly increasing stitches).
- Joining Yarn & Color Changes: If your design includes multiple colors.
- Working Ribbing (Optional): For necklines, cuffs, and hems (e.g., BLO or post stitches).
- Seaming (if applicable): How to neatly join crocheted pieces.
- Weaving in Ends: Meticulously hiding all yarn tails for a polished finish.
- Blocking: Absolutely critical for any crochet garment. It evens out stitches, enhances drape, opens up lace patterns, and sets the final shape and fluid movement of the sweater and its ruffles.
Planning Your Ruffled Sweater Project
Careful planning leads to a successful and beautifully fitting garment:
- Sizing & Measurements:
- Take precise body measurements: full bust, waist (if shaping), hip (if relevant to length), shoulder-to-hem length, sleeve length, and upper arm circumference.
- Choose a pattern size that corresponds to your bust measurement, keeping in mind the desired “ease” (amount of extra room) for your preferred fit.
- Gauge Swatch (Non-Negotiable!):
- This is the most critical step for any garment. Crochet a substantial swatch (at least 4×4 inches / 10×10 cm) in your chosen yarn and hook, using the primary stitch pattern for the main body of the sweater. If your ruffles are a different stitch, swatch that too.
- Wash and block your swatch exactly as you plan to wash and block the finished sweater. This is vital, as yarn can behave differently after laundering.
- Measure your stitches and rows per inch/cm accurately. Adjust your hook size if your gauge doesn’t match the pattern’s recommendation.
- Yarn Quantity: Consult your chosen pattern’s yardage requirements for your specific size. It’s always wise to purchase an extra skein, as ruffles can consume more yarn than anticipated due to their high stitch count.
- Pattern Selection: Choose a well-written pattern specifically for a crocheted sweater with ruffles, or a base sweater pattern that you feel confident modifying to add ruffles. Look for clear instructions, sizing options, and positive reviews.
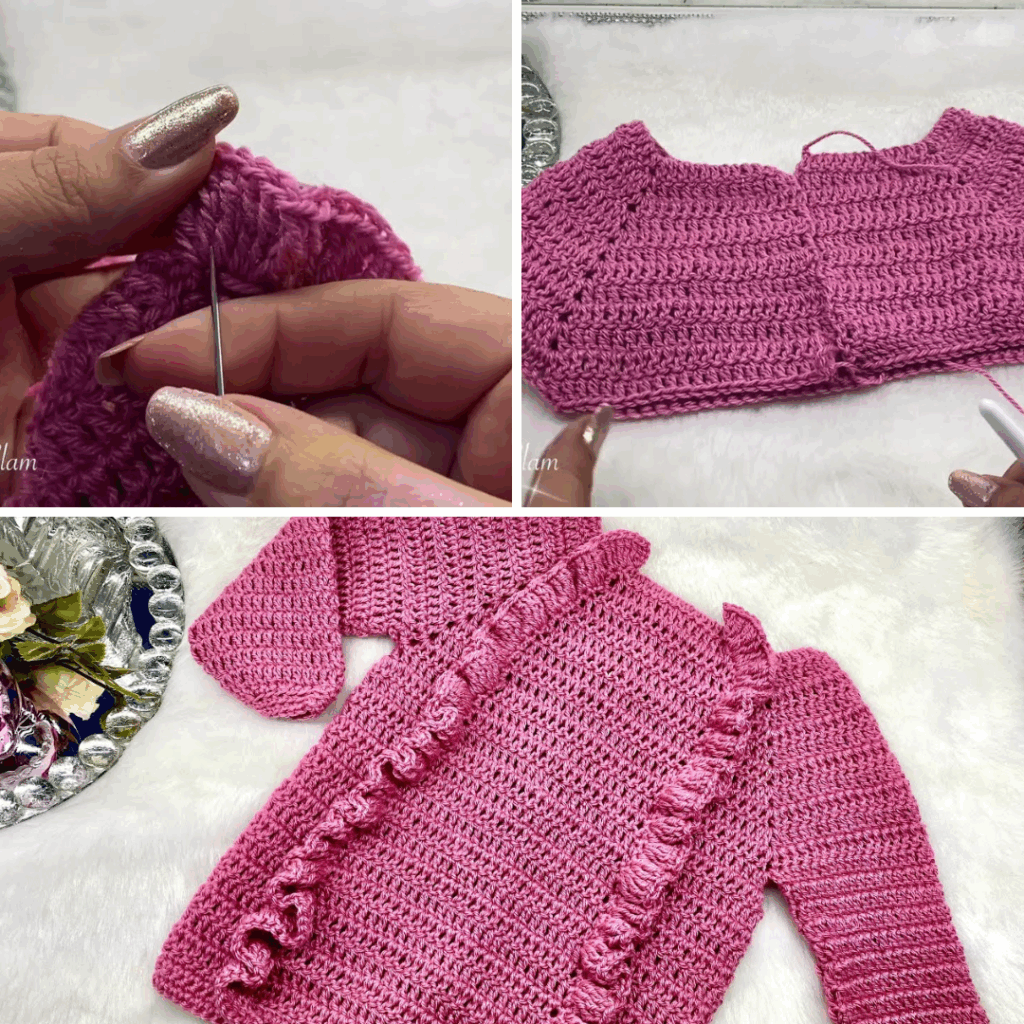
Construction Journey: Bringing the Sweater to Life (Conceptual Guide)
The steps will vary based on your chosen pattern and construction method.
- Main Sweater Body & Sleeves:
- Follow your chosen pattern to create the core sweater: front, back, and sleeves. This could be seamless top-down, bottom-up, or seamed panels.
- Ensure all shaping for the neckline, armholes, shoulders, and any body shaping is completed.
- Add ribbing or a simple border to the neckline, cuffs, and hem if desired.
- Adding the Ruffles:
- Method 1 (Working directly into an edge): For cuffs, hems, or necklines, simply begin crocheting into the stitches along the edge of your finished sweater. For each stitch along the edge, work multiple new stitches (e.g., 2, 3, or even 4 dc into each stitch) in your ruffle row. The higher the ratio, the fuller the ruffle. Continue for a few rows/rounds until the ruffle reaches your desired depth.
- Method 2 (Working into a specific row): For ruffles running vertically or horizontally across the body/sleeves, you might work into an existing row of stitches (e.g., a specific chain space or by working around posts).
- Method 3 (Separate Ruffles): Some designs might have you crochet ruffle strips separately and then sew them onto the sweater. This is less common for integrated ruffles but an option.
Finishing Touches: The Polish of a Pro
- Weave in All Ends: Meticulously hide every yarn tail. For a wearable garment with lots of stitches (especially in ruffles), neatness and security are paramount.
- Add Fastenings (if applicable): If your design includes buttons, sew them on securely.
- Blocking (The Ultimate Transformation): This is absolutely crucial for a ruffled sweater. Gently wet the finished sweater, carefully shape it to its intended dimensions on blocking mats, paying special attention to spreading out the ruffles to define their shape. Pin securely. Allow it to dry completely. Blocking evens out stitches, enhances drape, and sets the fluid movement of the ruffles and the overall garment.
Tips for a Beautiful Ruffled Sweater
- Swatch Your Ruffles: If the ruffle stitch is different from the main body, make a small swatch of it to see how it drapes with your chosen yarn and hook.
- Yarn Choice Matters Most: For soft, flowing ruffles, prioritize yarns with good drape.
- Count Carefully: Ruffles involve a lot of increases. Count your stitches to maintain consistency in your ruffle rows.
- Don’t Over-Block Ruffles (Unless Desired): While blocking helps define them, avoid aggressive pinning if you want them to remain voluminous rather than flat.
- Experiment with Ruffle Depth: Short ruffles give a subtle wave; taller ruffles create more drama.
Video Tutorial :
A crocheted ruffled sweater is a delightful project that allows for immense creativity and results in a truly charming and distinctive piece. Embrace the flow and texture, and enjoy creating a garment that’s as unique as you are!
What kind of ruffle effect are you dreaming of for your sweater?