 by
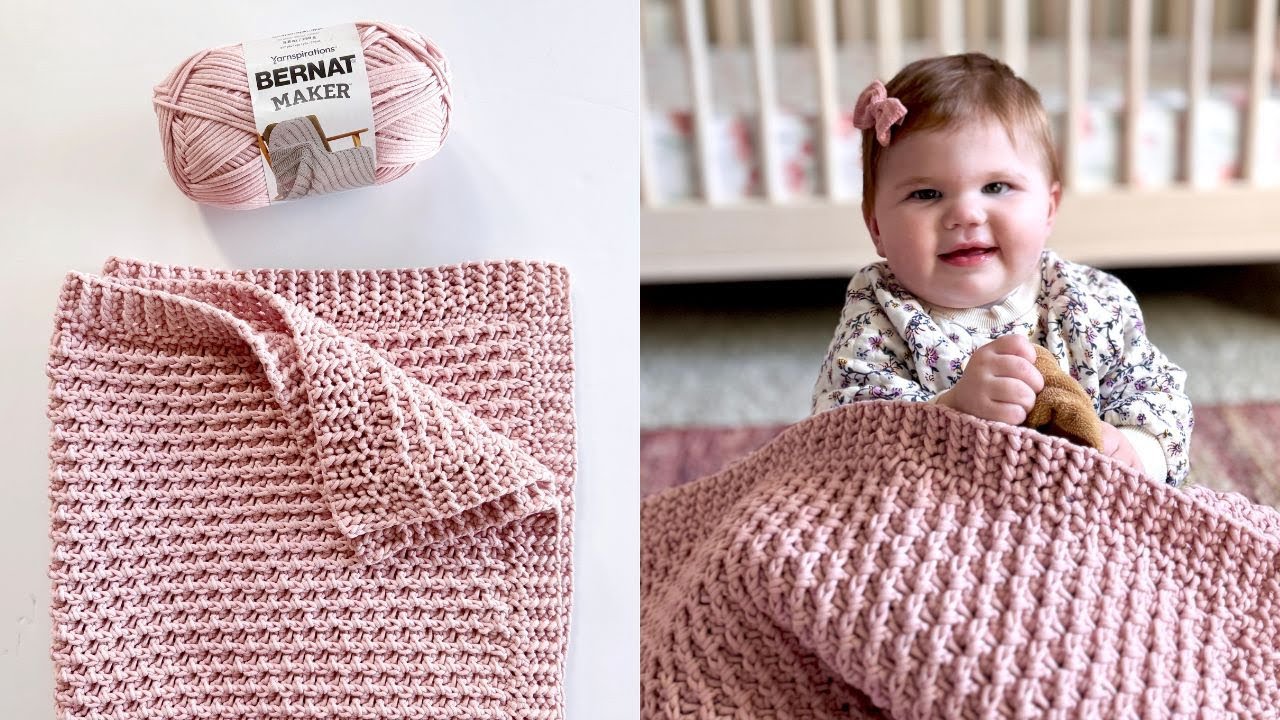
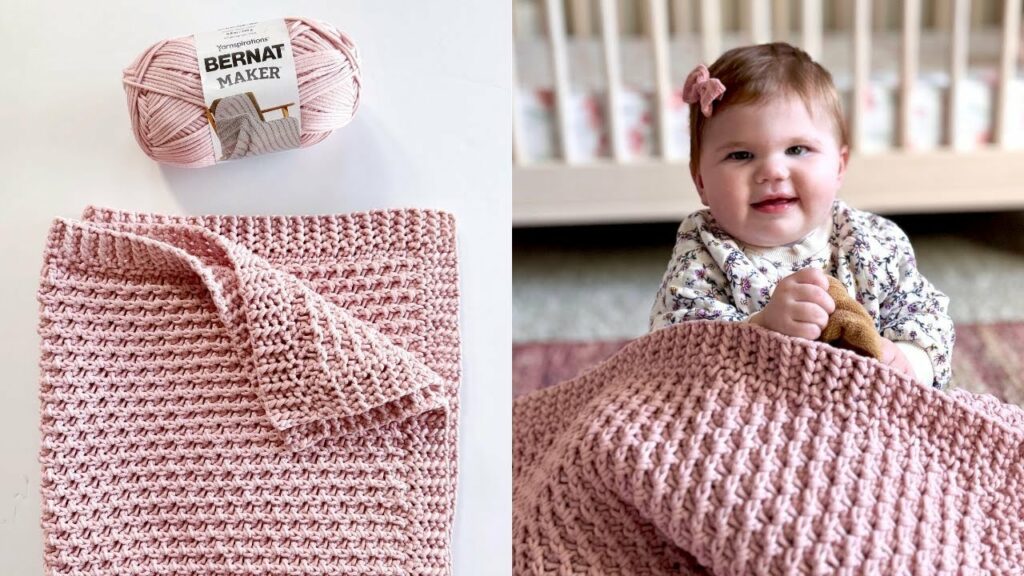
by The Modern Mini Weave Baby Blanket is a beautiful, textured project designed by Hannah from Daisy Farm Crafts. This blanket features a sophisticated, woven-like appearance created by alternating two simple crochet stitches. Its chunky yet soft feel makes it an ideal gift for a new arrival.
This guide provides a detailed walkthrough of the techniques and steps required to create this blanket, based on the official tutorial.
Project Overview and Materials
The blanket uses a specific combination of stitches to achieve its signature “mini weave” texture. While the body of the blanket looks intricate, it relies on a consistent two-row repeat that is easy to master.
- Yarn: Bernat Maker yarn (a cotton-blend tube yarn that provides excellent stitch definition).
- Hook: 8 mm crochet hook.
- Size: To create a standard baby blanket, the original pattern starts with a chain of 80. For practice, you can start with any even number.
Step 1: Foundation and Row 1
To begin, create a foundation chain of an even number (e.g., 80 for a full blanket or 12 for a swatch).
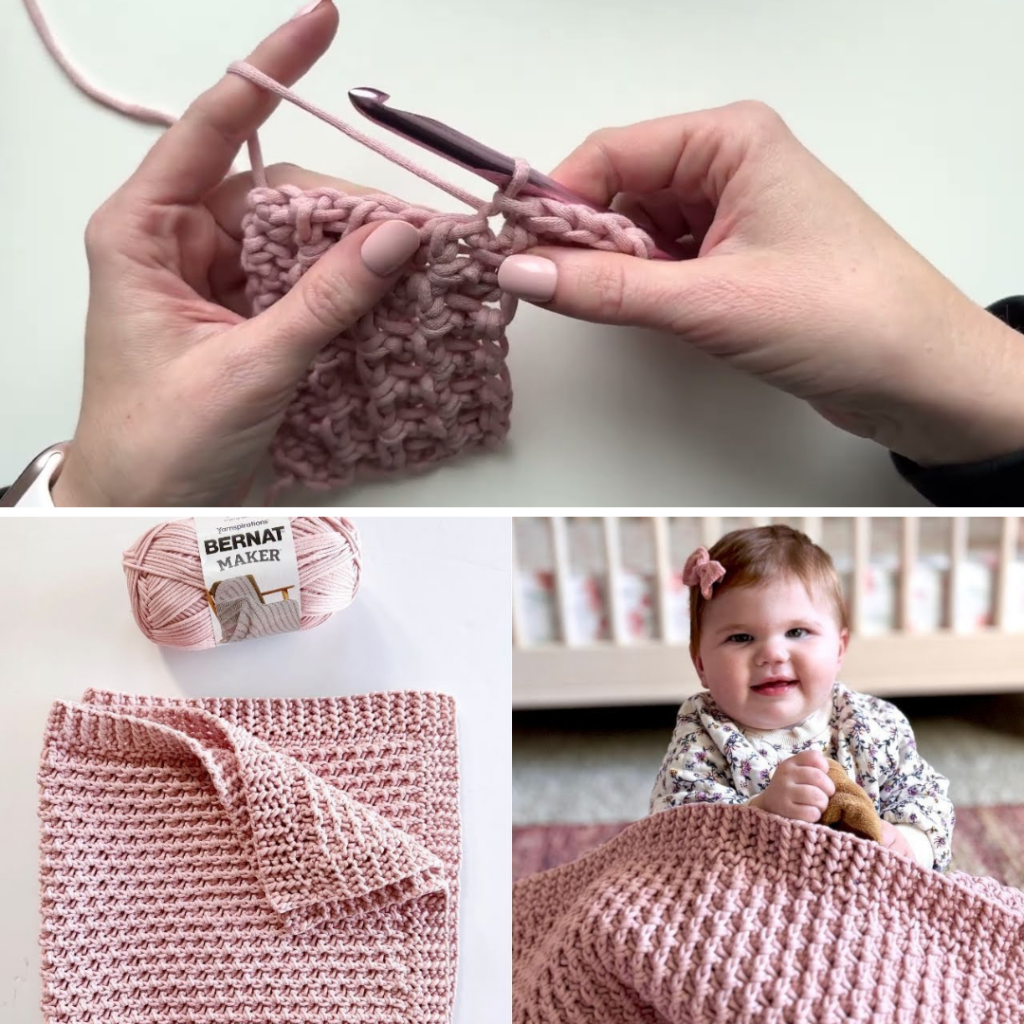
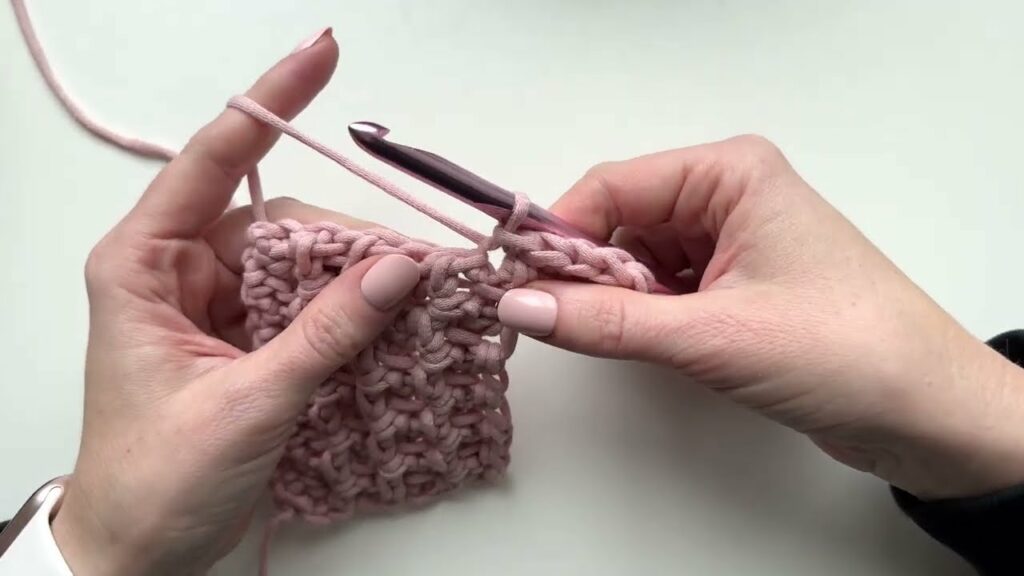
- First Stitch: Starting in the second chain from the hook, work a half double slip stitch (also known as a yarn over slip stitch).
- To do this: Yarn over, insert hook, yarn over and pull up a loop. Immediately pull that same loop through the two loops already on your hook.
- Second Stitch: In the next chain, work a standard half double crochet (HDC).
- To do this: Yarn over, insert hook, yarn over and pull up a loop. Yarn over again and pull through all three loops.
- The Sequence: Continue alternating between the half double slip stitch and the half double crochet across the entire row.
- Important Note: To maintain clean edges, always start and end every row with a half double slip stitch.
Step 2: The Core Pattern (Row 2 and Beyond)
The unique “weave” look comes from where you place your stitches in subsequent rows.
- Front Bottom Loop Half Double Slip Stitch: For the slip stitches, instead of going into the top of the stitch, insert your hook up through the front bottom loop (the horizontal bar just below the top V-loops). This pushes the top loops forward to create a braided texture.
- Wide Half Double Crochet: For the HDC stitches, work them as “wide” stitches. Instead of the top loops, insert your hook into the space underneath all three loops of the stitch from the row below.
- The Alternating Sequence: Work two rows of the same sequence (e.g., Row 2 and 3).
- Shifting the Pattern: To create the staggered weave effect, every two rows you will shift the sequence. You do this by working two half double slip stitches at the beginning and end of the row, rather than just one. This ensures the vertical “V” shapes of the wide HDC stitches sit in between each other rather than stacked directly on top.
Step 3: Working the Ribbed Border
Once the body of your blanket reaches the desired length, you can transition directly into the border without fastening off.
- Starting the Ribbing: Chain five. Starting in the second chain from the hook, work half double slip stitches back toward the blanket edge (4 stitches total).
- Attaching to the Blanket: Slip stitch into the next two spaces along the blanket edge to anchor the ribbing.
- Working Back Up: Turn your work and work four half double slip stitches back up the border piece. To create a twisted-line look, work into the top two loops of the border stitches.
- Repeating the Process: Chain one, turn, and work back down. Slip stitch twice into the blanket edge and repeat the process all the way around.
Step 4: Navigating the Corners
Hannah recommends a square corner for this specific texture, as it maintains the structure of the weave.
- Reaching the Corner: Work your border until you reach the corner stitch.
- Turning the Corner: Instead of Fanning around the corner, finish the border segment at the corner, then chain five again to start a new segment of ribbing that runs perpendicular to the first side. This creates a crisp, 90-degree angle.
- Finishing: Continue this process for all four sides. When you return to the starting point, tie off your yarn and weave in all loose ends with a tapestry needle.
Final Tips for Success
- Check the Back: The texture is often more visible on the back side of the work as you crochet. Occasionally flip your piece to ensure the “V” stitches are staggering correctly.
- Consistent Tension: Because the half double slip stitch is a shorter, tighter stitch, keep your tension even to prevent the blanket from pulling inward at the edges.
Video Tutorial: