 by
by The humble bucket hat has surged back into mainstream fashion, proving its timeless appeal as a versatile, laid-back accessory. But why stop at classic solid colors when you can infuse your hat with personality and charm? Themed crochet bucket hats, particularly those adorned with playful strawberries or adorable froggy features, have taken the crafting world by storm, offering a unique blend of practicality and whimsical self-expression.
This detailed guide will take you through the delightful journey of crocheting your own strawberry or frog-themed bucket hat, covering essential techniques, material choices, and special considerations for bringing these adorable designs to life.
Why Crochet a Themed Bucket Hat?
Beyond the general appeal of a handmade bucket hat, adding a theme amplifies the fun:
- Expressive & Unique: A themed hat is a fantastic way to showcase your personality, sense of humor, and love for all things cute. It’s a wearable piece of art!
- Instant Conversation Starter: Prepare for compliments and questions! These hats are eye-catching and bring joy to anyone who sees them.
- Perfect for Photos: Adorable for kids, whimsical for adults – these hats make fantastic props for photoshoots and social media.
- Thoughtful Gifts: Handmade and personalized, a themed bucket hat makes a truly special and memorable gift for friends, family, or little ones.
- Seasonal & Event Wear: Ideal for summer days, festivals, themed parties, or just brightening up a dull outfit.
- Skill Diversification: Beyond basic hat construction, you’ll practice embellishment techniques like appliqué, embroidery, and possibly amigurumi for dimensional elements.
Understanding the Elements of a Themed Bucket Hat
A themed bucket hat builds upon the standard bucket hat structure, with key elements transformed by color and embellishment:
- The Main Hat Body (The Canvas): This is the traditional bucket hat shape – a flat crown, straight sides, and a flaring brim. Its color will be the primary base for your chosen theme (e.g., red or pink for a strawberry, various greens for a frog).
- Color Palette: Crucial for setting the theme. Think beyond just the main color to include accent colors for leaves, stems, seeds, eyes, and cheeks.
- Thematic Embellishments: These are the elements that bring your chosen theme to life.
- For a Strawberry Hat: Green calyx (stem and leaves) at the top, and small embroidered “seeds” scattered across the hat body.
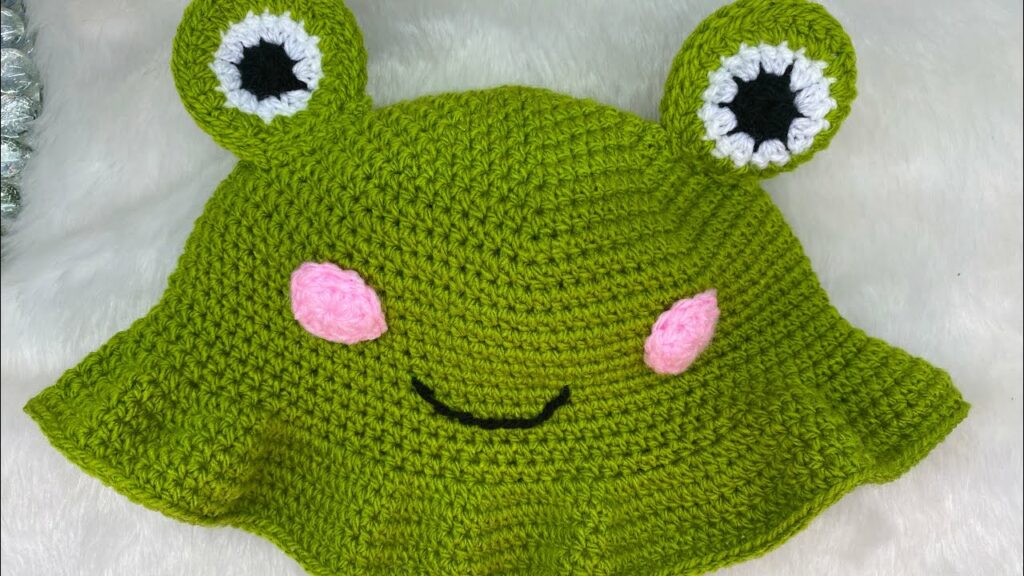
- For a Frog Hat: Large, expressive eyes (often white with black pupils) perched on top, and sometimes rosy pink cheeks.
Materials You’ll Need
Selecting the right materials ensures your hat is both sturdy and adorable.
- Yarn:
- Fiber:
- Cotton or Cotton Blends: Highly recommended for most bucket hats due to their excellent stitch definition, breathability, and ability to hold shape well. Perfect for summer hats.
- Acrylic: A good, affordable alternative, available in a vast range of colors. Choose a softer, less fuzzy acrylic for better stitch definition, especially for smaller embellishments.
- Weight: Worsted Weight (Category 4) is the most common choice, working up quickly and providing good body. DK (Category 3) can also be used for a slightly finer fabric.
- Colors (Specific to Themes):
- Strawberry Hat:
- Main Hat Body: Bright red, classic red, or even a deep pink.
- Leaves/Stem: Various shades of green (forest green, lime green).
- Seeds: Small amounts of yellow, cream, or light green.
- Frog Hat:
- Main Hat Body: Various greens (lime green, kelly green, dark green).
- Eyes: White (for the eye base), Black (for pupils).
- Cheeks (Optional): Small amount of light pink or blush.
- Strawberry Hat:
- Quantity: A typical adult bucket hat uses 100-200 yards for the main color, plus very small amounts (scrap yarn often works!) for the embellishments.
- Fiber:
- Crochet Hook: The size that achieves a dense, firm fabric with your chosen yarn. This often means going down one or two sizes from what the yarn label suggests, to ensure the hat holds its shape.
- Notions:
- Stitch Markers: For marking the beginning of rounds.
- Tapestry Needle (or blunt yarn needle): Essential for weaving in ends, seaming embellishments, and for embroidering details like strawberry seeds.
- Scissors.
- Measuring Tape: For checking gauge and hat dimensions.
- Fiberfill (Optional for Frog Eyes): A small amount of poly-fill for lightly stuffing the frog eyes to make them more dimensional.
- Safety Eyes (Optional for Frog): Small plastic safety eyes can be used for frogs, but exercise extreme caution if making for babies or toddlers, as these can be a choking hazard. Embroidered eyes are always safer for young children.
Key Crochet Techniques for Themed Hats
Beyond standard bucket hat construction, you’ll utilize some specialized techniques:
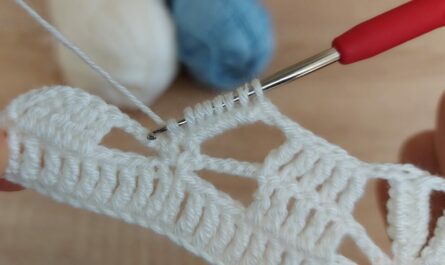
- Basic Stitches: Chain (ch), Slip Stitch (sl st), Single Crochet (sc), Half Double Crochet (hdc), Double Crochet (dc).
- Working in the Round: Essential for the main hat body (crown, sides, brim) and for crocheting dimensional embellishments like frog eyes.
- Increasing & Decreasing: Used for shaping the crown, brim, and any rounded elements like eyes.
- Consistent Tension: Crucial for maintaining the hat’s shape and ensuring the embellishments look neat.
- Blocking: Recommended for the main hat body to set its shape and ensure the brim lays nicely. Can also be used lightly for embellishments.
- Amigurumi Techniques: For dimensional elements like frog eyes, you’ll use skills from amigurumi: working in tight spirals, making neat increases, and sometimes stuffing.
- Embroidery: For details like strawberry seeds (French knots or small straight stitches) or embroidered frog pupils.
- Appliqué/Sewing: Securely attaching all crocheted embellishments (leaves, stems, eyes, cheeks) to the main hat body. Security is paramount, especially for children’s items.
Planning Your Themed Bucket Hat
- Sizing:
- Measure the head circumference of the wearer.
- Refer to your pattern’s sizing guide, or calculate the crown diameter needed (Head Circumference / π) – (0.5 to 1 inch for negative ease, for a snug fit).
- Gauge Swatch: Absolutely critical for a hat that fits.
- Crochet a swatch (at least 4×4 inches / 10×10 cm) using your main yarn and hook in the primary stitch pattern.
- Wash and block your swatch to see how the yarn behaves.
- Adjust your hook size until your gauge matches the pattern’s.
- Yarn Quantity: Ensure you have enough of your main hat color, and small amounts of your accent colors for the embellishments. Scrap yarn is often perfect for the small details.
Step-by-Step Construction (Conceptual Guide)
Most themed bucket hats follow a similar general flow, with the thematic elements added at specific stages.
Part 1: Crocheting the Main Hat Body
- The Crown (Top):
- Start with a Magic Ring for a tight center.
- Work in single crochet (SC) or half double crochet (HDC) in continuous rounds (or joined rounds, depending on the pattern), increasing stitches evenly in each round.
- Continue increasing until your flat circle reaches the desired crown diameter for your head.
- The Sides/Body:
- Once the crown reaches the correct diameter, stop increasing.
- Work even (one stitch in each stitch) in continuous rounds until the hat reaches the desired height, typically covering the top of the forehead and ears.
- The Brim:
- Begin increasing stitches again to make the hat flare outwards. Increases should be evenly distributed around each round.
- Continue working in rounds, increasing as needed, until the brim reaches your desired width.
- Finish the brim edge neatly (e.g., with a slip stitch round or a round of reverse single crochet for a textured edge).
- Weave in Ends: Meticulously weave in any yarn tails from the main hat body.
Part 2: Creating Themed Embellishments (Specifics Below)
Crochet all your thematic elements separately.
Part 3: Assembling Your Themed Hat
- Blocking (Main Hat): Gently wet your main hat body, shape it, and let it dry completely. This sets the shape and helps the brim lie flat.
- Attaching Embellishments: Position all your crocheted elements (leaves, stem, eyes, cheeks) on the hat. Pin them in place. Using your tapestry needle and matching yarn, securely sew each piece onto the hat. For children’s items, ensure attachments are extremely robust to prevent choking hazards.
- Final Details (Embroidery): For strawberry seeds or frog pupils, use your tapestry needle and the accent color yarn to embroider these details directly onto the hat or the eyes.
Specific Themed Hat Breakdowns
Let’s look at the unique components for each theme:
A. Crochet Strawberry Hat 🍓
- Main Hat Body: Typically crocheted in red or pink yarn.
- The Calyx (Leaves & Stem):
- Leaves: Crochet several individual leaf shapes. These are often made by chaining, then working various stitches (e.g., SC, HDC, DC) into the chain, then decreasing back down to form a point. Make 3-5 leaves.
- Stem: A small crocheted cylinder (a few rounds of SC in a magic ring) or simply a short, sturdy chain.
- Strawberry Seeds:
- These are usually embroidered onto the finished red/pink hat body.
- Using yellow, cream, or light green yarn and your tapestry needle, create small French knots or tiny vertical/diagonal straight stitches scattered randomly across the entire hat body for a realistic seeded effect.
- Assembly: Securely sew the leaves around the center top of the hat’s crown. Sew the stem in the very center, peeking out from the leaves. Then, embroider the seeds.
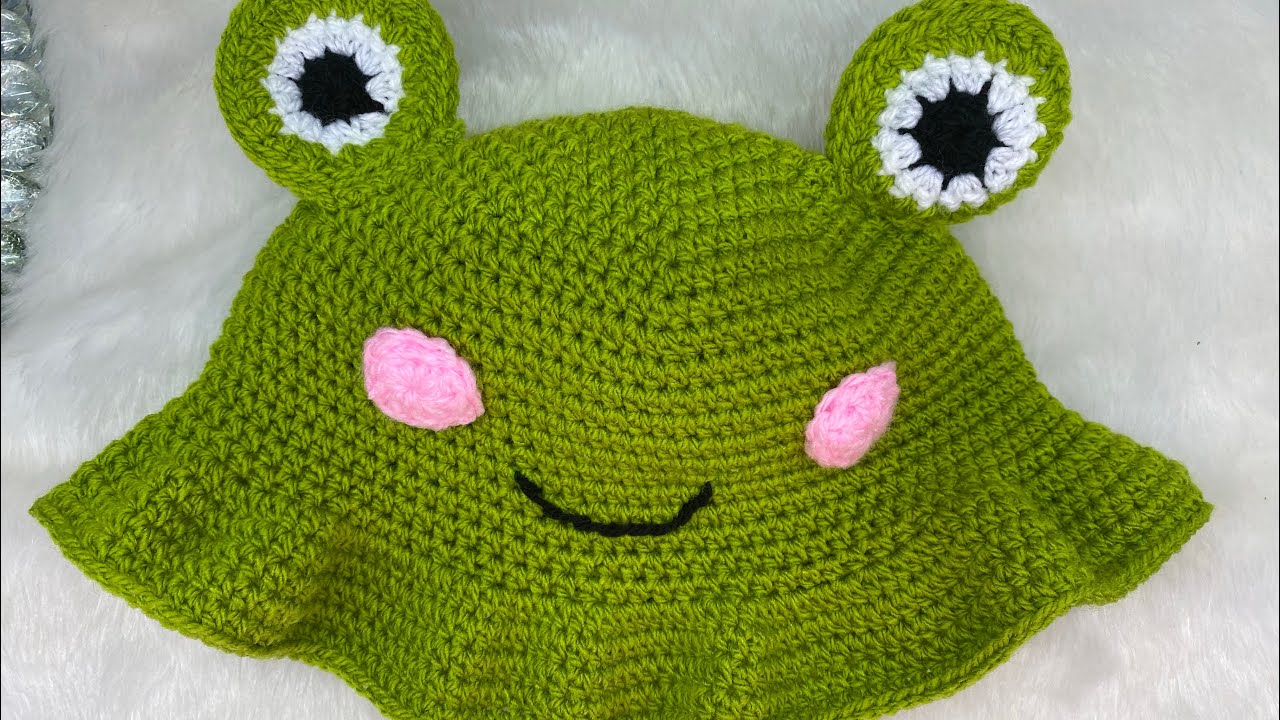
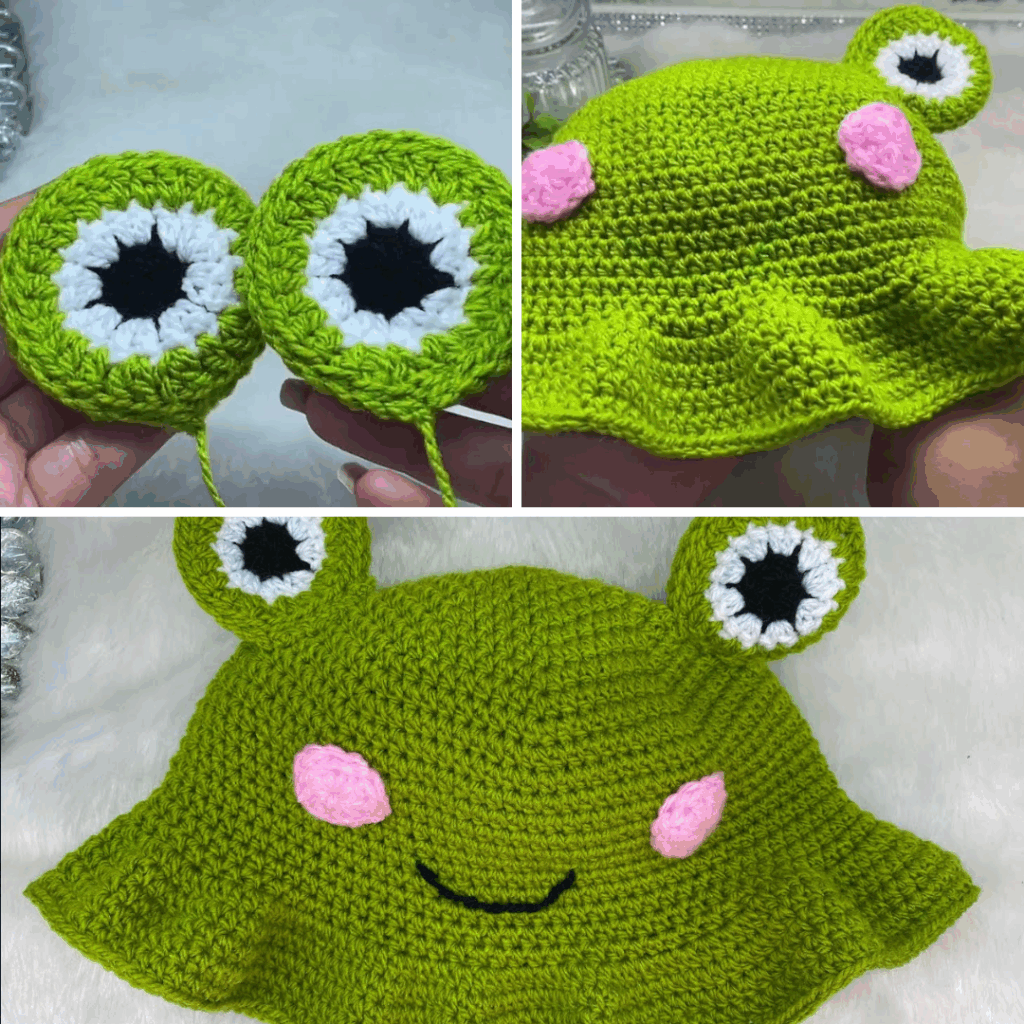
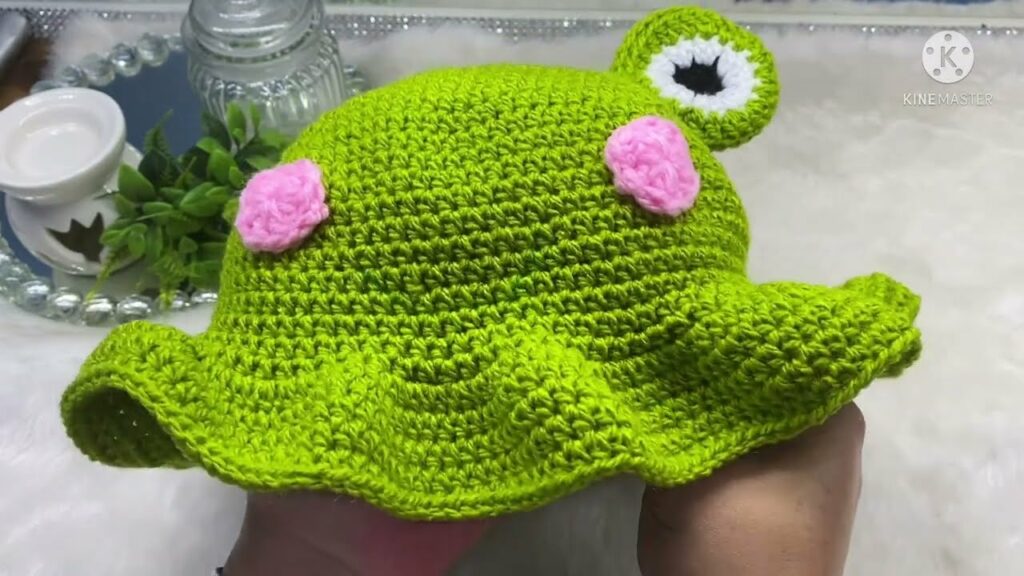
B. Crochet Frog Hat 🐸
- Main Hat Body: Crocheted in various shades of green yarn.
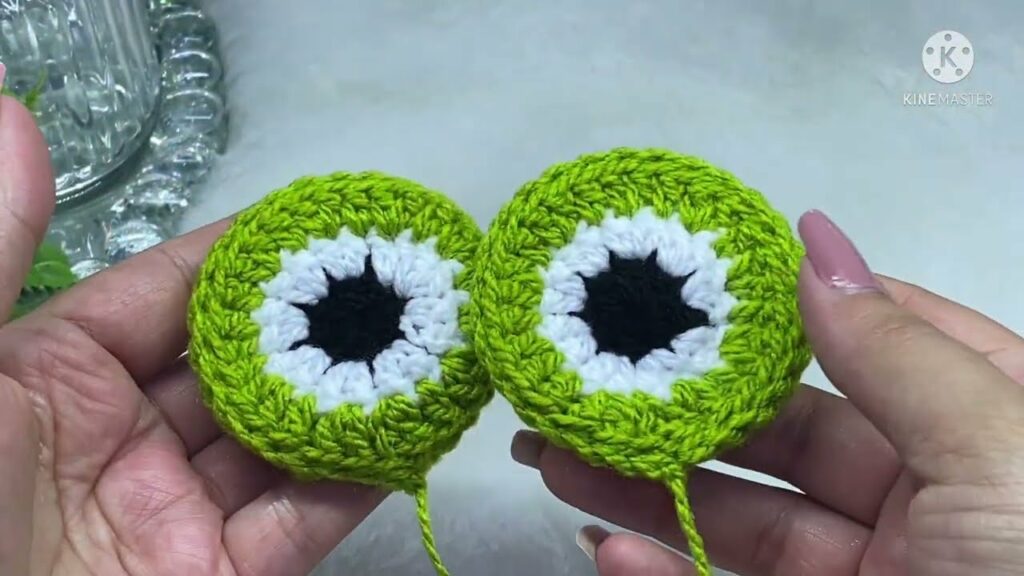
- The Eyes:
- Crochet two identical large white circles/half-spheres for the eye bases (using amigurumi techniques of working in rounds, increasing to form a cup shape). You can lightly stuff them for more dimension or leave them flat.
- Crochet two smaller black circles for the pupils.
- Assembly: Sew the black pupils securely onto the white eye bases. Then, position the completed eyes on the top-front part of the hat’s crown (where a frog’s eyes would typically sit) and securely stitch them into place.
- Cheeks (Optional):
- Crochet two small, flat pink circles.
- Assembly: Sew them onto the hat body just below and slightly in front of the eyes.
Tips for Themed Hat Success
- Secure Attachments are Key: This is paramount for safety, especially if the hat is for a child. Stitch all embellishments very firmly to the main hat body. Consider stitching around the entire perimeter of each piece multiple times.
- Embroidery Practice: If you’re new to French knots or small embroidery, practice on a scrap piece of yarn first to get a feel for it.
- Symmetry: For features like frog eyes and cheeks, take care to place them symmetrically for the best effect. Pin them in place before sewing.
- Yarn Choice for Embellishments: For small details like leaves and eyes, choose yarns that have good stitch definition so your crocheted shapes are clear.
- Don’t Overstuff Frog Eyes: If stuffing, use just enough fiberfill to give them shape without making them too rigid or heavy.
Customization Beyond Strawberry & Frog
These themes are just the beginning! Once you master the techniques, you can explore other whimsical designs:
- Other Fruits: Lemon, orange, blueberry (with little embroidered dots), apple.
- Other Animals: Bear ears, cat ears, bunny ears, sleepy fox face.
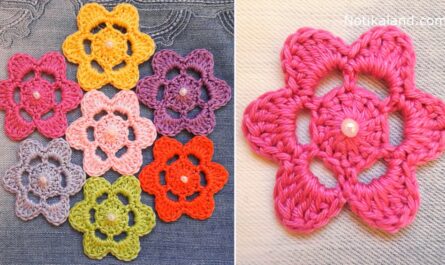
- Flowers: Large crocheted flower appliqués on the side or crown.
- Food Items: Donut (with sprinkles!), cupcake, ice cream cone.
Caring for Your Themed Crochet Hat
- Follow Yarn Label Instructions: Always refer to your specific yarn’s care guidelines.
- Hand Wash Recommended: Especially with multiple embellishments, hand washing helps preserve the hat’s shape and details. Use cool water and a mild detergent.
- Reshape and Lay Flat to Dry: Never wring or hang a wet crocheted hat, as this will cause it to stretch and distort. Gently squeeze out excess water, reshape the hat, and lay it flat on a clean towel or a mesh drying rack to air dry completely. This also helps maintain the shape of the brim.
Conclusion
Crocheting a themed bucket hat is a delightful journey into the world of whimsical wearables. Whether you choose the sweet charm of a strawberry or the playful quirkiness of a frog, these projects allow you to express your creativity, hone your crochet skills, and craft a truly unique accessory. Get ready to turn heads and spread smiles with your one-of-a-kind handmade creation! Sources
Video Tutorial ;;