by
by 1. Materials and Specifications
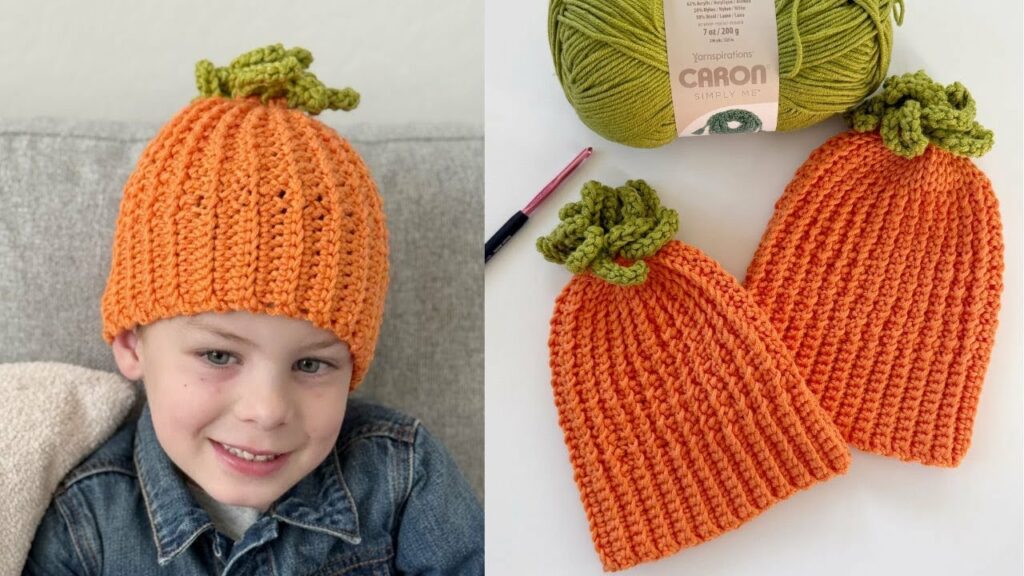
To achieve the best results, use the following materials:
- Yarn:Caron Simply Me (a size 5 acrylic, nylon, and wool blend).
- Orange: Lively Mandarin (Main color)
- Green: Olive Quartz (For the leaves)
- Hook: I/5.5 mm (Tiffany recommends sizing down from the package’s suggested 6 mm hook to ensure the hat has plenty of stretch) .
- Skill Level: Easy (uses slip stitches and single crochets).

2. Starting the Hat (The Top and Center)
The hat is worked flat in rows and then seamed together.
- Foundation Chain: Start by chaining 36.
- Top of Hat (Slip Stitches): In the second chain from the hook, work a slip stitch. Work slip stitches into each of the next four chains for a total of 5 slip stitches .
- Center Portion (Mesh Stitch):
- Work a single crochet in the next chain.
- Chain 1, skip one chain, and single crochet into the next .
- Repeat this across for a total of 21 stitches of the mesh pattern].
- The Brim (Single Crochet): Work the final 9 chains in single crochet to create the ribbed brim].
3. Building the Ribbed Texture
- Row 2 (Back Loop Only): Chain 1 and turn. To create the ribs, work into the back loops only (BLO).
- Work back loop single crochets for the brim portion (the first 9 or 10 stitches).
- Continue with the mesh stitch (single crochet into the back loop of the previous row’s single crochet, chain 1, skip the chain space) .
- Finish with 5 back loop slip stitches at the top.
- Pro-Tip: Use a stitch marker to mark the transition between the brim and the mesh stitch to keep your count consistent ].
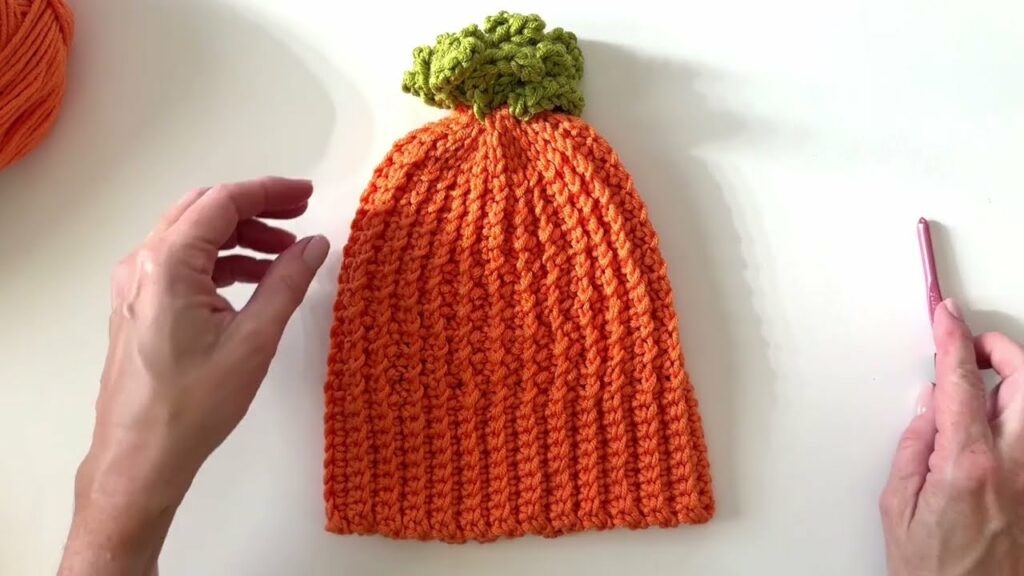
4. Adding the “Curly-Cue” Leaves
The green leaves are added every other row at the top of the hat.
- Color Change: On the final step of the last slip stitch of the row, pull through with the green yarn instead of orange. Do not cut the orange yarn .
- The Leaf: Chain 10. In the second chain from the hook, work a Yarn Over Slip Stitch (yarn over, insert hook, pull through everything on the hook). Work one in each chain back down to the hat .
- Returning to Orange: Finish the last step of the leaf by pulling the orange yarn back through. Leave the green yarn attached; you will pull it across every two rows to make the next leaf .
5. Finishing and Seaming
Continue working rows until the hat reaches the desired width. For the child size shown, the creator worked until she had 13 green curly-cues .
- Seaming the Side: Fold the hat in half with the inside facing you. Use a Zigzag Slip Stitch to join the sides. Insert the hook from the “outside” of each side to create a seam that blends perfectly with the ribbed texture .
- Closing the Top: Cut a long tail. Use a tapestry needle to weave in and out just underneath the green curly-cues. Pull the yarn tight to gather the top of the hat closed .
- Final Round: Secure the top with a few extra stitches and weave in all remaining ends .
Video tutorial: