 by
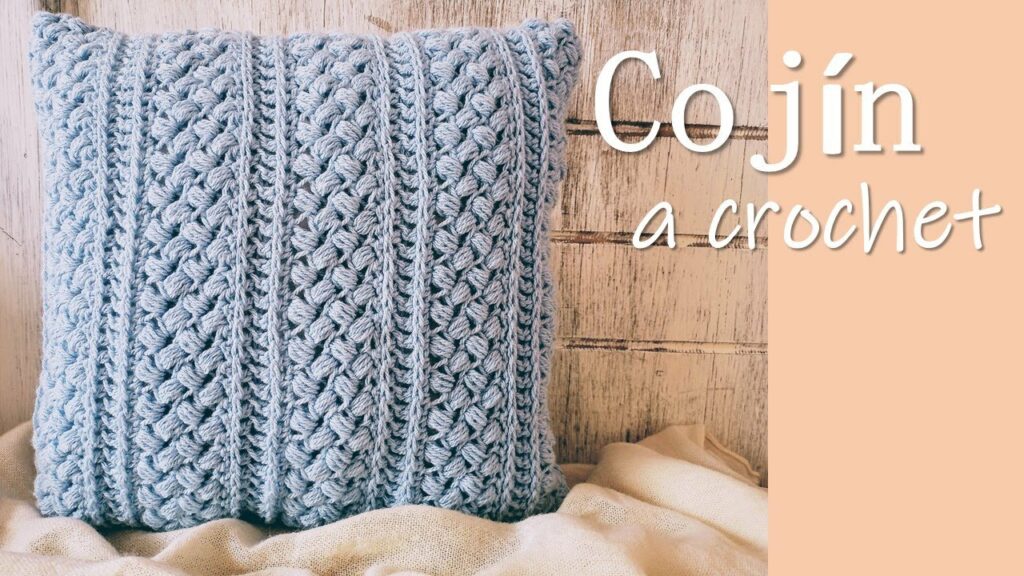
by Cushions are the unsung heroes of home decor, instantly adding comfort, color, and personality to any space. A handmade crochet cushion cover takes this charm to the next level, infusing your home with unique texture and a touch of artisanal warmth. But beyond beauty, practicality is key. This detailed guide focuses on creating crochet cushion covers that are not only stunning but also incredibly easy to put on and take off, making washing a breeze and seasonal refreshes a joy.
Why Crochet an Easy On/Off Cushion Cover?
Opting to crochet a cushion cover with convenient removal in mind offers several advantages:
- Instant Decor Refresh: Quickly change the entire look and feel of a room without investing in new furniture. Swap covers for different seasons, holidays, or just when you fancy a change!
- Hygienic & Washable: Cushion inserts can get dusty or accumulate spills over time. An easy-to-remove cover means you can simply slip it off and toss it in the wash, keeping your home fresh and clean without wrestling the entire cushion.
- Seasonal Versatility: Imagine switching from a cozy, textured winter cover to a light, airy lace cover for spring. Easy-on/off closures make this effortless.
- Personalized Style: Unleash your creativity! With crochet, you have infinite possibilities for color palettes, intricate textures, and unique patterns that perfectly match your home’s aesthetic.
- Skill Building: Cushion covers are fantastic projects for practicing various crochet stitches, shaping techniques (for different cushion shapes), and mastering specific closure methods.
- Eco-Friendly: By re-using your existing cushion inserts, you reduce waste and contribute to a more sustainable home.
- Great Gift Idea: A handmade cushion cover is a thoughtful and practical gift, appreciated for its beauty and utility.
Understanding the Easy On/Off Cushion Cover Aesthetic
The durability, feel, and overall look of your cushion cover will depend on your yarn and stitch pattern choices.
Yarn Selection: Balance of Durability, Softness, & Washability
For cushion covers, you’ll want a yarn that is durable enough to withstand daily use, provides good coverage, and is easy to clean.
- Weight:
- Worsted (Category 4) or Bulky (Category 5): These are excellent choices for cushion covers. They work up quickly, provide good coverage (so the insert doesn’t show through easily), and create a satisfyingly squishy fabric.
- DK (Double Knitting, Category 3): Can be used for finer details or if you want a lighter-weight cover, but ensure your stitch pattern isn’t too open.
- Fiber:
- Acrylic: A highly popular choice. It’s durable, easily washable (often machine wash/dry), hypoallergenic, fade-resistant, and comes in an enormous range of colors. Ideal for high-traffic areas.
- Cotton/Cotton Blends: Breathable, offers a natural feel, and provides excellent stitch definition. Cotton is generally washable but can be prone to stretching or losing shape if not cared for properly. Mercerized cotton has a lovely sheen and good drape.
- Blends (e.g., Wool/Acrylic, Cotton/Acrylic): These combine the best qualities of different fibers, offering benefits like warmth, softness, and enhanced durability or washability.
- Consider: How the yarn will feel against your skin (if it’s a decorative cushion, this might matter less) and how it will look in your space. For cushions, durability and easy care are often top priorities.
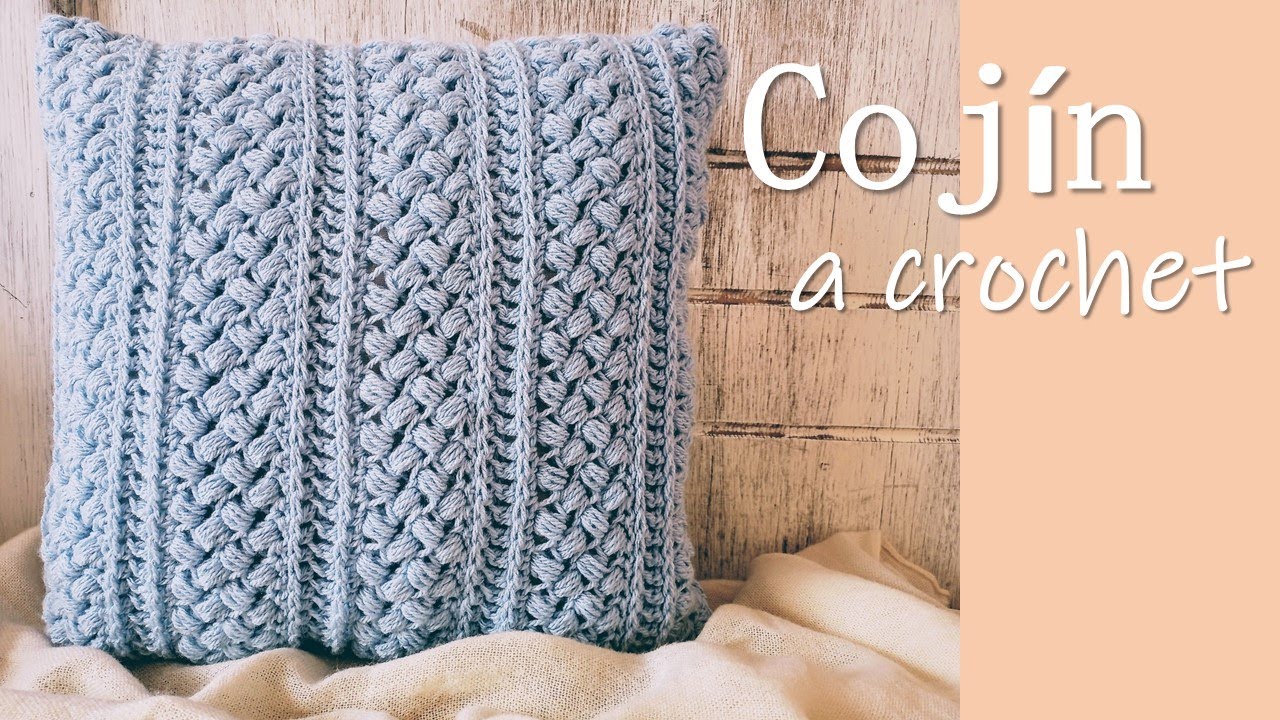
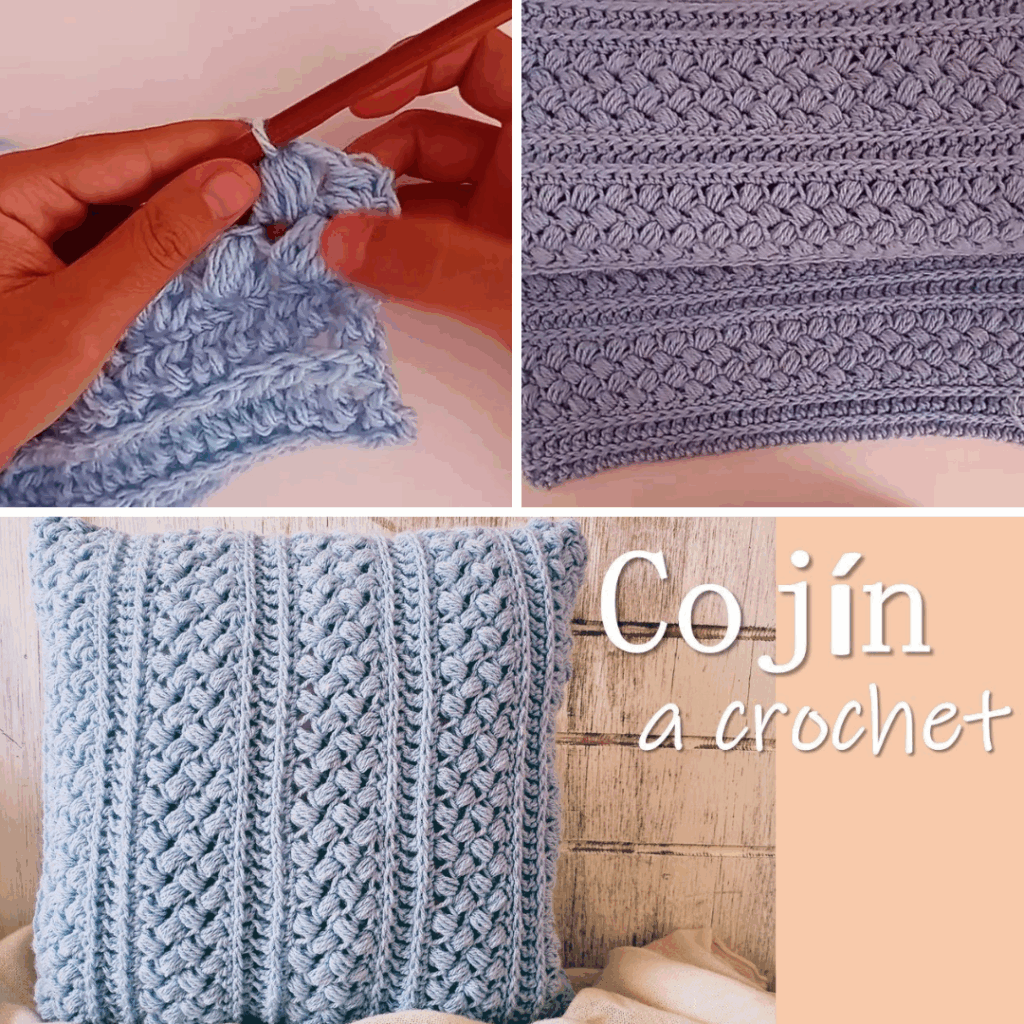
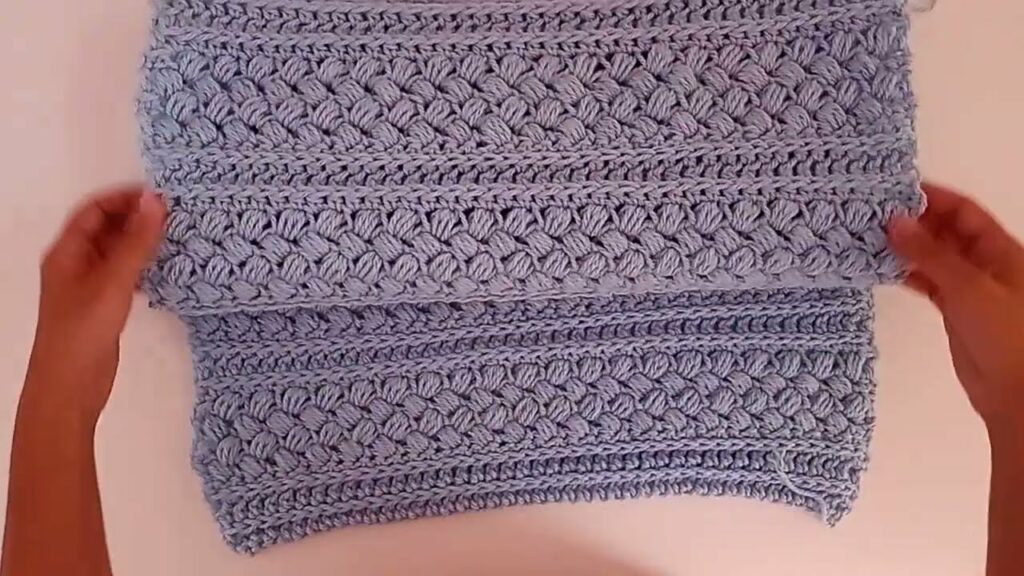
Stitch Patterns: Focus on Texture & Coverage
Choose stitches that provide sufficient coverage to hide the cushion insert and offer interesting visual texture.
- Dense Stitches:
- Single Crochet (SC): Creates a very dense, sturdy fabric, excellent for hiding inserts.
- Half Double Crochet (HDC): A good balance of speed and density, creating a slightly softer fabric than SC.
- Double Crochet (DC): Works up quickly, creating a slightly more open but still relatively dense fabric.
- Textural Stitches:
- Moss Stitch (Granite Stitch): Creates a lovely, subtle texture that lies flat.
- Basketweave Stitch: Creates a beautiful, woven-like texture with good elasticity.
- Bobble Stitch, Puff Stitch, Popcorn Stitch: Add significant raised texture and visual interest.
- Post Stitches (Front Post Double Crochet, Back Post Double Crochet): Can be used to create ribbed textures or simulated cables for a more intricate look.
- Moderate Openwork: Shell stitch or V-stitch can work well if dense enough or if you plan to back the crochet with a fabric lining. Avoid very lacy or open stitches unless you specifically want the cushion insert to show through as part of the design or you intend to line the cover.
Design Elements
- Shape: Most cushion covers are square or rectangular, but you can also make round covers or even custom shapes to fit unique cushions.
- Fit: Will your cover be snug (requiring a slightly smaller finished size than your insert for a taut look) or more relaxed?
- Borders/Edging: A simple border around the perimeter or opening can provide a polished finish and help maintain shape.
- Front & Back: You can make the front and back panels identical, or create a decorative front with a simpler back panel for convenience.
Planning Your Cushion Cover Project
Careful planning ensures a well-fitting and functional cushion cover.
- Measure Your Cushion Insert (ACCURATELY!):
- Key: Measure from seam to seam across the center for both the length and width of your cushion insert. Do not measure along the edges, as this can be misleading.
- Consider the “Poof”: If your cushion insert is very plump and full, you might need to make your finished crochet cover slightly smaller (e.g., 0.5 to 1 inch smaller in both length and width) to create a taut, snug fit. For very deep cushions, you might need to account for this depth in your stitch count.
- Pattern Selection (or Design Your Own):
- Existing Patterns: Many excellent free and paid patterns are available online (Ravelry, Etsy, crochet blogs). Look for patterns that clearly specify the closure method you prefer.
- Designing Your Own: For square or rectangular covers, designing your own is straightforward. You simply need to crochet two panels (or one larger panel for an envelope style) to your desired dimensions.
- Gauge Swatch (Highly Recommended):
- While not as critical as for garments, a gauge swatch helps ensure your cover will fit as intended and your fabric has the desired density and drape.
- Crochet a swatch (at least 4×4 inches / 10×10 cm) using your chosen yarn and main stitch pattern.
- Measure your stitches and rows per inch/cm. Adjust your hook size if needed to achieve the desired fabric consistency (e.g., if it’s too loose and gappy, go down a hook size).
Materials You’ll Need
- Yarn: (As detailed in the “Aesthetic” section). The quantity will depend on your cushion’s size, the yarn weight, and the stitch pattern, but typically ranges from 2-5 skeins for a standard throw pillow.
- Crochet Hook(s): The size recommended by your yarn or pattern, adjusted based on your gauge swatch.
- Notions:
- Stitch Markers: Useful for marking corners, beginning of rounds, or the start/end of specific sections.
- Tapestry Needle: For neatly weaving in all yarn ends and for seaming the panels.
- Scissors.
- Measuring Tape: Essential for measuring your cushion insert and checking your work as you go.
- Cushion Insert: The actual pillow you’re making the cover for!
- Closure Specifics (if applicable): Buttons, zipper, fabric for a lining, etc.
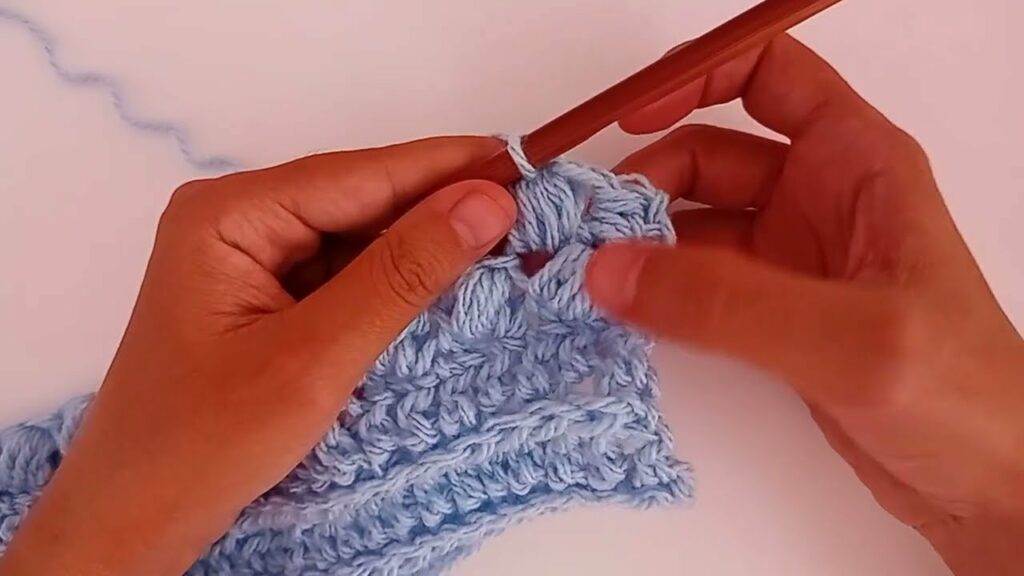
Key Crochet Techniques
You’ll utilize fundamental crochet techniques for your cushion cover:
- Basic Stitches: Chain (ch), Slip Stitch (sl st), Single Crochet (sc), Half Double Crochet (hdc), Double Crochet (dc) are your building blocks.
- Working in Rows: Most cushion cover panels are worked flat in rows, turning your work at the end of each row.
- Working in the Round: Used for seamless round cushion covers, or for joining two squares together with a seam worked in the round.
- Joining: Methods for connecting your crocheted panels. Common techniques include slip stitch seams, single crochet seams, or using a tapestry needle to stitch them together for a neater finish.
- Edging: A final border of single crochet or a decorative stitch around the opening and/or perimeter of the cushion cover provides a polished look.
Easy On/Off Closure Methods (The Core of Convenience)
Here are the most popular and convenient closure methods for a crochet cushion cover:
1. Envelope Closure (Overlap Back)
This is perhaps the easiest and most common “easy on/off” method, requiring no buttons, zippers, or ties.
- Description: Instead of two full-size back panels, you create two shorter back panels that overlap significantly in the center of the cushion. The front panel is then seamed to these overlapping back panels.
- Pros: Extremely fast and easy to make and use. No fiddly hardware. Very clean look when closed.
- Cons: If the overlap isn’t generous enough (e.g., at least 4-6 inches for a standard 18-inch cushion) or if the fabric is very stretchy/loose, the opening might gape slightly.
- How to:
- Crochet the Front Panel: Make one panel the exact width and length of your cushion insert.
- Crochet Two Back Panels:
- Panel A: Crochet one panel that is the same width as your cushion, but approximately 2/3 to 3/4 the length of your cushion.
- Panel B: Crochet a second panel that is the same width as your cushion, but approximately 3/4 the length of your cushion plus an additional 4-6 inches (10-15 cm) for the overlap.
- Assembly: Lay the front panel flat (right side up). Place Panel A on top of the front panel, aligning it with the top edge. Place Panel B on top of Panel A, aligning it with the bottom edge and allowing the excess length to overlap Panel A in the center. The overlap creates the opening.
- Seam: Pin the layers together securely. Seam the four outer edges together (top, bottom, and two sides), catching all layers where they overlap.
2. Button Closure (Button Band)
A classic and decorative option that provides a secure closure.
- Description: One of the back panels (or one side of a continuous piece) is designed with a button band. This involves working buttonholes along one edge and sewing buttons onto the opposite edge.
- Pros: Secure and reliable closure. Buttons add a charming decorative element.
- Cons: Takes time to make buttonholes and securely sew on all the buttons. Buttons can sometimes get caught or scratched.
- How to:
- Crochet the Front Panel: Make one panel the exact width and length of your cushion insert.
- Crochet the Back Panel: Make one panel that is the same width and length as your cushion, plus an additional 2-4 inches (5-10 cm) in length to create the button band/overlap.
- Create Buttonholes: On one long edge of the back panel (e.g., the last few rows or a separately worked strip), follow a pattern for creating buttonholes at regular intervals.
- Attach Buttons: Fold the buttonhole edge over to form the band. On the opposite long edge of the back panel, securely sew on your chosen buttons, aligning them with the buttonholes.
- Seam: Lay the front panel and the back panel (with buttoned edge closed) together. Seam the three remaining outer edges (the two sides and one top/bottom).
3. Tie Closure
A rustic and adjustable method, often very decorative.
- Description: Instead of a full seam on one side (often the bottom or a side seam), you leave an opening. Crocheted ties or ribbons are then attached at intervals along the edges of the opening to tie the cover closed.
- Pros: Very decorative and charming. Allows for adjustable tension. No hard components.
- Cons: Ties can come undone easily if not tied securely. Can look messy if not neatly tied.
- How to:
- Crochet Front and Back Panels: Make two panels the exact size of your cushion.
- Seam: Seam three sides of the panels together (e.g., both sides and the top), leaving one long side completely open.
- Attach Ties: Along the open edges, attach evenly spaced crocheted chains (e.g., 8-10 inches long) or ribbons. You can attach them by looping them directly into stitches or by sewing them on.
4. Zipper Closure
For the neatest, most secure, and completely flush closure.
- Description: A zipper is sewn into one of the seams of the cushion cover, usually along the bottom or a side.
- Pros: Very secure and provides a clean, professional finish. Invisible zippers can virtually disappear into the seam.
- Cons: Requires more precise sewing skills. Can be challenging to integrate seamlessly with the natural stretch of crochet fabric.
- How to:
- Crochet Front and Back Panels: Make two panels the exact size of your cushion.
- Seam: Seam three sides of the panels together, leaving one side completely open for the zipper.
- Install Zipper: Hand-sew (or machine-sew, if comfortable) a zipper into the opening. It’s often helpful to add a simple single crochet border around the opening first to create a stable edge for sewing.
5. Drawstring Closure (Best for Round Cushions or Poufs)
While less common for square cushions, this works beautifully for round shapes or poufs.
- Description: A channel is crocheted around the opening of the cushion cover, through which a crocheted cord or ribbon is threaded to pull the opening shut.
- Pros: Easy to open and close. Very adjustable.
- Cons: May not provide a perfectly flat or neat closure for square/rectangular cushions.
- How to:
- Crochet the Cover: Work the cover as a single, large “bag” with an open top.
- Create Channel: Near the top opening, create a row of chain spaces (e.g.,
(ch 1, skip 1, dc in next)) to form a channel. - Thread Drawstring: Thread a crocheted chain or cord through the channel.
Step-by-Step Construction (General Flow)
Regardless of the closure, the general steps for making a crochet cushion cover are similar:
- Plan & Measure: Decide on your cushion’s shape, exact dimensions, yarn, stitch pattern, and your preferred easy-on/off closure method.
- Make Swatch & Adjust Hook: Crochet your gauge swatch. If it’s too loose or too dense, adjust your hook size until you achieve the desired fabric consistency.
- Crochet Front Panel: Work your front panel(s) to the specified width and length for your cushion.
- Crochet Back Panel(s) with Chosen Closure: Based on your selected closure method, crochet your back panel(s) to the appropriate dimensions, incorporating any buttonholes, overlaps, or open seams.
- Join Panels:
- Lay the front panel flat.
- Place the back panel(s) on top (usually with right sides facing each other if you want an invisible seam, or wrong sides facing for a visible seam).
- Carefully align all edges.
- Seam three sides together (or four if integrating a zipper into a seam) using your preferred seaming method (slip stitch, single crochet, or tapestry needle).
- Add Closure Details (if applicable):
- Envelope: No further steps needed after seaming.
- Button: Securely sew your chosen buttons onto the appropriate side of the opening, aligning them with the buttonholes.
- Ties: Attach your crocheted ties or ribbons to the edges of the opening.
- Zipper: Install your zipper into the open seam.
- Add Optional Edging: Work a final border of single crochet or a decorative stitch around the entire perimeter of the cushion cover (or just the opening) for a neat, finished look.
- Weave in Ends & Block (Optional but Recommended):
- Meticulously weave in all loose yarn ends using your tapestry needle.
- Light blocking can help square up your panels, even out stitches, and ensure the cover fits perfectly.
- Insert Cushion: Gently slide your cushion insert into its beautiful new cover. Enjoy!

Tips for Success
- Measure Twice, Crochet Once: This adage is particularly true for cushion covers. Accurate measurements of your insert are crucial for a good fit.
- Consider Yarn Stretch: Some yarns (like cotton) can stretch more than others. Account for this in your sizing, especially with envelope closures.
- Secure All Ends: For durability and a neat finish, weave in all yarn tails meticulously.
- Choose Buttons Wisely: If using buttons, ensure they are appropriately sized for your buttonholes and comfortable against furniture surfaces.
- Practice Closures: If you’re trying a new closure method (like buttonholes or zipper insertion), practice it on a small swatch first to get the hang of it.
- Don’t Underestimate Edging: A simple single crochet border around the entire cover, even if just one row, can make a huge difference in how polished your finished piece looks.
Caring for Your Crochet Cushion Cover
Proper care will ensure your handmade cushion cover remains beautiful for years to come:
- Follow Yarn Label Instructions Strictly: This is your primary guide for appropriate washing and drying methods for your specific yarn.
- Gentle Washing: Most crochet cushion covers will benefit from machine washing on a gentle or delicate cycle with cool water. For very delicate yarns or intricate designs, hand washing is recommended.
- Reshape & Lay Flat to Dry: Gently squeeze out excess water (never wring or twist!). Reshape the cover back to its original dimensions and lay it flat on a clean towel or a mesh drying rack to air dry completely. This prevents stretching and distortion.
Conclusion
Crocheting an easy on/off cushion cover is a wonderfully satisfying project that combines the joy of crafting with practical home decor. By understanding the different closure methods and applying fundamental crochet techniques, you can create functional, beautiful, and personalized pieces that effortlessly refresh your living space. Embrace the comfort and convenience of handmade, and enjoy your beautifully adorned cushions!
Video Tutorial ;