 by
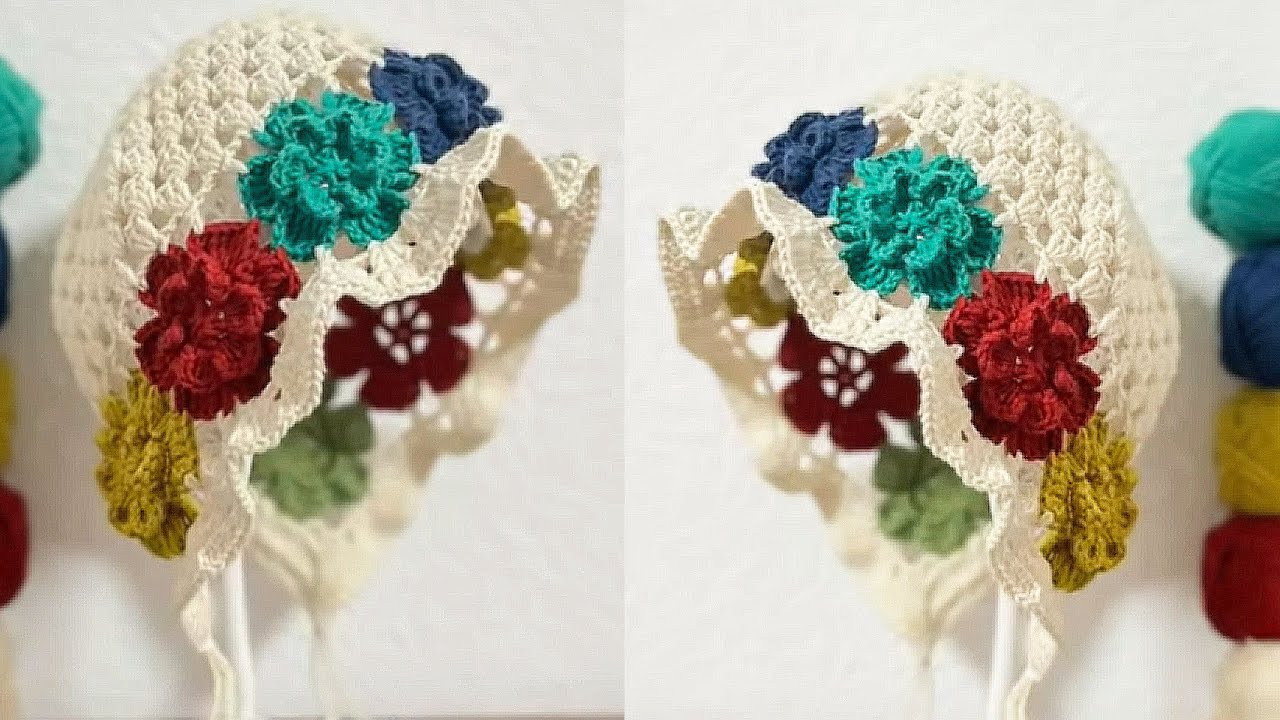
by Crocheting your own hat is a fun and satisfying project, especially when it’s decorated with beautiful flowers. Whether you’re making it for a baby, child, or adult, a flowers crochet hat adds a charming, handmade touch to any wardrobe. In this step-by-step tutorial, we’ll walk you through how to crochet a basic hat and embellish it with lovely crocheted flowers — all for free!
🧶 Materials You’ll Need
Before we begin, gather the following supplies:
For the Hat:
- Worsted weight yarn (100g): Choose your main color.
- Crochet hook (5.0 mm / H-8 or size appropriate for your yarn)
- Yarn needle
- Scissors
- Stitch marker (optional)
For the Flowers:
- Worsted or DK weight yarn in various colors (great for using up scraps!)
- Crochet hook (4.0 mm / G-6 or suitable for your yarn)
- Yarn needle
- Small buttons or beads (optional for flower centers)
🧵 Skill Level
Beginner to Intermediate
This tutorial is great for adventurous beginners who know basic stitches and are ready to try increasing and decorative elements.
✨ Stitches & Abbreviations Used (US Terms)
- ch – chain
- sl st – slip stitch
- sc – single crochet
- hdc – half double crochet
- dc – double crochet
- tr – treble crochet
- st(s) – stitch(es)
- inc – increase (2 stitches in the same stitch)
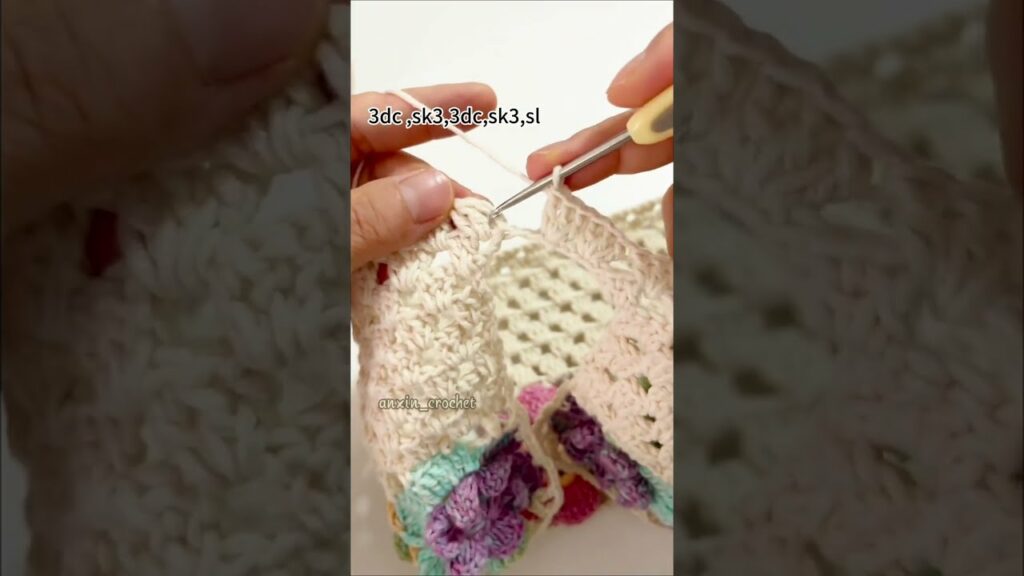
🧢 Part 1: Basic Crochet Hat Pattern (Top Down)
We’ll make a beanie-style hat that you can adapt to any size.
Step 1: Start the Crown
Magic ring, ch 2 (counts as first dc), make 11 dc in ring. Join with sl st to top of ch 2. (12 dc)

Step 2: Increase Rounds
Round 2: Ch 2, *2 dc in each st* around. Join. (24 dc)

Round 3: Ch 2, *dc in next st, 2 dc in next st* around. Join. (36 dc)

Round 4: Ch 2, *dc in next 2 sts, 2 dc in next st* around. Join. (48 dc)

Round 5: Ch 2, *dc in next 3 sts, 2 dc in next st* around. Join. (60 dc)
👉 Tip: Stop increasing once the diameter matches your desired crown width. For an adult hat, about 6.5–7″ across is standard.
Step 3: Work the Body
Rounds 6–14: Ch 2, dc in each st around. Join. (60 dc)
Repeat until the hat reaches your desired height (about 7–8″ for adults).
Step 4: Optional Ribbing (for a stretchy edge)
Round 15–17: *Front post dc in one st, back post dc in next st* around. Join.
Fasten off and weave in ends.
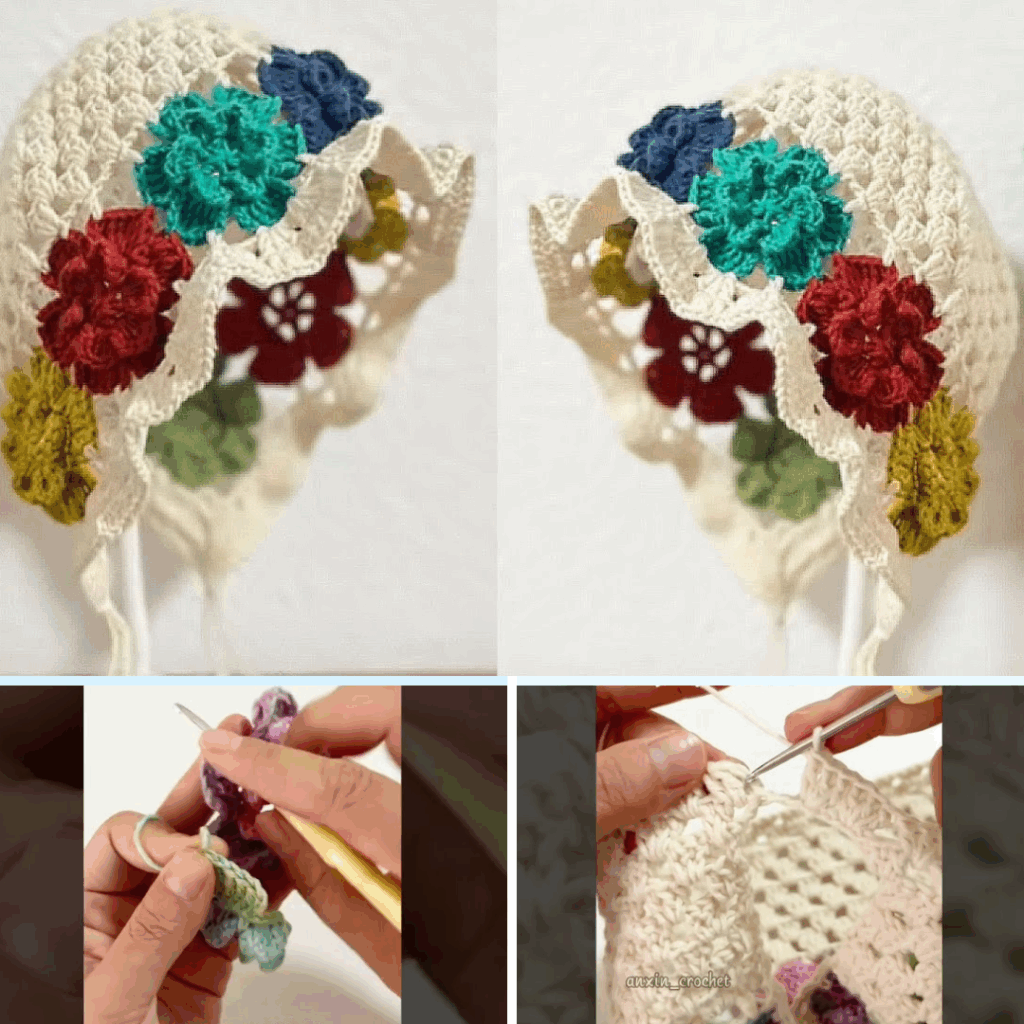
🌺 Part 2: Crochet Flowers
Here are two simple flower patterns to embellish your hat.
🌼 Simple 5-Petal Flower
Round 1: Magic ring, ch 1, 10 sc in ring, sl st to join. (10 sc)

Round 2: *Ch 2, 2 dc in next st, ch 2, sl st in next st* – repeat around (5 petals)

Fasten off and leave a long tail for sewing.
🌹 Layered Flower (More Dimensional)
Round 1: Magic ring, ch 1, 10 sc in ring, sl st to join.

Round 2: In BLO (back loop only), *ch 3, 3 dc in next st, ch 3, sl st in same st* – repeat around (5 large petals)

Round 3: In FLO (front loops from Round 1), *ch 2, 2 dc in next st, ch 2, sl st in next st* – repeat around (5 smaller inner petals)

Fasten off and leave tail for sewing.
You can experiment with different yarn weights and hook sizes to create a variety of flower sizes.
🪡 Part 3: Assembling the Hat
- Position Your Flowers
Try placing one large flower on the side of the hat with a few smaller ones around it. Arrange them however you like. - Attach Flowers
Using a yarn needle and the long tails from your flowers, sew them securely onto the hat. Be sure to weave in ends on the inside. - Add a Center Detail (Optional)
You can sew a button, bead, or crochet a small circle for the flower center to give it more detail.
🎨 Customize It!
Make the hat uniquely yours with these ideas:
- Use multicolored yarn for a variegated flower look
- Add a pom-pom to the top of the hat
- Crochet leaves to go under your flowers
- Make a matching set with a flowered scarf or mittens
📏 Sizing Guide (Hat Circumference)
| Size | Crown Diameter | Hat Height |
|---|---|---|
| Baby | 4–4.5″ | 5–6″ |
| Toddler | 5–5.5″ | 6.5–7″ |
| Child | 6″ | 7–7.5″ |
| Adult S | 6.5″ | 8″ |
| Adult M/L | 7″ | 8.5″ |
Adjust the number of increase rounds and body rounds accordingly.

💕 Final Thoughts
Crocheting a flower hat is a beautiful way to combine functionality and creativity. Whether you’re making it as a gift or for yourself, it’s a wonderful project that works up quickly and looks stunning. Don’t be afraid to play with colors and try different flower types. Once you make one, you’ll probably want to make more!
📸 Share Your Creation!
If you try this pattern, share your results online with the hashtag #FlowerCrochetHat and inspire others. Happy hooking!
Video Tutorial: