 by
by Absolutely! Let’s create a detailed tutorial for a beautiful, easy-to-make crochet baby outfit with unique design details that even beginners can enjoy. This will be a one-piece baby romper/dress hybrid that’s modern, stylish, and soft enough for little ones. While it looks intricate, it uses basic stitches and clever shaping to keep things simple and fun.
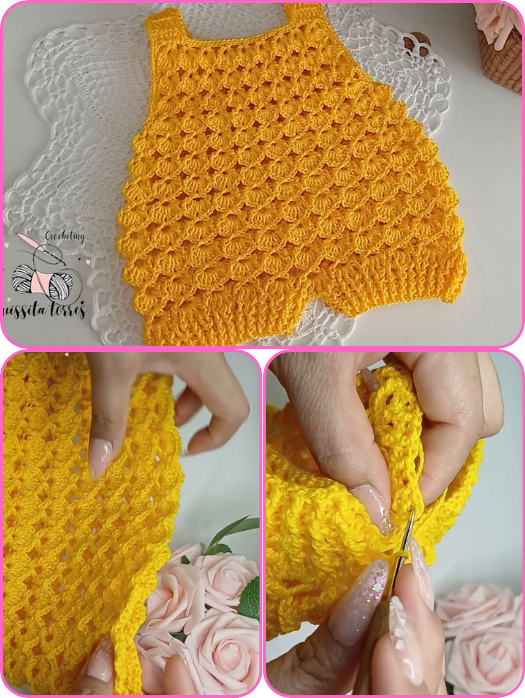
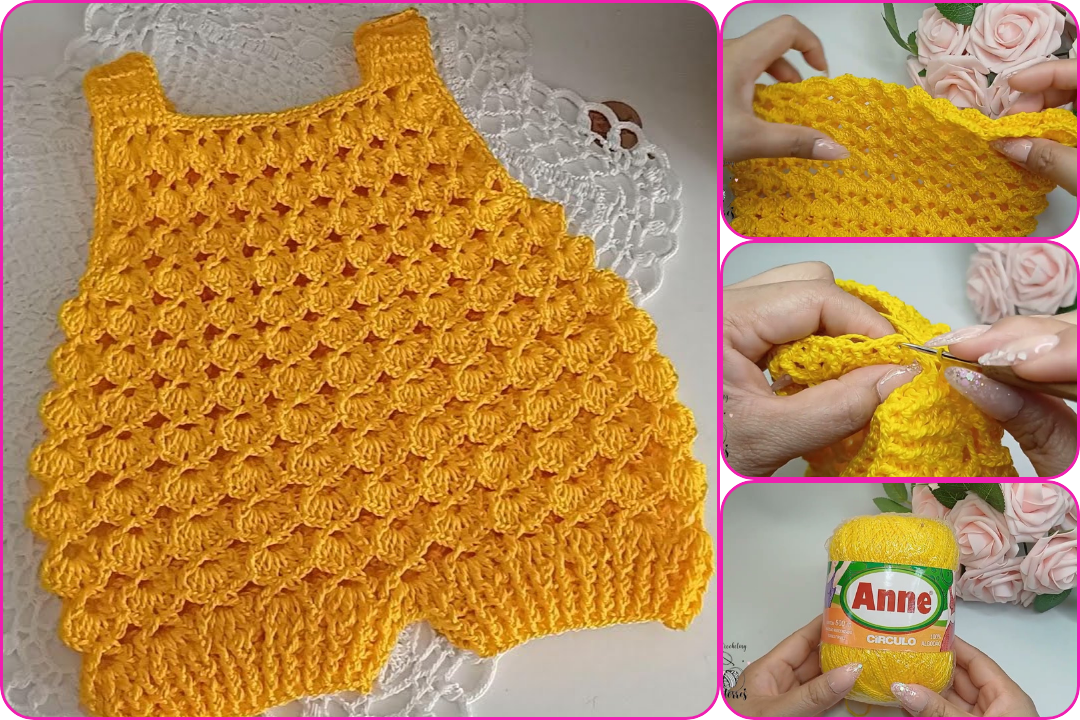
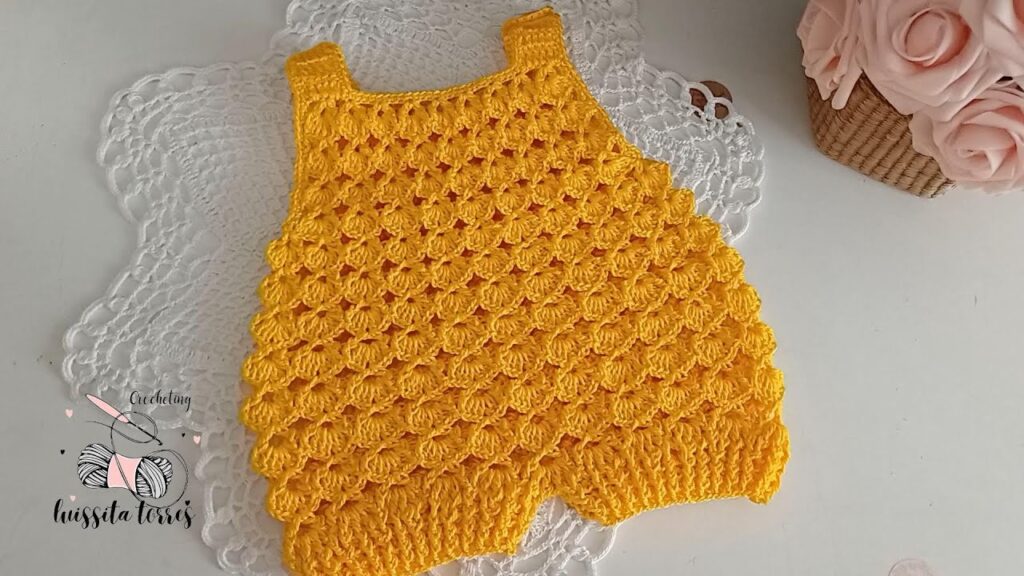
NEW! Crochet Baby Clothes with Unique Details
“You’ll Love Crocheting This Easy-to-Make Beauty!”
What You’re Making:
A crochet baby romper-dress (or “dressy onesie”) that looks like a flared dress from the front, but has a built-in bottom for comfort and practicality. Features include:
- A delicate shell-stitch skirt
- A solid bodice with button closure
- Sweet cap sleeves
- Optional bow or lace trim
Size:
Pattern written for 0–6 months. Tips for resizing to 6–12 months or 1 year included.
Materials:
- Yarn: Soft DK (light worsted) weight yarn – approx. 250g
Cotton blends or baby-safe acrylics work best. - Hook: 4.0 mm (G-6) or size needed for your gauge
- Stitch markers
- Tapestry needle
- 3 small buttons (for back closure)
- Optional ribbon, lace, or bow appliqué
Stitch Guide (US Terms):
- ch – chain
- sl st – slip stitch
- sc – single crochet
- hdc – half double crochet
- dc – double crochet
- shell – (2 dc, ch 1, 2 dc in same stitch)
- inc – 2 stitches in one stitch
Construction Overview:
- Start with a top-down yoke
- Separate for bodice and sleeves
- Work flared shell-stitch skirt
- Add bottom diaper cover/romper section
- Finish with edging and buttons
Step-by-Step Tutorial:
1. Make the Yoke:
Ch 52 (adjustable based on size)
Row 1:
Dc in 4th ch from hook and across (total 50 dc).
Ch 2, turn.
Row 2 (raglan increases):
Use stitch markers to divide into sections:
8 dc (front) – 1 (marker) – 6 (sleeve) – 1 (marker) – 20 (back) – 1 (marker) – 6 (sleeve) – 1 (marker) – 8 (front)
Work 2 dc in each raglan marker st.
Repeat raglan increase rows until yoke fits baby’s chest and arms (usually 6–8 rows).
2. Separate for Sleeves:
- Dc across front
- Skip sleeve stitches
- Ch 6–8 for underarm
- Dc across back
- Skip other sleeve
- Ch 6–8 for other underarm
- Join with sl st
3. Create the Skirt (Shell Stitch)
Round 1:
Dc in each dc and chain around, join with sl st
Round 2:
Shell pattern:
Skip 2, work (2 dc, ch 1, 2 dc) in next stitch (shell), skip 2, repeat around
Round 3 and beyond:
Continue shell stitch in ch-1 spaces.
Repeat until desired skirt length (6–8 inches)
Optional: Add a stripe or contrast color in the last few rows.
4. Bottom/Diaper Cover Section
From inside bottom edge of skirt:
Round 1:
Attach yarn, sc evenly around bottom edge under skirt.
Round 2–4:
Hdc or dc in rounds to create a short romper section.
Leg Openings:
- Divide stitches in half
- Work short rounds for each leg hole (4–6 rows)
- Finish with sc or shell edging
5. Sleeves (Cap Style)
Attach yarn to armhole edge.
Round 1:
Sc around, sl st to join
Round 2–3:
Dc or shell stitch for a fluttery look
Fasten off, weave in ends
6. Back Closure and Finishing
- Leave top 3–4 rows of back unjoined
- Create 3 button loops on one side (ch 5, sl st)
- Sew on buttons
- Add ribbon bow or lace trim to waist if desired
- Steam lightly (if using natural fiber yarn) to soften edges
Size Modifications:
| Size | Starting Ch | Yoke Rows | Skirt Length | Bottom Rows |
|---|---|---|---|---|
| 0–6 months | 52 | 6–7 | 6–7″ | 3–4 rounds |
| 6–12 months | 58–60 | 7–8 | 7–8″ | 4–5 rounds |
| 1 year | 64–66 | 8–9 | 8–9″ | 5–6 rounds |
Style Options:
- Use sparkly yarn for a festive look
- Add tiny heart or flower appliqués
- Make it sleeveless for summer, or add long sleeves for cooler months
Want a Video Walkthrough?
I can recommend detailed YouTube videos with visual step-by-step help — just let me know your preference (romper, dress, or full set with cardigan).
Watch video: