 by
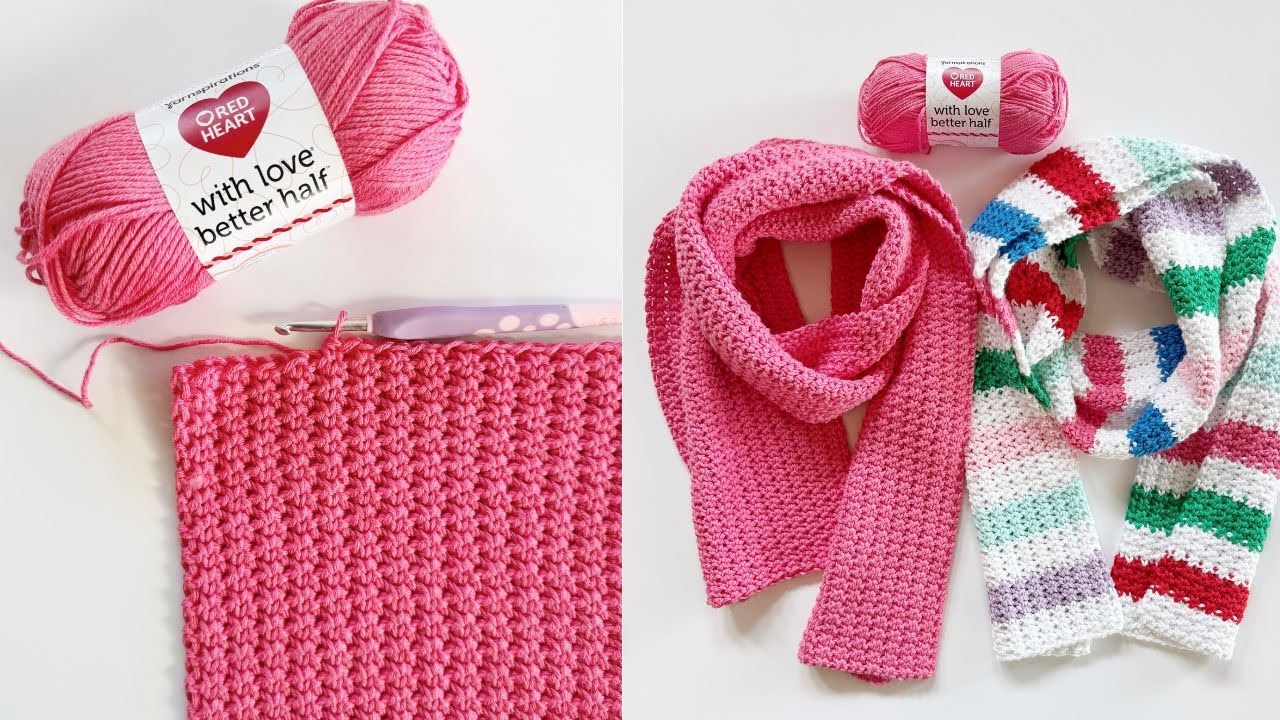
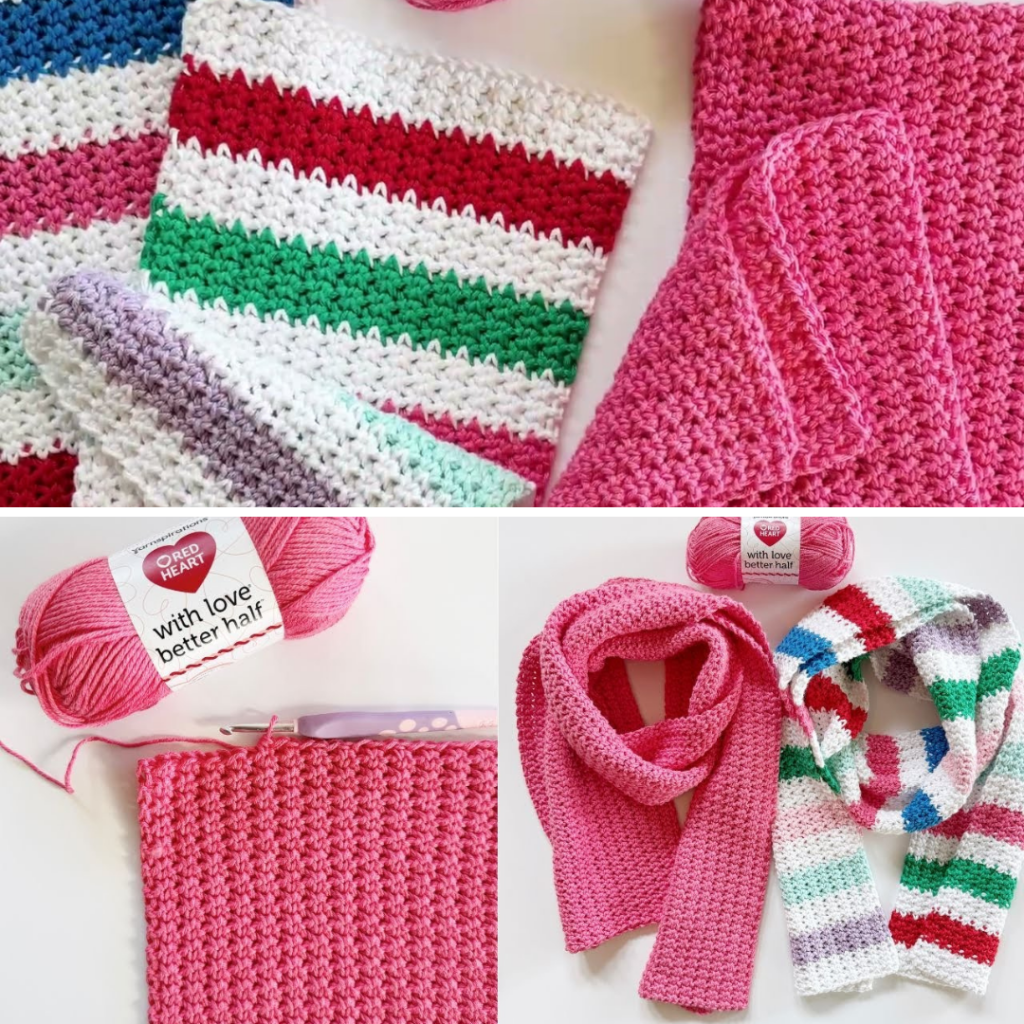
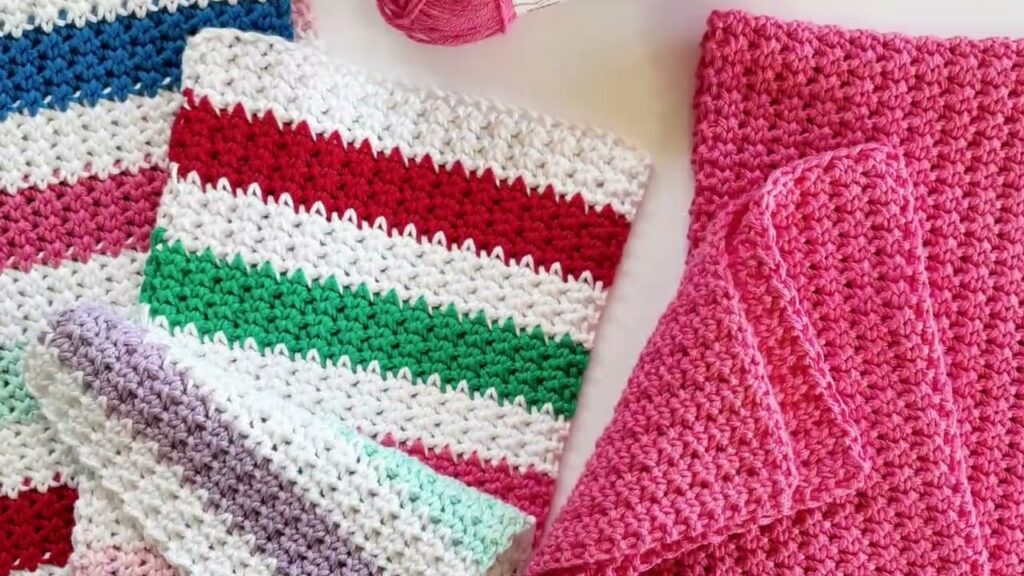
by The Merry and Bright Winter Scarves are beautiful, festive accessories designed by Hannah from Daisy Farm Crafts. These scarves utilize a modified version of the “Even Moss Stitch” to create a unique texture that resembles knitted lines. Whether you choose to make a solid version or a vibrant striped one, this project is perfect for holiday gifting.
1. Materials and Specifications
- Yarn:Red Heart With Love Better Half (a soft cotton/acrylic blend).
- For the Striped Scarf: 2 skeins of White; 1 skein of each chosen accent color.
- For the Solid Scarf: 4 skeins of your preferred color (e.g., Pink) .
- Hook: Size I (5.5 mm).
- Finished Size: Approximately 8 inches wide by 64 inches long .
2. Getting Started: The Base
The scarf is worked by alternating slip stitches and half double crochets.
- Foundation Chain: Chain 30 (or any even number for a custom width) .
- Row 1 (Foundation Row): * Starting in the second chain from the hook, work a slip stitch .
- In the next chain, work a half double crochet (HDC).
- Repeat the pattern (Slip Stitch, HDC) across the row.
- You should end with a slip stitch in the last chain.
- Turning: Chain 1 and turn.
3. The Modified Even Moss Stitch
This is the core technique that creates the “knit look” of the scarf.
- Start of Row: Always start with a slip stitch in the first stitch of the row
- The Split Half Double Crochet: Instead of working into the top loops of the HDC, you will “split” the stitch.
- Yarn over and insert your hook directly between the two vertical posts of the HDC from the previous row.
- Ensure your hook goes under all three bars of the stitch and through to the back
- Complete the HDC normally (yarn over, pull up a loop, yarn over, pull through three loops).
- Continuing the Pattern: Work a slip stitch into the next slip stitch, followed by a split HDC into the next HDC. Repeat across.
- End of Row: Always end with a slip stitch . Chain 1 and turn.
Note: The first row of split HDCs can be tight and tricky. It becomes much easier to identify the “V” to split in subsequent rows .
4. Color Changes for Stripes
If you are making the striped version, follow these steps to switch colors every six rows:
- The Switch: Work the last slip stitch of Row 6 until there are two loops on your hook. Cut the old color and pull the new color through to finish the stitch .
- Securing the Tail: Chain 1 and turn. To save time on finishing, lay the tail of the new color along the top of the first few stitches and crochet over it.
- Repeat: Continue the 6-row stripe pattern throughout the length of the scarf.

5. Finishing Touches
- Weaving in Ends: Because of the many color changes in the striped version, you will have several ends. Use a tapestry needle to weave them back and forth through the “V” shapes of the stitches until secure .
- Blocking: This scarf has a “bouncy” texture, but you can lightly steam block it if you wish to relax the stitches.
Video Tutorial: