 by
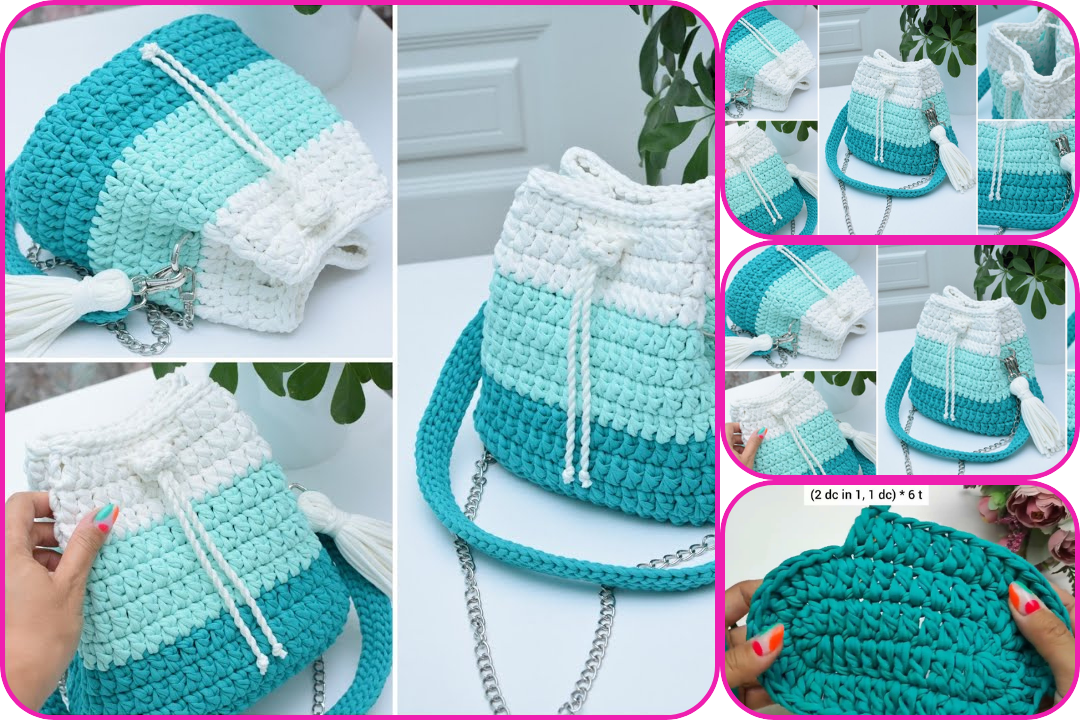
by Absolutely! Here’s a detailed guide on how to make a simple and beautiful crocheted Torba handbag—perfect for beginners. This Torba-style handbag blends functionality with elegance and is great as a casual tote or boho-style accessory.
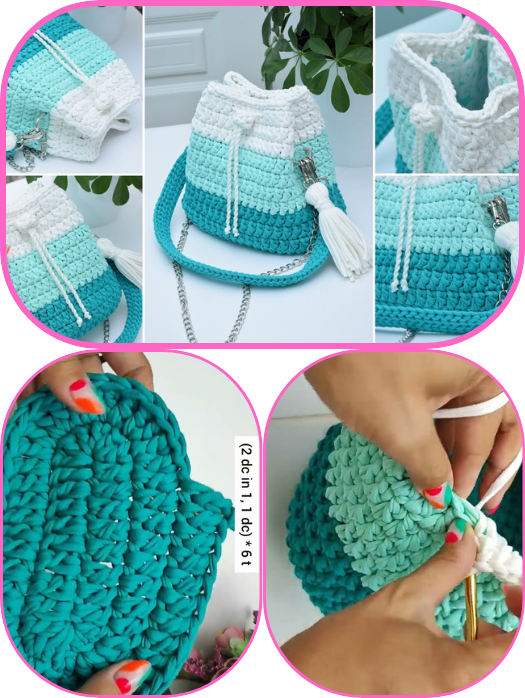
“Torba” means “bag” in several Slavic and Middle Eastern languages. In the crochet community, a Torba bag often refers to a simple, round or oval-bottomed bag with a drawstring or sturdy handles, often inspired by traditional or folk styles.
- Yarn: Thick cotton or t-shirt yarn (approx. 300–400g for a medium bag)
- Tip: Use #5 (bulky) or #6 (super bulky) yarn for faster results.
- Crochet Hook: Size 6mm to 8mm (depending on yarn thickness)
- Scissors
- Yarn Needle (Tapestry Needle)
- Stitch Marker (optional but helpful)
- Optional: Wooden or leather handles, lining fabric, buttons, or magnetic clasps.
- Width: ~25–30 cm (10–12 inches)
- Height: ~25 cm (10 inches)
- Base: Circular or oval
- Magic Ring (Adjustable Ring)
- Chain Stitch (ch)
- Single Crochet (sc)
- Slip Stitch (sl st)
- Increase (2 sc in one stitch)
- Optional: Half Double Crochet (hdc) for a textured body
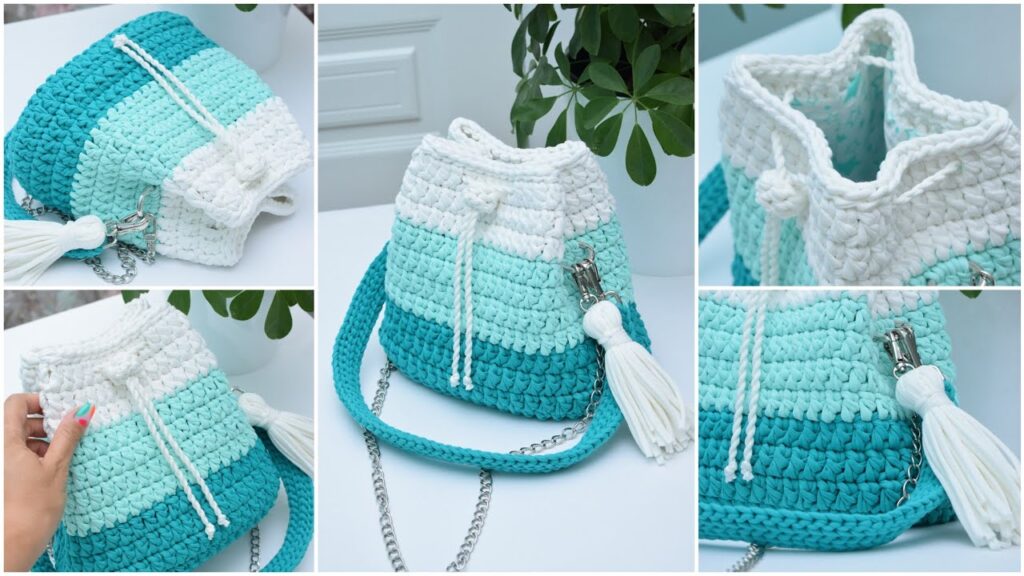
Step 1: Crochet the Base (Flat Circle or Oval)
For a circular base:
- Start with a magic ring.
- Round 1: 6 sc into the ring. Pull tight. (6)
- Round 2: 2 sc in each st around. (12)
- Round 3: (1 sc, inc) repeat around. (18)
- Round 4: (2 sc, inc) repeat around. (24)
- Continue increasing in this pattern until you get the desired base width (e.g., 30–36 stitches across).
- Stop increasing once the circle is around 8–10 inches wide.
For an oval base (optional):
- Chain 15–20.
- Sc along the chain, placing 3 sc in the last stitch to turn.
- Continue sc along the other side of the chain.
- Increase at each end in the following rounds.
Step 2: Build the Body (Straight Sides)
- Once the base is the desired size, start working 1 sc in each stitch around without increasing.
- Continue this for 15–20 rounds or until the bag reaches the desired height.
- You can switch to hdc or dc for a textured look or work in back loops only for ribbing effect.
Step 3: Shape the Top or Add Handles
Option 1: Drawstring Torba
- Work 2–3 rows of hdc or sc.
- On the last row, chain 1, sc 2, ch 1, skip 1 (eyelet row).
- Use a cord or crochet chain as a drawstring and weave it through the eyelets.
Option 2: Sturdy Handles
- Stop at desired height.
- Chain 30 (or desired handle length), skip 10 stitches, and sl st to secure.
- Repeat on the opposite side.
- Sc around the handles to reinforce.
Step 4: Finishing Touches
- Weave in all ends using your yarn needle.
- Block the bag if needed (light steam or damp shaping).
- Optional: Add a fabric lining for durability.
- Decorate with buttons, tassels, or wooden rings for style!
- Use sturdy yarn like cotton or recycled t-shirt yarn for strength and shape.
- Count your stitches to keep the sides even.
- Use a stitch marker to mark the beginning of rounds.
- Customize with color changes, stripes, or patterns once comfortable.
- Boho Torba: Earthy tones, fringe, leather strap.
- Minimalist: Solid color, simple round base, fabric handles.
- Folk Style: Multicolor, embroidered motifs, wooden button.
Watch video: