by
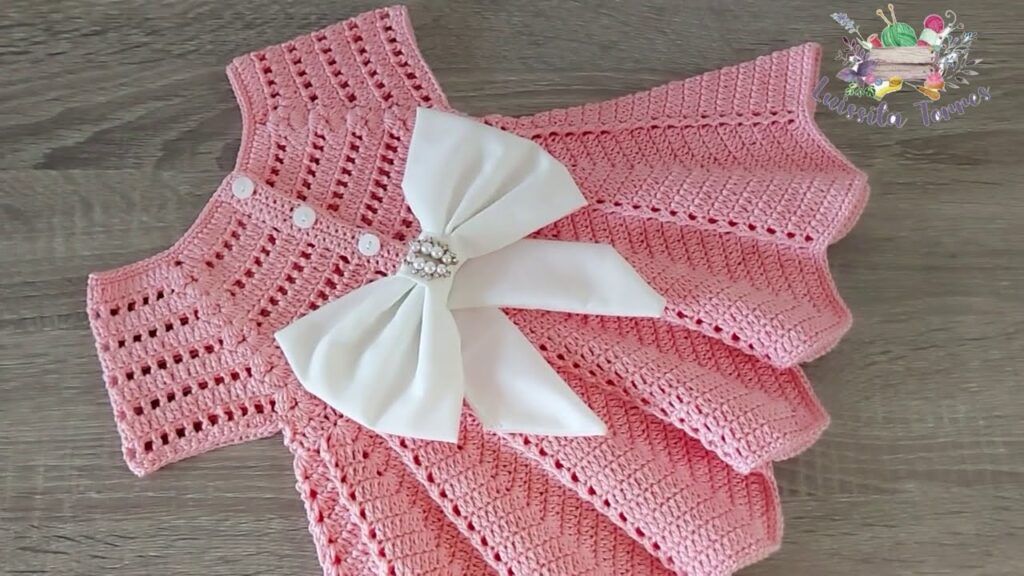
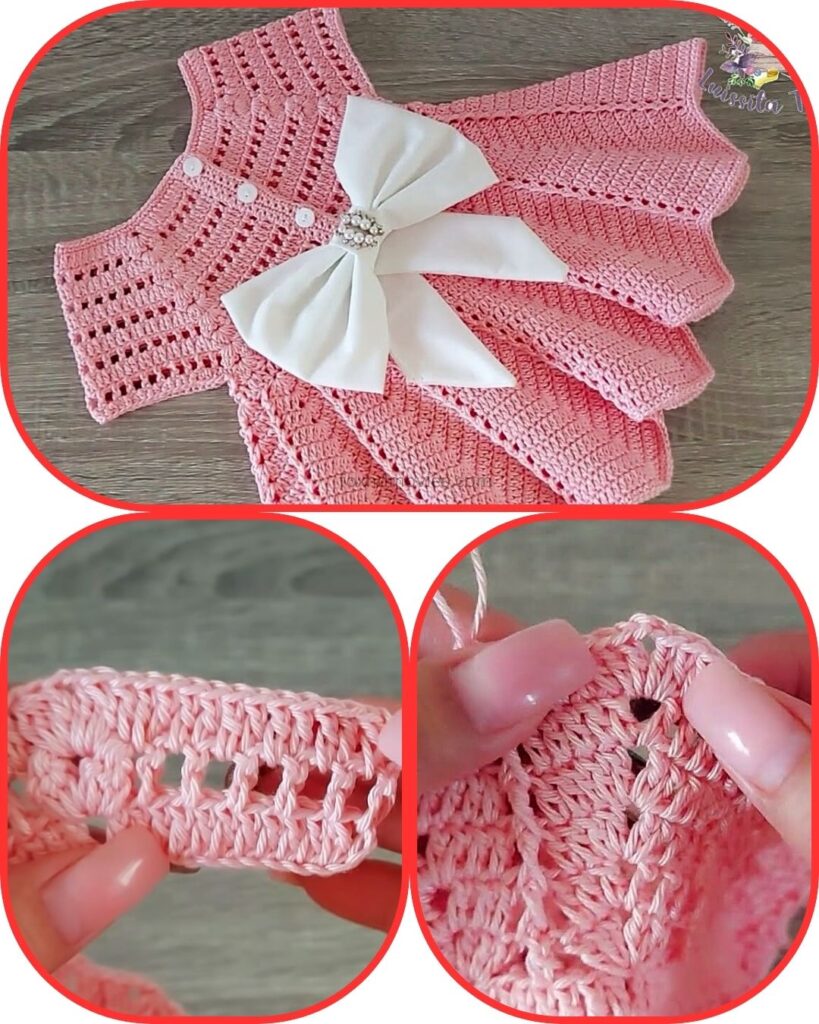
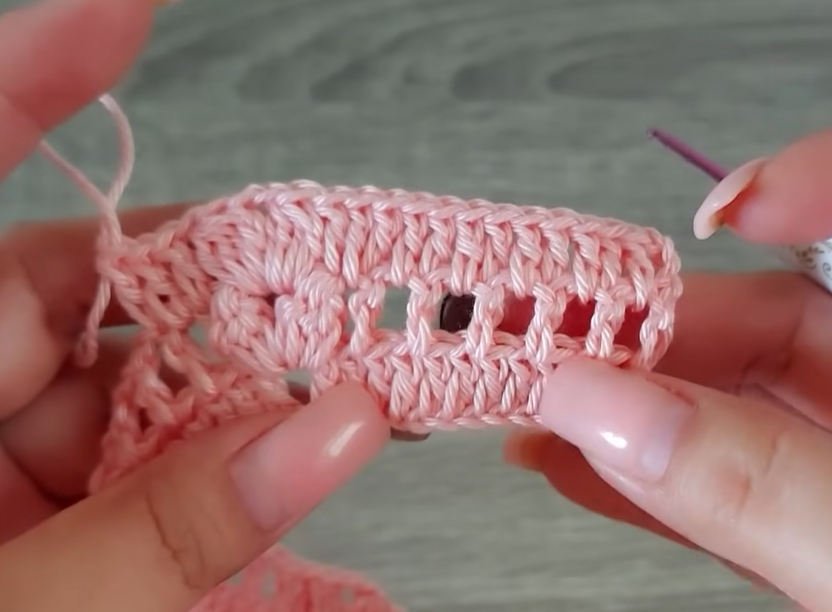
by Imagine your little one twirling in this adorable crochet dress, featuring a fitted bodice and a wonderfully lacy, flowing skirt. Inspired by the charming design in the picture, this pattern combines classic stitches with delicate openwork to create a truly special garment perfect for special occasions or sunny days.
Skill Level: Intermediate (requires knowledge of basic stitches, increasing, decreasing, working in rounds, and some familiarity with lace patterns)
Materials:
- Yarn: DK (Light Worsted) weight yarn (cotton or cotton blend recommended for comfort and drape).
- Main Color (MC): Approx. 200-300 yards, depending on size.
- Small amount of contrasting color (Optional): For buttons or small embellishments if not using yarn for flowers.
- Crochet Hook: Size G/6 (4.0 mm) or size needed to obtain gauge.
- Yarn Needle: For weaving in ends and seaming.
- Scissors
- Stitch Markers: Very helpful for marking increase points, armholes, and the beginning of rounds.
- Small Buttons: 2-3, for the back closure.
Gauge (Crucial!):
Achieving the correct gauge is essential for the dress to fit properly.
- Bodice Gauge: 4 rows of hdc should measure approximately 1 inch.
- Skirt Gauge: 3 shell rows should measure approximately 2 inches.
- Adjust your hook size if necessary to meet these gauges.
Finished Size (Approximate, 12-18 Months):
- Chest Circumference: 19-20 inches
- Length (Shoulder to Hem): 16-18 inches
- Adjustments for other sizes: Guidance will be provided.
Abbreviations (US Crochet Terms):
- ch: chain
- sl st: slip stitch
- sc: single crochet
- hdc: half double crochet
- dc: double crochet
- tr: treble crochet (or triple crochet)
- sk: skip
- sp: space
- st(s): stitch(es)
- beg: beginning
- rep: repeat
- inc: increase (work 2 sts in the same st)
- dec: decrease (work 2 sts together)
- V-st: V-stitch (dc 1, ch 1, dc 1 in same st/sp)
- Shell: (dc 2, ch 1, dc 2) in same st/sp (adjust for denser or lacier shell if desired)
- Picot: ch 3, sl st into the 3rd ch from hook
- ( ): repeat instructions in parentheses a specified number of times
- [ ]: total stitches in a round/row
Pattern for Crochet Sweetheart Sundress
Part 1: The Bodice (Working from the Top Down)
We’ll start with the neckline and work downwards, forming the yoke.
Initial Chain: Ch 76 (for 12-18 months). Adjust this number to fit around the widest part of the baby’s head comfortably, ensuring it’s a multiple of 4 plus 4 for symmetry of the yoke divisions.
Row 1 (Neckline/Foundation): Hdc in 3rd ch from hook and in each ch across. [74 hdc] Do NOT join. You’ll work in rows for the back opening.
Row 2 (First Yoke Row – Increases): Ch 2 (counts as hdc). Hdc in first st. Hdc in next 10 sts (Right Back Panel). (Hdc 2 in next st, ch 1, hdc 2 in next st) in next st (Corner 1). Place stitch marker in ch-1 sp. Hdc in next 15 sts (Right Sleeve). (Hdc 2 in next st, ch 1, hdc 2 in next st) in next st (Corner 2). Place stitch marker in ch-1 sp. Hdc in next 20 sts (Front Panel). (Hdc 2 in next st, ch 1, hdc 2 in next st) in next st (Corner 3). Place stitch marker in ch-1 sp. Hdc in next 15 sts (Left Sleeve). (Hdc 2 in next st, ch 1, hdc 2 in next st) in next st (Corner 4). Place stitch marker in ch-1 sp. Hdc in next 10 sts. Hdc 2 in last st (Left Back Panel). [86 hdc, 4 ch-1 sps] Ch 2, turn.
Row 3 (Yoke Increases): Hdc in first st. Hdc in each hdc until you reach the first ch-1 sp. (Hdc 2 in ch-1 sp, ch 1, Hdc 2 in ch-1 sp) in ch-1 sp (Corner 1). Hdc in each hdc until you reach the next ch-1 sp. (Hdc 2 in ch-1 sp, ch 1, Hdc 2 in ch-1 sp) in ch-1 sp (Corner 2). Hdc in each hdc until you reach the next ch-1 sp. (Hdc 2 in ch-1 sp, ch 1, Hdc 2 in ch-1 sp) in ch-1 sp (Corner 3). Hdc in each hdc until you reach the next ch-1 sp. (Hdc 2 in ch-1 sp, ch 1, Hdc 2 in ch-1 sp) in ch-1 sp (Corner 4). Hdc in each hdc until last st. Hdc 2 in last st. Ch 2, turn.
Repeat Row 3 for approximately 2-4 more rows, or until the yoke (measured across the widest part of the baby’s chest) reaches the desired width. Typically, 5-7 total yoke rows are sufficient for this age group. The dress in the picture has about 6-7 rows for the yoke.
Joining for Armholes & Body:
Next Row: Ch 2. Hdc in each hdc until you reach the first corner ch-1 sp. Hdc 1 in corner ch-1 sp. Ch 2 (this creates the armhole space). Sk ALL sts between this corner and the next corner. Hdc 1 in the next corner ch-1 sp. Hdc in each hdc across the Front Panel until you reach the next corner ch-1 sp. Hdc 1 in corner ch-1 sp. Ch 2 (this creates the second armhole space). Sk ALL sts between this corner and the next corner. Hdc 1 in the next corner ch-1 sp. Hdc in each hdc until the end of the row. [Number of sts will depend on yoke size, approx. 60-70 hdc plus 4 chs for armholes]. Ch 2, turn.
Next Row (First Body Round): Hdc in each hdc across. When you reach the ch-2 armhole spaces, work 2 hdc into each ch-2 sp. Sl st to the first hdc to join. You will now work in rounds for the skirt. [Approximately 64-74 hdc, depends on your final yoke size]
Bodice Waist Shaping (Optional, based on picture): The picture shows a slightly cinched waist. You can achieve this with a round of sc, or a round of front post/back post dc for a ribbed effect, or simply by reducing the stitch count slightly before transitioning to the skirt.
Option 1 (Simple Transition): Ch 1. Sc in each st around for 1-2 rounds. Sl st to join.
Option 2 (Ribbed Transition like picture): Ch 2 (does not count as st). Work in rounds. Round 1: Hdc in each st around. Sl st to join. Round 2: Ch 2. (FPHdc around next st, BPHdc around next st) around. Sl st to join. Round 3: Ch 2. (FPHdc around next FPHdc, BPHdc around next BPHdc) around. Sl st to join. Adjust these rounds as needed to create your desired waistband effect.

Part 2: The Lacy Skirt (Working in Rounds)
The skirt is the main feature, with a beautiful openwork pattern. The picture shows a pattern of V-stitches and possibly shells. Let’s aim for something similar.
Transition from Bodice: After your last bodice round, ensure your stitch count is a multiple of 6 for the skirt pattern. Adjust with small increases/decreases (e.g., sc2tog or 2sc in one st) if needed in the first round of the skirt.
Round 1 (Foundation for Lace): Ch 3 (counts as dc). Dc in each st around. Sl st to join. [Same stitch count as bodice transition, or adjusted to multiple of 6]
Round 2 (First Lace Row – V-stitches): Ch 4 (counts as dc, ch 1). Dc in same st (forms first V-st). *Sk 2 sts, (dc 1, ch 1, dc 1) in next st (V-st made).* Repeat from * to * around. Sl st to 3rd ch of beg ch-4 to join.
Round 3 (Shells in V-sts): Sl st into the ch-1 sp of the first V-st. Ch 3 (counts as dc). (Dc 1, ch 1, dc 2) in same ch-1 sp (first Shell made). *Shell (dc 2, ch 1, dc 2) in the ch-1 sp of next V-st.* Repeat from * to * around. Sl st to 3rd ch of beg ch-3 to join.
Round 4 (V-stitches in Shells): Ch 4 (counts as dc, ch 1). Dc in same st (forms first V-st, placing it in the ch-1 sp of the shell). *Sk 2 dc, (dc 1, ch 1, dc 1) in the ch-1 sp of the next Shell.* Repeat from * to * around. Sl st to 3rd ch of beg ch-4 to join.
Repeat Rounds 3 and 4 alternately until the skirt reaches your desired length. The picture shows quite a long skirt for a baby dress, indicating many repeats (perhaps 15-20 total rounds).
Final Skirt Round (Optional – for a solid hem): Ch 3 (counts as dc). Dc in each dc and in each ch-1 sp around. Sl st to join. Fasten off and weave in ends.

Part 3: Finishing Touches
Collar/Neckline Edging: Join MC yarn to the top right corner of the back opening. Round 1: Ch 1. Sc evenly around the entire neckline opening. Join with sl st to first sc. Round 2 (Picot Edging): Ch 1. Sc in first st. *Picot (ch 3, sl st in 3rd ch from hook). Sc in next 2 sts.* Repeat from * to * around. Adjust spacing of picots as desired. Sl st to first sc. Fasten off and weave in ends.
Sleeve Edging: Join MC yarn to the bottom of one armhole. Round 1: Ch 1. Sc evenly around the armhole opening. Join with sl st to first sc. Round 2 (Picot Edging): Ch 1. Sc in first st. *Picot. Sc in next 2 sts.* Repeat from * to * around. Sl st to first sc. Fasten off and weave in ends. Repeat for the second sleeve.
Back Closure: Button Loops: On one side of the back opening (e.g., the right side when looking at the back of the dress), join MC yarn at the top. Ch 3-4 (to form a loop), sl st into a nearby stitch to create a small button loop. Make 2-3 loops evenly spaced down the back opening. Buttons: Sew 2-3 small buttons onto the opposite side of the back opening, aligning them with the button loops.
Small Crocheted Flowers (Make 2-3, as seen in picture): Center: Ch 2. 6 sc in 2nd ch from hook. Sl st to join. Petals: *Ch 2, dc 1, ch 2, sl st in same sc (or next sc).* Repeat from * to * 5 more times for 6 petals. Fasten off, leave a long tail. Sew these flowers onto the bodice as desired, often near the collar. You can add a small pearl or bead to the center if safe for babies.
Final Touches:
- Weave in all remaining yarn ends securely.
- Block the dress gently to open up the lace pattern and ensure evenness.
Video Tutorial
Adjusting for Different Sizes:
- Initial Chain: Adjust the initial chain to fit the head circumference, always ensuring it’s divisible by 4 (or whatever your yoke increase formula requires).
- Yoke Rows: Add or subtract yoke increase rows (Row 3 repeats) to achieve the desired chest circumference and armhole depth. Measure regularly!
- Armhole Chain: For larger sizes, you might need to chain 3-4 stitches for the armhole bridge instead of 2.
- Bodice Stitches: The number of stitches between increases in the yoke will naturally grow.
- Skirt Length: Add or subtract repeats of Rounds 3 and 4 of the skirt pattern to achieve the desired length.
- Gauge Swatch: ALWAYS make a gauge swatch for garments to ensure the correct fit!
Enjoy crocheting this beautiful little dress! It’s a wonderful project that results in a cherished handmade item.