 by
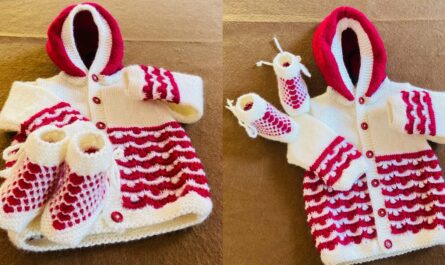
by There’s something uniquely heartwarming about knitting for a brand new baby. Every stitch is infused with anticipation, tenderness, and love. Among the countless adorable items, a newborn baby cardigan stands out as a truly perfect project for knitters of all levels, especially beginners. It’s small, quick to complete, and incredibly practical for keeping those precious little ones cozy.
This detailed article will guide you through the delightful world of knitting a newborn baby cardigan, covering essential considerations, popular construction methods, and key design elements to ensure your project is a beautiful success.
Why Knit a Newborn Baby Cardigan?

- Practicality: Newborns need frequent dressing and undressing, and cardigans (unlike pullovers) are incredibly easy to slip on and off, making temperature regulation a breeze for new parents.
- Ultimate Cuteness: There’s nothing quite like tiny knitwear! A miniature cardigan is endlessly adorable and makes for charming photos.
- Perfect Gift: A handmade newborn cardigan is a thoughtful, cherished gift for baby showers or welcoming a new arrival. It’s often kept as a special keepsake.
- Skill Building for Beginners: Its small size allows you to learn fundamental garment knitting techniques (like shaping, buttonholes, and finishing) without a huge time commitment.
- Yarn Scraps Friendly: Many patterns require only a small amount of yarn, making it ideal for using up remnants from other projects.
Essential Considerations for Newborn Cardigan Patterns:
Success begins with thoughtful planning, especially when knitting for the most delicate of recipients.
- Yarn Choice (Utmost Importance for Newborns!):
- Fiber:
- Superwash Merino Wool: Often considered the best choice. It’s incredibly soft, warm, breathable, and (crucially!) machine washable.
- Organic Cotton or Bamboo: Excellent for babies with sensitive skin or in warmer climates. They are soft, breathable, and often hypoallergenic.
- Baby-Specific Acrylics or Blends: Modern acrylics can be surprisingly soft, durable, and generally affordable. Blends (e.g., merino/cotton, acrylic/nylon) can offer a good balance of properties.
- Weight:
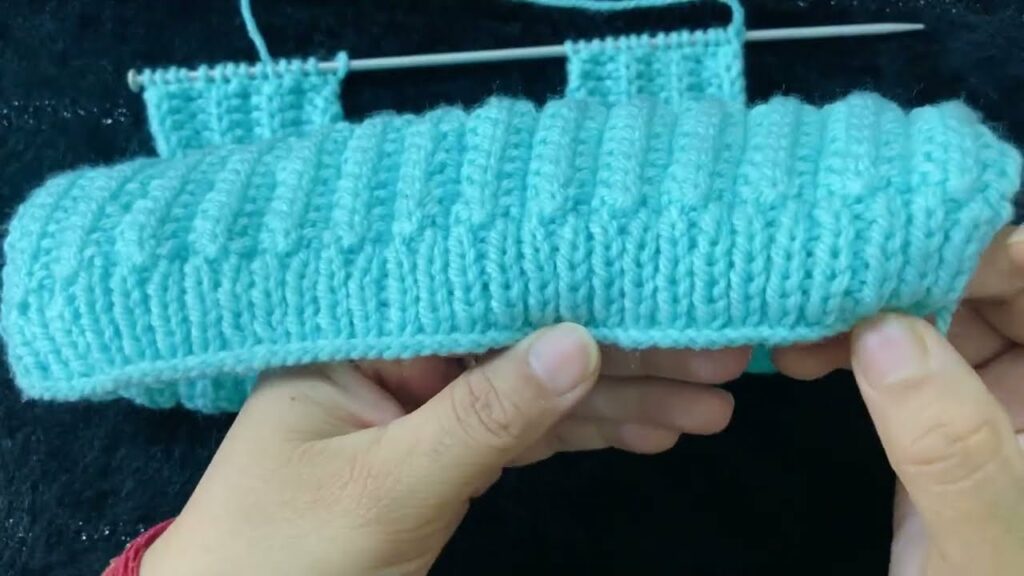
- DK (Double Knitting) or Sport Weight: These are the most common and often ideal choices for newborn cardigans. They work up at a reasonable pace, provide good stitch definition, and create a cozy fabric without being too bulky.
- Fingering (4-ply): Suitable for very delicate, lightweight cardigans, but will take longer to knit.
- Color: Soft pastels (pale blue, pink, mint, lavender, yellow) are traditional. Gentle neutrals like cream, white, light grey, or muted earthy tones (soft sage, gentle terracotta) are also popular and versatile. Avoid very dark colors that might hide stitch definition or harsh dyes.
- Key Takeaway: Prioritize extreme softness, breathability, and machine washability for easy care.
- Fiber:
- Sizing:
- Newborn cardigans are designed for babies typically weighing 5-8 lbs (2.3-3.6 kg).
- Keep in mind that newborns grow rapidly! If you’re knitting for a specific baby, clarify if they’re a preemie, average, or larger newborn. Often, knitting the “0-3 months” size will give more wear.
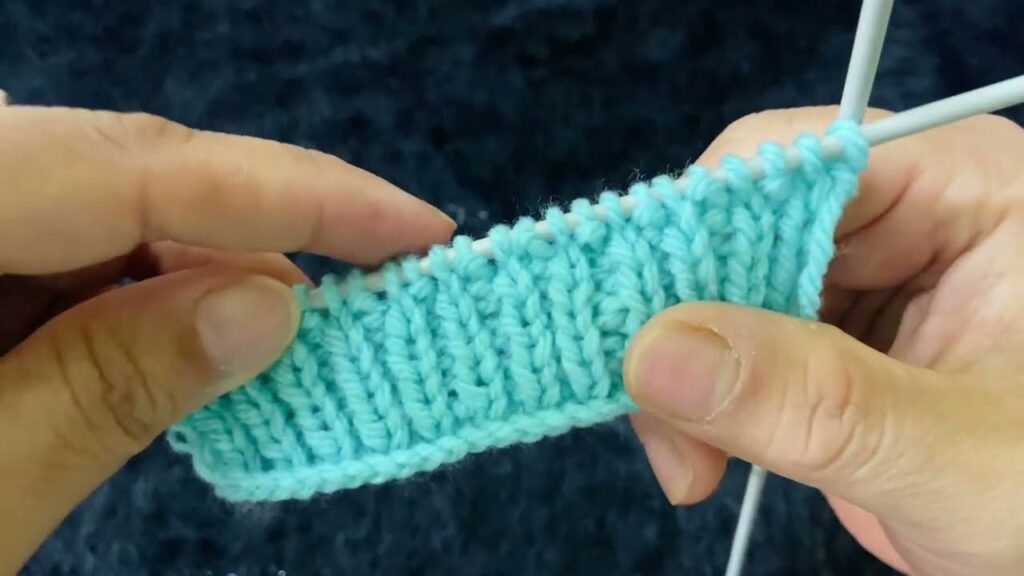
- Gauge Swatch (Absolutely Critical!):
- What it is: A small knitted square (usually 4×4 inches or 10×10 cm) made in the main stitch pattern of your cardigan.
- Why it’s vital: Your gauge (the number of stitches and rows per inch/cm) directly determines the finished size. A slight deviation in gauge can mean your tiny cardigan ends up much too big or small.
- How to do it: Cast on more stitches than the pattern’s gauge. Knit about 6 inches (15 cm). Wash and block it as you would the finished cardigan. Measure precisely. Adjust your needle size up (if your knitting is too tight/too many stitches per inch) or down (if too loose/too few stitches per inch) until you match the pattern’s gauge.
- Closure:
- Buttons: Small, flat buttons (ensure they are large enough not to be choking hazards – typically 1/2″ or larger for garment use). They must be securely sewn on.
- Ties: Knitted I-cords or ribbon ties. Avoid very long ties around a baby’s neck for safety reasons. Shorter ties at the hem or side can work.
- Snaps: Can be sewn onto plackets for a flat, secure closure.
- Ease of Dressing: Cardigans inherently offer good ease of dressing, but consider wider necklines or plackets that open fully for minimal fuss.
Recommended Construction Methods for Beginners:
For your first newborn cardigan, choose a pattern that utilizes one of these approachable methods:
- Top-Down Raglan (Seamless):
- How it Works: You cast on stitches for the neck and knit downwards. Increases are made along four “raglan” lines (diagonal lines from the neck to the underarm) to shape the shoulders and sleeves simultaneously. The body and sleeves are then separated and knit individually.
- Pros: No seaming (a huge time-saver and means no bulky seams against baby’s skin!), easy to try on as you go for length adjustments, often quicker to finish. Introduces fundamental increases (like KFB, M1).
- Cons: Requires circular needles (and often DPNs or the Magic Loop method for the tiny sleeves).
- Ideal for: Adventurous beginners ready to tackle circular knitting.
- Bottom-Up (Flat Pieces, Seamed):
- How it Works: The back, two fronts, and two sleeves are knit as separate flat rectangles (or shaped pieces). These pieces are then sewn together (seamed) at the shoulders, sides, and underarms. Button bands are often picked up and knit, or created separately and sewn on.
- Pros: Only requires straight needles (or circulars used flat), focuses purely on knit and purl stitches for the main body.
- Cons: Seaming can be time-consuming and requires practice for a neat finish (the mattress stitch is excellent for knitting seams).
- Ideal for: Absolute beginners who prefer flat knitting and are comfortable with seaming.
Basic Elements of a Beginner-Friendly Newborn Cardigan Pattern:
Look for a pattern that emphasizes these core skills:
- Cast On: How to begin your stitches (e.g., Long-Tail Cast On for a stretchy edge).
- Knit Stitch (K) & Purl Stitch (P): The two foundational stitches.
- Garter Stitch: Knit every row (flat) or every round (in the round). Creates a squishy, reversible fabric perfect for babies.
- Stockinette Stitch: Knit one row/round, purl the next row/round. Creates a smooth, V-shaped fabric.
- Ribbing (1×1 or 2×2): Alternating knits and purls for stretch and elasticity at cuffs, hems, and necklines.
- Bind Off: How to finish your stitches.
- Simple Increases (e.g., KFB, M1L/R): For shaping the raglan yoke or adding width.
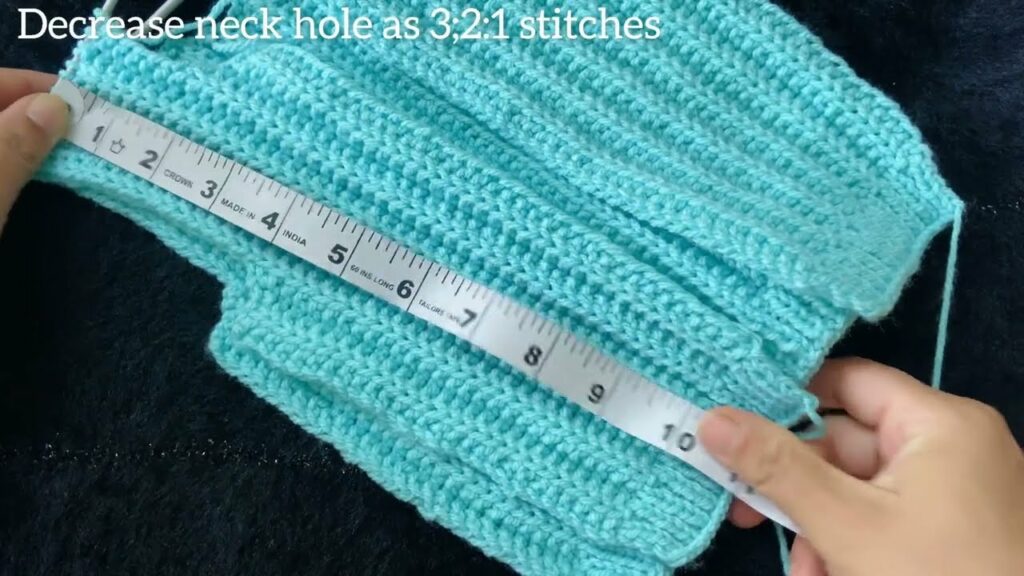
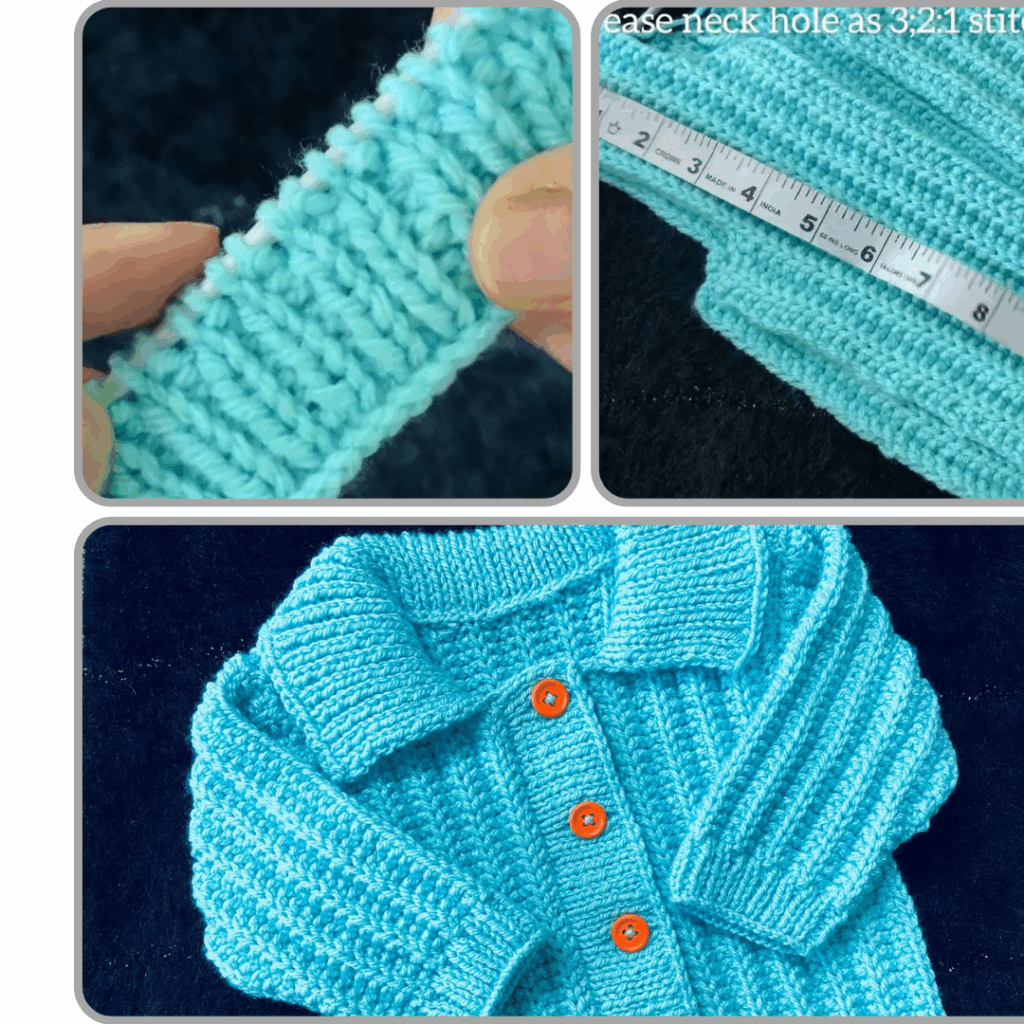
- Simple Decreases (e.g., K2tog, SSK): For simple neck shaping if not a full raglan.
- Buttonholes: Often a simple 1-row buttonhole (Yarn Over, Knit 2 Together or Slip, Slip, Knit).
- Picking Up Stitches: For knitting button bands or necklines (often needed for seamed patterns).
- Pattern Structure: A good pattern will clearly outline: materials, gauge, finished measurements, abbreviations, and step-by-step instructions for each section.
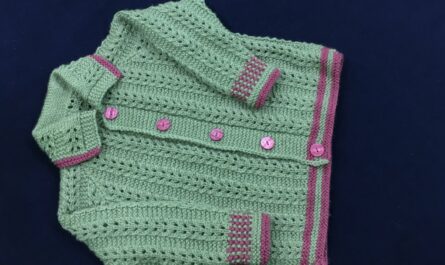
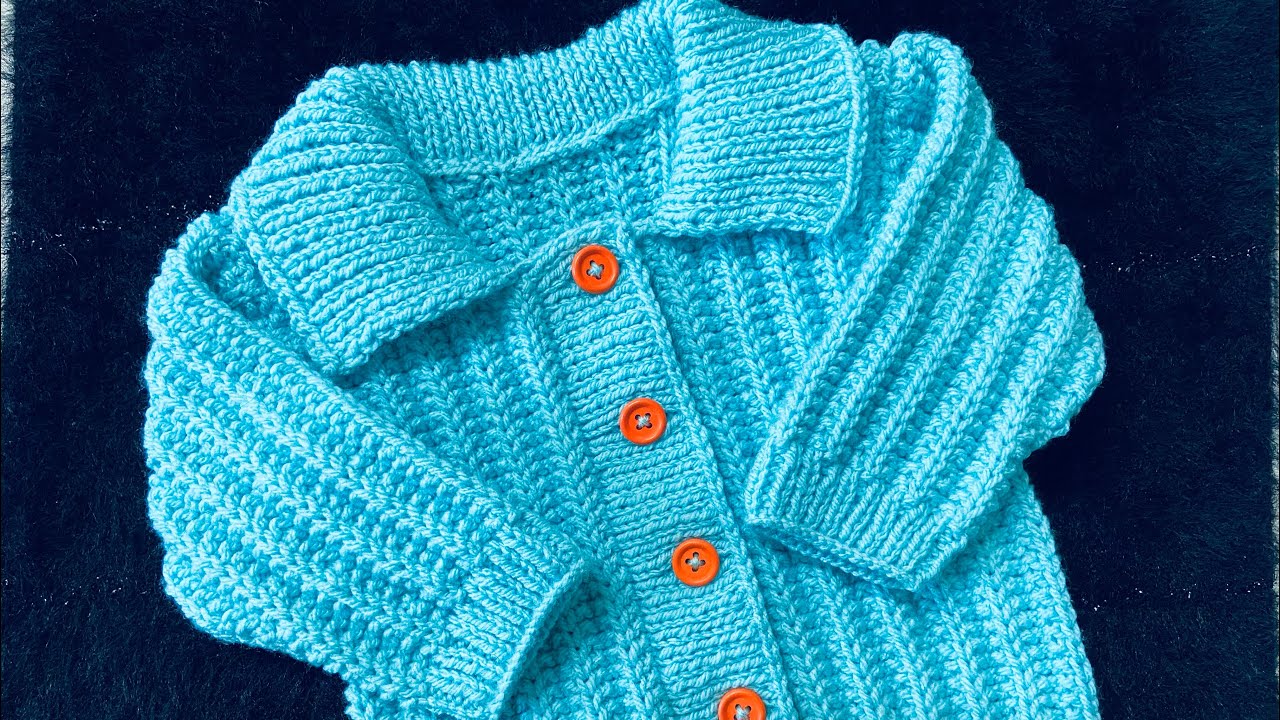
Key Design Elements for Newborn Cardigans:
Keep the design simple and charming for a newborn:
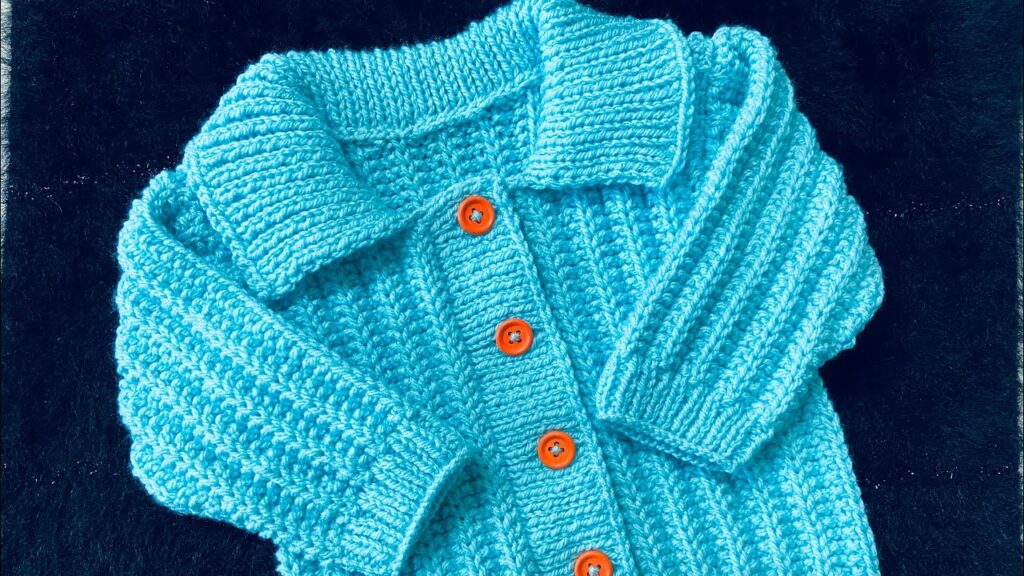
- Simple Shapes: Often a straightforward straight or A-line body that flares gently.
- Neckline: A wide crew neck, a gentle V-neck, or a simple straight opening with a button band.
- Sleeves: Straight or gently tapered, often finished with simple ribbing or garter stitch cuffs.
- Button Bands/Plackets: These define the front opening. They can be knit as part of the body or picked up and knit on afterward.
- Stitch Patterns:
- All Garter Stitch: A fantastic choice for beginners. It’s simple, soft, reversible, and won’t curl.
- Stockinette Body with Ribbing/Garter Edges: A classic, clean look.
- Moss Stitch / Seed Stitch: Creates a lovely, subtle texture that lies flat and prevents curling.
- Simple Ribbing: Can be used throughout the body for a very stretchy, textural garment.
- Very Simple Lace: Basic eyelet rows or simple lace repeats can add a delicate touch without being overly complex.
Step-by-Step (Simplified) Outline: Top-Down Raglan Newborn Cardigan (Example)
This is a general overview; your specific pattern will provide exact stitch counts and instructions.
- Cast On: Using your chosen yarn and smaller needles, cast on the specified number of stitches for the neck.
- Neckline/Button Band Ribbing: Work in K1, P1 ribbing (or your chosen stitch) for the specified height. This section will also incorporate your first buttonhole(s) if your pattern has them.
- Switch to Main Needles: Change to your larger needles (main body needles).
- Establish Raglan Markers: On the first round/row of the yoke, you’ll divide your stitches for the front bands, front panels, sleeves, and back panel, placing stitch markers at the four raglan “corners.”
- Knit Yoke (Increase Rows): Continue knitting in your main stitch pattern. On designated “increase rows,” work increases around each of your raglan markers. This creates the growing yoke (shoulders and upper chest). Knit plain rows in between increase rows. Remember to work buttonholes on your front band at regular intervals. Repeat until the yoke reaches the desired depth.
- Separate for Body & Sleeves: Once the yoke is complete, you’ll put the stitches for the two sleeves onto scrap yarn or stitch holders. The remaining stitches will form the front and back of the cardigan. You will usually cast on a few stitches under each armhole to complete the armhole curve.
- Knit Body: Continue knitting the body flat (working the front bands) until the body reaches the desired length. Finish with a few rows of ribbing or garter stitch for the hem, then bind off.
- Knit Sleeves: Return to the held sleeve stitches. Pick up the underarm stitches you cast on earlier. Knit each sleeve in the round (using DPNs or Magic Loop) or flat (then seam) to the desired length. Finish with ribbing or garter stitch for the cuff, then bind off.
- Finishing:
- Weave in Ends: Use a tapestry needle to neatly weave in all loose yarn tails.
- Sew on Buttons: Securely sew on all buttons, ensuring they are tightly attached and pose no hazard.
- Block: Gently wash your cardigan according to your yarn’s care instructions. Gently squeeze out excess water. Lay it flat on a towel or blocking mats, shaping it to the correct dimensions from the pattern. Let it air dry completely. This step is transformative!
Tips for Beginner Success:
- Read the Entire Pattern First: Get a clear picture of the whole project before you start.
- Watch Video Tutorials: For any technique you’re unsure about (e.g., “KFB increase knitting,” “picking up stitches knitting,” “mattress stitch knitting”).
- Use Stitch Markers! They are invaluable for marking raglan lines, repeats, or the start of a round.
- Don’t Fear Mistakes: The seam ripper (or simply unraveling) is your friend. It’s part of learning!
- Embrace Blocking: It makes all the difference in the final look and fit of your garment. Don’t skip it.
- Baby Safety First: Double-check that all buttons are sewn on extremely securely. Avoid any loose embellishments.
Video Tutorial :
Knitting a newborn baby cardigan is a truly joyful experience. You’ll create a functional, beautiful, and deeply personal garment that will be cherished. Take your time, enjoy the process, and soon you’ll have a tiny, cozy masterpiece ready for a tiny, precious arrival.