 by
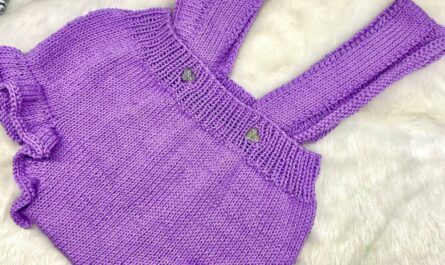
by There’s a special joy in creating something truly unique and cozy for the little boy in your life. A hand-knitted baby sweater is more than just a piece of clothing; it’s a tangible expression of love, a soft hug that keeps him warm, and a treasured keepsake for years to come. While blue has traditionally dominated baby boy wardrobes, the world of knitting offers an exciting palette of colors, textures, and designs to create a modern, stylish, and utterly adorable sweater.
This detailed article will guide you through the process of knitting a baby boy sweater, exploring contemporary design choices, essential techniques, and tips to ensure your project is a resounding success.
Why Knit a Baby Boy Sweater?
- Personal Touch: A handmade sweater is a one-of-a-kind garment, infused with your care and attention.
- Optimal Comfort & Warmth: You control the yarn fiber, ensuring it’s soft, breathable, and perfectly suited for delicate baby skin.
- Customization: Choose colors and patterns that reflect your personal style or coordinate with the baby’s nursery or personality.
- Heirloom Quality: A well-made knitted sweater can be passed down, becoming a cherished family heirloom.
- Rewarding Craft: The process of watching stitches turn into a beautiful garment is deeply satisfying.
Key Considerations for Your Baby Boy Sweater Design:
Before casting on, a little planning goes a long way to ensure your sweater is both beautiful and practical.
- Yarn Choice (The Most Important Decision!):
- Fiber:
- Superwash Merino Wool: The gold standard. Incredibly soft, warm, breathable, and most importantly, machine washable (essential for baby clothes!).
- Cotton or Organic Cotton: Excellent for warmer climates, babies with wool sensitivities, or those seeking plant-based fibers. Look for soft, mercerized varieties.
- Bamboo: Silky soft, breathable, and has a lovely drape.
- Baby-Specific Acrylics or Blends: Modern acrylics are often very soft, durable, and hypoallergenic. Blends (e.g., merino/cotton, acrylic/nylon) can offer a great balance of properties.
- Fiber:
- Weight:
- DK (Double Knitting) or Worsted Weight: These are ideal for baby sweaters. They work up at a reasonable pace, provide good stitch definition, and create a cozy fabric without being too bulky.
- Fingering/4-ply: Suitable for very delicate, lightweight garments, but will take longer to knit.
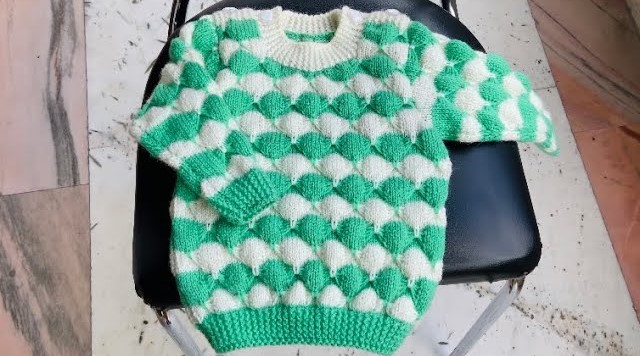
- Color Palette (Beyond Blue!): While classic blues are always an option, consider exploring:
- Neutrals: Soft greys (heather, charcoal), cream, off-white, beige, taupe, camel. These are sophisticated and versatile.
- Earthy Tones: Sage green, forest green, muted olive, terracotta, rust, mustard yellow, burnt orange.
- Muted Jewel Tones: Deep teal, sapphire blue, rich burgundy, plum.
- Bright Accents: Sunny yellow, vibrant orange, lime green, used in stripes or small motifs.
- Variegated/Self-Striping Yarns: These yarns create effortless color changes, adding interest without requiring complex colorwork.
- Two-Tone Combinations: Classic pairings like navy and cream, charcoal and bright yellow, or grey and emerald green.
- Sizing (1-18 Months):
- Baby sweater patterns are typically sized for age ranges (e.g., Newborn, 0-3 months, 3-6 months, 6-12 months, 12-18 months).
- Babies grow quickly! It’s often a good idea to knit one size up from their current age to ensure they get more wear out of the sweater and allow for layering.
- Positive Ease: Most baby sweaters are designed with a few inches of positive ease (garment measurement larger than body measurement) for comfort and mobility.
- Closures:
- Buttons: Along one shoulder seam (for pull-over ease), a partial front placket, or a full front opening (cardigan style). Choose baby-safe buttons that are securely sewn.
- Snaps: Can be used on plackets for very quick dressing.
- No Closure: Simple pull-over style, often with a wider neck or a bit of stretch from ribbing.
- Consider how easy it will be for parents to get the sweater on and off.
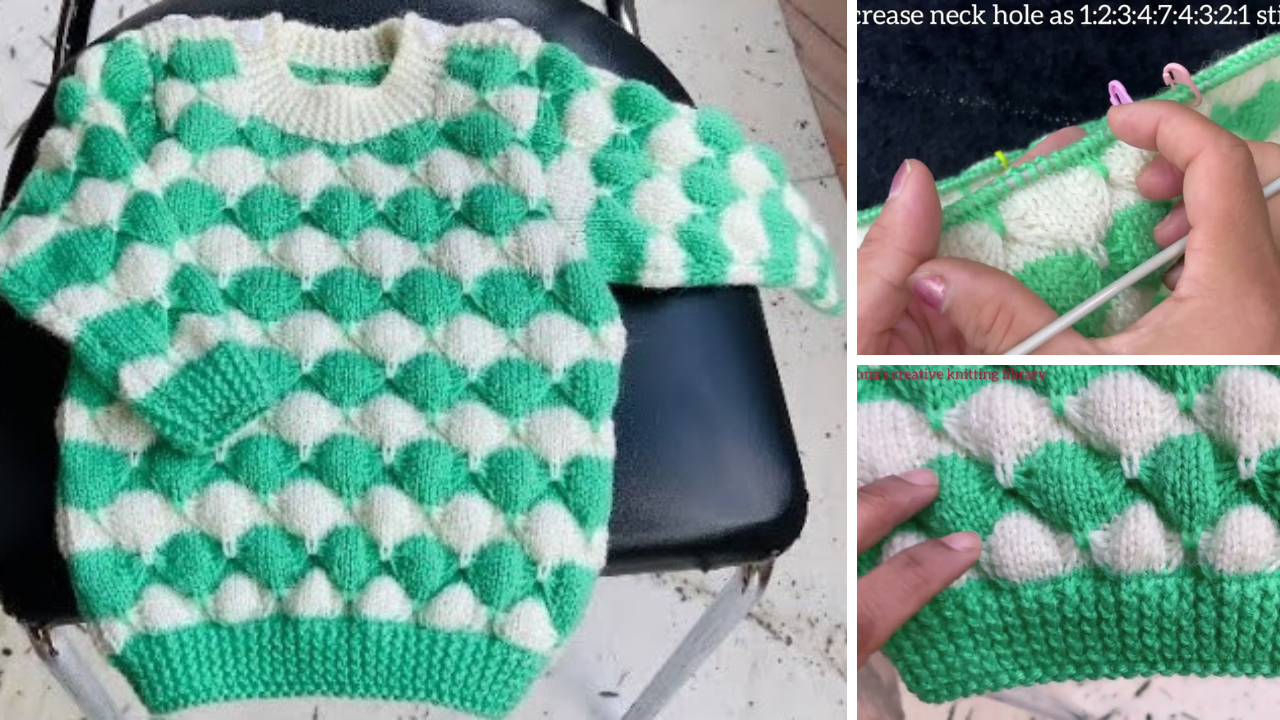
Design Elements & Stitch Patterns for Baby Boy Sweaters:
The “new” in design comes from thoughtful combinations of texture, color, and classic elements:
- Classic & Textured Stitches:
- Stockinette Stitch: Smooth, clean, and allows the yarn color to shine. Great for a minimalist look.
- Garter Stitch: Simple (knit every row/round), squishy, reversible, and creates a lovely textured fabric.
- Ribbing (1×1 or 2×2): Essential for cuffs, hems, and necklines for stretch and a neat finish.
- Moss Stitch / Seed Stitch: Alternating knits and purls in a staggered pattern creates a subtle, dense texture that lies flat.
- Basketweave Stitch: A more pronounced texture created by alternating blocks of knit and purl stitches.
- Simple Cable Patterns: A classic choice that adds definition and sophistication without being overly complex. Think single ropes, simple braids, or small panel cables.
- Textured Stripes: Create interest by alternating sections of garter stitch and stockinette, or moss stitch and stockinette, rather than just color stripes.
- Modern Colorwork (Simplified):
- Horizontal Stripes: Vary the width of stripes for modern appeal (e.g., broad bands of one color, thin accents of another). Two-color or multi-color.
- Color Blocking: Create distinct sections of color, such as a contrasting yoke, sleeves, hem, or chest panel. This is striking and easy to execute.
- Simple Intarsia: Incorporate a small, simple motif like a square, triangle, circle, star, or a very basic animal silhouette (e.g., a bear outline, a cloud) on the front in a contrasting color. Keep it graphic and bold.
- Speckled or Variegated Yarns: These yarns do the colorwork for you, creating a dynamic fabric without any extra effort.
- Subtle Embellishments & Details:
- Contrasting Edging: Use a contrasting color for all ribbing (neck, cuffs, hem) to frame the sweater.
- Buttons: Choose wooden, matte plastic, metal (ensure no sharp edges), or plain buttons that complement your color palette.
- Simple Embroidery (Post-Knitting): After the sweater is finished, use a contrasting yarn to embroider small geometric shapes, a simple initial, or outlines of baby-friendly objects (a small mountain, a tree, a tiny car) onto a solid section. Ensure all embroidery is very secure and poses no choking hazard.
- Patch Pockets: Small garter stitch or stockinette patch pockets on the front for a playful touch.
Popular Construction Methods:
For baby sweaters, these methods are common and offer different advantages:
- Top-Down Raglan (Seamless):
- How it Works: You cast on at the neck and knit downwards in the round. Increases are made along four diagonal “raglan” lines, simultaneously shaping the shoulders and sleeves. The body and sleeves are then separated and worked individually.
- Pros: No seaming (a huge bonus!), easy to try on as you go for length adjustments, often knits up quickly.
- Cons: Requires comfort with circular needles and potentially DPNs (Double Pointed Needles) or Magic Loop for sleeves.
- Good for: Adventurous beginners, intermediate knitters.
- Flat Pieces & Seamed:
- How it Works: The back, front, and two sleeves are knit as separate flat rectangles. These pieces are then expertly sewn together (seamed) at the shoulders, sides, and underarms.
- Pros: Only requires straight needles (or circulars used flat), great for beginners who are still mastering knit and purl stitches without the added complexity of circular knitting.
- Cons: Seaming can be time-consuming and requires practice for a neat finish (mattress stitch is ideal).
- Good for: Absolute beginners focusing on basic stitches.
General Knitting Tips for Success:
- Gauge Swatch, Gauge Swatch, Gauge Swatch! This cannot be stressed enough for garments. Knit a 4×4 inch (10×10 cm) swatch in your main stitch pattern, wash it, and block it. Measure your stitches and rows per inch/cm. Adjust your needle size until you match the pattern’s specified gauge. This is the only way to ensure your sweater will fit.
- Read the Entire Pattern First: Before casting on, read the pattern from start to finish. Understand the construction, identify any unfamiliar terms or techniques, and visualize the steps.
- Watch Video Tutorials: If a technique (like a specific cast-on, increase, decrease, or seaming method) is new to you, watch a quick video tutorial online.
- Use Stitch Markers: They are your best friends, especially in raglan constructions, for marking raglan lines, repeats, or the beginning of a round.
- Don’t Fear Mistakes: Everyone makes them! A good seam ripper is an essential tool. It’s better to unravel a few rows and correct an error than to finish a garment you’re unhappy with.
- Block Your Finished Sweater: This is a magical step that transforms your knitting. Blocking evens out stitches, relaxes the fabric, opens up stitch patterns, and allows the sweater to drape and conform to its intended size. Gently wash the sweater, squeeze out excess water, lay it flat on a towel or blocking mats, and shape it to the pattern’s measurements, then let it air dry.
- Baby Safety: Ensure all buttons are securely sewn. Avoid long ties or loose embellishments that could pose a choking hazard.
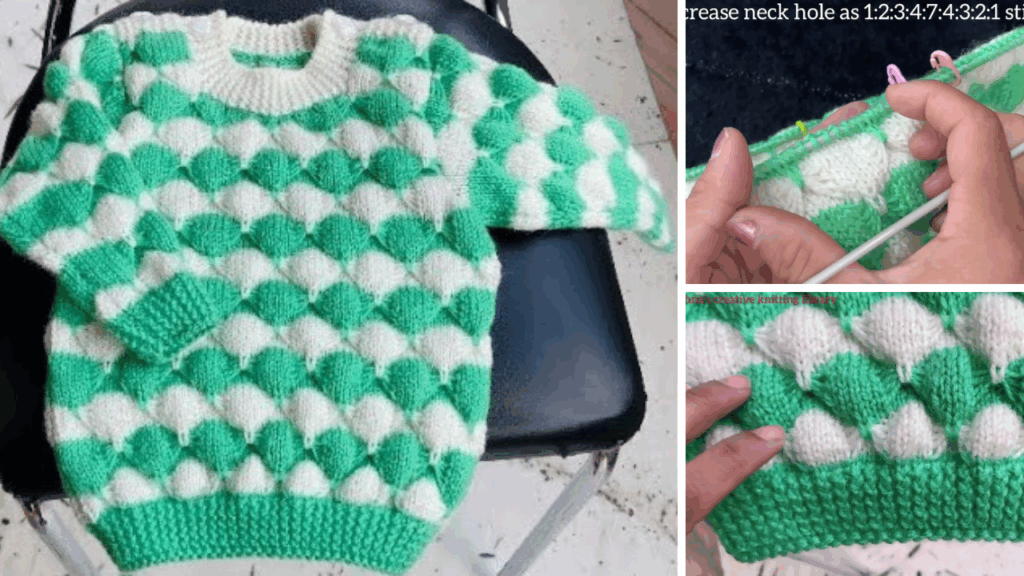
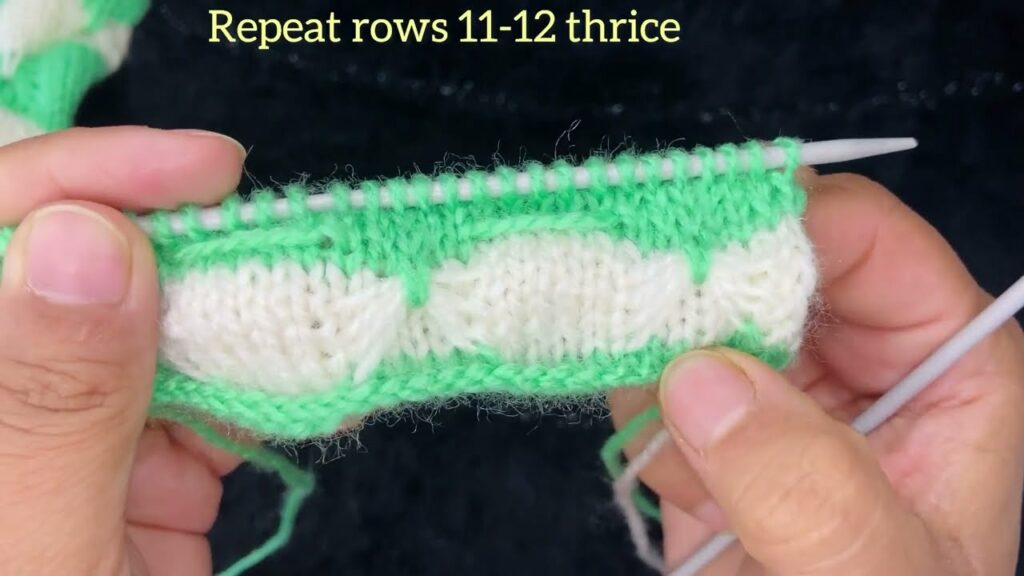
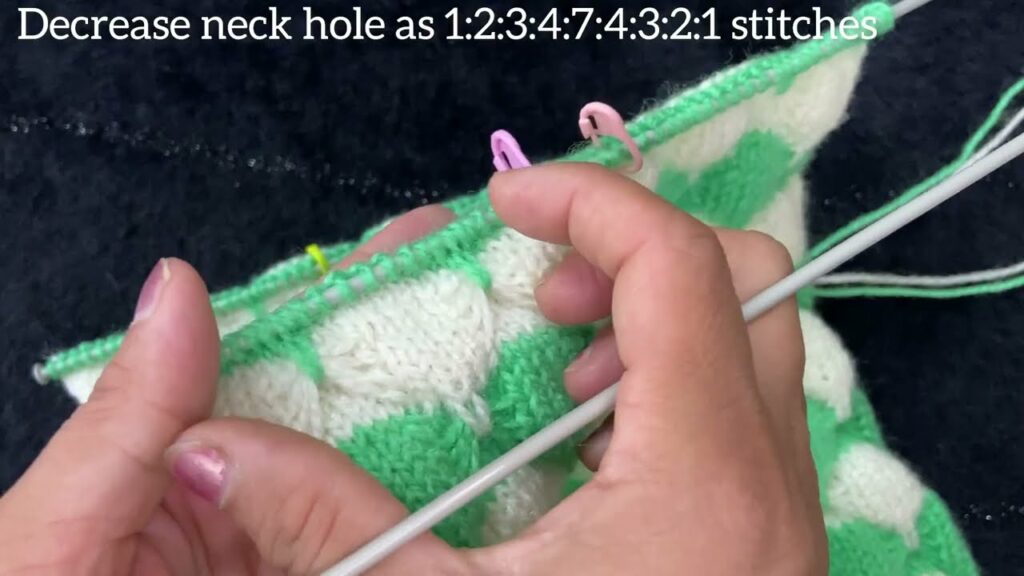
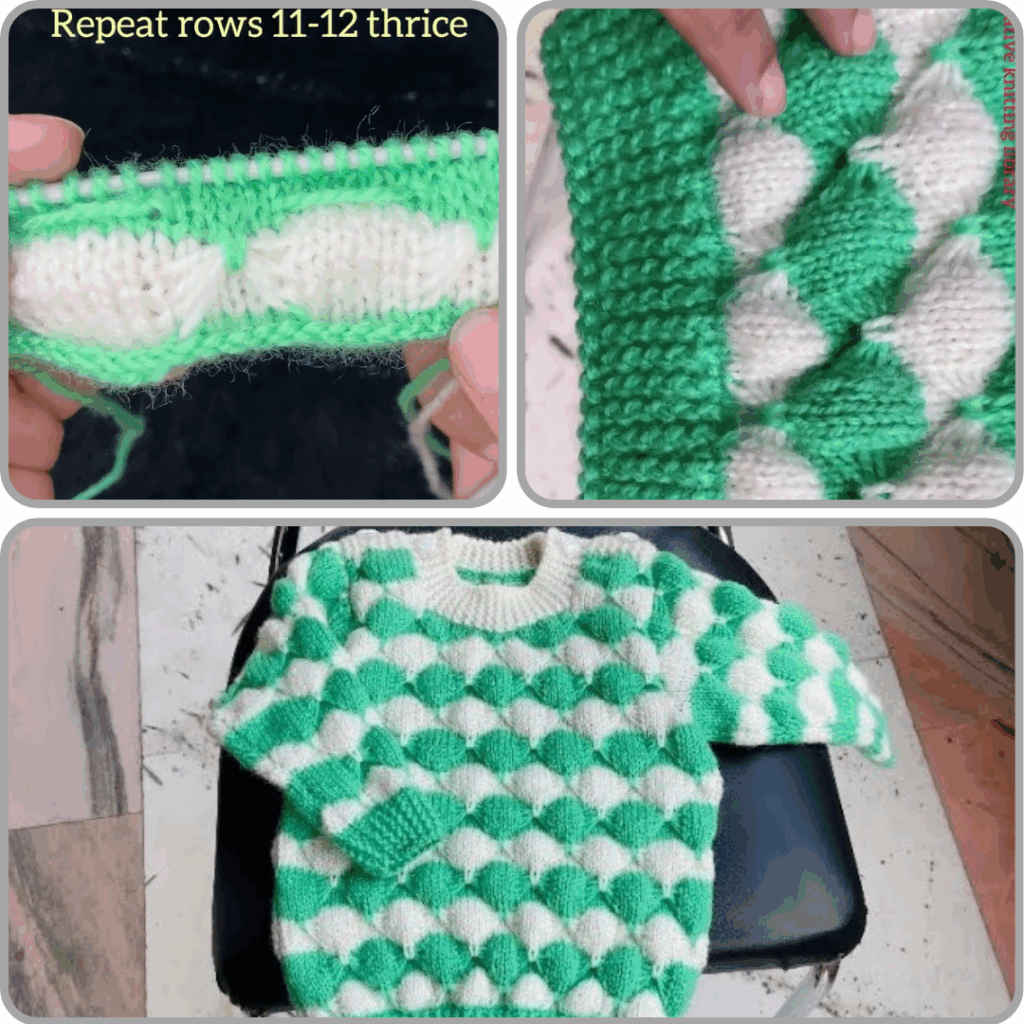
Video Tutorial :
Knitting a baby boy sweater is a journey filled with warmth, creativity, and the immense satisfaction of crafting something truly special. Choose a pattern that inspires you, select a beautiful, baby-friendly yarn, and enjoy every stitch as you create a garment that will be cherished by the little one and his family. Happy knitting! Sources