 by
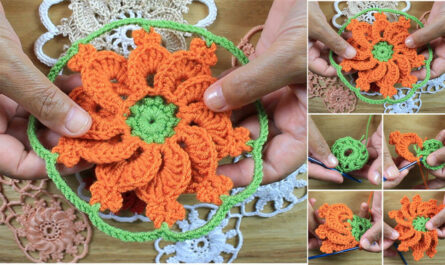
by Bring a beloved fairy tale to life with your crochet hook! A Snow White inspired baby dress is an enchanting project, perfect for a photo shoot, a special occasion, or simply to add a touch of whimsical charm to a little one’s wardrobe. This detailed, step-by-step guide will walk you through the process of creating this iconic dress, blending the classic colors and elements of Snow White’s attire into a comfortable and adorable baby garment.
We’ll focus on a top-down construction for ease of customization and seamless comfort, adapting common crochet techniques to achieve that signature look.
What Makes it “Snow White Inspired”? The Iconic Elements
The magic of a Snow White dress lies in a few distinct features:
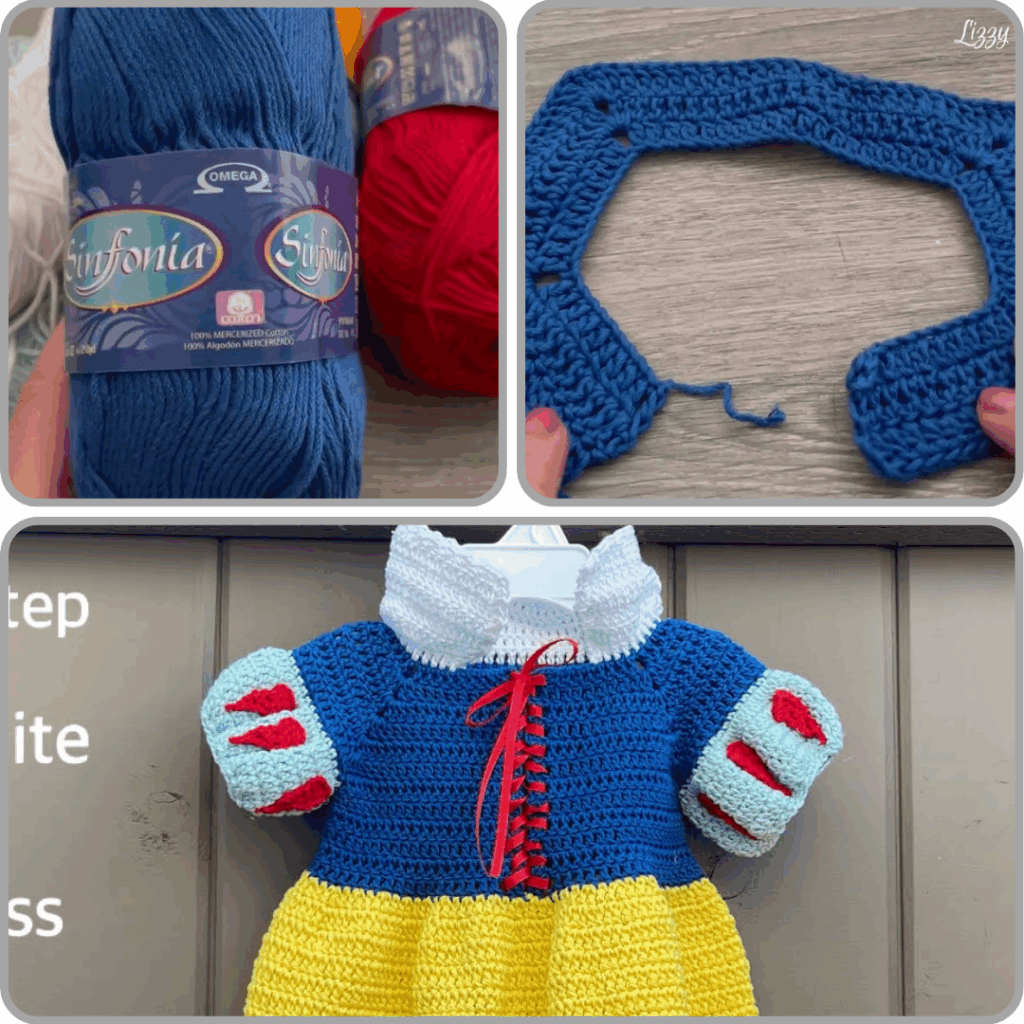
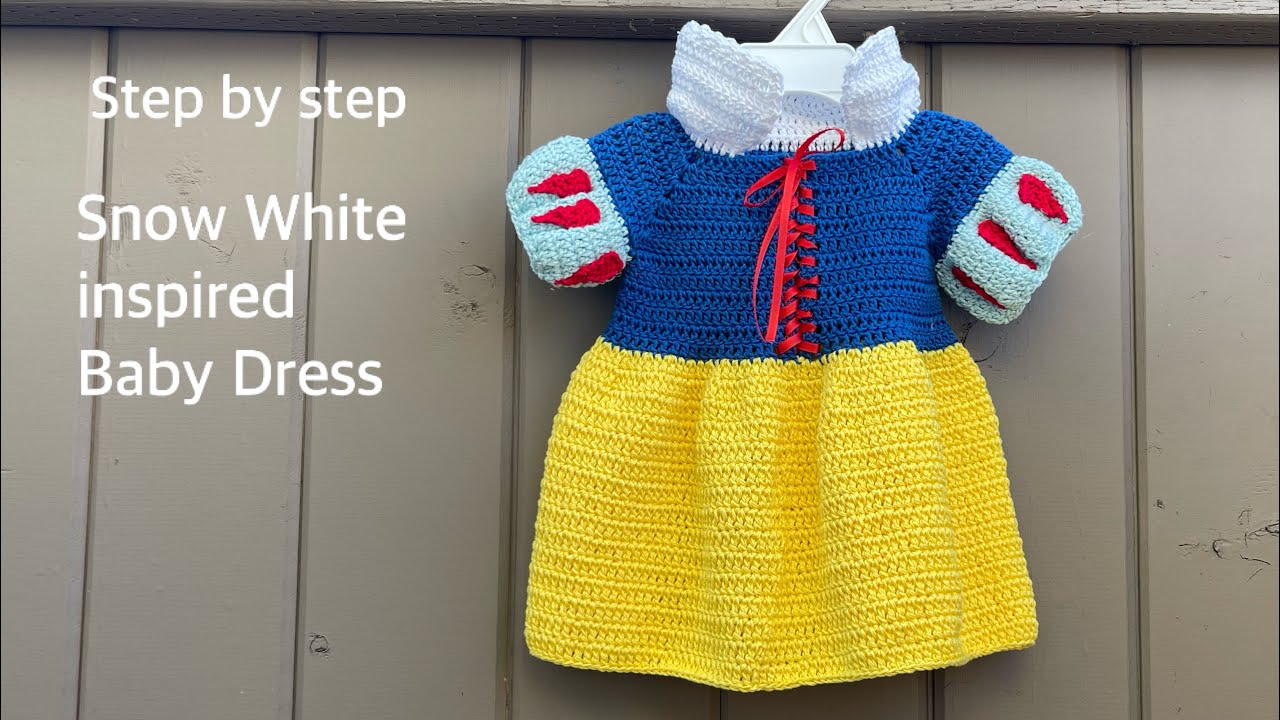
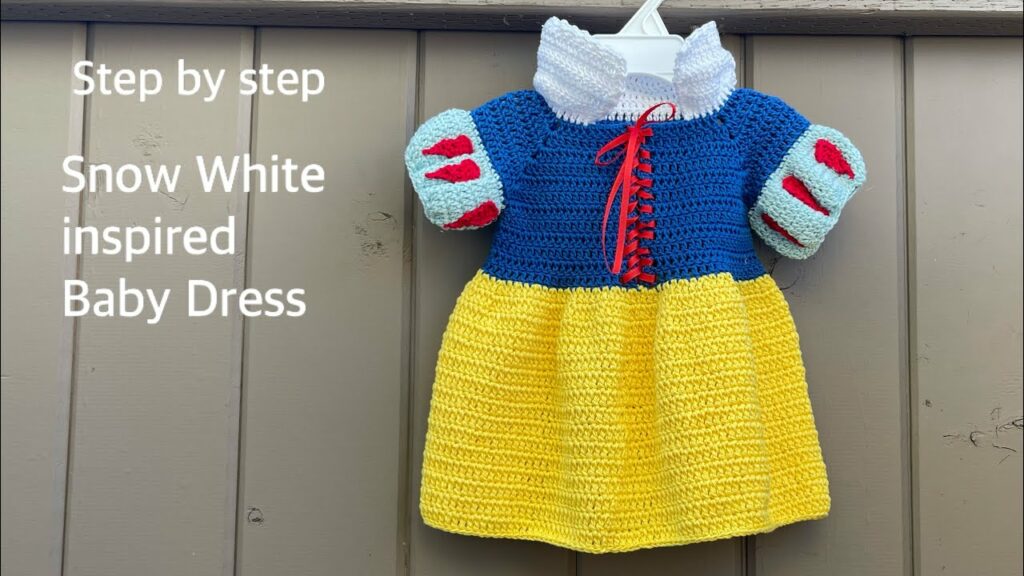
- The Colors: Deep royal blue for the bodice, vibrant yellow for the skirt, and bright red accents (often on the sleeves and a bow). Crisp white for the collar.
- The Bodice: A fitted or semi-fitted blue bodice.
- The Sleeves: The most recognizable element! Puffy, often striped red and blue sleeves.
- The Skirt: A full, flowing yellow skirt.
- The Collar: A crisp, white, pointed or rounded collar.
- Optional Details: A red bow (hair or dress accent) and perhaps a small apple appliqué.
Choosing Your Tools & Materials
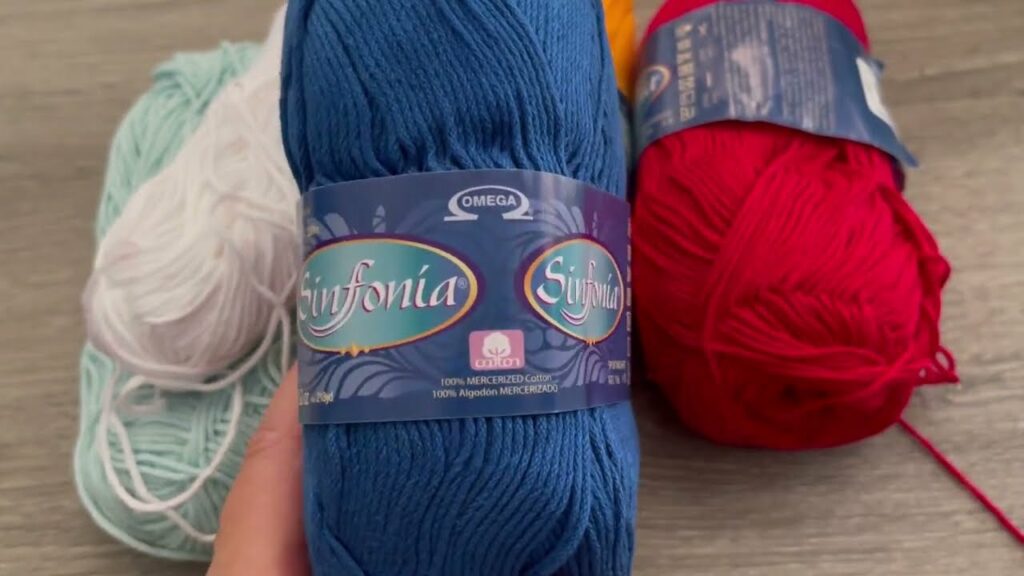
Accuracy in color is key to capturing the Snow White essence.
- Yarn Colors (DK or Sport Weight Recommended):
- Royal Blue: For the bodice.
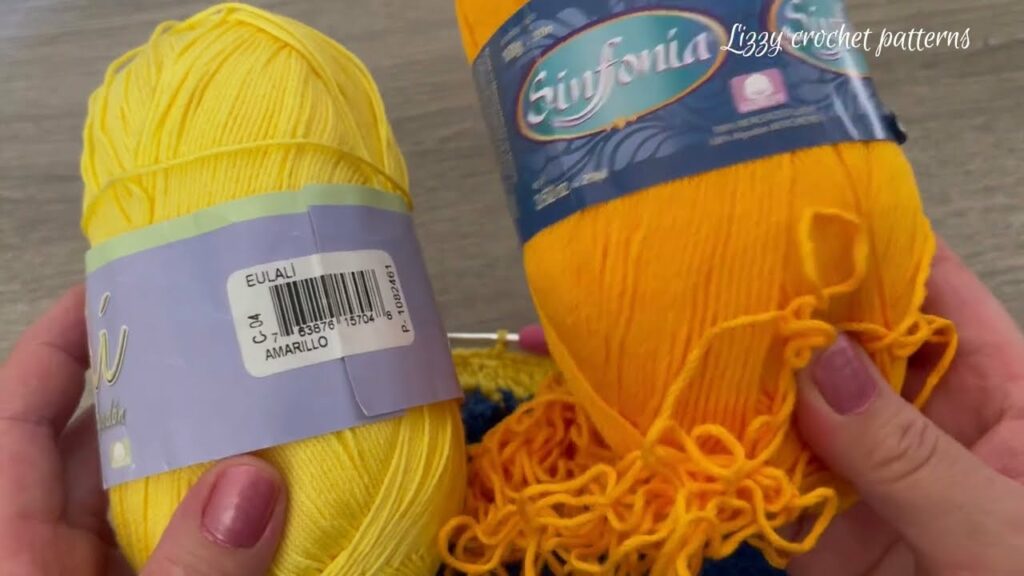
- Bright Yellow: For the skirt.
- Bright Red: For sleeve stripes and accents.
- Crisp White: For the collar.
- Quantity: You’ll need the most blue and yellow. Red and white will be smaller amounts. Total yarn for a 0-12 month size typically ranges from 250-400 yards (approx. 230-365 meters), depending on dress length.
- Fiber: Prioritize softness and washability for baby garments. Superwash Merino wool, soft acrylic, or cotton/bamboo blends are excellent choices.
- Crochet Hook:
- Match your yarn weight. A 3.5mm or 4.0mm (E or G hook) is common for DK/Sport weight.
- Crucial: Your hook size will be determined by your gauge swatch to ensure proper sizing.
- Other Notions:
- Stitch Markers: Essential for raglan lines, color changes, and the beginning of rounds.
- Tapestry Needle: For weaving in ends and sewing on details.
- Scissors.
- Small Buttons: 3-5 small, flat buttons (white or blue are good choices) for the back closure.
- Optional: Small ribbon (red), small amount of poly-fill for puff sleeves (if desired for extra puffiness), embroidery floss for apple seeds, tiny safety bell (if adding a bell, ensure it’s securely sewn).
Sizing & Gauge: Ensuring a Royal Fit
Getting the right fit is crucial for a baby dress. For a themed dress, slight positive ease (a little room) is often preferred for comfort and ease of dressing.
- Typical Baby Sizes & Measurements:
- 0-3 Months: Approx. 17-19″ (43-48 cm) chest; Yoke depth ~5″ (12.5 cm).
- 3-6 Months: Approx. 18-20″ (45-50 cm) chest; Yoke depth ~5.5″ (14 cm).
- 6-12 Months: Approx. 19-21″ (48-53 cm) chest; Yoke depth ~6″ (15 cm).
- (These are averages; always check your pattern’s size chart if using one.)
- The Gauge Swatch (Do NOT Skip!):
- Chain: Chain about 20-25 stitches plus turning chains in your chosen blue yarn.
- Work: Crochet a square of at least 6×6 inches (15×15 cm) in the main stitch pattern you’ll use for the bodice (e.g., double crochet).
- Wash & Block: Fasten off. Wash and block your swatch exactly as you plan to treat the finished dress. This will reveal the true stitch size.
- Measure: Once dry, measure how many stitches fit within 4 inches (10 cm) and how many rows fit within 4 inches (10 cm).
- Adjust: If your stitch count is too high (too tight), go up a hook size. If it’s too low (too loose), go down a hook size. Re-swatch until your gauge matches your desired density.
Step-by-Step Construction: Crocheting Your Snow White Dress
We’ll use a top-down, seamless raglan yoke for the bodice (blue), which is worked flat for a back opening. The skirt (yellow) will be joined directly to the bodice.
Abbreviations Used:
- ch: chain
- sc: single crochet
- hdc: half double crochet
- dc: double crochet
- sl st: slip stitch
- st(s): stitch(es)
- sk: skip
- inc: increase (e.g., 2 dc in one st)
- […] : repeat instructions in brackets
- (…) : stitch count at end of row/round
- Color changes: Change color on the last yarn over of the previous stitch.
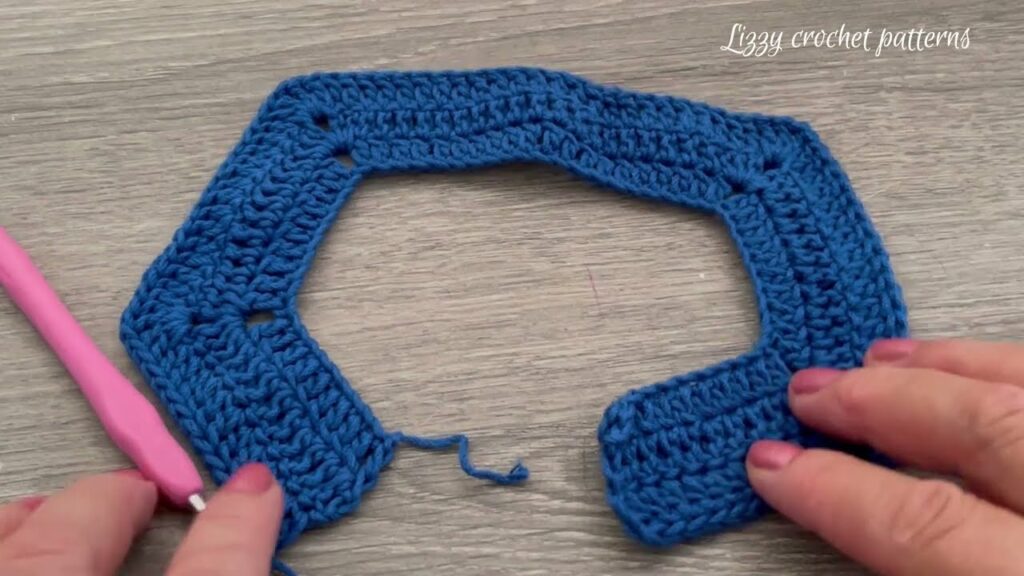
Phase 1: The Royal Blue Bodice
1.1. Neckline & Back Opening (Royal Blue Yarn)
- Foundation Chain: With royal blue yarn, chain a length (e.g., 40-60 chains, depending on size) that slightly exceeds your desired neckline circumference, plus a few extra for the back opening placket. (Ensure it’s an even number if working into stitches, or follow specific pattern recommendations).
- Neckband Rows:
- Row 1: Ch 2 (counts as first hdc). Work 1 hdc in 3rd ch from hook and in each ch across. Turn.
- Rows 2-3 (or more): Ch 2, work 1 hdc in each st across. Turn. This forms a flat band for the back opening.
- Buttonholes: On one of the back placket edges (e.g., Row 2 or 3), you’ll create buttonholes (e.g., 3-5 buttonholes, evenly spaced).
- To make a horizontal buttonhole: Work to desired position, ch 2, sk next 2 sts, then continue working across. On the next row, work into the ch-2 space.
1.2. Raglan Yoke Shaping (Royal Blue Yarn)
This forms the shoulders and chest of the bodice.
- Divide Stitches: Take your total stitch count from the neckband. Divide it into: Back Panel 1, Sleeve 1, Front, Sleeve 2, Back Panel 2. You will have 4 raglan corners. (e.g., 8 sts for BP1, 10 for S1, 14 for F, 10 for S2, 8 for BP2 – total 50 sts in this example).
- First Yoke Row:
- Ch 3 (counts as first dc). Dc in sts for BP1.
- Raglan Corner 1: [2 dc, ch 2, 2 dc] in the next st. Place a stitch marker in the ch-2 space.
- Dc in sts for S1.
- Raglan Corner 2: [2 dc, ch 2, 2 dc] in the next st. Place marker.
- Dc in sts for Front.
- Raglan Corner 3: [2 dc, ch 2, 2 dc] in the next st. Place marker.
- Dc in sts for S2.
- Raglan Corner 4: [2 dc, ch 2, 2 dc] in the next st. Place marker.
- Dc in remaining sts for BP2. Turn.
- Continue Yoke Rows: Ch 3. Dc in each dc across, working [2 dc, ch 2, 2 dc] into each ch-2 raglan space. Move stitch markers up to the new ch-2 space. Turn.
- Yoke Depth: Repeat these increase rows until the yoke reaches the desired depth for your chosen baby size (e.g., 4-6 inches / 10-15 cm from neckline to underarm). Ensure you continue adding buttonholes on the appropriate back placket edge.
Phase 2: Separating & Preparing for Skirt
2.1. Separating for Body and Sleeves (Royal Blue Yarn)
- Separation Row:
- Ch 3. Dc in sts for Back Panel 1.
- Work 1 dc into Raglan Corner 1.
- Skip Sleeve 1: Skip all dc stitches of Sleeve 1.
- Underarm Chain: Ch 2-4 stitches (to form the underarm space; check pattern).
- Work 1 dc into Raglan Corner 2.
- Dc in sts for Front Panel.
- Work 1 dc into Raglan Corner 3.
- Skip Sleeve 2: Skip all dc stitches of Sleeve 2.
- Underarm Chain: Ch 2-4 stitches.
- Work 1 dc into Raglan Corner 4.
- Dc in sts for Back Panel 2. Turn.
- Sleeve Stitches: Place the skipped sleeve stitches onto a piece of scrap yarn or a stitch holder for later.
2.2. Bodice Body (Royal Blue Yarn)
- Body Rows: Continue working rows of dc (keeping the back opening flat) for another 1-2 inches (2.5-5 cm). This creates the main blue bodice section before the skirt begins.
- Prepare for Skirt: On the last row of the blue bodice, change color to bright yellow on the last yarn over of the last stitch. Turn.
Phase 3: The Sunny Yellow Skirt
3.1. Attaching Skirt & Creating Fullness (Bright Yellow Yarn)
- First Skirt Row (Increase Row): Ch 3. Work 2 dc in the first st. Dc in next 2-3 sts, then 2 dc in next st. Repeat from * to * across the row to significantly increase your stitch count and create immediate flare for the skirt. (Your pattern will specify exact increase frequency). Turn.
- Continuing Skirt Rows: Continue working rows of dc (keeping the back opening flat).
- Adding More Flare (Optional): For a very full skirt, you can work additional increase rows every 5th or 6th row (e.g., work 2 dc into an evenly spaced stitch 8-12 times across the row).
- Length: Continue working rows until the skirt reaches the desired length for your chosen size (e.g., knee or mid-calf, around 12-16 inches / 30-40 cm total length from shoulder).
- Hem: Work 2-3 rows of sc or hdc for a neat, stable hem. Fasten off.
Phase 4: The Signature Puff Sleeves (Red & Blue Yarn)
This is a defining feature of the Snow White dress!
- Attach Yarn: With the dress right side out, attach royal blue yarn to one of the underarm corners of a skipped sleeve.
- First Sleeve Round (Puff Setup): Ch 3 (counts as dc). Work dc into each dc stitch of the held sleeve stitches and 1 dc into each chain of the underarm chain. Join with a sl st to the top of the initial ch 3. (You are now working in the round.)
- Puff Round (Royal Blue): Ch 3. Work a puff stitch (or a cluster stitch that creates a puff) in every other stitch around, or as desired for puffiness. Join with a sl st.
- Simple Puff Stitch example (3-dc puff): [Yarn over, insert hook into st, yarn over, pull up loop] 3 times in the same st. Yarn over, pull through all 7 loops on hook. Ch 1 to secure.
- Next Round (Royal Blue): Ch 3. Work 1 dc in each stitch around (working into the top of the puff and the chain-1 space, if applicable). Join.
- Color Change: Change color to bright red on the last yarn over of the last stitch.
- Red Stripe Round: Ch 3. Work 1 dc in each stitch around. Join.
- Color Change: Change color back to royal blue.
- Blue Stripe Round: Ch 3. Work 1 dc in each stitch around. Join.
- Repeat: You can repeat the red and blue stripe rounds once more if desired for more stripes.
- Cuff: Work 2-3 rounds of sc or hdc for a neat cuff. Fasten off.
- Repeat: Repeat for the second sleeve.
- Optional Puffiness: If you want very round, pronounced puff sleeves, you can lightly stuff the puff section with a tiny bit of poly-fill before closing the cuff. Secure the stuffing well.
Phase 5: The Crisp White Collar
- Attach Yarn: With crisp white yarn, attach to one corner of the neckline’s back opening.
- Collar Rows:
- Row 1: Ch 2. Work 1 hdc (or dc for a taller collar) in each stitch evenly around the entire neckline, including the back opening edges. Turn.
- Row 2 (Increase for Flare): Ch 2. Work [1 hdc, inc hdc] in every 2nd or 3rd stitch across the entire row to create a subtle flare. Turn.
- Row 3 (or more): Work 1 hdc (or dc) in each stitch across, or repeat the increase row if more flare is desired. Turn.
- Edging (Optional): Work a final row of sc or a picot edging along the outer edge of the collar for a polished look. Fasten off.
Phase 6: Finishing Touches & Royal Embellishments
This is where your dress transforms into a true masterpiece!

- Back Opening Bands: If you didn’t integrate buttonholes directly into the initial neckband, you’ll need to create button bands now. Pick up stitches evenly along both back opening edges. Work 2-3 rows of sc or hdc for each band. Create buttonholes on one side.
- Weave in Ends: This is paramount for a professional, clean look. Use your tapestry needle to meticulously weave in all loose yarn tails from color changes and fasten-offs, hiding them securely within the stitches on the wrong side.
- Blocking (The Magic Step!):
- Gently wash your finished dress according to your yarn’s care instructions.
- Gently squeeze out excess water (do not wring).
- Lay the dress flat on clean towels or blocking mats. Gently shape it to the correct dimensions for your chosen size, smoothing out any unevenness and opening up any lace patterns. Use rust-proof pins to hold it in place.
- Allow the dress to air dry completely. Blocking is essential for setting the shape, evening out stitches, and enhancing the drape of cotton or acrylic.
- Attach Buttons: Lay your dress flat and mark the positions for your buttons, aligning them with the buttonholes. Securely sew on your chosen small, festive buttons. Ensure they are sewn on very, very tightly with strong thread to prevent any choking hazard.
- Optional Embellishments:
- Red Bow: Crochet a small red bow (using sc or dc) or tie a small red satin ribbon into a bow and securely stitch it onto the bodice or neckline.
- Apple Appliqué: Crochet a small red apple shape with a brown stem and a small green leaf. Stitch it securely onto the skirt or bodice.
- Subtle Sparkle: If desired, use a needle and fine thread to sew on a few tiny, transparent beads or sequins (ensure they are absolutely secure for baby safety).
Safety & Care for Your Royal Creation
- Button Security: This is critical! Stitch buttons on very securely with strong thread. Check them regularly for any looseness.
- Small Embellishments: Exercise extreme caution with small beads, tiny bells, or anything that could potentially detach and become a choking hazard. If unsure, omit them. Avoid long ties or ribbons around the neck or waist that could pose a strangulation risk.
- Washing: Always follow your yarn’s care instructions. For handmade items, gentle machine wash (in a laundry bag) or hand wash and lay flat to dry are usually best to preserve shape and details.
Video Tutorial :
Crafting a Snow White inspired baby dress is a labor of love that transforms yarn into a wearable fairy tale. With patience, attention to detail, and a dash of magic, you’ll create a cherished garment that will bring smiles and capture precious memories for years to come. Happy crocheting!