by
by Timeless Warmth: How to Crochet a Double-Breasted Baby Coat
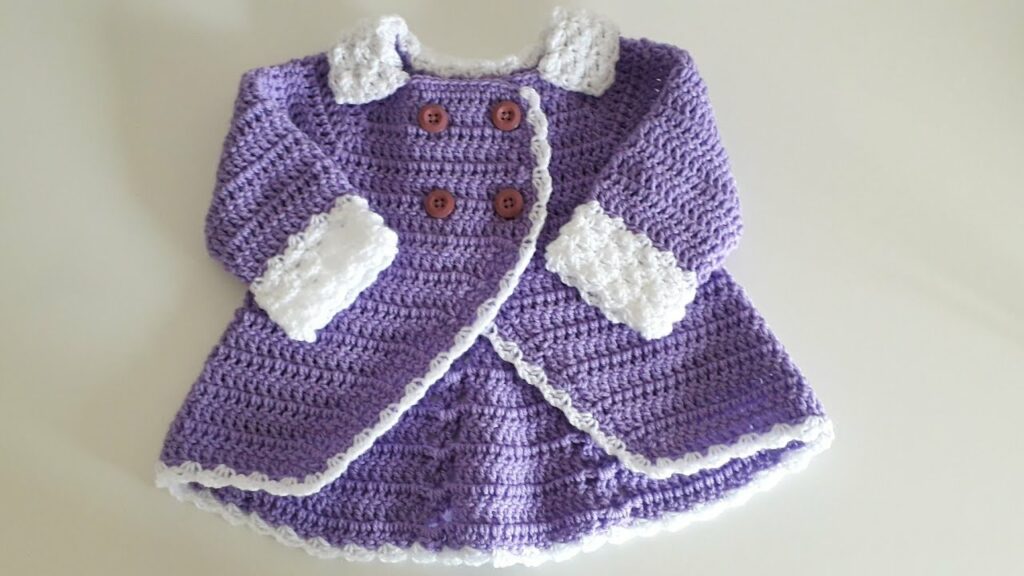
There’s something uniquely charming about a double-breasted coat – a classic silhouette that exudes timeless elegance and sophistication. When scaled down for a baby, this design transforms into an utterly adorable and wonderfully practical garment, perfect for keeping your little one snug and stylish. Crocheting a double-breasted baby coat allows you to create a truly special, heirloom-quality piece, customized with love in every stitch.
This detailed guide will walk you through the essential steps and considerations for creating this beautiful and cozy addition to any baby’s wardrobe.
What is a Double-Breasted Baby Coat?
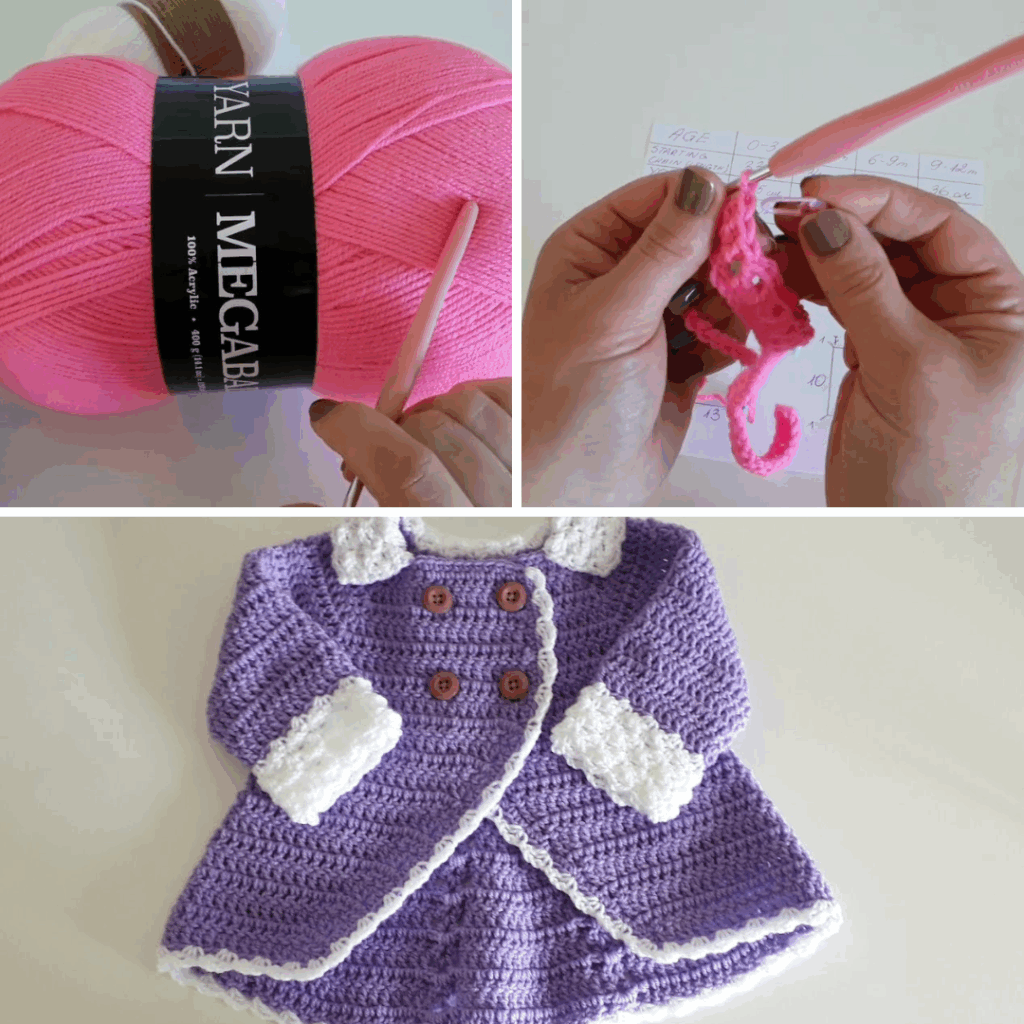
A double-breasted coat is characterized by its overlapping front flaps that fasten with two parallel columns of buttons. This design not only creates a distinct, sophisticated aesthetic but also offers practical benefits:
- Enhanced Warmth: The overlapping fabric provides an extra layer of insulation over the baby’s chest, offering superior protection against the cold.
- Classic Style: It’s a traditional design that never goes out of fashion, making the coat suitable for special occasions, photoshoots, or everyday wear.
- Defined Structure: Unlike a simple cardigan, a double-breasted coat often has a more structured feel, typically featuring a defined collar, long sleeves, and a tailored body.
Why Crochet a Double-Breasted Baby Coat?
- Exceptional Warmth & Protection: The double layer of fabric across the chest is ideal for keeping babies extra cozy in cooler weather.
- Timeless Elegance: This classic design is incredibly endearing on babies, giving them a polished and sophisticated look. It’s a garment that feels truly special.
- Personalized & Unique: Choose from a vast array of baby-friendly yarns and colors, select unique buttons, and add your personal handmade touch to create a one-of-a-kind piece.
- Heirloom Quality: With careful construction and finishing, a crocheted double-breasted coat can become a cherished family heirloom, passed down through generations.
- Skill Building: It’s an excellent project for advancing your crochet skills, particularly in garment construction, creating neat buttonholes, and intricate shaping.
- Thoughtful & Luxurious Gift: A handmade double-breasted baby coat is a profound expression of love, offering both beauty and practicality to new parents.
Choosing Your Tools & Materials:
Careful selection of materials is paramount when crocheting for babies, prioritizing softness, warmth, durability, and safety.
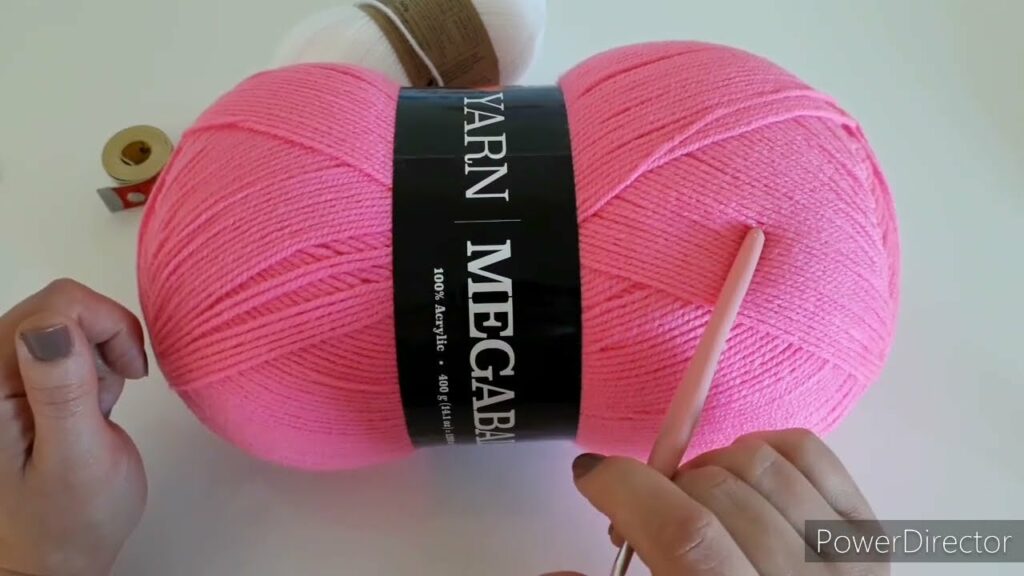
- Yarn: The Foundation of Comfort and Care!
- Fiber (Prioritize Baby-Safe!):
- Baby-Specific Yarns: Many brands offer acrylic or acrylic/nylon blends specifically designed for babies. These are often incredibly soft, anti-pilling, hypoallergenic, and most importantly, machine washable and dryable.
- Superwash Merino Wool (Baby/DK Weight): Excellent for its luxurious softness, superior warmth-to-weight ratio, breathability, and machine washability.
- Organic Cotton: Soft, breathable, and good for warmer climates or babies with very sensitive skin, but less warm than wool or acrylic.
- Avoid: Any yarn that feels scratchy, sheds excessively (like mohair for newborns), or contains small, loosely attached fibers that could be ingested.
- Weight:
- DK (Double Knitting / Category 3) or Sport (Category 2): These weights are generally ideal for baby garments, creating a fine, soft, and comfortable fabric without too much bulk.
- Worsted (Category 4): Can be used for a slightly quicker-working, chunkier coat, offering extra warmth.
- Color Palette: Traditional baby pastels (mint, lavender, baby blue, pale pink, lemon yellow), classic neutrals (cream, white, grey, beige, soft navy), or more vibrant hues can all look beautiful.
- Quantity: Baby coats require a good amount of yarn. Expect to need 500-1000+ yards depending on the specific size, yarn weight, and desired coat length. Always consult your chosen pattern’s specific recommendations.
- Fiber (Prioritize Baby-Safe!):
- Crochet Hook:
- Consult your chosen yarn label for a suggested hook size (e.g., 3.5mm, 4.0mm, 4.5mm, 5.0mm).
- Crucial for Garments: Your actual hook size will be determined by achieving the correct gauge for your pattern. You will almost certainly need to adjust your hook size (up or down by half a size) to ensure the proper fit, comfortable drape, and desired fabric density.
- Other Notions:
- Stitch Markers: Essential for marking increase/decrease points and the beginning/end of rows.
- Tapestry Needle: For neatly weaving in all yarn ends and seaming the panels.
- Scissors.
- Measuring Tape: For frequent measurements during construction.
- Buttons (6-12 small, baby-safe buttons): This is a critical safety component. Choose buttons that are securely attached (consider reinforcing with extra stitches) and larger than a child’s windpipe diameter (approx. 1.25 inches or 3.2 cm) to prevent choking hazards. Flat, smooth buttons are generally safer.
- Sewing Needle & Matching Strong Thread: To securely attach the buttons.
Understanding Sizing & Gauge (ABSOLUTELY CRITICAL for Garments!)
Accurate sizing is paramount for a comfortable, well-fitting, and functional baby coat. Babies grow quickly, so consider sizing up slightly if you want it to last longer.
General Baby Coat Sizing (Approximate Measurements):
| Size | Approx. Chest Circ. | Approx. Finished Length (Shoulder to Hem) | Approx. Sleeve Length (Underarm to Cuff) |
|---|---|---|---|
| Newborn | 16 inches | 9-10 inches | 5-6 inches |
| 0-3 Months | 18 inches | 10-11 inches | 6-7 inches |
| 3-6 Months | 20 inches | 11-12 inches | 7-8 inches |
| 6-12 Months | 22 inches | 12-13 inches | 8-9 inches |
| 12-18 Months | 24 inches | 13-14 inches | 9-10 inches |
| 18-24 Months | 26 inches | 14-15 inches | 10-11 inches |
Export to Sheets
Disclaimer: These are general averages. Always refer to the specific pattern’s measurements and sizing chart. Allow for 1-2 inches of “positive ease” (extra room beyond body measurements) for comfort and layering.
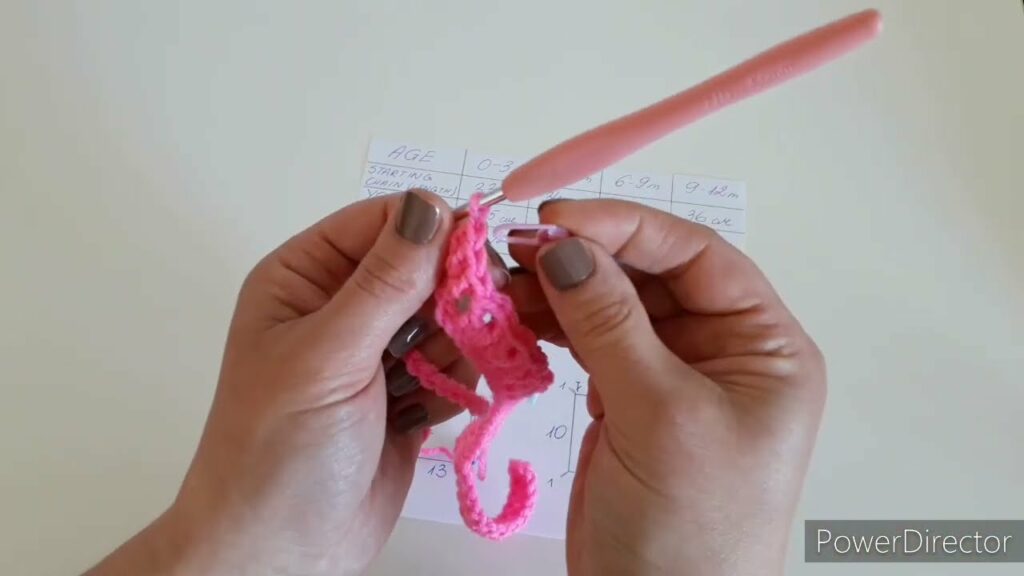
How to Make a Gauge Swatch (Do NOT Skip This Step!):
- Chain: Chain about 25-30 stitches, plus any turning chains (e.g., ch 3 for dc) as per your chosen main stitch pattern.
- Work: Crochet a square of at least 6×6 inches (15×15 cm) using the specific hook size you plan to use for the body of the coat. A larger swatch provides a more accurate measurement.
- Wash & Block: Fasten off your swatch. Crucially, wash and block your swatch exactly as you plan to treat the finished coat. This step relaxes the fibers and reveals the true stitch size and drape after washing, which can change significantly.
- Measure: Once dry, lay the swatch flat. Place a ruler over the center. Count how many stitches fit within 4 inches (10 cm) and how many rows fit within 4 inches (10 cm).
- Adjust:
- If you have more stitches per inch than your pattern (or desired gauge) states (your work is too tight), go up half a hook size and re-swatch.
- If you have fewer stitches per inch than your pattern states (your work is too loose), go down half a hook size and re-swatch.
- Repeat until your gauge precisely matches.
General Stitch Patterns for a Baby Coat:
- Main Body (for warmth and texture):
- Half Double Crochet (hdc): Creates a dense, warm fabric with good stitch definition. Excellent for a sturdy baby coat.
- Double Crochet (dc): Works up quicker, creating a slightly looser fabric with more drape.
- Moss Stitch (Linen Stitch): (
sc, ch 1, sk 1) Produces a dense, textured, and even fabric with lovely drape. - Seed Stitch (alternating sc/dc): Creates a simple, nubbly texture that looks great on baby garments.
- Ribbing (for cuffs, hem, and collar/front band):
- Front Post/Back Post Double Crochet (fpdc/bpdc): Creates a strong, elastic, and professional-looking ribbed edge that springs back well. Ideal for a structured hem and crisp front bands.
- Single Crochet in Back Loop Only (sc blo): A simpler, flexible ribbing option.
- Buttonholes: Typically created by chaining a few stitches and skipping the corresponding number of stitches in the row below.
Step-by-Step Construction: The Double-Breasted Baby Coat (Panel-Based Method)
This construction method involves crocheting individual flat panels (back, two fronts, two sleeves) and then seaming them together. This approach is excellent for creating a structured, coat-like garment with crisp edges and a tailored fit, which is particularly suited to the double-breasted style.

Phase 1: The Back Panel
- Starting Chain: Chain the number of stitches specified by your pattern for the lower edge of the back panel.
- Ribbed Hem: Work several rows of your chosen ribbing stitch (e.g., fpdc/bpdc or sc blo) to create a sturdy, elastic hem.
- Body: Continue working flat in your chosen main stitch pattern until the panel reaches the desired height before the armholes begin.
- Armhole Shaping: On both ends of the row, follow your pattern’s instructions to decrease stitches, creating the curve for the armholes.
- Shoulder/Neck Shaping: Continue working flat, shaping the shoulders and the back neck opening (if any) as per your pattern.
- Fasten off, leaving a long tail for seaming if desired.
Phase 2: Front Panels (Make 2 – Left & Right)
These panels are crucial for the double-breasted design and will be wider than normal front panels to accommodate the overlap.
- Starting Chain & Ribbed Hem: Similar to the back panel, chain and work the ribbed hem to match the back.
- Body: Work flat in your main stitch pattern.
- Front Opening/Neckline Shaping: As you work up the body, your pattern will guide you on how to shape the front opening. This often involves gradually decreasing stitches along the inner front edge (the side that will overlap towards the center) to create the neckline opening. The outer edge of the panel will remain straight or be shaped subtly for the coat’s overall line.
- Armhole Shaping: Shape the armholes on the outer edge of each front panel to match the armholes on the back panel.
- Shoulder Shaping: Shape the shoulders to match the back panel’s shoulders.
- Fasten off, leaving long tails for seaming.
Phase 3: Sleeves (Make 2)
Each sleeve is typically worked flat and then seamed, or worked in the round from the cuff up.
- Starting Chain & Ribbed Cuff: Chain for the wrist circumference and work several rows of your chosen ribbing stitch for the cuff.
- Body: Continue working in your main stitch pattern.
- If working flat: Work in rows, increasing gradually along both edges to widen the sleeve towards the armhole.
- If working in the round: Join the cuff into a round, then work in continuous rounds, increasing periodically to widen the sleeve.
- Armhole Cap Shaping: Once the sleeve reaches the desired length from the cuff, follow your pattern’s instructions to decrease stitches at the top of the sleeve, creating the curve (cap) that will fit into the armhole.
- Fasten off, leaving a long tail for seaming.
Video Tutorial Part 1;
Phase 4: Assembly
This is where your individual panels come together to form the coat. Use your tapestry needle and a strong, invisible seaming method (like the mattress stitch) for a professional finish.
- Shoulder Seams: Align the shoulder edges of the front panels with the shoulder edges of the back panel. Seam them together securely.
- Sleeve Seams (if worked flat): Fold each sleeve in half lengthwise and seam the side edges together from the cuff to the armhole cap.
- Set-in Sleeves: Align the top of each sleeve cap with the armhole opening on the body of the coat. Carefully seam the sleeve caps into the armholes, distributing the stitches evenly.
- Side Seams: Align the side edges of the front panels with the side edges of the back panel. Seam them together from the armhole down to the hem.
Phase 5: Front Bands & Collar
These elements are essential for the double-breasted look and structure.
- Front Bands: These form the main front closure and button plackets. Pick up stitches evenly along the entire front opening (from hem up one front, around the back neck, and down the other front).
- Buttonholes: On one of the front bands (the overlap side), strategically place buttonholes as you work the band rows. Your pattern will specify the exact placement and size of the buttonholes (typically
ch 2, skip 2 stitches). - Work several rows of ribbing (or chosen stitch pattern) to create a sturdy, neat front edge and collar area.
- Buttonholes: On one of the front bands (the overlap side), strategically place buttonholes as you work the band rows. Your pattern will specify the exact placement and size of the buttonholes (typically
- Collar (if separate or shaped): The collar might be an extension of the front bands that is then folded back and stitched into place, or it might be crocheted separately in rows, shaped as desired, and then sewn onto the neckline/front bands.
Phase 6: Finishing Touches
These final steps elevate your handmade garment to a truly professional and safe standard.
- Weave in All Ends: Using your tapestry needle, meticulously weave in every single yarn tail. Secure them firmly by weaving them into existing stitches in different directions to prevent unraveling. This is crucial for a neat, durable, and baby-safe finish.
- Attach Buttons (Safety First!): Securely sew your chosen buttons onto the designated front band (the side without the buttonholes), aligning them perfectly with the buttonholes. This is the most critical safety step. Use strong thread, double-knot each stitch, and consider adding a small backing button on the inside for extra security. Ensure buttons are firmly attached and larger than a child’s windpipe diameter to prevent choking hazards.
- Blocking (ABSOLUTELY CRUCIAL for Garments!):
- Gentle Wash: Fill a basin with cool water and a small amount of mild, baby-friendly detergent. Gently submerge the coat and let it soak for 20-30 minutes. Do not agitate or wring.
- Remove Excess Water: Gently squeeze out excess water. Roll the coat in a clean, dry towel and press firmly to absorb as much moisture as possible.
- Shape & Dry: Lay the coat flat on blocking mats. Gently stretch and shape it to the correct finished dimensions (chest width, body length, sleeve length, collar/lapel shape). Smooth out any unevenness and define the edges. Use rust-proof T-pins to hold the shape firmly.
- Air Dry Completely: Allow the coat to air dry completely. Blocking is a transformative step that relaxes the fibers, evens out your stitches, enhances the drape, and gives your coat a beautifully polished, professional appearance.
Tips for Double-Breasted Baby Coat Success:
- Baby-Safe Yarn is Non-Negotiable: Always prioritize softness, hypoallergenic qualities, and ease of care. Avoid any potential irritants or choking hazards.
- Button Safety is Paramount: Double-check that all buttons are securely attached and are large enough not to be a choking risk.
- Gauge Precision: Absolutely vital for sizing baby garments. A slight deviation can significantly alter the finished size.
- Ample Overlap: Ensure the front panels overlap enough to provide good coverage and security, allowing for comfortable buttoning.
- Neat Buttonholes: Practice making clean, consistent buttonholes that don’t stretch excessively.
- Seaming Quality: For panel construction, neat and strong seams are crucial for both appearance and durability.
Care Instructions for Your Handmade Coat:
- Always follow your chosen yarn label’s specific care instructions. This is especially important for natural fibers.
- Reshape and Lay Flat to Dry: Gently reshape the coat while wet and lay it flat on a clean towel or drying rack to air dry completely. Pay extra attention to reshaping the collar, front bands, cuffs, and hem to ensure they retain their intended form. Do not hang, as this can stretch the fabric and distort the garment’s shape.
Video Tutorial Part2 ;
Creating a crocheted double-breasted baby coat is a truly rewarding endeavor. With its classic appeal and thoughtful construction, you’ll be crafting a beautiful, warm, and cherished garment that will wrap your little one in comfort and timeless style. Happy hooking! Sources