 by
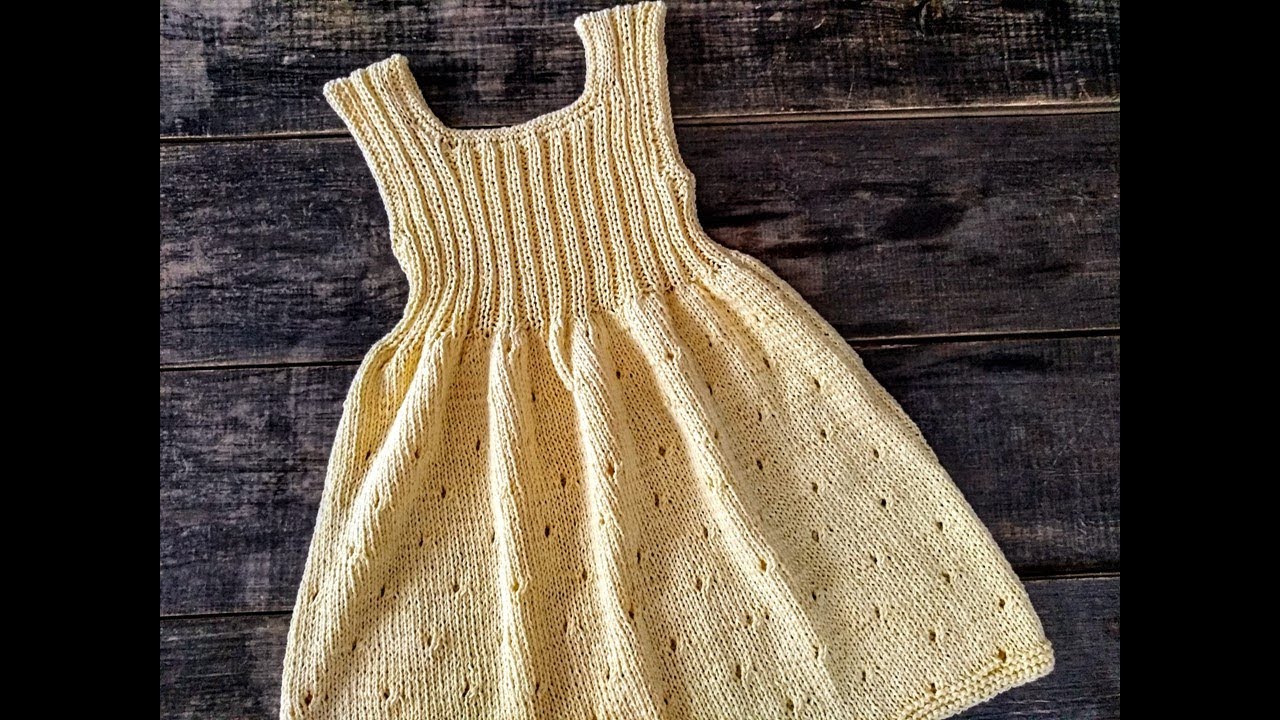
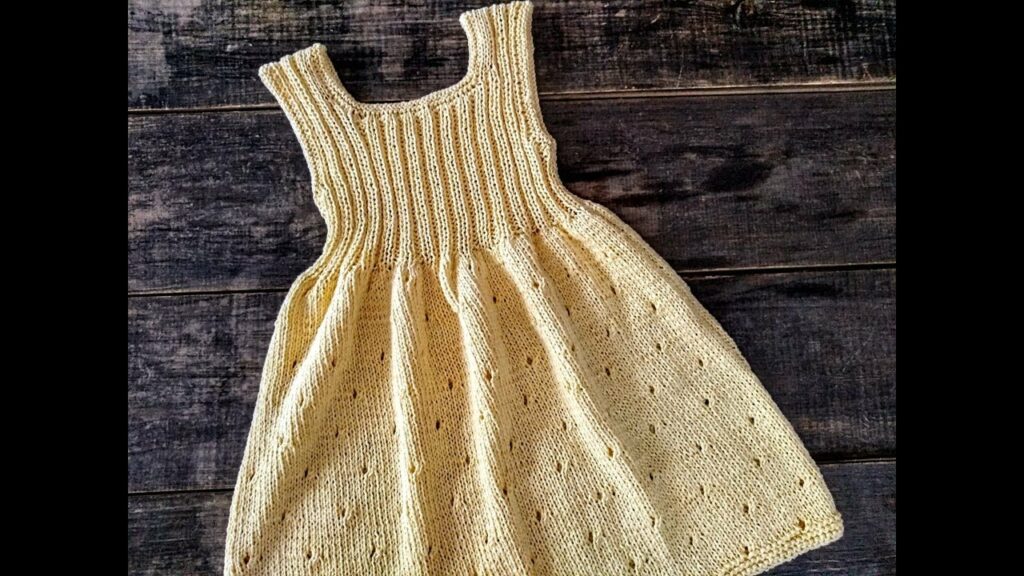
by There’s something truly magical about a handmade dress. It’s a garment crafted with warmth, intention, and a unique touch that no store-bought item can replicate. If you’ve been yearning to knit a wearable piece but feel intimidated by complex patterns, you’re in the right place! This guide is designed to walk you through creating a VERY EASY knitted dress for girls, perfect for beginners and adaptable for three common sizes: 2, 4, and 6.
We’ll focus on straightforward construction, minimal shaping, and basic stitches to ensure a satisfying and successful project. Get ready to cast on and knit a dress that will be loved!
Why Knit a Very Easy Girl’s Dress?

This project isn’t just about making a dress; it’s about building confidence and enjoying the process:
- Beginner-Friendly Garment: This is an excellent “first wearable” project beyond simple scarves or blankets. The flat panels and basic shaping provide a gentle introduction to garment construction.
- Quick & Gratifying: Because of its smaller size and simplified design, this dress works up much faster than adult garments, offering satisfying results in a shorter timeframe.
- Perfect for Gifting: A handmade knitted dress is a deeply thoughtful, personalized, and cherished gift for birthdays, holidays, or baby showers.
- Customizable Cuteness: Even with basic stitches, you have endless possibilities for personalization through color choices, simple striping, or adorable embellishments.
- Practicality & Comfort: You get to choose soft, durable, and easily washable yarns – essential for active kids and busy parents.
- Skill Building: You’ll practice fundamental knitting techniques like casting on, knitting, purling, basic increases and decreases for shaping, and seaming, all crucial skills for future projects.
Understanding the “Very Easy” Dress Aesthetic
The secret to a “very easy” knitted dress lies in streamlining the design and embracing the simplicity of basic stitches.
Simplicity in Design
Think straightforward construction: we’ll create a front panel and a back panel, which are then seamed together. Shaping will be kept to a minimum, primarily for the armholes and neckline, using simple bind-offs or basic decreases. The resulting silhouette is often a classic A-line or a simple straight shape, allowing the yarn and stitch texture to shine.
Yarn Selection: Comfort, Drape, Durability & Washability
Choosing the right yarn is paramount for a comfortable and practical dress.
- Weight:
- Worsted (Category 4): Highly recommended for this project. It’s easy to work with, creates a good fabric weight for dresses, and helps the project progress at a reasonable speed.
- DK (Double Knitting, Category 3): Can also be used for a slightly lighter, more delicate dress, but it will require more stitches for the same width.
- Fiber:
- High-Quality Acrylics (especially “baby” or “soft” blends): A top choice for children’s clothing. Modern acrylics are incredibly soft, durable, often anti-pilling, available in a vast array of colors, generally hypoallergenic, and most importantly, machine washable and dryable – essential for kids’ clothes!
- Superwash Merino Wool or Blends: Offers excellent softness, warmth, and breathability with lovely drape. The “superwash” treatment makes it machine washable.
- Cotton or Cotton Blends: Great for warmer climates, providing breathability and a natural feel. Cotton holds stitch definition well and is generally washable.
- Drape is Important: For a dress to hang nicely, choose a yarn that isn’t too stiff. A test swatch will confirm its drape.
- Avoid: Very delicate fibers that require hand-washing only (unless that’s your preference), non-superwash wool (if you need machine washability), scratchy yarns, or novelty yarns that could be uncomfortable or pose a hazard.
Needle Size
Start with the needle size recommended on your chosen yarn label. However, be prepared to adjust your needle size based on your gauge swatch to achieve the correct fabric and dimensions.
Stitch Patterns: Focus on Simplicity & Flow
For “very easy,” we’ll stick to the knitting basics.
- Garter Stitch: This is the simplest stitch: you just knit every row! It creates a reversible, slightly stretchy fabric with horizontal ridges that lies flat without curling. An entire dress in garter stitch can be charmingly simple.
- Stockinette Stitch: This creates the classic “V” pattern (knit on the right side, purl on the wrong side). It’s smooth and soft but tends to curl at the edges. If using Stockinette for the main body, you’ll need to add a few stitches of garter stitch (or K1P1 ribbing) at the bottom hem, armholes, and neckline to prevent curling.
- Recommended: For the absolute easiest, choose Garter Stitch throughout.
- Avoid: Complex cables, intricate lace patterns, or very textured stitches that involve a lot of counting or unusual stitch manipulations.
Design Elements
- Construction: The dress will be made from two separate panels (front and back) that are knitted flat and then seamed together.
- Neckline: A simple wide round neck, achieved by binding off a central section of stitches.
- Armholes: Created by binding off a few stitches at the beginning of rows, making a simple, straight cut.
- Length: Typically above-knee to knee-length, but easily customizable.
Planning Your Very Easy Knitted Dress Project
Careful planning, especially regarding sizing and gauge, is key to a successful project.
- Size Selection & Measurements (Approximate Guidance for Sizes 2, 4, 6):
- Crucial: Always use the girl’s actual chest measurement as your primary guide, as age-based sizing can vary greatly.
- Approximate Finished Chest Circumferences (with ease):
- Size 2: To fit a finished chest of approximately 22-24 inches (56-61 cm).
- Size 4: To fit a finished chest of approximately 24-26 inches (61-66 cm).
- Size 6: To fit a finished chest of approximately 26-28 inches (66-71 cm). (Note: These measurements include typical positive ease for comfort.)
- Approximate Finished Length (shoulder to hem):
- Size 2: Approximately 18-20 inches (46-51 cm).
- Size 4: Approximately 20-22 inches (51-56 cm).
- Size 6: Approximately 22-24 inches (56-61 cm). (These are general guidelines. Adjust length as desired.)
- Pattern Selection (ESSENTIAL!):
- Look specifically for knitting patterns labeled “beginner,” “easy,” “flat knit,” or “seamed” dress patterns for girls. Websites like Ravelry (filter by skill level), yarn brand websites (e.g., Lion Brand, Bernat), and knitting blogs offer many free and paid options.
- Look for: Clear, step-by-step instructions, minimal shaping, simple stitch repeats, CRITICALLY, comprehensive gauge information (stitches and rows/rounds per inch/cm), and helpful photos.
- Gauge Swatch (ABSOLUTELY NON-NEGOTIABLE!):
- This is the single most critical step in knitting a garment that fits! For children’s sizes, even a slight difference in your tension (gauge) can lead to a significant difference in the final fit.
- Knit a large swatch (at least 6×6 inches / 15×15 cm) using your chosen yarn and needles in the main stitch pattern (Garter or Stockinette) that you will use for the dress.
- Crucial Step: Wash and block your swatch exactly as you intend to wash and block the finished dress. Yarn can change significantly after laundering (e.g., stretch, bloom, or slightly shrink), and this will directly affect the final fit and drape.
- Measure your stitches and rows per inch/cm accurately. If your gauge doesn’t match the pattern’s, adjust your needle size (go up for fewer stitches per inch/cm, down for more stitches per inch/cm) until it matches. Even a small gauge error will result in a large sizing error for the dress.
Materials You’ll Need
- Yarn: (As detailed in the “Aesthetic” section). The quantity will vary greatly depending on your chosen size, desired length, and yarn weight. Typically, you’ll need 300-600 yards (275-550 meters) for these sizes. Always check your pattern’s specific yarn requirements and ensure you purchase enough from the same dye lot.
- Knitting Needles: The size recommended by your pattern or yarn label, adjusted based on your gauge swatch. You’ll likely need straight needles or circular needles (for working flat, back and forth).
- Notions:
- Stitch Markers: Optional but helpful for marking edges or specific points.
- Tapestry Needle (or blunt yarn needle): Essential for neatly weaving in all yarn ends and for seaming your panels.
- Scissors.
- Measuring Tape: Your constant companion for checking gauge and ensuring your panels are the correct dimensions as you knit.
- Blocking Mats & T-pins: Highly recommended for professional finishing.

Key Knitting Techniques for a Very Easy Knitted Dress
You’ll be using fundamental knitting stitches and basic shaping methods.
- Casting On (CO): How you begin your knitting. The Long-Tail Cast-On is a popular choice for its stretchiness and neat edge.
- Knit Stitch (K): The most basic knitting stitch.
- Purl Stitch (P): The other basic knitting stitch, which creates the reverse of a knit stitch.
- Binding Off (BO): How you end a row and secure your stitches.
- Basic Increases (Optional, for A-line shaping):
KFB (Knit Front and Back): Knits into the front loop, then the back loop of the same stitch, increasing by one stitch.M1L (Make One Left) / M1R (Make One Right): Creates a new stitch from the strand between two stitches.
- Basic Decreases (for Neckline & Armholes):
K2tog (Knit Two Together): Knits two stitches together as one, creating a right-leaning decrease.SSK (Slip, Slip, Knit): Slips two stitches knitwise, then knits them together through the back loop, creating a left-leaning decrease.
- Seaming: The process of joining your finished knitted pieces. The Mattress Stitch is highly recommended for creating neat, almost invisible vertical seams.
- Weaving in Ends: Crucial for a neat and durable finish.
Step-by-Step Construction (Conceptual Guide – Two-Panel Seamed)
This guide outlines the general progression for a very easy knitted dress, using two flat panels that are seamed. Remember to always refer to your specific pattern for exact stitch counts, row counts, and detailed instructions, as these conceptual numbers are illustrative.
General Notes for All Sizes:
- Gauge is paramount! Use the provided stitch counts after achieving the correct gauge.
- Use stitch markers if your pattern suggests, or to help keep track of rows if you like.
- Always check your measurements against the planned finished dimensions as you knit.
Illustrative Sizing Guidance (Approximate Stitch Counts & Lengths based on a hypothetical gauge of 20 stitches and 28 rows per 4 inches in Garter/Stockinette):
- Size 2: Requires approximately 55 stitches per panel for ~22 inches total finished chest circumference.
- Size 4: Requires approximately 60 stitches per panel for ~24 inches total finished chest circumference.
- Size 6: Requires approximately 65 stitches per panel for ~26 inches total finished chest circumference. (Please note: These are illustrative numbers only. Your actual stitch counts will depend entirely on your chosen pattern and your personal gauge after swatching!)
Part 1: The Back Panel
- Cast On:
- Using your determined needle size and yarn, cast on the required number of stitches for your chosen size (e.g., 55 sts for Size 2, 60 sts for Size 4, 65 sts for Size 6).
- Work the Body:
- If using Garter Stitch: Knit every row.
- If using Stockinette Stitch: Knit all stitches on Right Side (RS) rows, Purl all stitches on Wrong Side (WS) rows. To prevent curling, you may want to add a small border: knit the first 2-4 stitches and the last 2-4 stitches of every row (this creates a garter stitch border that lies flat).
- Work straight in your chosen stitch pattern until the piece measures:
- Size 2: Approximately 14 inches (36 cm) from the cast-on edge.
- Size 4: Approximately 15 inches (38 cm) from the cast-on edge.
- Size 6: Approximately 16 inches (41 cm) from the cast-on edge. (This is the length before you start shaping for the armholes).
- Shape Armholes (Very Easy Method):
- At the beginning of the next 2 rows, Bind Off a few stitches (e.g., BO 3 stitches at the beginning of the next 2 rows).
- Continue knitting straight in your chosen stitch pattern until the armhole measures:
- Size 2: Approximately 4-4.5 inches (10-11.5 cm) from the bind-off edge.
- Size 4: Approximately 4.5-5 inches (11.5-12.5 cm) from the bind-off edge.
- Size 6: Approximately 5-5.5 inches (12.5-14 cm) from the bind-off edge.
- Shape Neckline & Shoulders:
- This step will involve binding off stitches for the back neck and then knitting each shoulder separately.
- Work to the center of your panel. Bind Off a central section of stitches for the back neck opening.
- Finish each shoulder section separately. For a slightly rounded neckline, you might bind off a few stitches at the neck edge on the next row or two.
- Work until the shoulder section measures the same as the total armhole depth. Bind off the remaining shoulder stitches.
Part 2: The Front Panel
- Cast On: Cast on the exact same number of stitches as you did for the back panel for your chosen size.
- Work the Body:
- Work in the same stitch pattern as the back panel for the exact same length before armhole shaping.
- Shape Armholes:
- Shape the armholes identically to the back panel by binding off the same number of stitches.
- Shape Neckline (Lower than Back):
- Continue knitting until the armhole measures:
- Size 2: Approximately 2.5-3 inches (6.5-7.5 cm) from the bind-off edge.
- Size 4: Approximately 3-3.5 inches (7.5-9 cm) from the bind-off edge.
- Size 6: Approximately 3.5-4 inches (9-10 cm) from the bind-off edge. (This is the length before you start the front neck bind-off, which is typically lower than the back neck).
- Bind Off a central section of stitches for the front neck opening (this section is usually wider than the back neck).
- Work each shoulder section separately. Continue binding off a few stitches at the neck edge on the next few rows to create the curve of the front neckline.
- Work until the shoulder section matches the total length of the back panel (from cast-on to shoulder top). Bind off the remaining shoulder stitches.
- Continue knitting until the armhole measures:
Part 3: Finishing Your Dress
- Blocking (Highly Recommended):
- Gently wash your two finished panels according to your yarn’s care instructions.
- Lay them flat on blocking mats. Pin them to the exact finished dimensions you planned for your chosen size (or slightly larger, according to the desired ease). Allow them to dry completely. Blocking evens out your stitches, enhances drape, and makes seaming much easier and neater.
- Seaming:
- Lay your front and back panels with their right sides facing up.
- Shoulder Seams: Align the shoulder edges of the front and back panels. Using your tapestry needle and a length of yarn, join them using the Mattress Stitch. This stitch creates a neat, almost invisible seam.
- Side Seams: Align the side edges of the front and back panels. Join them using the Mattress Stitch, starting from the bottom hem and working upwards, leaving open the sections designated for the armholes.
- Neckline & Armhole Edging (Optional but Recommended):
- Neckline: Using your knitting needles, pick up stitches evenly around the entire neckline opening (refer to a pattern or a tutorial for picking up stitches). Work a few rows of Garter Stitch (knit every row) or K1P1 ribbing to create a neat border. Bind off loosely.
- Armholes: Repeat the process for the armholes, picking up stitches evenly around each opening, working a few rows of garter stitch or ribbing, and binding off loosely.
- Weave in All Ends: Using your tapestry needle, securely weave in any remaining yarn tails. Ensure they are neatly hidden within the fabric.
Tips for Success
- Read the Pattern Meticulously: Even for a very easy project, read through all instructions before starting. Understanding the flow prevents mistakes.
- Don’t Skip the Gauge Swatch! This cannot be overemphasized. It’s the most critical step for achieving a correctly sized garment.
- Count Your Stitches! Regularly verify your stitch counts at the end of each row. Catching errors early saves significant time and frustration later.
- Use Stitch Markers! While optional for simple patterns, they can be helpful for marking edges or specific shaping points.
- Choose Child-Friendly Yarn: Always prioritize softness, durability, and washability.
- Blocking is Your Friend: It truly transforms the finished piece, making stitches even, enhancing drape, and setting the final shape for a professional look.
- Learn Mattress Stitch: It’s a game-changer for knitting seams, making them almost invisible.
Caring for Your Knitted Dress
Proper care will ensure your handmade dress remains beautiful and comfortable for years to come:
- Follow Yarn Label Instructions Strictly: This is your primary guide for appropriate washing and drying methods for your specific yarn.
- Gentle Washing: Machine wash on a gentle or delicate cycle (if your yarn is machine washable) with cool water. If your yarn is not superwash, hand wash gently in cool water with a mild detergent.
- Reshape and Lay Flat to Dry: Gently squeeze out excess water (never wring or twist the garment!). Reshape the dress back to its original dimensions and lay it flat on a clean towel or a mesh drying rack to air dry completely.
- Never Hang Wet: The weight of a wet knitted garment will cause it to stretch and distort significantly if hung to dry.
Conclusion
Creating a “VERY EASY” knitted dress for girls is a wonderfully satisfying project, perfectly suited for beginners eager to knit their first garment. By focusing on simple stitches, flat panels, and basic finishing techniques, you’ll gain confidence and produce a beautiful, comfortable, and unique dress for the special girl in your life. Embrace the simplicity, enjoy the rhythm of the needles, and delight in the cherished garment you create!
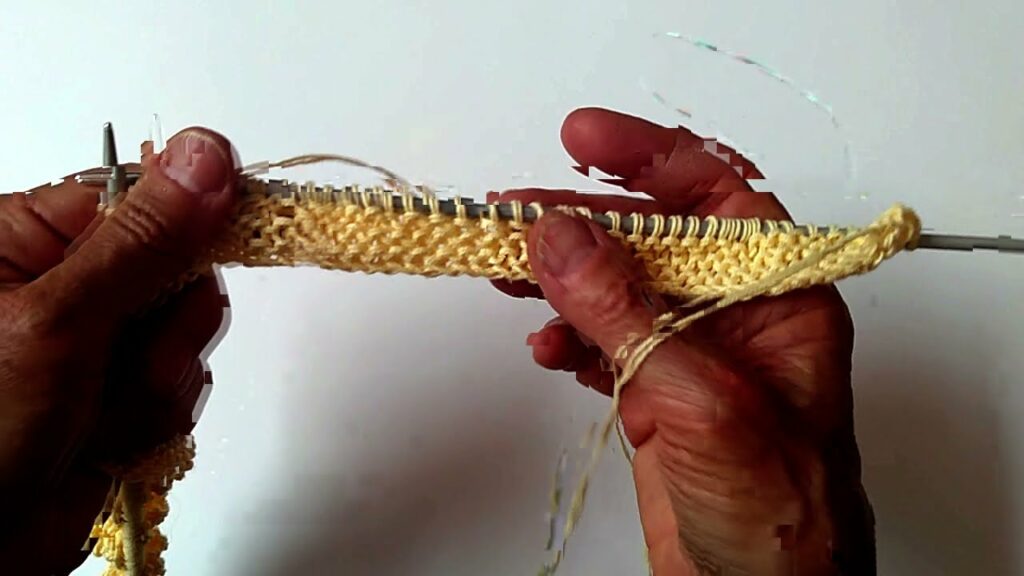
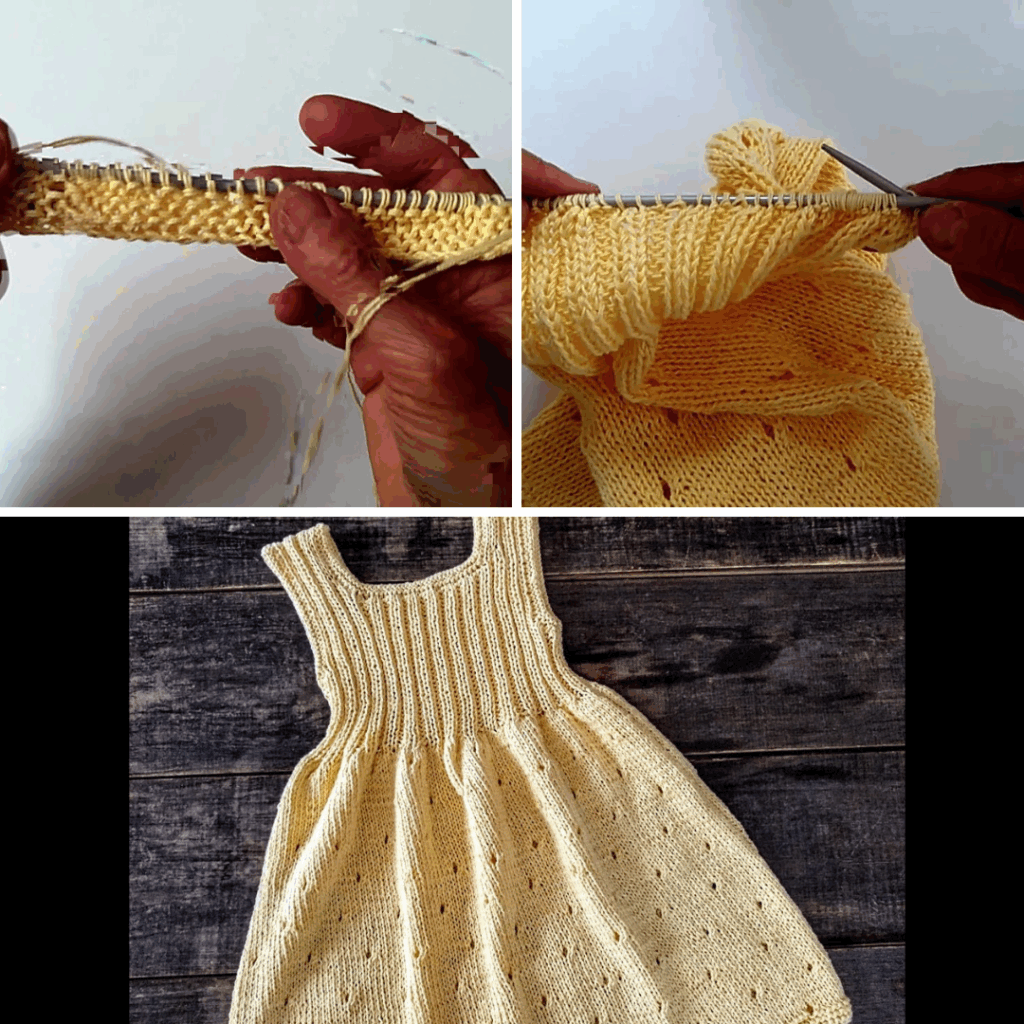
Video Tutorial ;