 by
by There’s a special kind of magic in creating garments for the little ones in our lives. The swiftness with which tiny clothes come together, combined with the immense joy they bring, makes them perennial favorites among crafters. If you’ve been searching for a project that embodies speed, simplicity, and undeniable charm, then prepare to discover the Galy Crochet Dress.
While the phrasing might hint at a “knitted dress,” rest assured, we’re diving headfirst into a crochet delight! The Galy dress is renowned in crochet circles for being a remarkably quick and easy pattern that results in a beautiful, comfortable, and playful garment perfect for girls of all ages. The accompanying emojis ✨🌺✨🎈 suggest a design that is bright, cheerful, possibly airy, and adorned with pretty details – all achievable with straightforward crochet techniques.
What is the Galy Crochet Dress? (Key Features & Design Philosophy)

The “Galy” style, often found across various designers, encapsulates a specific philosophy for children’s wear:
- The “Galy” Aesthetic ✨🌺✨:
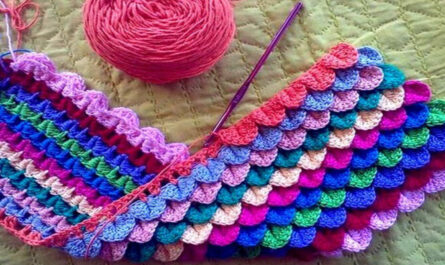
- Light & Airy: Often made with stitches that create a beautiful drape and breathable fabric, perfect for spring, summer, or layering.
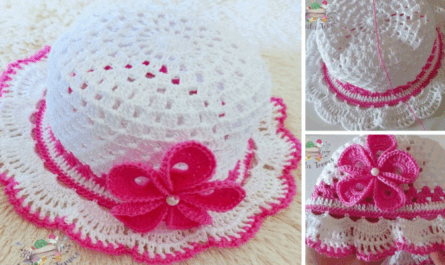
- Pretty Details: The “🌺” suggests the incorporation of subtle floral motifs, simple picot edgings, shell stitches, or perhaps even an actual crocheted flower appliqué.
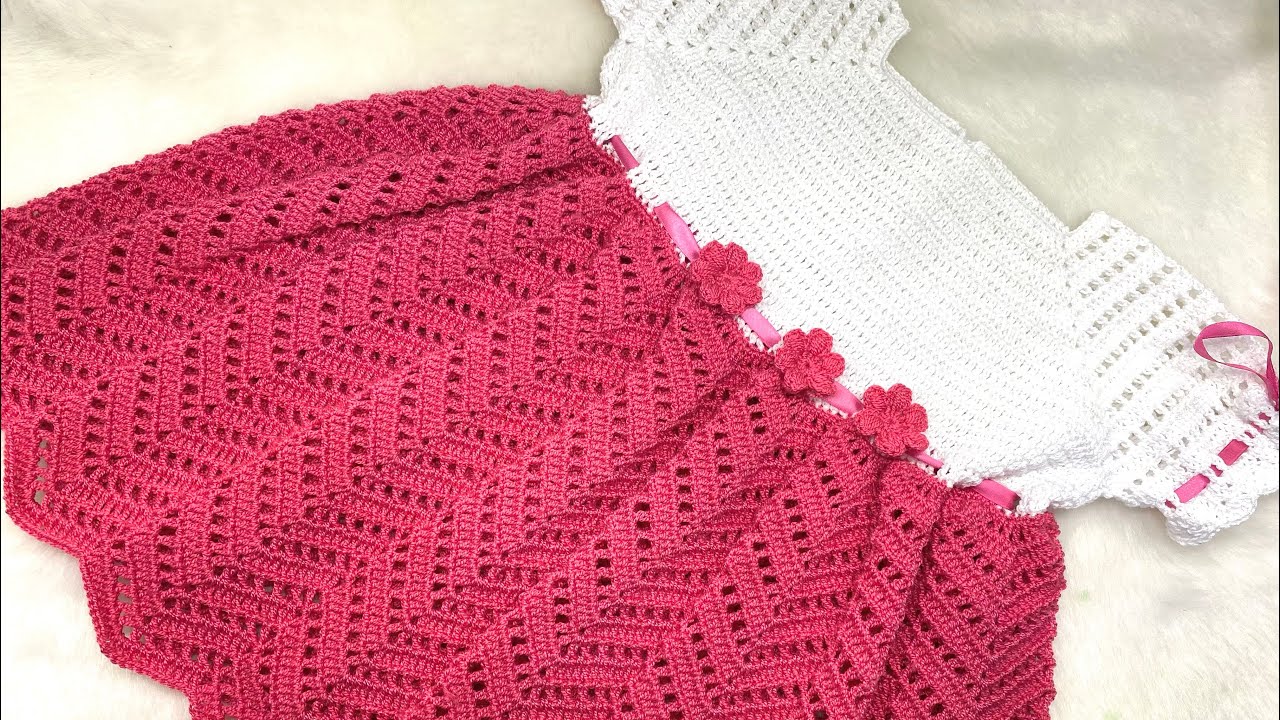
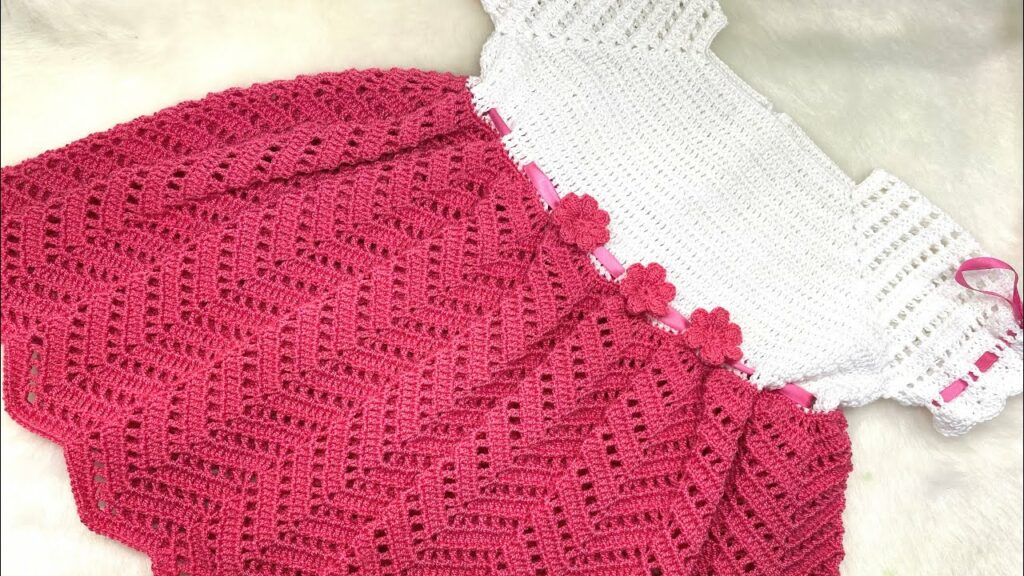
- Comfortable Movement: Designed with a comfortable fit that allows for plenty of play and unrestricted movement, typically an A-line shape that flares gently from the yoke.
- Bright & Cheerful: The “✨” and “🎈” hints at vibrant color possibilities, making it a truly joyful garment.
- “Quick & Easy” Explained 🎈:
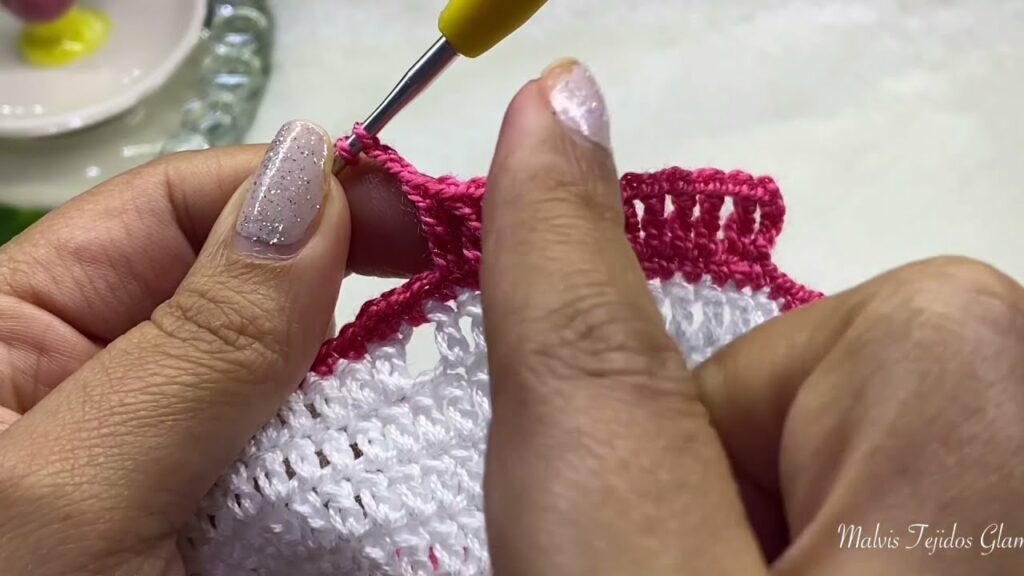
- Top-Down Construction: This is the hallmark of many “quick and easy” crochet dresses. You start at the neckline and work downwards in rounds. This means minimal to no seaming for the main body of the dress, saving significant time.
- Simple Stitch Repeats: The pattern typically relies on basic crochet stitches (like double crochet, half double crochet, or simple shell stitches) worked in repetitive rounds. Once you get the hang of the repeat, it’s smooth sailing.
- Clear Shaping: Increases are strategically placed to form the yoke (shoulder/chest area) and then the A-line body, making the shaping intuitive rather than complex.
- Accessible Techniques: No advanced or obscure stitches are usually required, making it suitable for confident beginners and a relaxing project for experienced crocheters.
- “For Girls”: Comfort & Playability:
- Child-Friendly Design: The fit is generally designed to accommodate a child’s active lifestyle – not too tight, good drape, and often with comfortable armhole openings.
- Diaper-Friendly (for smaller sizes): For baby and toddler sizes, the A-line shape provides ample room for diapers.
- Grow-With-Me Potential: Some top-down designs can be easily adjusted for length as the child grows.
Why Choose the Galy Dress Pattern? (Benefits)
- Instant Gratification: Witness your dress come to life surprisingly fast, offering a huge boost of creative satisfaction.
- Beginner-Friendly: Its straightforward nature makes it an excellent choice for those new to garment crocheting.
- Customization Galore: The simple base allows for endless personalization in terms of color, hemline, sleeve additions, and embellishments.
- Perfect Gift: A handmade Galy dress is a truly cherished and unique gift for birthdays, baby showers, or just because.
- Comfort & Playability: Kids love comfortable clothes, and this dress is designed for ease of movement.
- Heirloom Potential: A well-made Galy dress can become a beloved keepsake, perhaps even passed down.
Materials: Gathering Your Supplies
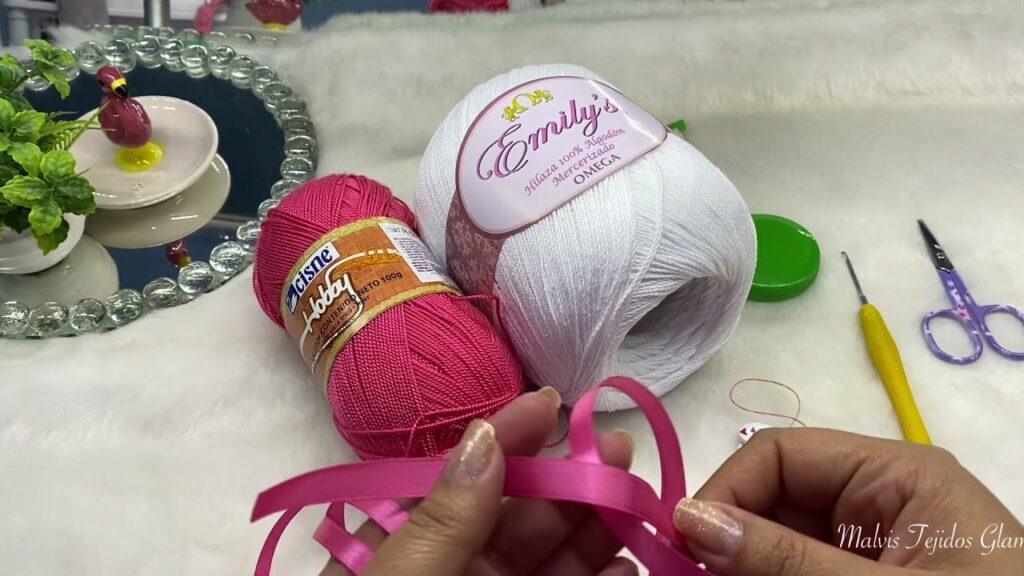
- Yarn:
- Fiber: Choose soft, breathable, and easily washable yarns. Cotton, cotton blends, bamboo blends, or high-quality baby acrylics are excellent choices for drape, comfort, and durability.
- Weight: DK (Double Knitting, Category 3) or Sport (Category 2) are often ideal, creating a lightweight yet sturdy fabric with beautiful stitch definition. Worsted (Category 4) can also work for a quicker, denser dress.
- Quantity: Check your specific Galy pattern, but typically ranges from 200-600 yards (180-550 meters) depending on the size.
- Colors: Embrace the ✨🌺✨🎈 by choosing vibrant hues, cheerful pastels, or even a fun variegated yarn.
- Crochet Hook: The size recommended by your pattern to achieve the correct gauge. Ensure it creates a fabric with good drape – not too stiff, not too gappy.
- Notions:
- Stitch Markers: Essential for marking the beginning of rounds and separating yoke sections.
- Tapestry Needle: For weaving in ends.
- Scissors.
- Measuring Tape: Crucial for checking gauge and garment dimensions.
- Buttons or Ties (for Yoke Closure): Some Galy patterns have a small opening at the back of the neck/yoke for easier dressing, secured with buttons or ties.
- Blocking Mats & T-pins: For shaping and setting the final garment.
Essential Techniques: Your Crochet Toolkit
The Galy dress builds on fundamental crochet skills:
- Basic Stitches: Chain (ch), Slip Stitch (sl st), Single Crochet (sc), Half Double Crochet (hdc), Double Crochet (dc). Some patterns might incorporate simple shell stitches or clusters.
- Working in the Round: The entire dress is typically worked this way, from the neckline down.
- Increasing Stitches: Primarily used in the yoke to create the flat top and then to expand for the body.
- Creating Armholes: A key step where stitches are skipped or chained to form the arm openings, then the body is joined back together.
- Buttonholes (if applicable): Small chain spaces for closures.
- Edging: For neatening the neckline, armholes, and hem (often simple SC, picot, or shell stitches).
- Blocking: Critical for evening out stitches, enhancing drape, and achieving the correct final size.
Construction Journey: Bringing the Galy Dress to Life (Conceptual Guide)
As a “quick and easy” pattern, the Galy dress typically follows a streamlined top-down approach:
Part 1: The Yoke (Top-Down)
- Start at the Neckline: Begin with a foundation chain that forms the neckline circumference. This might be joined into a round, or worked flat with a small opening for a back closure.
- Initial Rounds: Work a few rounds in your chosen stitch, often increasing stitches evenly to begin forming the flat top of the yoke.
- Yoke Shaping: Continue increasing stitches in specific segments (e.g., corners for a square yoke, or evenly distributed for a circular yoke) over several rounds. This creates the flat panel that covers the shoulders and chest.
- Armhole Separation: This is where the magic happens! Once the yoke is wide enough to cover the shoulders and armpits, you’ll reach a round where stitches are set aside (or skipped with a chain) for the armholes. The remaining stitches for the front and back of the dress are then joined to form the body.
Part 2: The Dress Body
- Work Even or Increase Gradually: After separating for armholes, you’ll continue working in continuous rounds for the body of the dress.
- A-Line Shape (Optional): If the pattern calls for an A-line flare, you’ll perform gradual increases every few rounds. For a straight dress, you would simply work even.
- Length: Continue working until the dress reaches the desired length, from tunic to full dress.
Part 3: Finishing Touches
- Neckline Edging: If your neckline was worked flat, you’ll seam it. Then, pick up stitches (or work a round of SC) around the entire neckline for a neat border, possibly adding a picot or shell edging.
- Armhole Edging: Work a round or two of SC, HDC, or a decorative edging around each armhole.
- Hemline Edging: Finish the bottom of the dress with a neat border, often matching the neckline or armhole edging, or with a simple ruffled/shell design (perfect for the “🌺” touch!).
- Closures (if applicable): If your dress has a back neck opening, sew on buttons or add ties.
- Weave in All Ends: Meticulously weave in every single yarn tail using your tapestry needle. For children’s items, ensure all ends are completely secured.
- Blocking: Gently wet the finished dress, shape it according to your pattern’s schematic on blocking mats, and allow it to dry completely. Blocking is crucial for evening out stitches, relaxing the fabric, enhancing drape, and ensuring the dress lays beautifully.
Tips for Success: Ensuring a Beautiful Galy Dress
- Gauge is Paramount: For any garment, especially children’s clothing where fit matters, a gauge swatch is non-negotiable. It ensures your dress will be the correct size.
- Yarn Choice for Drape: Ensure your chosen yarn and hook combination create a fabric with good drape. A stiff fabric won’t be comfortable or flattering for a dress.
- Consistent Tension: Maintain even tension throughout for a smooth, professional-looking garment.
- Don’t Skip Blocking: It transforms your work, opening up stitch patterns and evening out any inconsistencies.
- Read the Pattern Thoroughly: Even if it’s “easy,” read the entire pattern before you start to understand the flow and any specific instructions.
Customization Ideas: Making Your Galy Unique
- Color Blocking: Create stripes or color-blocked sections in the body.
- Hemline Variations: Add a contrasting color ruffle, a lacy border, or a simple scalloped edge.
- Sleeve Options: While many Galy dresses are sleeveless, you could add short puff sleeves, cap sleeves, or even long sleeves.
- Embellishments: Sew on crocheted flowers (🌺), leaves, or small appliques. Embroider tiny details. Attach a pretty ribbon bow (🎀) to the neckline or hem.
Caring for Your Galy Dress
- Follow Yarn Label Instructions: Always refer to your specific yarn’s care guidelines.
- Machine Wash (if yarn allows): Many baby yarns are superwash and machine washable on a gentle cycle with cool water. Use a mesh laundry bag to protect the dress.
- Hand Wash (Recommended for Delicates): For very delicate stitches or added embellishments, hand wash gently in cool water with a mild detergent.
- Reshape and Lay Flat to Dry: Never wring or hang a wet crocheted dress, as this will stretch and distort its shape. Gently squeeze out excess water, reshape the dress, and lay it flat on a clean towel or a mesh drying rack to air dry completely.
Conclusion
The Galy Crochet Dress is more than just a pattern; it’s an invitation to experience the joy of creating a beautiful, comfortable, and utterly adorable garment with surprising speed and ease. Its top-down construction and simple techniques make it accessible to a wide range of crocheters, while its inherent charm and customizability ensure each finished dress is a unique celebration of childhood joy. So pick up your hook, embrace the ✨🌺✨🎈 spirit, and get ready to create a beloved piece that will be cherished! Sources
Video Tutorial ;