 by
by The crochet romper is a charming and practical garment that holds a special place in the handmade wardrobe. A single-piece outfit that combines a top and shorts or bloomers, rompers offer unparalleled comfort and ease of movement, making them a favorite for babies, toddlers, and even a stylish choice for adults. Whether you envision a playful outfit for a sunny day or a cozy layering piece, a handmade crochet romper offers boundless opportunities for customization and creative expression.
This detailed article will delve into the delightful world of crocheting rompers, exploring design considerations, essential techniques, and the satisfaction of creating a truly unique and functional garment.
The Allure of the Crochet Romper
- Practical & Stylish: For babies and toddlers, the one-piece design means no lost socks or tops riding up, offering convenience for parents and comfort for active little ones. For adults, rompers provide a chic, effortless outfit.
- Comfort Factor: The seamless flow of a romper allows for unrestricted movement, making it ideal for crawling, playing, or simply lounging. The soft drape of crochet fabric further enhances this comfort.
- Customizable Charm: From delicate lacework to bold textures, vibrant colors to subtle pastels, the design possibilities are endless. You can tailor every detail to the wearer’s personality and the occasion.
- Heirloom Potential: A lovingly crocheted romper, especially for a baby, often becomes a cherished keepsake, passed down through generations.
Designing Your Romper Dream: Key Considerations
Thoughtful planning is essential for a successful crochet romper, particularly due to its one-piece nature.
- Target Wearer:
- Baby/Toddler: This is the most common use for crochet rompers. Focus on supreme softness, ease of dressing (wide necklines, generous armholes, crucial crotch closures), and diaper accommodation. Safety is paramount (no small, detachable parts).
- Adult: Requires more complex shaping for the bust, waist, and hips to ensure a flattering fit. Drape and comfort remain key.
- Style & Silhouette:
- Legs: Short-shorts, bloomer-style (gathered at the leg opening), or knee-length. Consider the season and desired aesthetic.
- Top: Simple straps, a halter neck, short sleeves, flutter sleeves, or a full bodice (e.g., a tank top or short-sleeved top attached to the shorts).
- Neckline: Crew neck, V-neck, scoop neck, or a more decorative collar.
- Fit: Fitted, relaxed, or oversized? The romper should allow for comfortable movement.
- Yarn Choice: This significantly impacts comfort, drape, and wearability.
- Fiber:
- Cotton/Organic Cotton: Excellent for breathability, softness, and durability. Ideal for warm-weather rompers.
- Bamboo Blends: Known for their silky softness, beautiful drape, and cool feel, perfect for summer.
- Baby Acrylics: Often specifically designed to be ultra-soft, hypoallergenic, and machine washable, making them practical for babies.
- Superwash Merino Wool: Offers incredible softness and warmth without bulk, often machine washable, good for cooler climates or layering.
- Weight:
- Fingering/Sport (Categories 1-2): Creates a delicate, lightweight fabric, ideal for lacy or fine rompers.
- DK (Double Knitting, Category 3): A versatile choice, offering a good balance of drape, warmth, and working speed.
- Worsted (Category 4): Creates a more substantial and quicker-to-make romper, suitable for cooler weather.
- Colors: Playful brights, classic pastels, earthy neutrals, or bold stripes.
- Fiber:
- Closure System (Crucial for Babies!):
- Crotch Closures: Essential for easy diaper changes without undressing the entire baby. Options include:
- Buttons & Buttonholes: Small, flat buttons securely sewn onto a crocheted placket.
- Sew-on Snaps: Discreet and easy to use.
- No-sew Snaps/Poppers: Applied with a special tool, very durable.
- Shoulder Buttons/Snaps: Useful for easier dressing over the head, especially for newborns.
- Back Button Placket: For designs where the top opening needs to be wider.
- Crotch Closures: Essential for easy diaper changes without undressing the entire baby. Options include:
- Stitch Pattern:
- Balance of Drape & Density: For a romper, you want a fabric that isn’t too stiff, allowing for movement. Open, lacy stitches offer great drape and breathability. Denser stitches like single crochet (SC) or half double crochet (HDC) provide more structure but might need a larger hook or softer yarn to maintain drape.
- Texture: Shell stitches, V-stitches, ripples, or simple alternating stitches can add visual interest.
- Construction Method:
- Top-Down (Seamless): Start at the neckline/yoke and work downwards, splitting for armholes, then working the body, and finally splitting for leg openings. Often preferred for minimizing seams against skin.
- Bottom-Up: Start with the legs (either individually or joined), then join them to work the torso upwards, shaping for armholes and neckline.
- Panels & Seams: Crocheting front, back, and leg pieces flat, then meticulously seaming them together. Offers precise shaping but requires careful seaming techniques.
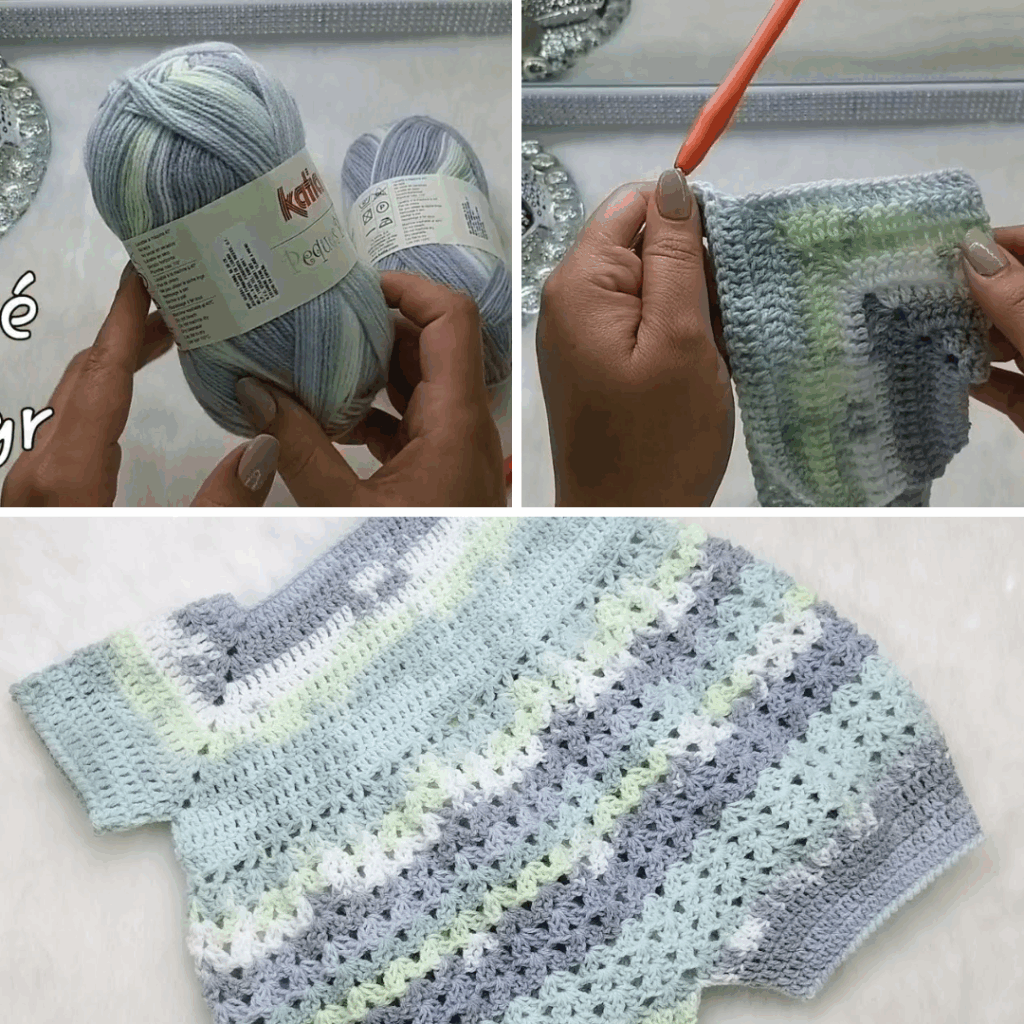
Materials: Your Romper Crafting Toolkit
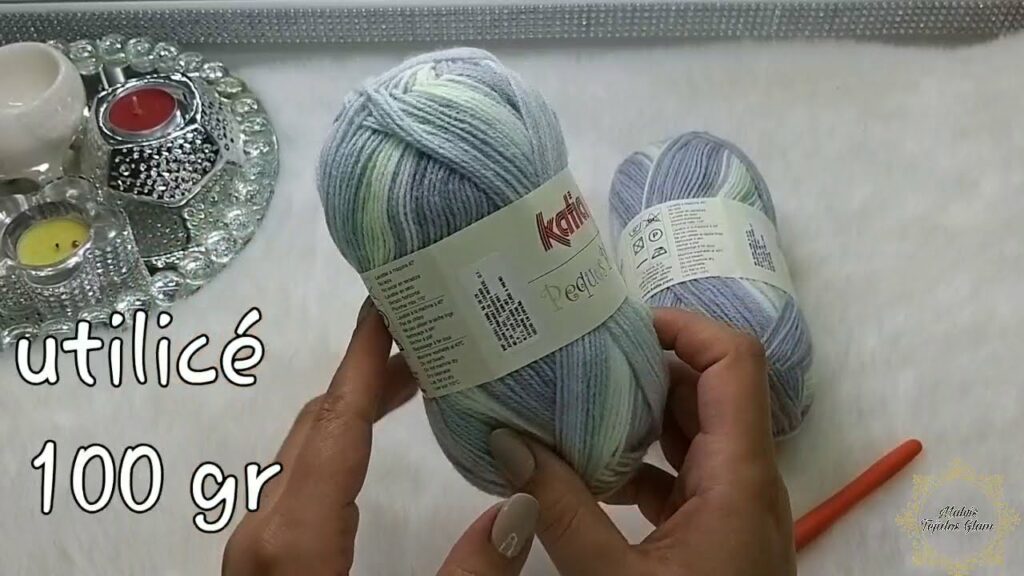
- Yarn: Your chosen colors, fiber, and weight. Ensure you have enough yardage, as rompers consume a fair amount of yarn.
- Crochet Hooks: The size(s) recommended by your pattern to achieve gauge.
- Stitch Markers: Indispensable for marking rounds, stitch counts, shaping points, and dividing sections for legs.
- Tapestry Needle (or Blunt Yarn Needle): Crucial for weaving in ends and seaming.
- Scissors.
- Measuring Tape: Essential for detailed body measurements, gauge swatching, and checking garment dimensions.
- Blocking Mats & T-pins: Highly recommended for shaping and setting the final garment, especially for drape.
- Buttons/Snaps: The size and quantity determined by your chosen closure system.
- Sewing Needle & Thread: For attaching sew-on snaps or buttons.
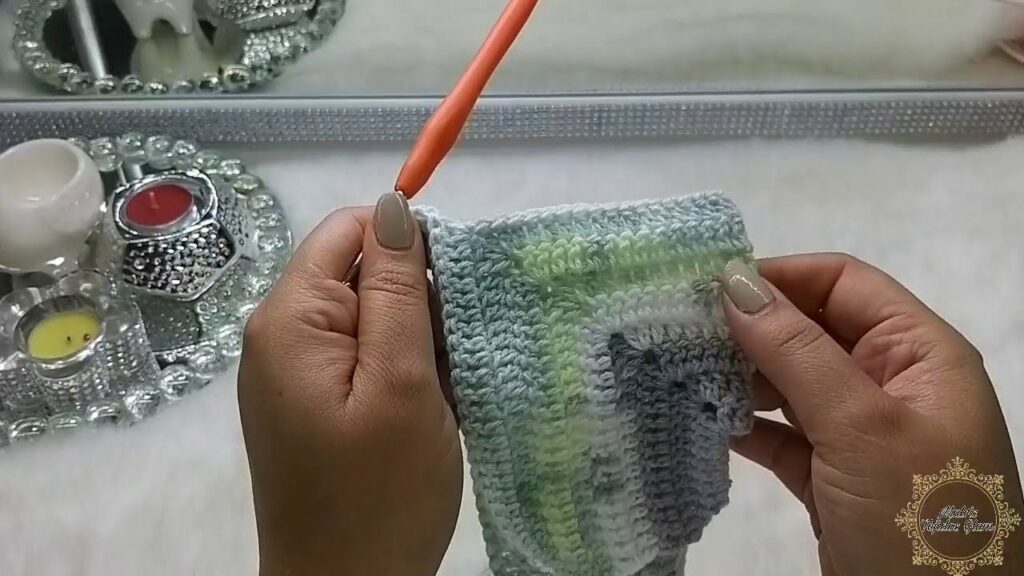
Essential Crochet Techniques for Rompers
You’ll utilize a comprehensive range of fundamental and garment-specific techniques:
- Foundation Chains/Foundation Single Crochet (FSC): For starting edges; FSC provides more elasticity.
- Basic Stitches: Chain (ch), Slip Stitch (sl st), Single Crochet (sc), Half Double Crochet (hdc), Double Crochet (dc).
- Working in Rounds vs. Rows: Depending on your construction method.
- Increasing Stitches: Extensive use for yoke shaping, hip curves, and leg circumference.
- Decreasing Stitches: For waist shaping, armholes, necklines, and leg tapering.
- Ribbing/Edging: For hems, leg openings, necklines, and armholes, providing structure and a neat finish.
- Buttonholes/Snap Plackets: Creating functional and neat openings or strips for closures.
- Seamless Joins (for Top-Down/Bottom-Up): Techniques to join work into rounds without noticeable seams.
- Blocking: The most critical finishing step. It transforms the fabric, evens out stitches, enhances drape, and sets the final shape and dimensions.
Planning Your Project: Laying the Foundation for Fit
- Detailed Sizing & Measurements:
- For babies/toddlers, refer to standard sizing charts (e.g., 0-3 months, 3-6 months). Take actual measurements of the chest, torso length (shoulder to crotch), thigh circumference, and desired leg length.
- For adults, take full bust, waist, hip, torso length (shoulder to natural waist, natural waist to crotch), and thigh circumference measurements.
- Understand “ease”: How much extra room do you want beyond body measurements for comfort and style? Rompers generally need more positive ease for movement.
- Gauge Swatch (The Golden Rule!):
- Crochet a substantial swatch (at least 6×6 inches / 15×15 cm) using your chosen yarn and hook in the main stitch pattern of your romper.
- Crucial Step: Wash and block your swatch exactly as you plan to wash and block the finished romper. Yarn and stitch patterns can change significantly after laundering and blocking, especially affecting drape, stretch, and size.
- Measure your stitches and rows per inch/cm accurately. Adjust your hook size if your gauge doesn’t match the pattern’s.
- Yarn Calculation: Based on your gauge and chosen size, calculate the necessary yardage. Always round up and consider buying an extra skein.
Construction Journey: Bringing Your Romper to Life (Conceptual Guides)
Method 1: Top-Down (Most Common for Seamless Baby Rompers)
- Yoke/Bodice: Start at the neckline, working in rows (for a back opening) or in the round (for a seamless pull-over). Increase stitches to form the yoke, accommodating the shoulders and chest.
- Divide for Armholes: Once the yoke reaches below the armpits, put sleeve stitches on hold. Join the remaining body stitches to work the torso in the round.
- Torso: Work the torso downwards, shaping with subtle decreases/increases for the waist and hips if desired.
- Split for Leg Openings: When the torso reaches the crotch, divide the stitches into two equal halves for the legs.
- Legs: Work each leg individually in the round, decreasing stitches gradually for tapering. Finish with a desired length and an edging.
- Crotch Closure: Create a placket with buttonholes or snap placement, joining the two leg openings across the crotch for easy diaper access.
Method 2: Bottom-Up
- Legs: Start by working each leg separately in the round from the hem up.
- Join Legs: Once legs are desired length, join them together to work the torso in the round.
- Torso: Work the torso upwards, shaping for waist/hips.
- Shape Armholes/Neckline: Divide work for front and back panels, shaping armholes and neckline by decreasing.
- Shoulder/Back Closures: Join shoulders. Add button bands or closures as needed at the shoulders or back.
Method 3: Panels & Seams
- Crochet Pieces: Work front, back, and two leg pieces flat in rows, shaping each piece precisely.
- Assembly: Meticulously seam the pieces together (using mattress stitch for invisible seams) for side seams, shoulder seams, and inner leg seams.
- Finishings: Add neckband, armhole edgings, leg edgings, and crotch placket/closures.
Finishing Touches: The Polish of Practicality
- Weave in All Ends: Meticulously weave in every single yarn tail. For baby items, ensure no loose ends could pose a hazard or irritate skin.
- Edgings: Neatly finish all raw edges (neck, armholes, leg openings, plackets) with slip stitch, single crochet, or a simple ribbed band.
- Blocking (The Most Critical Step!): This transforms your crochet romper.
- Gently wet your finished romper (or steam it).
- Carefully lay it out flat on blocking mats, shaping it to the correct measurements and emphasizing the intended drape and silhouette. Pin firmly with T-pins, ensuring leg openings are even.
- Allow to dry completely (this can take 24-48 hours for a larger garment). Blocking evens out stitches, relaxes the fabric, and sets the final shape and dimensions of your romper.
- Attaching Closures:
- Buttons: Securely sew small, flat, baby-safe buttons onto your plackets or shoulder tabs. Ensure they are firmly attached and pose no choking hazard.
- Snaps: Sew on snaps or use a tool to apply no-sew snaps, ensuring they are aligned correctly for a smooth closure.
Tips for Romper Success
- Gauge is Crucial: For a one-piece garment, accurate gauge is non-negotiable for a good fit.
- Yarn Choice Matters Immensely: For comfort, especially for babies, choose the softest, most washable yarn.
- Plan Closures Carefully: Envision how the romper will be put on and taken off, especially for diaper changes.
- Try It On (if applicable): For adult rompers or older children, try it on as you go to check shaping and fit.
- Prioritize Baby Comfort: For infant rompers, ensure there are no bulky seams, scratchy tags, or choking hazards.
- Don’t Skip Blocking: It makes a significant difference in the final look and drape.

Caring for Your Crocheted Romper
- Follow Yarn Label Instructions: Always refer to your specific yarn’s care guidelines for washing and drying.
- Gentle Wash Recommended: For most handmade crochet rompers, gentle hand washing in cool water with a mild detergent is safest. If your yarn is superwash, machine wash on a gentle cycle in a mesh laundry bag.
- Reshape and Lay Flat to Dry: Never wring, twist, or hang a wet crocheted romper, as this will stretch and distort its shape. Gently squeeze out excess water (rolling in a clean towel helps), reshape the romper to its original dimensions, and lay it flat on a clean towel or a mesh drying rack to air dry completely.
A crocheted romper is a wonderful blend of fashion and function, promising comfort and charm for its wearer. It’s a project that challenges your skills and rewards you with a truly unique, handmade garment filled with love. Sources
Video Tutorial ;