by
by Cozy & Chic: A Detailed Guide to Crocheting a Neck Sweater
A crocheted neck sweater is the perfect garment for adding warmth and style without the bulk of a full sweater. Often referred to as a dickey, neck warmer, or cowl sweater, this piece covers the neck, shoulders, and chest, providing a cozy layer that fits seamlessly under a coat, jacket, or blazer. It’s an incredibly practical accessory for transitional weather and an excellent project for any crocheter looking for a quick and satisfying make.
Whether you prefer a snug turtleneck, a relaxed cowl, or a classic V-neck, crocheting a neck sweater is a fantastic way to practice shaping, ribbing, and texture. This detailed article will guide you through all the design choices, essential techniques, and steps to create your own chic and cozy neck sweater.
Why Crochet a Neck Sweater?
- Ultimate Versatility: Wear it under a jacket to mimic a layered sweater, over a dress for a modern silhouette, or with a simple shirt to add a pop of color and texture.
- Quick & Portable: It’s a small project that works up much faster than a full sweater, making it perfect for weekend crafting or travel.
- Yarn-Efficient: It uses significantly less yarn than a full garment, making it a great way to use up leftover yarn or try out a more luxurious fiber.
- Skill Builder: It’s a wonderful project for practicing key garment techniques like working in the round, shaping a neckline, and creating different types of ribbing.
- Comfort Without Bulk: Provides all the warmth of a turtleneck or scarf without making you feel overheated or bulky.
Designing Your Neck Sweater: Key Considerations
Before you pick up your hook, think about the style and fit you want to achieve.
1. Style & Neckline: Your Statement Piece
- Turtleneck/High Neck: This style is knit with a tall, straight collar that can be folded down for extra warmth. It requires a dense stitch like single crochet or ribbing to hold its shape.
- Cowl Neck: A looser, wider neck that drapes beautifully in soft folds around the collarbone. It’s often created by working with generous increases in the neck area.
- V-Neck: This classic style is shaped with decreases to create a flattering V-opening at the front, offering a more open feel.
- Crew Neck: A simple, rounded neckline that sits close to the base of the neck, giving a clean, polished look.
2. Construction Method: Seamless vs. Flat
- Top-Down (Recommended): You start at the top of the neck (often with a ribbed band) and work down towards the chest and shoulders.
- Pros: It’s seamless, which is great for comfort. You can easily try it on as you go and adjust the length.
- Bottom-Up: You start at the chest or shoulder line and work up towards the neck, shaping as you go.
- Pros: Can be worked flat in rows if you prefer using straight hooks, then seamed later.
3. Stitch Pattern: Texture and Drape
- Ribbing (for the neck): This is crucial for a snug, elastic fit around the neck. Use back loop only (BLO) or front post/back post (FP/BP) stitches to create this stretchy texture.
- Simple Body Stitches: Half Double Crochet (hdc) or Double Crochet (dc) are excellent for the body. They work up quickly and create a soft, drapey fabric.
- Textured Stitches: The granny stitch, moss stitch, or linen stitch can add beautiful visual interest to the body of the sweater.
4. Yarn Choice: Comfort and Functionality
Since this garment sits close to your skin, yarn choice is key.
- For Warmth:
- Wool/Merino Wool: Soft, warm, and elastic. A superwash merino is ideal for its easy care.
- Alpaca: Incredibly soft and warm with a beautiful drape, making it perfect for a cowl neck.
- For Easy Care:
- High-Quality Acrylic or Acrylic Blends: Many modern acrylics are soft, durable, and machine washable, making them a very practical choice for a frequently worn item.
- Weight: Worsted (Category 4) is a versatile choice that is not too thick but works up quickly. DK (Category 3) will create a lighter fabric.
Essential Materials You’ll Need
- Yarn: Your chosen color(s) and fiber. A standard neck sweater typically requires 2-3 skeins of worsted weight yarn.
- Crochet Hook: The size recommended on your yarn label for your chosen yarn. You might use a slightly smaller hook for the neck ribbing for a firmer fit.
- Stitch Markers: Invaluable for marking the beginning of rounds and key shaping points.
- Tapestry Needle (Yarn Needle): Essential for weaving in ends and seaming.
- Scissors.
- Measuring Tape: Crucial for checking your measurements and gauge.
The Construction Journey: A Step-by-Step Guide
Here is a common top-down construction method for a seamless neck sweater.
Step 1: The Gauge Swatch (Do Not Skip!)
Before you begin, crochet a swatch (at least 4×4 inches / 10×10 cm) in your chosen yarn and hook, using the stitch pattern for the main body. Wash and block your swatch to see how it will behave. Measure your stitches and rows per inch. Adjust your hook size if your gauge doesn’t match your pattern’s recommendation. This ensures the final piece will fit!
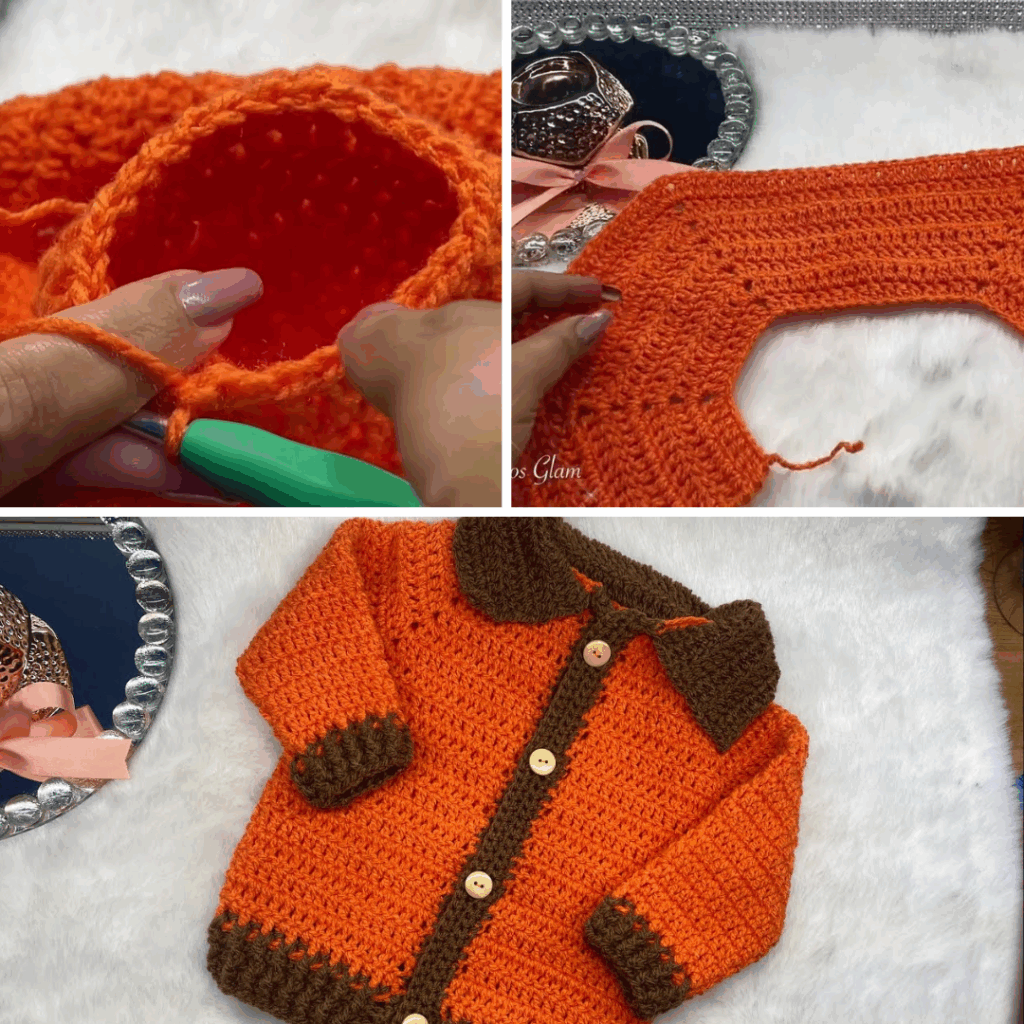
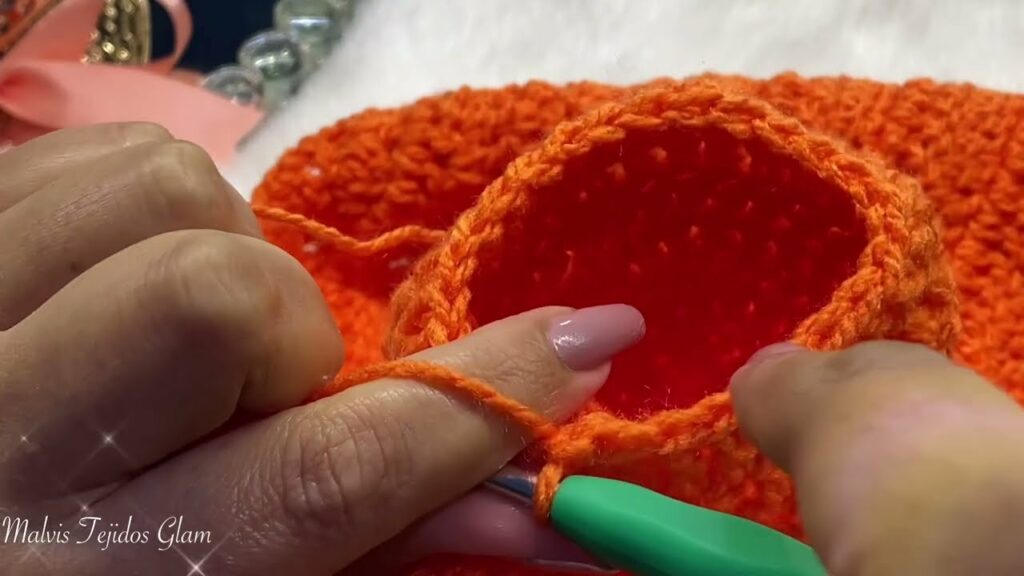
Step 2: Start the Neckband
Begin with a foundation chain that, when joined, forms the circumference of your neck. Or, you can work a flat ribbed rectangle and then seam the ends to form a loop. Work in rounds of ribbing (e.g., using BLO hdc) until the neckband reaches the desired height (e.g., 6-8 inches for a turtleneck).
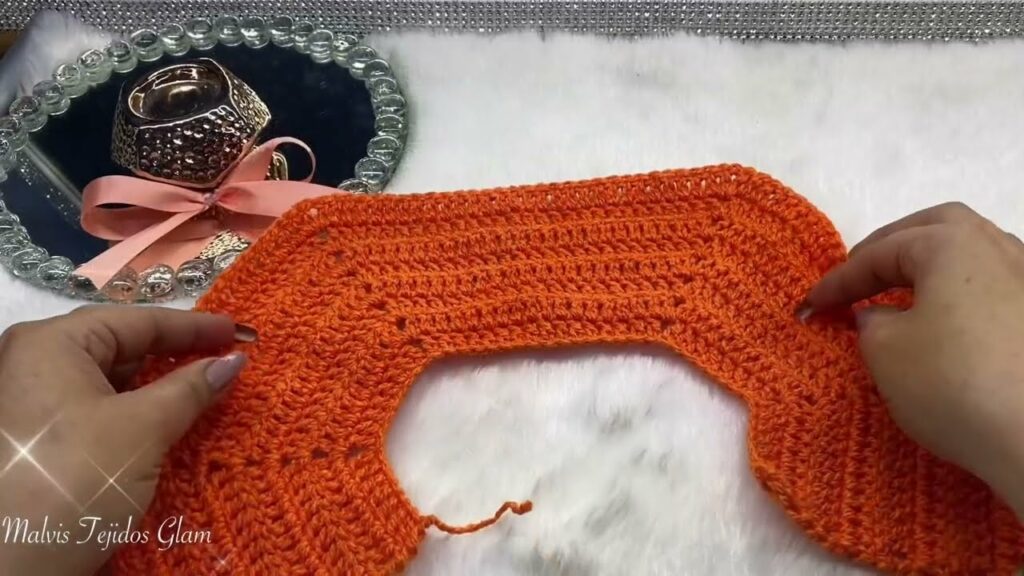
Step 3: Shape the Shoulders and Chest (The Yoke)
Transition from the neckband to your main body stitch (e.g., hdc). You will now begin to increase stitches evenly in each round to create the yoke—the part that sits over your shoulders and chest. Follow a pattern that provides a stitch count for each increase round. Continue increasing until the yoke measures the desired width across the shoulders.
Step 4: Crochet the Body
Once the yoke is wide enough, stop increasing. Simply work one stitch into every stitch around for each subsequent round. The fabric will now grow downwards, forming the body of the neck sweater. Continue working straight rounds until the body reaches your desired length (e.g., to the top of your ribcage or a few inches below).
Step 5: Finishing Touches
- Bind Off: Finish the last round with a slip stitch to join, and then cut your yarn, leaving a long tail.
- Weave in Ends: Use your tapestry needle to meticulously weave in all yarn ends. A neat finish is key to a professional-looking garment.
- Blocking: Gently soak your finished neck sweater in cool water and lay it flat to dry, shaping it to its final dimensions. This will even out your stitches and enhance the drape, making the fabric look much more polished.
Tips for a Beautiful Result
- Choose the Right Fit: For a snug turtleneck, use a slightly smaller hook for the ribbed neck. For a drapey cowl, use a larger hook and a loose stitch.
- Try It On: The great thing about top-down construction is that you can try on your neck sweater as you go. This helps you get the perfect fit and length.
- Don’t Be Afraid of Post Stitches: Learning front post/back post ribbing is worth it—it creates a beautifully defined and stretchy rib.
- Embrace Simple Stitches: A basic stitch in a beautiful yarn can create a stunning and elegant piece. You don’t need a complex pattern to make a fashionable garment.
Crocheting a neck sweater is a satisfying project that results in a versatile and chic accessory. With these tips and a little practice, you’ll be able to create a cozy garment you’ll want to wear all season long.
What color are you imagining for your neck sweater?
Video Tutorial :