by
by The Charm of the Bodoquito: Knitting a Textured Hat on Two Needles 🍃
There’s a special satisfaction in creating a cozy, textured hat, and the Bodoquito Hat is the perfect project to get that feeling. “Bodoquito,” a charming term meaning “little lump” or “little dumpling,” perfectly describes the delightful, bumpy stitch that gives this hat its unique character. What makes this project even more appealing is that it can be knitted entirely on two straight needles, making it a fantastic and approachable project for beginners and a relaxing make for experienced knitters.
This detailed guide will walk you through the simple construction and the delightful stitch that will help you create your own cozy Bodoquito hat.
What is the Bodoquito Stitch?

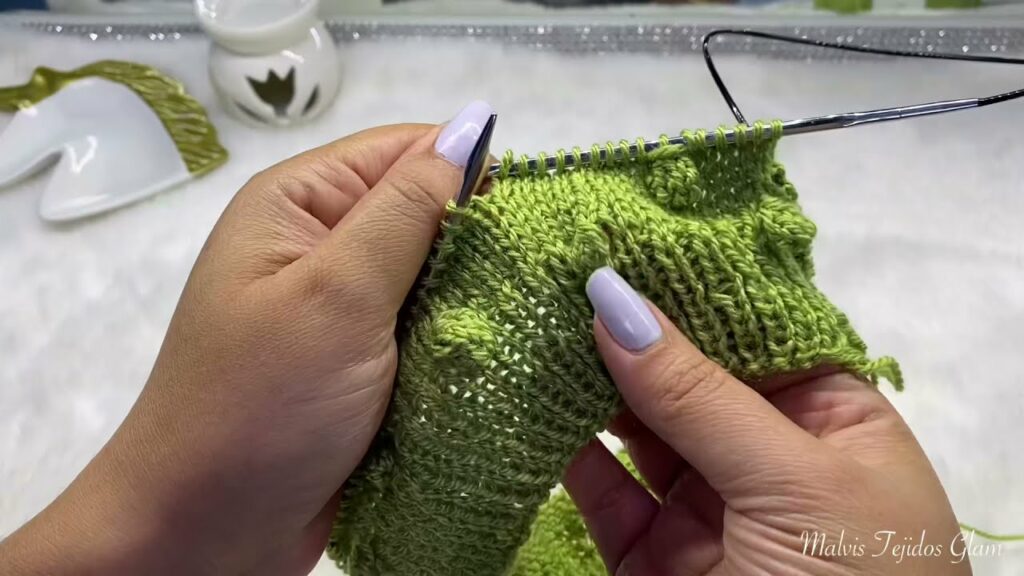
The Bodoquito stitch is a type of cluster stitch that creates a dense, bobble-like texture on the fabric’s surface. Unlike a full bobble, which is worked with several stitches into one, the Bodoquito is often a simple knit/purl sequence that pulls stitches together, forming a compact “lump.” This makes it easier to work and less yarn-intensive than a traditional bobble, while still providing a wonderful, tactile texture. The result is a squishy, reversible, and visually interesting fabric that is perfect for hats, blankets, and scarves.
Why Knit a Hat on Two Straight Needles?
Knitting a hat on two needles means you’ll be working in flat rows to create a rectangle, which is later seamed into a tube. This method is a favorite for several reasons:
- Beginner-Friendly: You don’t need to learn how to knit in the round, manage multiple double-pointed needles (DPNs), or navigate circular needles. You simply work back and forth.
- Simple Construction: The shaping is minimal and done at the end, making the process straightforward.
- Easy to Manage: The flat panel is easy to hold and transport, making it a great “on-the-go” project.
Essential Materials You’ll Need
- Yarn: For a textured stitch like the Bodoquito, a soft, worsted (Category 4) or bulky (Category 5) yarn is ideal. A plied yarn (made of several twisted strands) will help the stitch pop. A wool or wool blend will be cozy and elastic, while cotton or acrylic is easy to care for.
- Knitting Needles: A pair of straight knitting needles in the size recommended on your yarn label.
- Tapestry Needle (Yarn Needle): A blunt needle with a large eye, essential for seaming and weaving in ends.
- Scissors: For cutting yarn.
- Measuring Tape: Crucial for checking your gauge and the length of your hat.
The Construction Journey: A Step-by-Step Guide
Follow these steps to knit your Bodoquito hat from start to finish.
Step 1: The Gauge Swatch (Do Not Skip!)
Before you cast on, knit a swatch (at least 6×6 inches) in the Bodoquito stitch. Wash and block your swatch! This step is crucial. The texture of the Bodoquito stitch can affect your gauge, and blocking will show you the true size of your knitting. Measure your stitches and rows per inch. If your gauge is off, adjust your needle size until it matches your pattern’s recommendation.
Step 2: Cast On
Cast on the required number of stitches for the circumference of your hat. Since the fabric will be seamed, your cast-on edge will become the bottom edge of your hat.
Step 3: Knit the Hat Body in the Bodoquito Stitch
Work back and forth in rows, following the Bodoquito stitch pattern. The pattern is a simple repeat over a few rows (e.g., a row of purl stitches followed by a row of knit stitches with clusters). Continue knitting until the panel reaches the desired length from the bottom of the hat to the top of your head, minus the length needed for the crown shaping.
Step 4: Shape the Crown (Decreases)
Once your panel is long enough, you’ll begin to decrease stitches to shape the top of the hat. Follow your pattern’s instructions for decreasing, which will typically involve knitting or purling two stitches together at regular intervals. This will gradually taper the top of the rectangle. Continue decreasing until you have a small number of stitches left on your needle.
Step 5: Finish the Top
Cut your yarn, leaving a long tail (about 15-20 inches). Thread this tail onto your tapestry needle. Slip all the remaining stitches from your knitting needle onto the yarn tail and pull it tight, cinching the top of the hat closed. This creates the rounded crown. Weave the yarn tail through the cinched stitches a few times to secure them.
Step 6: Seam the Hat
Fold your flat knitted panel in half with the right sides facing each other. Using your tapestry needle and the long yarn tail, stitch the two long side edges together to form a tube. For a neat, invisible seam, use a mattress stitch. If you’re a beginner, a simple whip stitch or backstitch will also work well.

Step 7: Weave in Ends and Block
Use your tapestry needle to meticulously weave in all remaining yarn ends. Finally, block your finished hat. Gently wet it, shape it over a hat form or a large bowl, and let it dry completely. Blocking will relax the stitches, make the Bodoquito texture even more defined, and set the final shape of your hat.
Tips for a Cozy Result
- Choose a Smooth Yarn: A smooth, plied yarn will help the texture of the Bodoquito stitch stand out beautifully. Fuzzy yarns might hide the stitch definition.
- Seam Neatly: A neat seam can make a handmade hat look professionally finished. Take your time with the seaming, and consider watching a quick video tutorial on the mattress stitch.
- Add a Pom-Pom: A fluffy yarn pom-pom on top can be the perfect finishing touch for a Bodoquito hat!
You’ll be amazed at how quickly you can create this charming and textured hat with just two needles. It’s a wonderful project that results in a cozy, unique, and wearable piece.
What color are you imagining for your Bodoquito hat?
Video Tutorial :