 by
by Knit, Stitch, and Adorn: A Detailed Guide to a Knitted & Embroidered Headband ✨
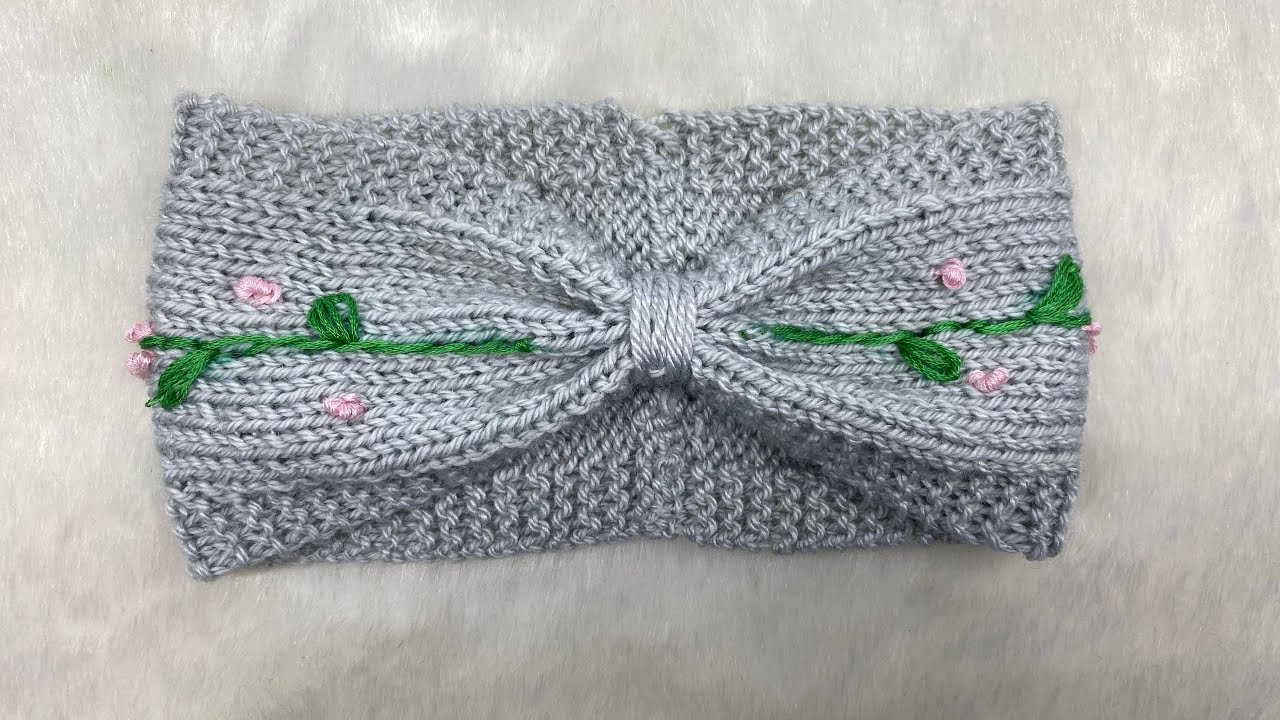
A knitted headband is a charming and practical accessory for babies and children. It keeps little ears warm, holds hair back, and adds a sweet touch to any outfit. What makes it even more special is the personal touch of embroidery, turning a simple knitted band into a unique work of art. This detailed guide will walk you through the surprisingly easy process of knitting a headband and then show you how to embroider beautiful details onto it, creating a truly one-of-a-kind piece.
Why Knit and Embroider a Headband?
- Quick & Easy: A headband is a small project that knits up in a flash, making it perfect for beginners or for experienced knitters looking for a quick win.
- Skill-Builder: It’s a great project to practice basic stitches, working flat, and learning simple embroidery techniques on a small scale.
- Customizable: You have complete control over the color, stitch, and embroidery design, allowing you to create a personalized accessory for a baby or as a gift.
- Perfect for Scraps: You only need a small amount of yarn, making it an ideal way to use up leftover yarn from other projects.
Essential Materials You’ll Need
- Yarn: A soft, baby-friendly yarn. DK (Double Knitting, Category 3) or Worsted (Category 4) weight yarn is a great choice. Look for cotton, cotton blends, or baby acrylics that are gentle and washable.
- Embroidery Yarn/Floss: A small amount of yarn in contrasting colors for your embroidery. You can use a thinner yarn or a few strands of embroidery floss.
- Knitting Needles: Straight or circular needles in the size recommended on your yarn label.
- Tapestry Needle (or Yarn Needle): A blunt needle with a large eye, essential for weaving in ends and for the embroidery.
- Scissors: For cutting yarn.
- Measuring Tape: To check the headband’s length as you knit.
- Buttons (Optional): If you want a closure for the headband.
Part 1: How to Knit a Baby Headband
Here is a straightforward and easy method for knitting a simple headband, perfect for beginners.
Step 1: The Gauge (Don’t Skip!)
While a swatch isn’t as critical for a headband as it is for a sweater, it’s still good practice. Knit a small square with your chosen yarn and needles to check your tension. This will help you estimate the final size.
Step 2: Cast On
Cast on a small number of stitches to create the width of the headband. For a baby or toddler, casting on 10 to 15 stitches is a good starting point. This will create a band that is about 2 to 3 inches wide.
Step 3: Knit the Band
Knit every row in a Garter Stitch (just knit every stitch, every row) or Stockinette Stitch (knit one row, purl one row).
- Garter Stitch: This creates a reversible, bumpy texture that lies flat and is very easy for beginners.
- Stockinette Stitch: This creates the classic smooth “V” texture of knitting, but it tends to curl, so you may want to add a few rows of garter stitch at the beginning and end to create a border.
Continue knitting in rows until the band is long enough to fit snugly around the baby’s head. The headband should be a few inches shorter than the head’s circumference because knitting stretches. A good length for a newborn is about 12-13 inches, while for a 6-month-old, it’s about 15 inches. Check your measurements as you go!
Step 4: Bind Off
Once you reach the desired length, bind off all your stitches. Cut the yarn, leaving a long tail (about 12 inches) for seaming.
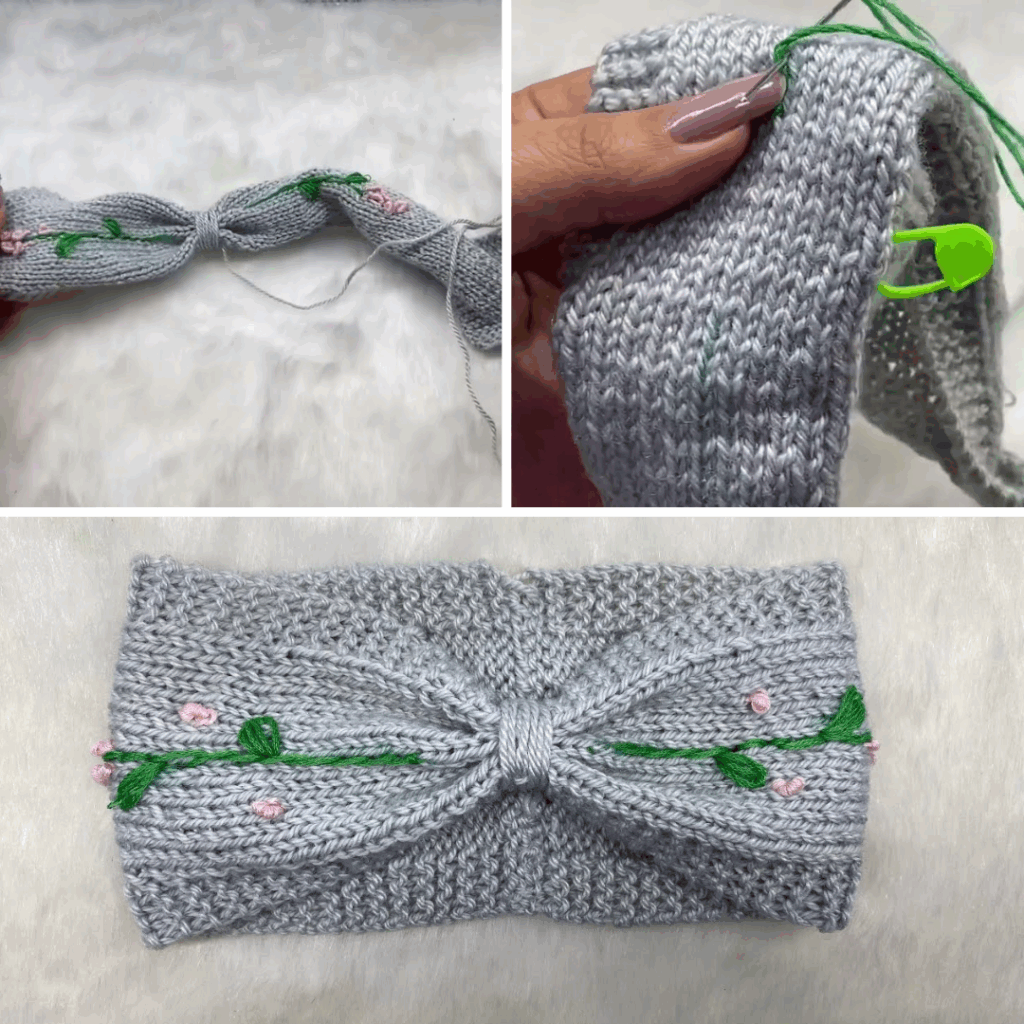
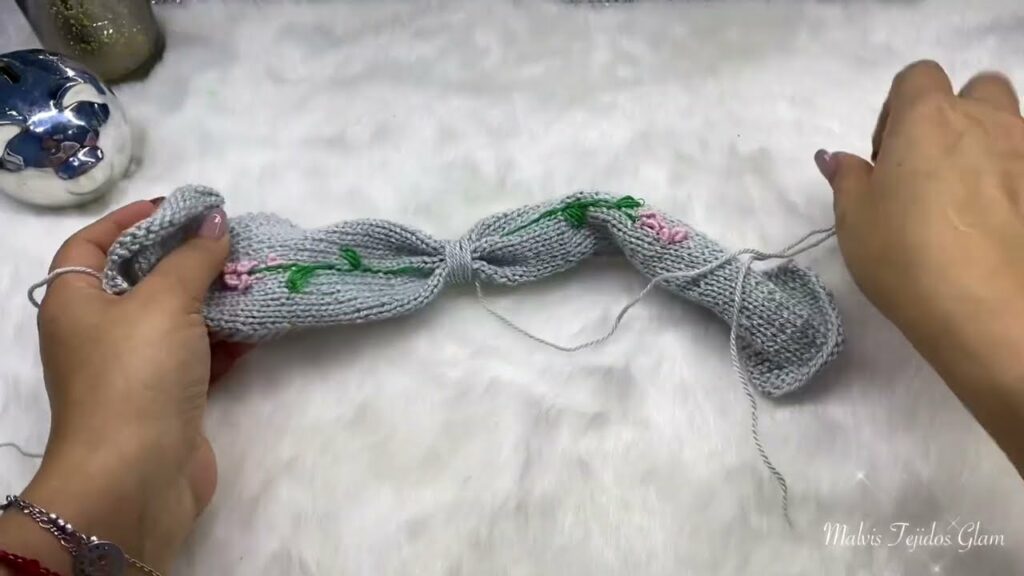
Step 5: Seam the Headband
Use your tapestry needle and the long yarn tail to sew the two cast-on and bound-off ends of the headband together. Use a neat mattress stitch or a simple whip stitch to create a seamless join. Weave in any remaining yarn ends to hide them.
Part 2: How to Embroider a Knitted Headband ✨🌸
Now for the fun part: adding the decorative embroidery! This step allows you to personalize the headband with a touch of color and creativity.
Step 1: Plan Your Design
Decide what you want to embroider. Simple, sweet motifs work best.
- Flowers and Leaves: Perfect for a “🌸” theme.
- Small Stars or Hearts: A simple yet charming choice.
- Abstract Stitches: Use lines or dots for a modern, minimalist look.
Step 2: Thread Your Tapestry Needle
Cut a length of your embroidery yarn and thread it through your tapestry needle.
Step 3: Begin Embroidering
Here are two easy embroidery stitches to get you started:
- Lazy Daisy Stitch (for flowers):
- Bring your needle up from the back of the knitting.
- Insert the needle back down into the same spot, but don’t pull the yarn all the way through. Leave a small loop on the surface.
- Bring your needle up a short distance away (this will be the petal’s length), and pass it over the loop you created.
- Insert the needle back down just outside the loop to secure it in place, creating a tear-drop shape.
- Repeat this process in a circle to create a flower with multiple petals.
- Straight Stitch (for leaves, stems, or stars):
- Bring your needle up from the back of the knitting.
- Insert it back down a short distance away. This creates a simple line.
- Repeat to create stems, leaves, or tiny stars by making short lines in different directions.
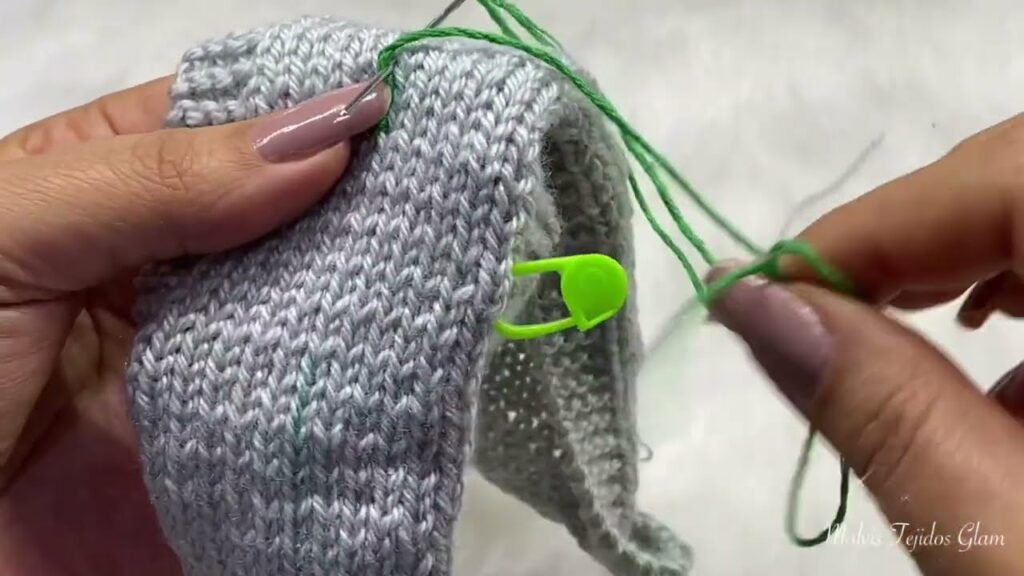
Step 4: Finish Your Embroidery
Once you have finished your design, use your tapestry needle to weave in the ends of your embroidery yarn on the back of the headband. Be careful not to pull too tightly, which could distort the knitting.
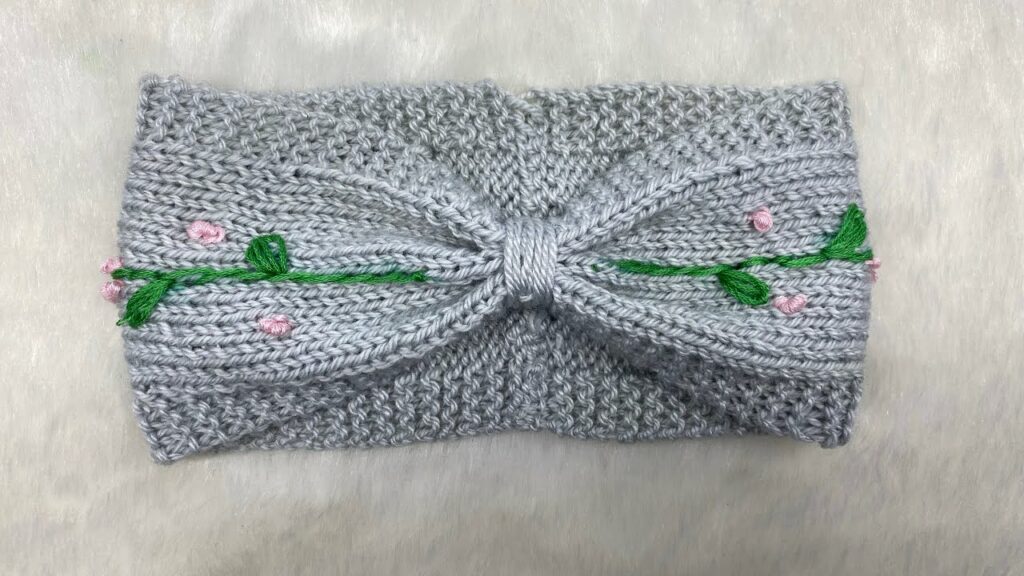
Final Touches for a Beautiful Headband
- Blocking: For a perfect finish, give your headband a quick block. Gently wet it, lay it flat on a towel, and shape it to the correct size. Let it dry completely. This will even out your stitches and make your embroidery pop.
- Add a Bow: You can crochet a simple bow and stitch it to the headband.
- Add a Button: If you want an adjustable fit, sew a button to one end and create a simple loop with chains on the other end to form a buttonhole.
You’ll be delighted by how easy it is to create a beautiful, custom-knit headband for a baby or child. The combination of knitting and embroidery allows you to create a truly special keepsake that is both practical and full of charm.
Video Tutorial :