 by
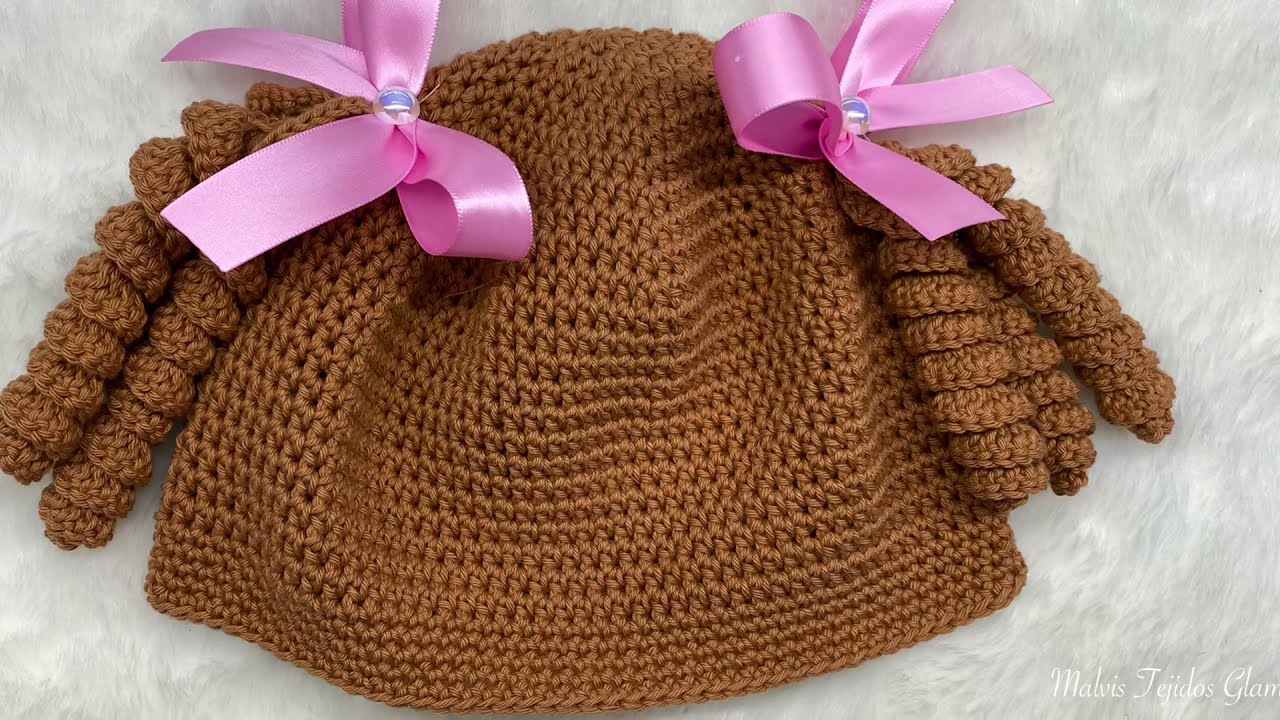
by Cozy & Cute: A Detailed Guide to Crocheting a Hat with a Rolled Brim 🎀
A crocheted hat is a classic accessory, and adding a rolled brim is a simple detail that gives it a stylish, polished, and effortlessly chic look. This design, sometimes called a “roll-brim beanie” or a “fisherman’s hat,” creates a natural, cozy curl at the bottom that provides extra warmth and a clean finish. It’s a fantastic project for any crocheter, offering a perfect canvas to showcase beautiful yarn and a simple stitch.
This detailed article will guide you through the essential techniques and steps to create a cute and cozy hat with a charming rolled brim, proving that sometimes, the simplest details make all the difference.
What Makes a Rolled Brim Hat So Special?
- Effortless Style: The brim naturally curls up on itself, creating a clean, seamless roll that looks relaxed and modern.
- Extra Warmth: The rolled-up fabric doubles the thickness around your ears, providing excellent insulation against chilly winds.
- Beginner-Friendly: You don’t need to know complex ribbing or complicated stitches. The rolled effect is achieved simply by using a stitch that curls, which is a natural property of many crochet fabrics.
- Versatile: This style looks great on everyone and can be worn casually or dressed up.
Designing Your Hat: Key Considerations
Before you pick up your hook, consider these crucial design elements to make sure your hat turns out just right.
1. Yarn Choice: The Key to the Roll
The yarn you choose is the single most important factor for this project.
- Fiber: For warmth and elasticity, wool or merino wool is a fantastic choice, as it has a natural springiness that helps the brim hold its shape. High-quality acrylic or blends also work beautifully and are easy to care for.
- Weight: Worsted (Category 4) is a versatile choice that works up quickly and creates a cozy fabric. Bulky (Category 5) yarn will create a chunkier, cozier hat that works up in a flash.
2. Construction Method: Top-Down is Best
For a seamless rolled brim hat, top-down construction is recommended.
- How it Works: You start at the crown (the very top of the hat) with a magic circle and work outwards in continuous rounds, increasing stitches evenly to form a flat circle. Once the circle reaches the correct diameter for the hat’s crown, you stop increasing and work straight down to create the sides of the hat.
- Why it’s Great: You can easily check the size as you go, and you avoid the need for seaming or creating a separate ribbed band.
3. Stitch Pattern: Embracing the Curl
The rolled brim effect is a result of crochet fabric’s natural tendency to curl. The Stockinette-like fabric created by stitches worked in the round is perfect for this.
- Half Double Crochet (hdc) or Double Crochet (dc): These stitches are ideal for the hat’s body. They create a smooth, dense fabric that will curl beautifully at the bottom edge.
- Single Crochet (sc): Will also work, but creates a denser fabric that might be less stretchy.
Essential Materials You’ll Need
- Yarn: Your chosen yarn in a cute color. A standard hat requires about 1-2 skeins of worsted weight yarn.
- Crochet Hook: The size recommended on your yarn label for your chosen yarn weight.
- Stitch Marker: Essential for keeping track of the beginning of your rounds when working top-down.
- Tapestry Needle: A blunt needle for weaving in ends.
- Scissors.
- Measuring Tape: Crucial for checking your crown diameter and hat height.
The Construction Journey: A Step-by-Step Guide
Here is a common top-down construction method for a seamless rolled brim hat.
Step 1: Start the Crown
Begin with a magic circle or a chain of 4 stitches joined with a slip stitch. In the first round, work a small number of stitches (e.g., 10 double crochets) into the ring. Place a stitch marker in the first stitch to mark the beginning of the round.
Step 2: Increase to Form the Circle
Work in continuous rounds, increasing your stitches evenly in each round to create a flat circle. For example, in Round 2, you might work 2 stitches into every stitch from the previous round. In Round 3, you might work 2 stitches into every other stitch. Continue this pattern of gradual increases until your circle measures the correct crown diameter for the hat’s size (usually about 6 to 8 inches for an adult).
Step 3: Work the Body of the Hat
Once your crown is the correct diameter, stop increasing. Simply work one stitch into every stitch around for each subsequent round. The fabric will now stop expanding outwards and will start growing downwards, forming the sides of your hat. Continue working straight rounds until the hat reaches the desired height.
Step 4: Create the Rolled Brim
You’ve already done the work for this! The brim is simply the last few inches of the hat body. The natural curl of the crochet fabric will cause the last few rows to roll up on themselves. To achieve the perfect roll, you will typically work about 2 to 3 extra inches in length on the hat’s body to account for the curl. So, if you want a 10-inch high hat with a 2-inch roll, you would crochet a total length of 12 inches.
Step 5: Finish the Hat
- Bind Off: Finish the last round with a slip stitch to join, and then cut your yarn, leaving a long tail.
- Weave in All Ends: Use your tapestry needle to meticulously hide every yarn tail on the inside of the garment for a clean, professional finish.
- Block It: You can use a steamer to gently soften the fabric and encourage the brim to roll neatly.
Tips for a Perfect Rolled Brim
- Embrace the Curl: The brim’s curl is a natural part of crochet! Don’t try to fight it or add ribbing at the end. Just let the fabric do its thing.
- Check the Length: Try the hat on as you go. Remember to add about 2-3 inches to the total height to account for the rolled brim.
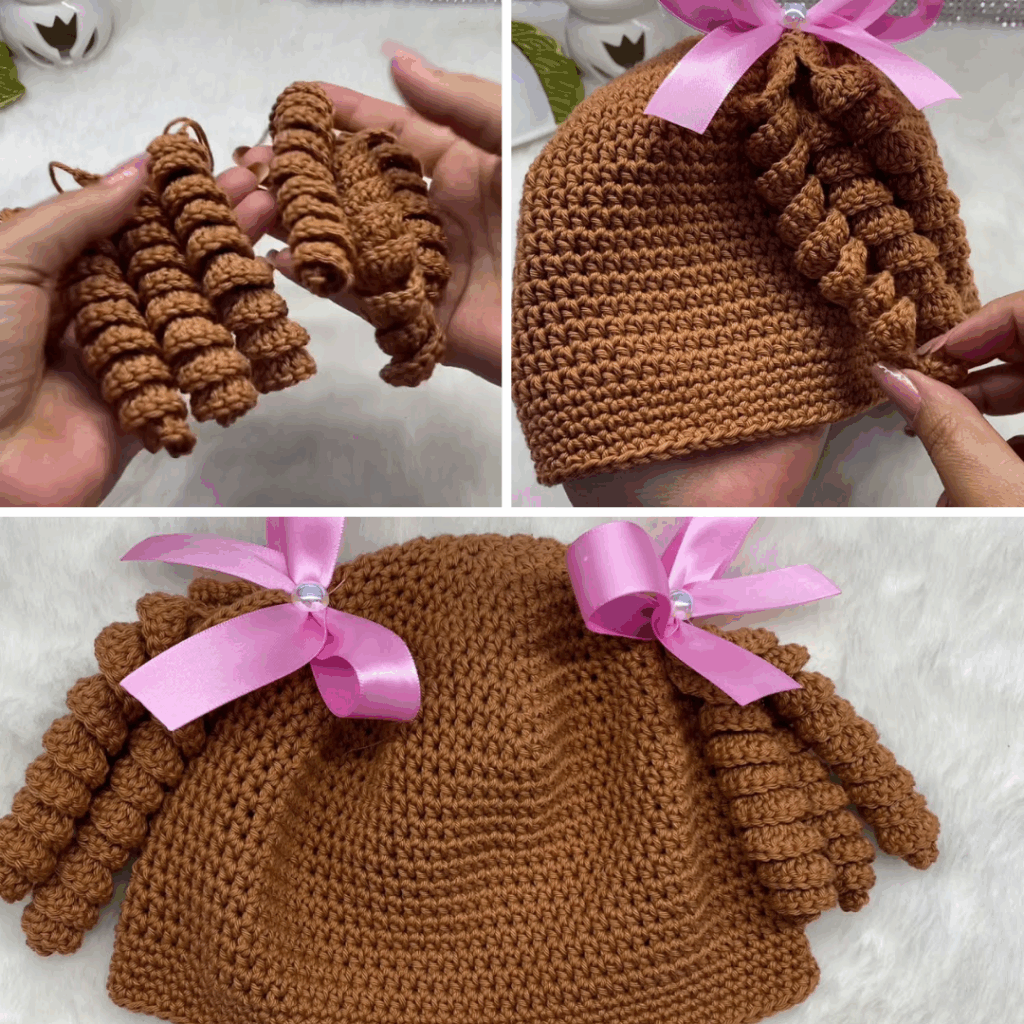
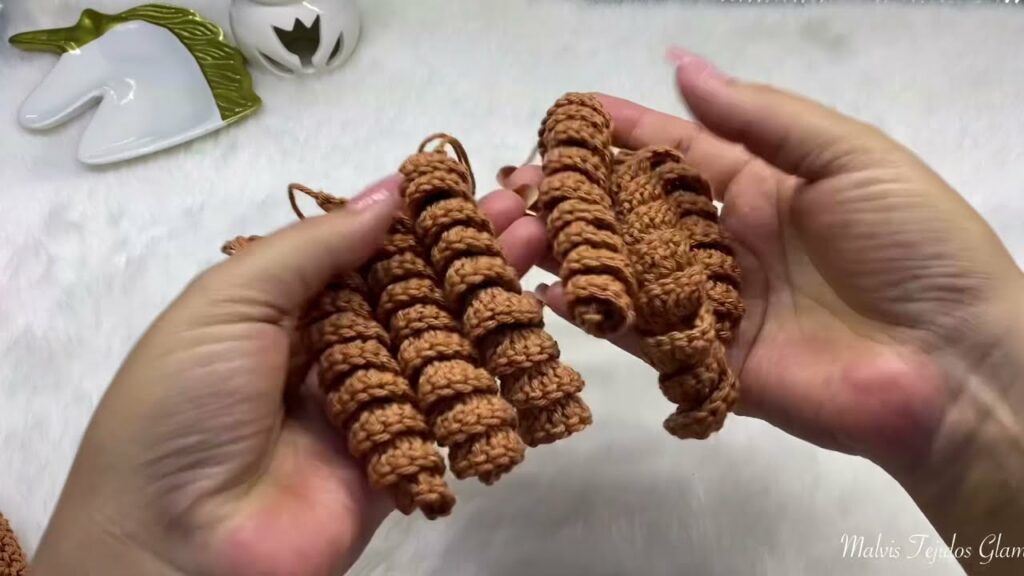
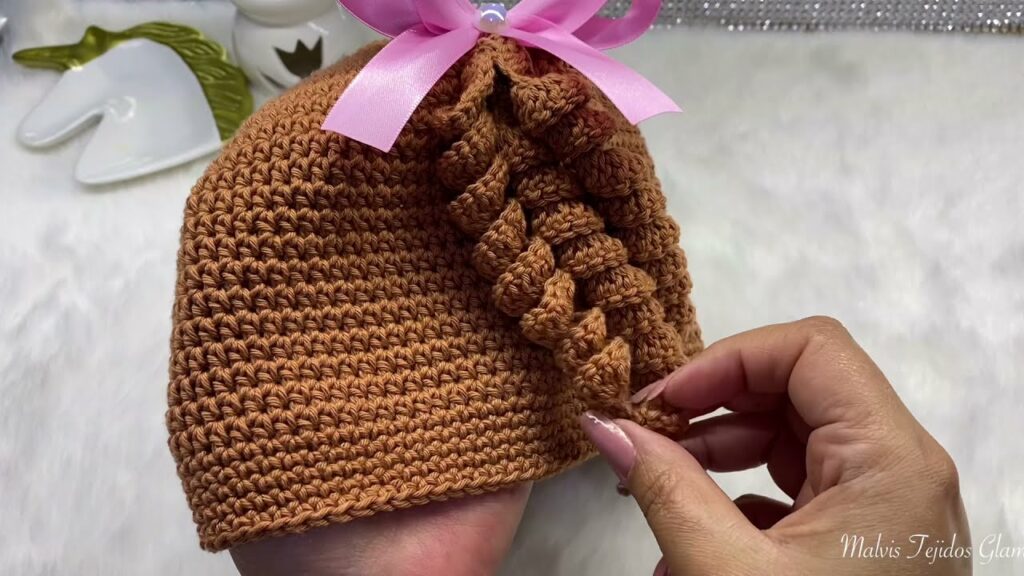
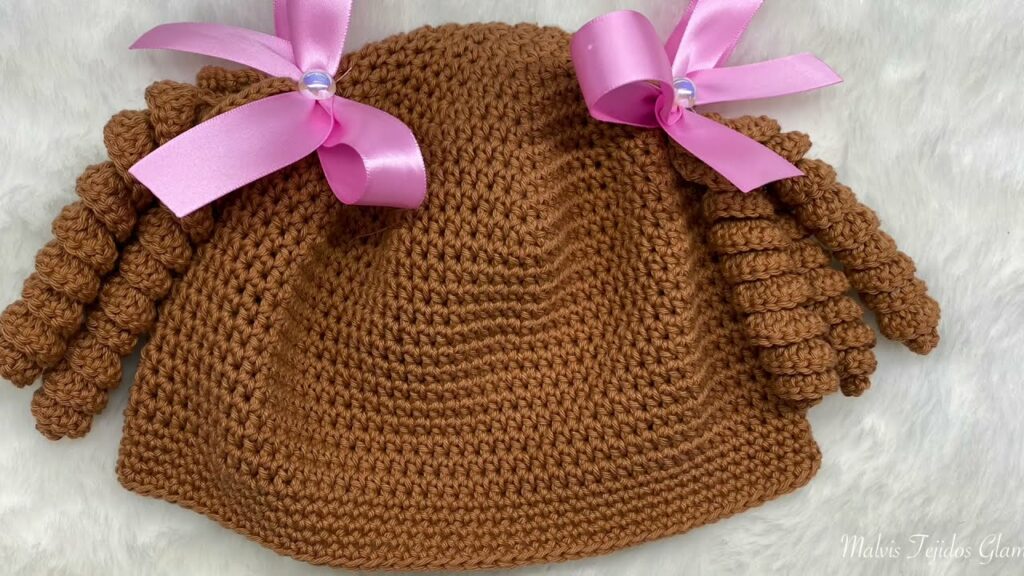
- Add a Bow: For a cute and charming detail, sew a small crocheted bow or a ribbon onto the brim once it’s rolled up.
- Experiment with Color: A solid color shows off the texture beautifully, but a self-striping yarn would also look fantastic with the rolled brim.
Crocheting a hat with a rolled brim is a delightful project that results in a cozy, stylish, and versatile accessory. With a little yarn and these simple techniques, you’ll have a new favorite hat in no time!
Video Tutorial :