by
by 1. Preparation and Materials
This pattern covers four sizes: 0–3, 3–6, 6–9, and 9–12 months. The construction is top-down, meaning you can adjust the length as you go.
- Yarn: DK weight (Lightweight #3).
- Approx. 100g for the smallest size; up to 150g for 9–12 months.
- Optional: Red and green scraps for strawberries.
- Hooks: * 4.0mm: Main body and sleeves.
- 3.5mm: Edging and neckline (to provide a snugger fit for smaller sizes).
- Notions: 5+ stitch markers, measuring tape, scissors, yarn needle, and 4–5 buttons (approx. 20mm).
2. The Foundation: Starting Loops
Instead of a standard chain, the project uses foundation loops for flexibility.
- Chain 3, then work a double crochet (dc) into the first chain to form the first loop.
- Repeat (Chain 3, dc into the base of the chains) until you have 16 loops.
- Place Markers: * Fronts: 2 loops each.
- Sleeves: 2 loops each.
- Back: 4 loops.
- Corners: 4 loops (marked with stitch markers) .
3. The Yoke (Top-Down)
The yoke is worked in a variation of the granny stitch (3-dc clusters).
- Row 1: Work 3-dc clusters in each loop. In the marked corner loops, work an increase: (2 dc, ch 1, 2 dc) .
- Row 2: Work 3-dc clusters in the spaces between clusters. Corners receive the same (2 dc, ch 1, 2 dc) increase.
- Rows 3 & 4 (Expansion Slowdown): To ensure the neck doesn’t widen too fast, work 3-dc clusters into the corner spaces without the (2 dc, ch 1, 2 dc) increase for these two rows only.
- Continue: Revert to the standard Row 1 & 2 repeats until the back measures half the chest width for your target size (e.g., 26 cm for 9–12 months) .
4. Connecting the Underarms
Once the yoke is the correct size, you will create the armholes:
- Crochet across the front to the first corner.
- Work 2 dc in the corner, chain 1, skip the sleeve section, and work 2 dc into the next corner.
- Repeat for the second sleeve.
- In the next row, work a 3-dc cluster directly into the underarm chain-1 space .
5. The Body and Edging
Continue the two-row repeat (3-dc clusters) until the length is approximately 3 cm short of the desired total length.
Bottom Ribbing:
- Switch to the 3.5mm hook.
- Row 1: Alternate Front Post Double Crochet (FPDC) and Half Double Crochet (HDC), skipping the ch-1 spaces from the previous row to tighten the bottom.
- Row 2: Work Back Post Double Crochet (BPDC) around the posts and HDC in the stitches .
- Row 3: Repeat Row 1 to finish the ribbing .
6. Finishing the Edges (Neckline and Buttons)
- Neckline: Add an “extra row” to the back loops to raise the collar slightly . Then, work a decorative border of FPDC and HDC around the entire neck .
- Button Borders: Work 3 rows of single crochet (sc) down each front panel.
- Buttonholes: In Row 2 of the border, ch 2 and skip 1 stitch at marked intervals to create holes .
7. The Sleeves
- Attach yarn at the underarm and work the 3-dc cluster pattern in rounds .
- Turn your work after every round to maintain the texture of the body .
- Cuff: Reduce the stitch count in the final row by alternating 2-dc and 3-dc clusters in the spaces . Finish with the same FPDC/HDC ribbing used for the body .
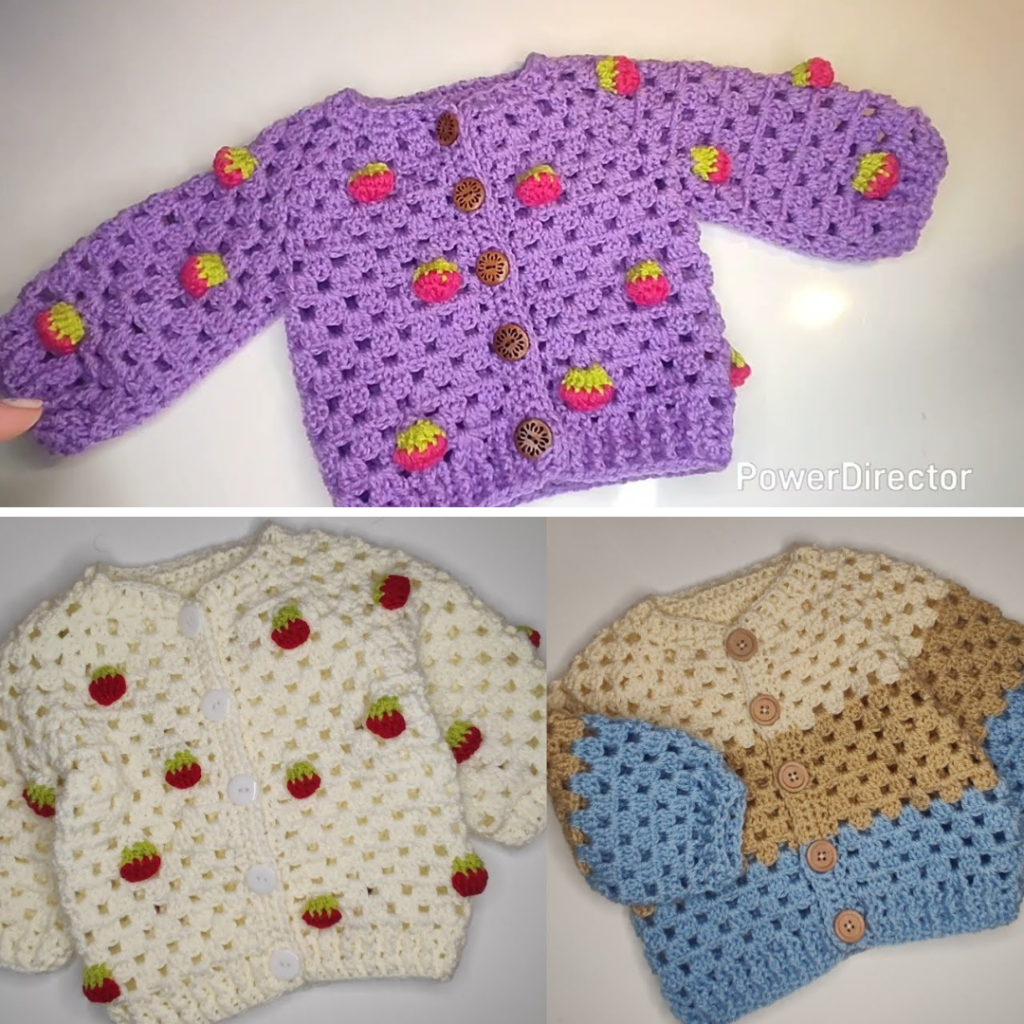
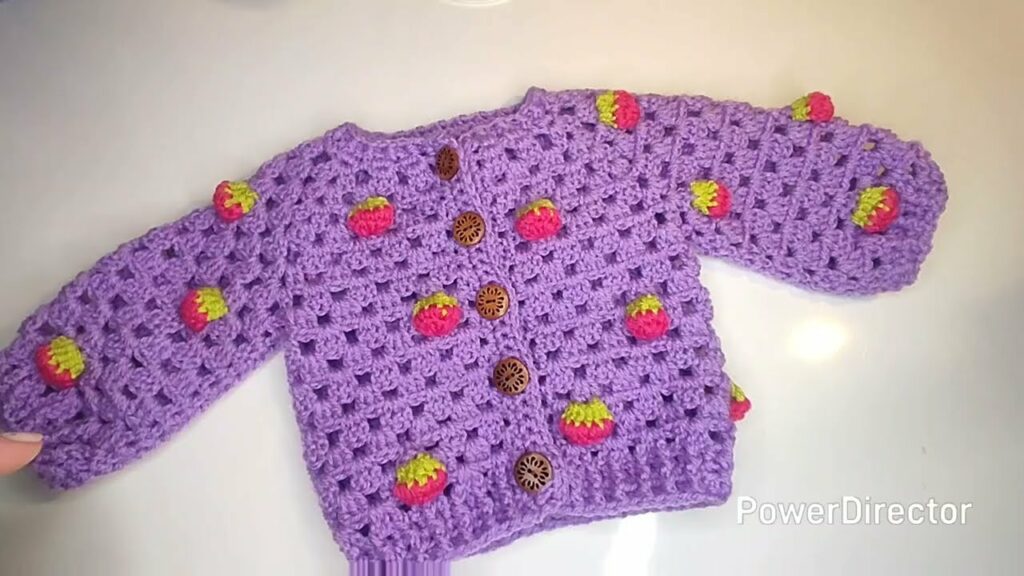
8. Adding the Strawberries (Optional)
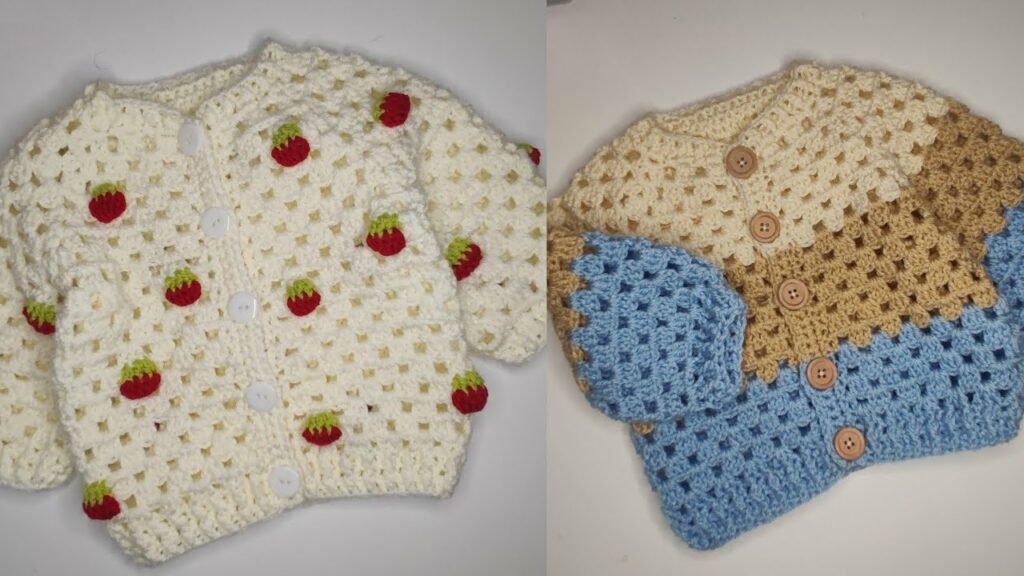
To give the cardigan its name, add these 3D embellishments:
- Green Top: Identify a 3-dc cluster where you want a strawberry. Work 1 hdc in the first dc, 2 hdc in the middle dc, and 1 hdc in the third dc.
- Red Fruit: Join red yarn to the green hdc stitches. Work a 6-dc cluster (crocheting 6 partial double crochets together) and pull tight to create a “berry” shape .
- Finishing: Use a yarn needle to pull the red tail through to the inside of the cardigan and secure it to the body to prevent the strawberry from dangling.
Your “Strawberry” Baby Cardigan is now ready!
Video Tutorial: