 by
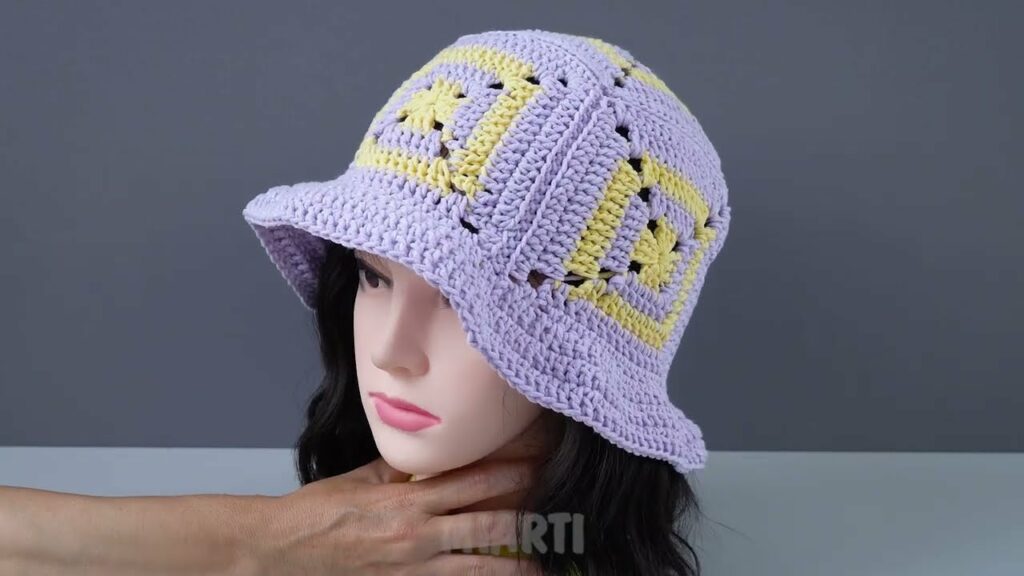
by Granny square bucket hats are the perfect blend of vintage charm and modern style. Whether you want a bold fashion statement or a cozy handmade accessory, this project is fun, customizable, and perfect for all skill levels.
In this article, you’ll learn how to make your own granny square bucket hat step-by-step, even if you’re fairly new to crochet.
🎯 What is a Granny Square Bucket Hat?
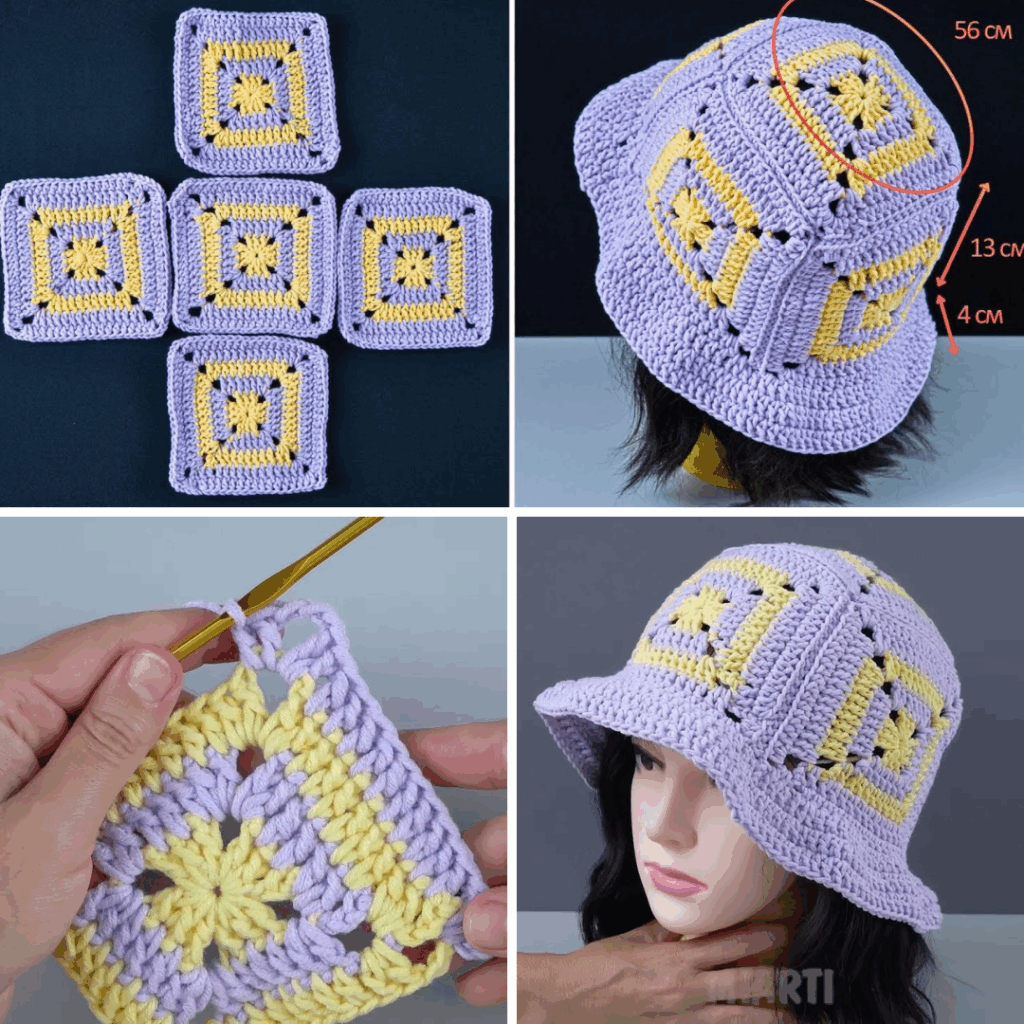
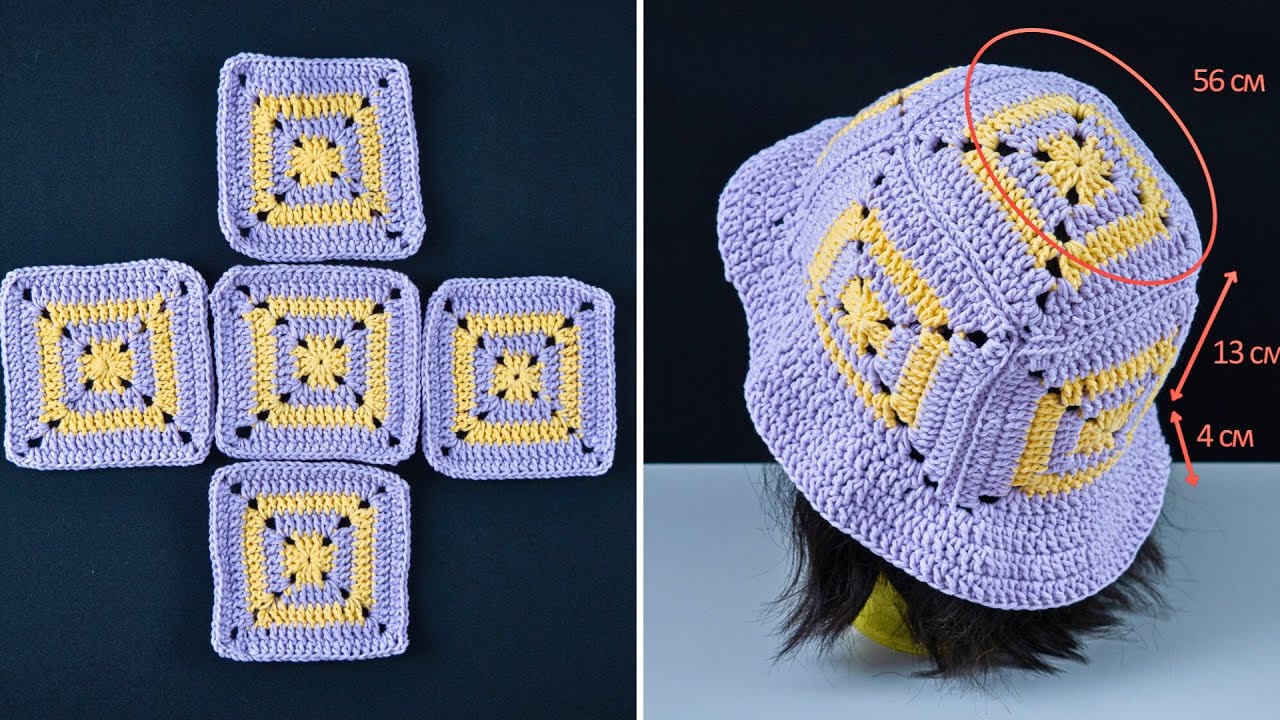
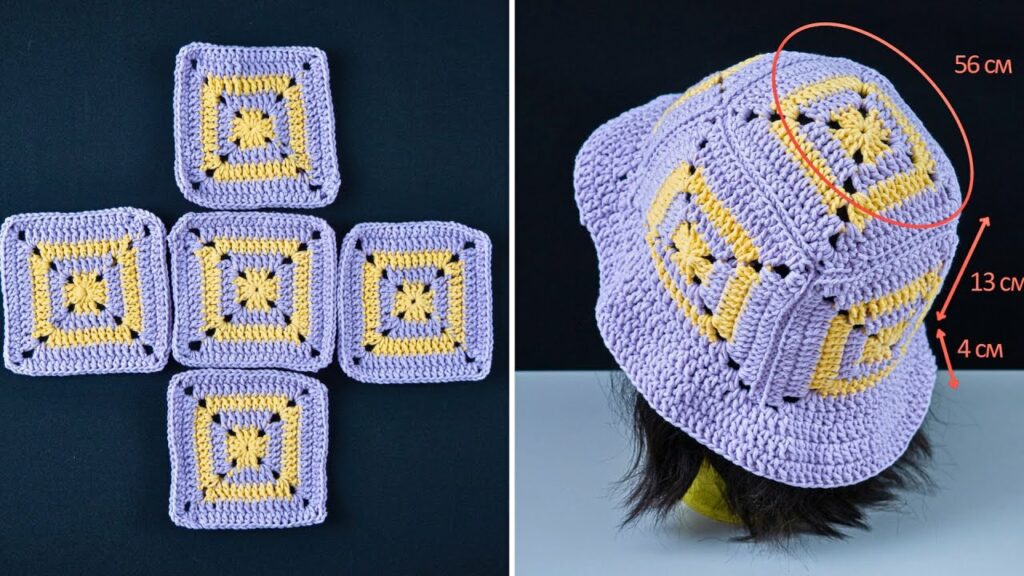
A granny square bucket hat is made by crocheting multiple granny squares and sewing them together to form the shape of a classic bucket hat — a flat top, straight sides, and a brim. This DIY crochet project lets you play with color and pattern, giving you a stylish hat that’s truly one-of-a-kind.
🧵 Materials You’ll Need:
- Worsted weight yarn (in 2–6 colors for contrast or solid look)
- Crochet hook (Size H/5.0mm or size appropriate for your yarn)
- Yarn needle (for sewing and weaving in ends)
- Scissors
- Measuring tape (optional but helpful)
🧩 How Many Granny Squares Do You Need?
You’ll need:
- 1 square for the top of the hat
- 4 squares for the sides (crown)
- 8–10 squares for the brim (or you can crochet the brim directly instead)
So, you’ll be making 13–15 granny squares in total, depending on the size of the hat and the size of each square.
🔶 Step 1: Make Basic Granny Squares
Here’s a simple granny square pattern (each one should be ~4″ x 4″ or adjust based on your desired hat size).
🌟 Basic Granny Square Pattern:
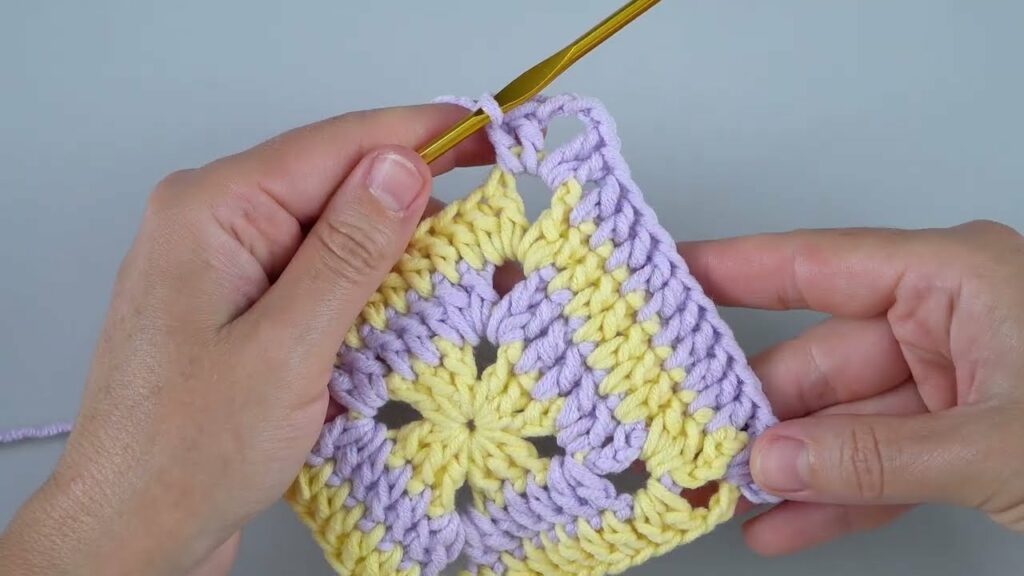
Round 1:
- Ch 4, slip stitch into first ch to form a ring.
- Ch 3 (counts as first dc), 2 dc into ring, ch 2, 3 dc into ring, ch 2 repeat 3 times.
- Join with sl st to top of ch 3.
Round 2:
- Sl st to next ch-2 space. Ch 3, 2 dc, ch 2, 3 dc in same space (corner).
- Ch 1, (3 dc, ch 2, 3 dc) in next ch-2 space repeat 3 times.
- Ch 1, join with sl st.
Round 3:
- Continue in the same manner, placing (3 dc, ch 2, 3 dc) in corners, and 3 dc in each ch-1 side space.
🔁 Make 3 or 4 rounds per square depending on the desired final hat size.
🧠 Tip: Keep all squares the same size!
🧷 Step 2: Arrange and Join the Squares
Once you’ve made all your granny squares, it’s time to assemble the hat.
Layout:
- Top of Hat: Use 1 granny square.
- Crown/Sides: Attach 4 granny squares to the sides of the top square, forming a cube-like crown.
- Brim: Attach 8 to 10 granny squares around the base (or crochet a continuous brim).
Joining the Squares:
Use one of these joining methods:
- Whip Stitch: Lay two squares with right sides facing, stitch through back loops only.
- Slip Stitch Join: Hold squares together and slip stitch through both layers with your hook.
- Join-As-You-Go (JAYG): If you’re experienced, crochet the last round of each square directly onto its neighbor.
Make sure all seams are smooth and flexible.
🪡 Optional: Crochet a Continuous Brim Instead
If you’d rather not use granny squares for the brim, here’s how to crochet it:
Crochet Brim Instructions:
Round 1: Attach yarn to any stitch at the bottom of the crown.
Sc all the way around the base. Join with sl st.
Round 2–5:
- Work in hdc or dc, increasing every few stitches (e.g., hdc in 2 stitches, 2 hdc in next stitch) to gently flare the brim.
- Continue until the brim is the desired length (3–4 rounds is typical).
Finishing Round (Optional):
- Work a round of reverse sc (crab stitch) or sl st for a clean, decorative edge.
📏 Sizing Tips
Standard adult head circumference is around 21–23 inches. Adjust square size or number of rounds to ensure your crown fits:
- If your squares are 4” each, 4 squares around = 16” before stretching — perfect with slight elasticity from the yarn.
- You can also add another square or make larger squares for looser fit.
🎨 Color Ideas & Customizations
- 🌈 Use a different color for each square for a patchwork look.
- 🖤 Use black to join the squares for a vintage ’70s vibe.
- 💐 Add applique flowers or embroidery to individual squares.
- ✨ Use metallic or speckled yarn for a trendy twist.
✅ Final Steps
- Weave in all ends with a yarn needle.
- Lightly block your hat if it feels stiff or misshapen.
- Try it on — you made it!
🧽 Care Instructions
- Hand wash or gentle cycle in cold water.
- Lay flat to dry to maintain shape.
- Store folded gently or on a mannequin head.
🧦 Conclusion
Granny square bucket hats are the perfect DIY crochet project for showcasing your creativity, color skills, and crochet technique. They make great gifts, craft fair items, or just a cozy statement piece for your wardrobe.
Once you’ve made one, you’ll want to make a dozen — each one totally unique!
Video Tutorial: