by
by In a world of fast fashion, there’s something uniquely satisfying about creating your own wardrobe. Not only does it allow for a perfect fit and personalized style, but it’s also a deeply rewarding creative process. If you’re looking to elevate your sewing skills and add a timeless piece to your collection, look no further than the classic straight-leg, high-waisted pant. This versatile garment flatters nearly every body type and can be dressed up or down for any occasion.
This detailed guide will walk you through the process of creating your own DIY straight-leg, high-waisted pants, complete with instructions on drafting your own sewing pattern. While it may seem daunting at first, breaking it down into manageable steps makes it an achievable and enjoyable project for intermediate sewers and adventurous beginners alike.
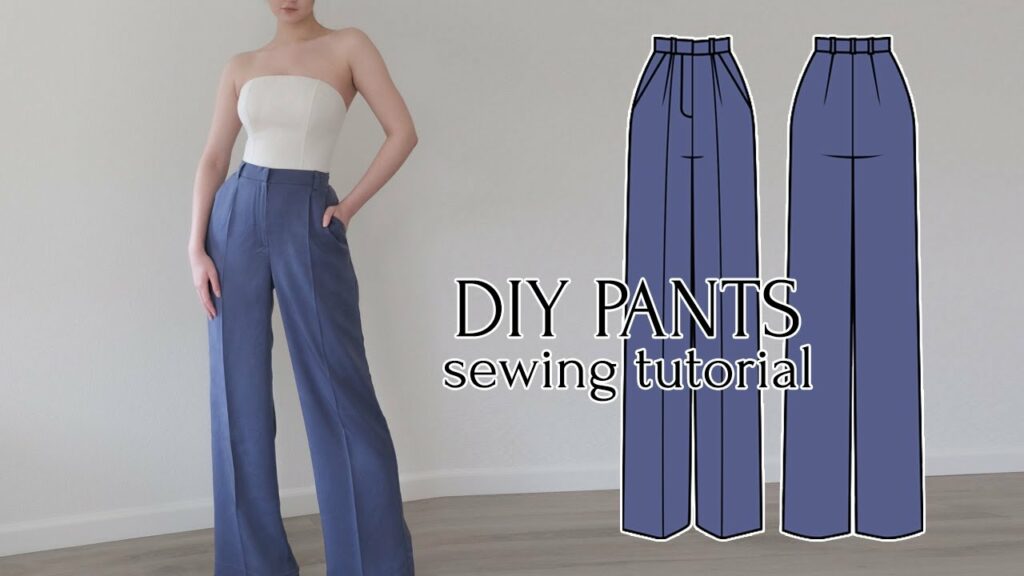
Why Straight-Leg, High-Waisted Pants?
Before we dive into the how-to, let’s appreciate the enduring appeal of this particular style:
- Flattering Silhouette: The high waist cinches at the narrowest part of the torso, creating an elongated leg line. The straight leg provides a balanced and elegant drape that skims the body without being too tight or too wide.
- Versatility: From casual tees to sophisticated blouses, sneakers to heels, these pants seamlessly transition between different aesthetics. They are perfect for work, weekend outings, or even a night out.
- Comfort: When made to your measurements, these pants offer unparalleled comfort and freedom of movement.
- Customization: Drafting your own pattern allows for complete control over rise, inseam, leg width, and pocket placement, ensuring a truly bespoke garment.
Materials You’ll Need:
- Fabric: Choose a medium-weight woven fabric with some drape. Good options include:
- Cotton Twill/Denim: Durable, classic, and holds its shape well.
- Linen/Linen Blends: Breathable, comfortable, and offers a relaxed elegance.
- Gabardine: Smooth, durable, and has a slight sheen, great for a more structured look.
- Wool Blends: Warm and luxurious for cooler weather.
- Avoid very stretchy knits for your first pair, as pattern drafting will be different.
- Matching Thread: Polyester all-purpose thread is usually sufficient.
- Zipper: A 7-9 inch dress zipper (or longer depending on your preference for opening ease).
- Button/Hook and Bar Closure: For the waistband.
- Interfacing: Fusible medium-weight interfacing for the waistband.
- Measuring Tape: Essential for accurate body measurements.
- Paper for Pattern Drafting: Large sheets of pattern paper, butcher paper, or even several pieces of newspaper taped together.
- Ruler (preferably a long straight edge and a clear gridded ruler): For drawing straight lines and accurate measurements.
- French Curve (optional but highly recommended): For drawing smooth curves for crotch seams.
- Pencil/Marker: For drafting.
- Scissors: Fabric shears and paper scissors.
- Pins: For securing fabric.
- Sewing Machine: With a regular sewing foot and a zipper foot.
- Iron and Ironing Board: Crucial for crisp seams and a professional finish.
Taking Accurate Body Measurements:
Accuracy is key here! Wear close-fitting clothing or underwear when taking these measurements.
- Waist Circumference: Measure around the narrowest part of your torso, typically above your navel.
- Hip Circumference: Measure around the fullest part of your hips and derriere.
- Waist to Hip (Vertical): Measure from your natural waistline down to the fullest part of your hip.
- Rise (Front): Sit on a flat chair. Measure from your natural waistline, down over your stomach, to the chair seat.
- Rise (Back): Measure from your natural waistline, down over your back and derriere, to the chair seat.
- Inseam: Measure from your crotch down to where you want the hem of your pants to fall (e.g., top of your foot, ankle).
- Outseam (Side Length): Measure from your natural waistline down to where you want the hem of your pants to fall.
- Thigh Circumference: Measure around the fullest part of your thigh, just below the crotch.
- Ankle/Hem Circumference: Decide how wide you want the bottom of your straight leg to be. Measure around your ankle if you want a snug fit, or simply choose a comfortable width (e.g., 16-20 inches total circumference for a classic straight leg, divided by two for half the width).
Drafting Your Custom Sewing Pattern:
This is where the magic happens! We’ll be drafting a front and back pant leg, and a waistband. Remember to add seam allowances to all edges after you’ve drawn your basic pattern pieces. A standard seam allowance is 1/2 inch (1.25 cm).
Part 1: Front Pant Leg
- Draw a Large “L” Shape: On your pattern paper, draw a long vertical line and a horizontal line extending to the right from the top of the vertical line. This is your starting point.
- Establish Waistline (A-B): From the top of the vertical line (A), measure down your desired front rise measurement (from step 4 above) and mark point B.
- Establish Hip Line (C): From point A, measure down your “waist to hip” measurement and mark point C. Draw a horizontal line from C extending to the right.
- Establish Inseam (D): From point B, measure down your inseam measurement and mark point D. Draw a horizontal line from D extending to the right (this is your hemline).
- Front Waist Width (E): Divide your total waist circumference by 4. Measure this amount from point A to the right and mark point E.
- Front Hip Width (F): Divide your total hip circumference by 4. Measure this amount from point C to the right and mark point F.
- Front Crotch Extension (G): From point B, measure out horizontally to the right. This measurement is typically 1/8 to 1/10 of your hip circumference. Mark point G.
- Connect Waist to Hip: Gently curve a line from E to F.
- Connect Hip to Crotch: Use your French curve (or freehand a smooth curve) to connect F to G. This forms the crotch curve.
- Draw Center Front Seam: Draw a straight line from E down to your chosen length on the vertical line (this will be the top of your fly opening, usually around 6-7 inches down).
- Front Thigh Width (H): From point G, drop a vertical line down to the hemline. At the level of your thigh circumference, measure out from this vertical line half of your thigh circumference (divided by 2 for the front half). Mark H.
- Front Hem Width (I): Divide your desired total ankle/hem circumference by 4. Measure this amount from the vertical line (dropped from G) out to the right along the hemline (D). Mark I.
- Connect Leg Lines: Draw a straight line from G to H, and then from H to I. This forms the inner leg seam.
- Draw Outer Leg Seam: Draw a straight line from F down to I. This forms the outer leg seam.
- Add Seam Allowances: Add 1/2 inch (1.25 cm) seam allowance around all edges of your drafted front pant leg piece, except for the center front line where the zipper will be (you’ll add a 1-inch fly extension here, as shown in zipper instructions).
Part 2: Back Pant Leg
- Start with Front Pattern: Place your drafted front pant leg pattern piece onto new pattern paper. Trace the outer leg seam (F to I) and the inseam (G to I). Also trace the hemline (D to I).
- Back Waist Width (J): On the back pattern, the waist is slightly wider than the front for fitting the derriere. From the top of the center back line, extend out about 1/2 to 1 inch more than your front waist width (E). Mark J.
- Back Hip Width (K): This will be the same as your front hip width (F) from the original vertical line. Mark K.
- Back Crotch Extension (L): From the point corresponding to G on the front pattern, extend out horizontally. This extension is typically 1/4 to 1/3 of your hip circumference. Mark L.
- Raise Back Waist (M): To accommodate the curve of the derriere, the back waist is often higher. From point J, measure up about 1 to 2 inches (adjust based on your body shape). Mark M. This will be the new top of your center back seam.
- Connect Back Waist to Hip: Gently curve a line from M to K.
- Connect Hip to Crotch: Use your French curve to connect K to L. This forms the back crotch curve, which will be deeper and curvier than the front.
- Back Thigh Width (N): From point L, drop a vertical line down to the hemline. At the level of your thigh circumference, measure out from this vertical line half of your thigh circumference (divided by 2 for the back half). Mark N. (This will be slightly wider than your front thigh for ease).
- Back Hem Width (O): This will be the same as your front hem width (I). Mark O.
- Connect Leg Lines: Draw a straight line from L to N, and then from N to O. This forms the inner leg seam.
- Draw Outer Leg Seam: Draw a straight line from K down to O. This forms the outer leg seam.
- Add Seam Allowances: Add 1/2 inch (1.25 cm) seam allowance around all edges of your drafted back pant leg piece.
Part 3: Waistband
- Measure Your Actual Waistline on Pattern: Measure the top curved edge of your front and back pant pattern pieces (subtracting seam allowances). Add these two measurements together. This is your adjusted waist circumference.
- Waistband Length: Take your adjusted waist circumference and add 1-2 inches for overlap for the closure.
- Waistband Height: Decide how wide you want your finished waistband to be (e.g., 1.5-2 inches). Double this measurement (because it will be folded) and add seam allowances (e.g., if finished width is 2 inches, total height would be 2 inches + 2 inches + 0.5 inch + 0.5 inch = 5 inches).
- Draft Rectangle: Draw a rectangle with your calculated waistband length and height. You’ll need two of these pieces: one for the outer waistband and one for the inner facing.
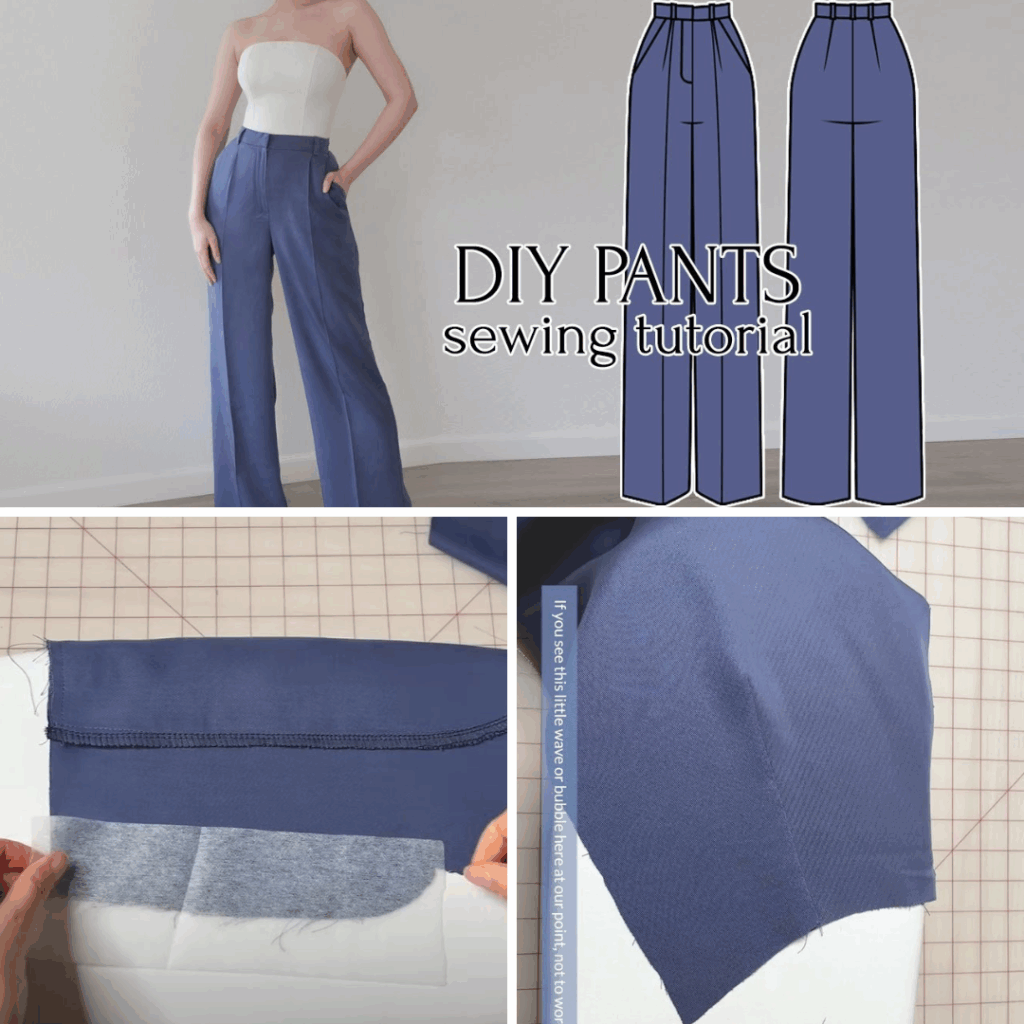
Sewing Your Straight-Leg, High-Waisted Pants:
Important: Always pre-wash and dry your fabric to prevent shrinkage.
- Cut Your Fabric:
- Place your pattern pieces on your fabric, aligning the grainline arrow on your pattern pieces with the selvage edge of your fabric.
- Cut two front pant leg pieces (one left, one right).
- Cut two back pant leg pieces (one left, one right).
- Cut two waistband pieces.
- Cut two front pocket bag pieces and two back pocket bag pieces (if adding pockets – see below for general pocket placement).
- Cut two waistband interfacing pieces.
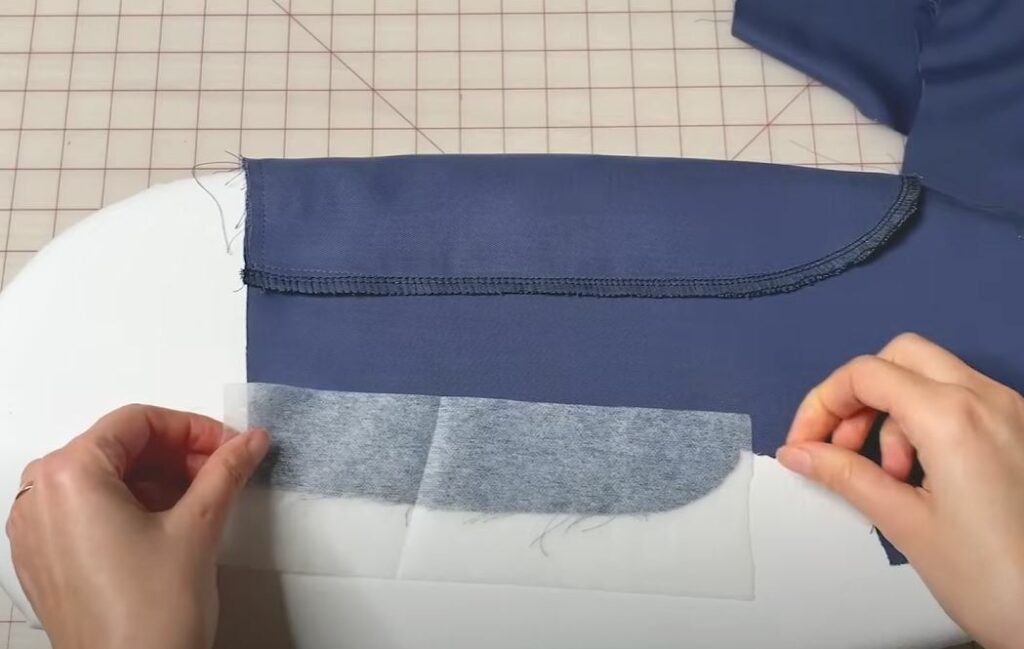
- Apply Interfacing: Fuse the interfacing to one of your waistband pieces according to the manufacturer’s instructions. This will be your outer waistband.
- Sew Darts (Optional but Recommended for Better Fit):
- If you added darts to your pattern (usually at the back waist for shaping), mark and sew them on both the front and back pant pieces. Press darts towards the center.
- Sew Side Seams:
- Place one front pant leg piece and one back pant leg piece right sides together, aligning the outer side seams.
- Pin and sew from the top down to the hem.
- Repeat for the other leg.
- Press seams open or towards the back. Finish raw edges with a serger or zigzag stitch to prevent fraying.
- Sew Inseam:
- Place one front pant leg piece and one back pant leg piece right sides together, aligning the inner leg seams.
- Pin and sew from the crotch down to the hem.
- Repeat for the other leg.
- Press seams open or towards the back. Finish raw edges.
- Sew Crotch Seam:
- Turn one pant leg right side out. Keep the other pant leg inside out.
- Slip the right-side-out leg inside the inside-out leg, so they are right sides together, aligning the front and back crotch seams perfectly.
- Pin carefully around the entire crotch curve.
- Sew the crotch seam in one continuous line.
- Clip curves carefully (do not cut through stitching!) to allow the seam to lie flat.
- Press seam open. Finish raw edges.
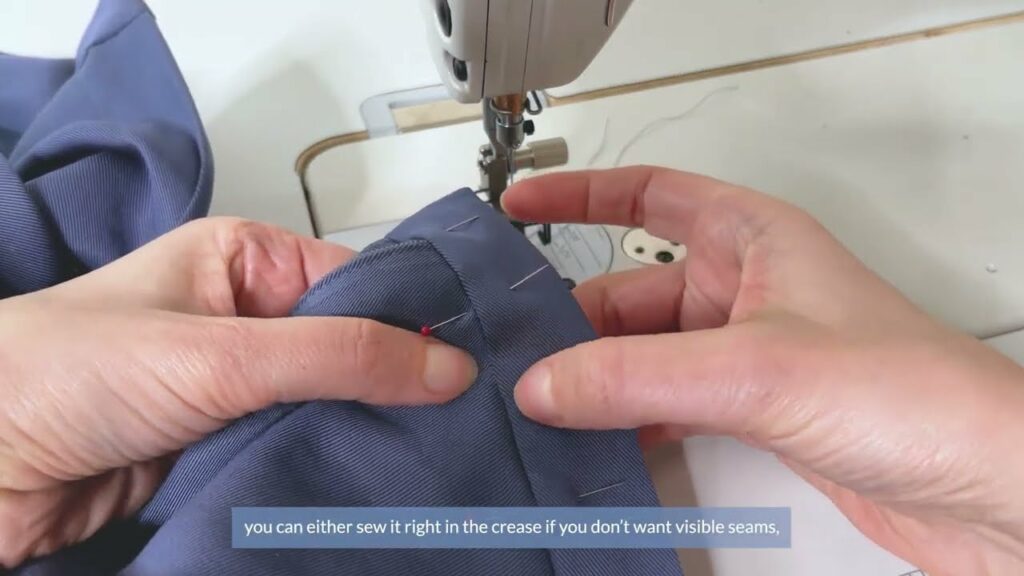
- Install Zipper (Fly Front):
- This is often the trickiest part. There are many tutorials online for fly front zippers. Here’s a simplified overview:
- On the left front pant leg, fold back the zipper extension.
- On the right front pant leg, fold back and press the fly facing.
- Attach the zipper to the right fly facing, then to the left front leg.
- Stitch the fly shield to the left front.
- Topstitch the fly to secure it.
- This is often the trickiest part. There are many tutorials online for fly front zippers. Here’s a simplified overview:
- Attach Waistband:
- Take your interfaced outer waistband piece. Press one long edge up by 1/2 inch (seam allowance).
- With right sides together, pin the unpressed long edge of the outer waistband to the top edge of your pants, aligning raw edges and notches. The waistband will extend past the zipper opening on one side for the overlap.
- Sew the waistband to the pants. Press seam allowance up towards the waistband.
- Take your inner waistband piece (no interfacing). Place it right sides together with the outer waistband, aligning the short ends and the remaining long raw edge.
- Sew the short ends of the waistband, effectively closing the waistband at the ends. Trim corners.
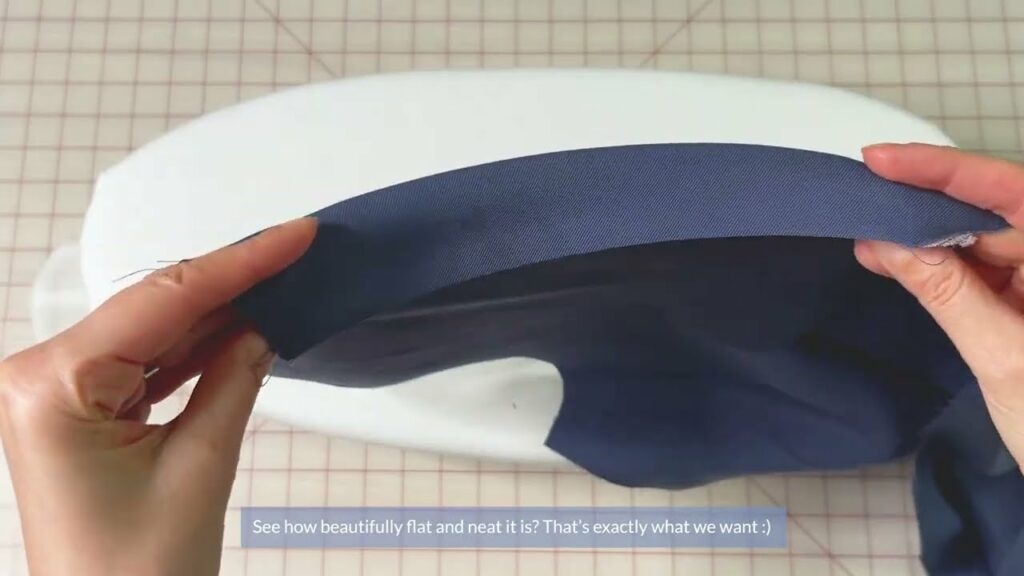
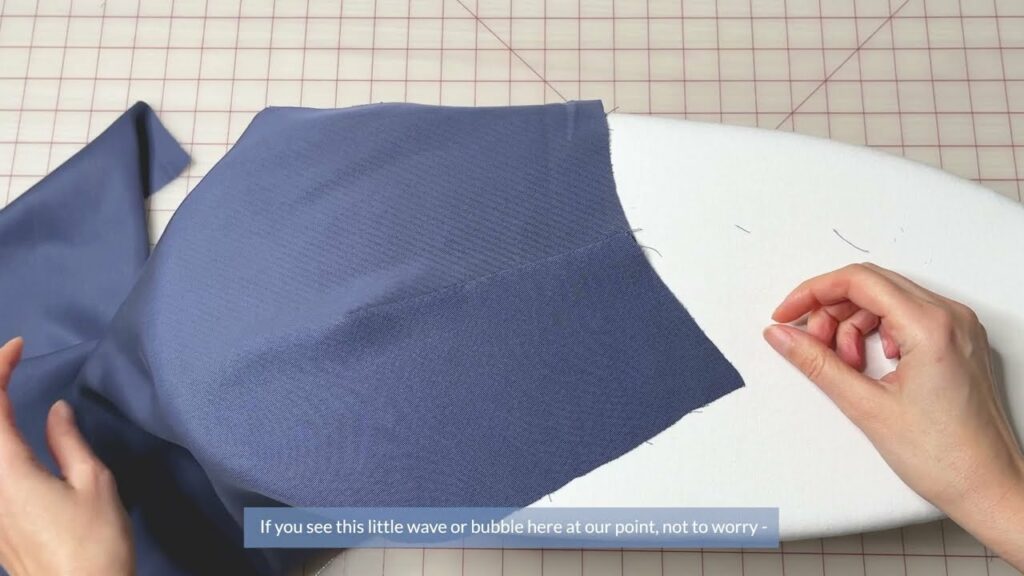
- Carefully turn the waistband right side out. The inner waistband should now be on the inside of the pants.
- Press the top edge of the waistband well. The previously pressed 1/2 inch seam allowance on the inner waistband should now be perfectly aligned with the seam where the outer waistband meets the pants.
- Hand-stitch or topstitch the inner waistband to the pants, catching that folded edge. This creates a neat finish.
- Add Buttonhole and Button/Hook and Bar:
- Create a buttonhole on the waistband overlap.
- Sew on your button or hook and bar closure to the corresponding position.
- Hem the Pants:
- Try on the pants and determine the desired length.
- Press up your desired hem allowance (e.g., 1-2 inches), twice.
- Stitch the hem in place by machine or hand for an invisible finish.
Adding Pockets (Optional):
Adding pockets greatly enhances the functionality of your pants. For a classic straight-leg, high-waisted pant, common pocket styles include:
- Side Seam Pockets: Integrated into the side seam, often with a slight curve for the opening.
- Back Patch Pockets: Square or rounded pockets sewn onto the outside of the back pant leg.
- In-Seam Pockets (Hidden): Similar to side seam pockets but the opening is less visible.
General instructions for side seam pockets:
- Draft Pocket Pieces: You’ll need two pocket bag pieces for each pocket (one for the front, one for the back). These are typically teardrop or rectangular shapes.
- Attach to Front and Back: Sew one pocket bag piece to the side seam of the front pant leg (right sides together, along the pocket opening). Do the same for the back pant leg. Clip curves.
- Sew Pocket Bags: With right sides together, align the two pocket bag pieces and sew around the curved edges, enclosing the pocket.
- Integrate into Side Seam: When sewing your main side seams (step 4 above), remember to stop and pivot around the pocket opening, securing the pocket in place.
Tips for Success:
- Muslin Up! Before cutting into your fashion fabric, sew a “muslin” (a test garment) from an inexpensive fabric like calico or old bedsheets. This allows you to check the fit and make any necessary pattern adjustments without wasting your good fabric.
- Press, Press, Press: Pressing seams after every sewing step makes a huge difference in the final appearance of your garment.
- Take Your Time: Don’t rush the process. Accuracy and patience will lead to a better result.
- Baste First: For tricky seams or zippers, use basting stitches (either by hand or with your machine’s basting setting) to temporarily hold pieces together before final stitching.
- Don’t Be Afraid to Unpick: Everyone makes mistakes. A seam ripper is your friend!
- Watch Tutorials: Supplement these instructions with video tutorials on specific techniques like zipper insertion or waistband attachment.
Conclusion:
Crafting your own straight-leg, high-waisted pants is a fulfilling project that yields a versatile and stylish addition to your handmade wardrobe. By taking precise measurements and following these steps, you’ll not only gain a deeper understanding of garment construction but also create a truly unique piece that fits you perfectly. So, gather your materials, fire up your sewing machine, and enjoy the satisfaction of creating your own bespoke fashion! Happy sewing!
Video tutorial: