by
by The wrap dress, iconic for its adjustability and graceful lines, has remained a fashion staple for decades. When paired with the whimsical touch of puff sleeves – whether subtle or dramatic – it transforms into a garment that exudes modern romance and playful sophistication. Imagine a dress perfectly tailored to your figure, flowing with every movement, and featuring those delightful voluminous sleeves. The good news is, you can create this bespoke piece yourself!
This guide will walk you through everything you need to know to sew your own wrap dress with puff sleeves, turning a seemingly complex design into a rewarding and achievable sewing project.
Why Sew Your Own Wrap Dress with Puff Sleeves?

- Perfect Fit: Wrap dresses are inherently adaptable, but making your own ensures the bust, waist, and length are exactly right for your unique body.
- Fabric Freedom: You choose the exact color, print, and drape you desire, unleashing your creativity beyond what’s available commercially.
- Unique Style: Combine the timeless wrap silhouette with your preferred level of puffiness and sleeve length for a truly one-of-a-kind garment.
- Skill Building: This project introduces or refines techniques like working with facings, gathering, attaching sleeves, and creating tie closures.
Materials You’ll Need:
- Fabric: The heart of your dress! Choose a fabric with good drape for the wrap body, but one that can also hold the shape of the puff sleeves.
- Recommended: Rayon Challis/Viscose, Cotton Lawn, Cotton Voile, Lightweight Linen/Linen Blends, Tencel Twill, Double Gauze, Lightweight Poplin (for a more structured puff).
- Avoid: Stiff fabrics (will make the wrap bulky), very slippery silks (difficult for beginners), or heavy knits (unless the pattern is specifically for them).
- Quantity: Consult your chosen commercial pattern for exact yardage. If drafting or modifying, estimate based on your pattern pieces (often 3-4 yards/meters for a maxi length on 45″ wide fabric, less for narrower fabric).
- Interfacing: Lightweight fusible interfacing for facings, collar bands (if applicable), and cuffs.
- Matching All-Purpose Thread: Polyester or cotton.
- Buttons/Snaps (Optional): For an internal closure on the bodice if your pattern suggests it.
- Safety Pin or Bodkin: For turning ties.
- Sewing Machine: With a universal needle appropriate for your fabric.
- Iron and Ironing Board: Non-negotiable for professional-looking seams.
- Measuring Tape, Fabric Scissors, Pins, Tailor’s Chalk/Fabric Marker, Seam Ripper: Your essential toolkit.
Pattern Selection or Modification:
For an “easy” approach, using a commercial sewing pattern specifically designed for a wrap dress with puff sleeves is highly recommended.
- Commercial Patterns: Look for patterns from brands like Simplicity, McCall’s, Butterick, New Look, or independent pattern companies (e.g., True Bias, Closet Core Patterns, Tilly and the Buttons). They will provide detailed instructions, proper shaping, and pre-drafted puff sleeves.
- What to Look For in a Pattern:
- Clearly labeled “wrap dress.”
- Sleeve options that include “puff sleeve,” “gathered sleeve head,” or “gathered cap sleeve.”
- A construction method you’re comfortable with (e.g., separate bodice and skirt, or one-piece body).
Modifying a Basic Pattern (More Advanced): If you’re comfortable with pattern drafting, you could adapt a basic fitted bodice and skirt pattern:
- Bodice: Add overlap to the front bodice pieces for the wrap closure. Create a V-neckline.
- Skirt: Use an A-line or gathered skirt pattern piece.
- Puff Sleeves: Take a basic sleeve pattern and use the “slash and spread” method.
- Draw vertical lines up the sleeve pattern from the hem to the top.
- Cut along these lines (stopping before cutting all the way through at the sleeve cap/head).
- Spread the pieces apart to create fullness at the top (for gathering into the armhole) and/or at the cuff (for gathering into a cuff band or elastic). Tape paper underneath to fill the gaps.
Understanding the Key Components:
Wrap Dress Body:
- Bodice: Typically consists of a back piece and two front pieces that overlap. One front piece usually has an extended tie or a channel for a tie.
- Skirt: Can be A-line, straight, or gathered, attaching to the bodice at the waistline.
- Waist Ties: Essential for the wrap closure. One tie is usually sewn into a side seam, and the other is threaded through an opening in the opposite side seam or through a buttonhole, then tied externally.
- Facings/Bindings: Used to create a clean finish on the neckline and front overlapping edges.
Puff Sleeves:
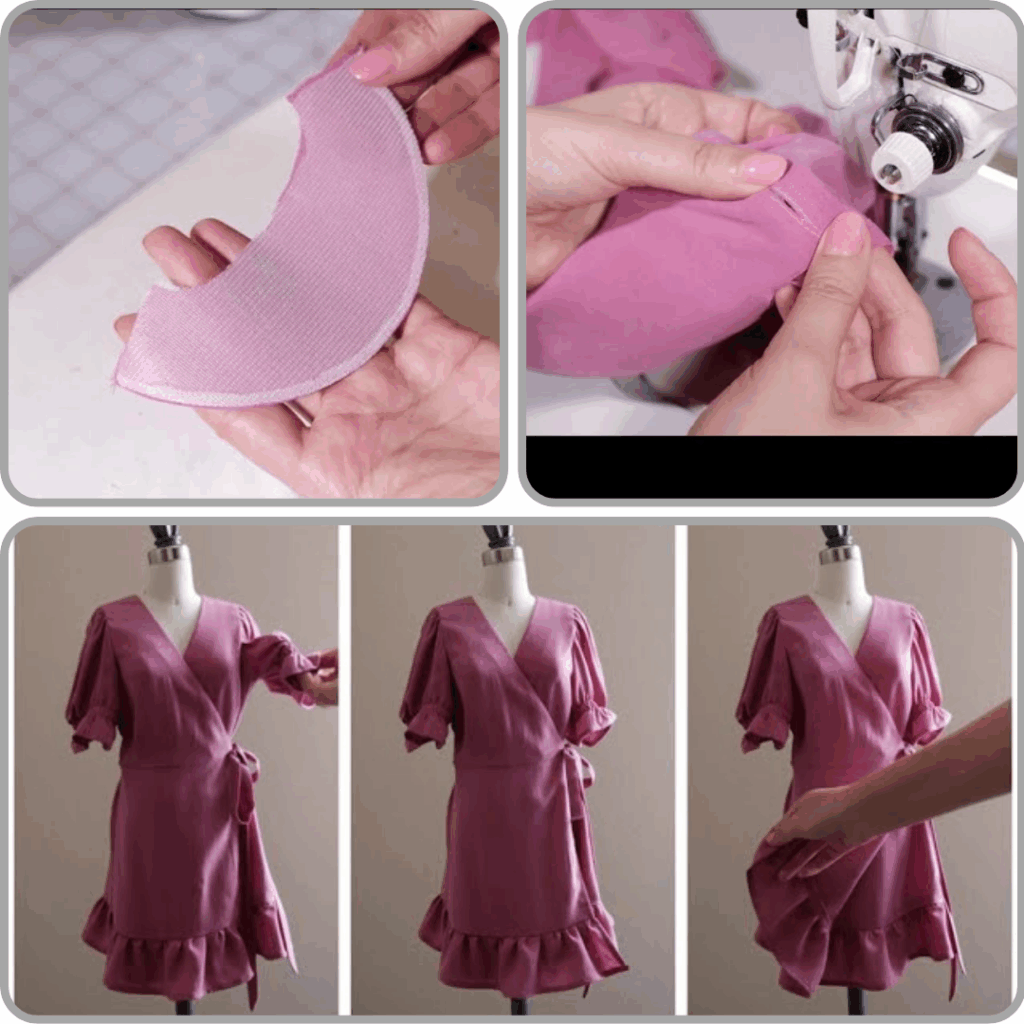
- Gathered Sleeve Head: The characteristic puffiness at the top of the sleeve is created by gathering the wider sleeve cap to fit the smaller armhole opening.
- Gathered Cuff: The bottom of the sleeve is also gathered into an elastic casing or a separate cuff band, which defines the puff shape.
- Length: Puff sleeves can be short (cap sleeve), elbow-length, or long, ending in a cuff.
Step-by-Step Sewing Instructions:
Always refer to your specific pattern’s instructions, as construction order can vary. This is a general guide:

Phase 1: Preparation
- Pre-wash and Press Fabric: Wash your fabric as you intend to wash the finished garment. Press thoroughly to remove wrinkles.
- Cut Pattern Pieces: Lay out your pattern pieces according to the cutting layout provided. Cut carefully.
- Transfer Markings: Transfer all notches, dots, and other pattern markings to your fabric using tailor’s chalk or a fabric marker.
- Apply Interfacing: Fuse interfacing to the wrong side of your facing pieces, cuff pieces, and any collar pieces, following the interfacing manufacturer’s instructions.
Phase 2: Construct the Bodice
- Sew Shoulder Seams: With right sides together (RST), sew the front bodice pieces to the back bodice piece at the shoulder seams. Press seams open.
- Prepare and Attach Facings:
- Sew the shoulder seams of your facing pieces. Press seams open.
- Pin the facing (RST) to the neckline and front raw edges of the bodice. Stitch.
- Trim seam allowances, clip curves (don’t cut through stitches!), and grade seams where necessary to reduce bulk.
- Understitch the facing: From the right side of the facing, stitch through the facing and the seam allowance close to the seam line. This helps the facing roll to the inside.
- Press the facing neatly to the inside of the bodice. You may want to baste or lightly tack the facing to the shoulder seams to keep it in place.
Phase 3: Construct the Puff Sleeves
- Sew Sleeve Underarm Seams: With RST, fold each sleeve piece in half lengthwise. Sew the underarm seam. Press seams open.
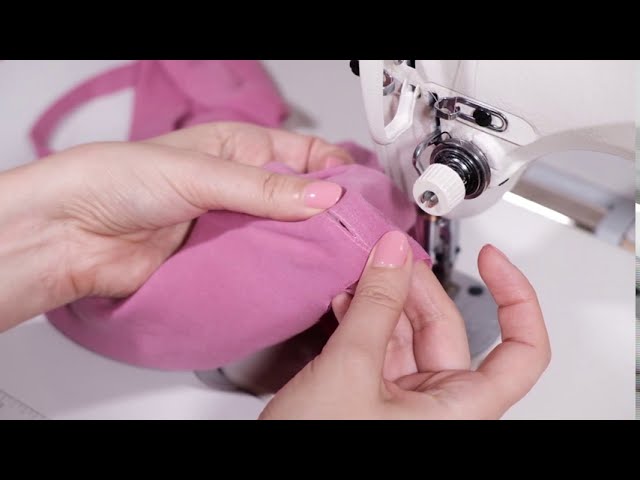
- Run Gathering Stitches (Sleeve Head): Set your machine to a long stitch length (e.g., 4.0-5.0). Stitch two rows of gathering stitches along the top curved edge of each sleeve cap, within the seam allowance (one at 1/4″ and one at 1/2″ from the raw edge). Do NOT backstitch. Leave long thread tails.
- Run Gathering Stitches (Sleeve Cuff): Repeat the gathering stitch process along the bottom raw edge of each sleeve.
- Prepare Cuff Bands (if applicable): If your pattern has separate cuff bands, sew them into loops and press.
- Attach Cuff Bands (or Elastic/Shirring):
- Gather the bottom edge of the sleeve to match the cuff band circumference (or your elastic length).
- With RST, pin the gathered sleeve edge to the cuff band. Stitch.
- Finish the cuff band according to your pattern (e.g., fold over and stitch, or create an elastic casing).
- Alternatively, if using elastic directly: Create a casing by folding and stitching the sleeve hem, then thread elastic through.
- If shirring: Use elastic thread in your bobbin to shirr the cuff area.
Phase 4: Join Bodice and Sleeves
- Attach Sleeves to Bodice:
- Gather the sleeve head (top gathering stitches) until the sleeve cap circumference matches the armhole opening on the bodice. Distribute gathers evenly.
- With RST, pin the sleeve into the armhole, matching notches and easing the gathers.
- Stitch the sleeve into the armhole using a 1/2″ seam allowance.
- Press the seam allowance towards the sleeve. Finish raw edges.
Phase 5: Construct the Skirt
- Sew Skirt Side Seams: With RST, sew the front skirt pieces to the back skirt piece at the side seams. Press seams open.
- Prepare Skirt Top (if gathered): If your skirt is gathered, run two rows of gathering stitches along the top raw edge of the skirt (where it will join the bodice).
Phase 6: Join Bodice and Skirt, Add Ties

- Attach Skirt to Bodice:
- If skirt is gathered, gather the top edge until it matches the bottom edge of the bodice. Distribute gathers evenly.
- With RST, pin the skirt to the bottom edge of the bodice, matching side seams and center front/back.
- Stitch the bodice and skirt together at the waistline using a 1/2″ seam allowance.
- Press seam allowance up towards the bodice. Finish raw edges.
- Prepare and Attach Waist Ties: Your pattern will likely have two long tie pieces.
- Fold each tie piece lengthwise (RST) and stitch, leaving one short end open for turning. Trim corners/curves.
- Turn ties right side out using a safety pin or bodkin. Press flat.
- Attach the ties as per your pattern: one typically gets sewn into a side seam, and the other gets inserted through an opening (buttonhole or gap left in a seam) on the opposite side.
- Internal Closure (Optional): Some wrap dresses have a button or snap on the inside to secure the underlap. Follow your pattern’s instructions.
Phase 7: Final Finishing
- Hem the Skirt: Try on the dress to determine the desired length. Press up your desired hem allowance (e.g., 1/4″ then 1″), and stitch.
- Final Press: Give your entire dress a thorough final press. This will make all the difference in the professional appearance of your handmade garment.
- Trim Threads: Snip any remaining loose threads.
Video Tutorial :
Tips for Success:
- Muslin/Toile: For a wrap dress, especially if it’s your first time, sewing a muslin (test garment in inexpensive fabric) is highly recommended. This allows you to check the fit of the bodice and waistline before cutting into your fashion fabric.
- Press, Press, Press: Pressing your seams after every single step is crucial for crisp, professional results.
- Gathering Evenly: Take your time. Pull threads gently and distribute gathers with your fingers. Pin extensively before sewing.
- Needle Change: Use a fresh needle appropriate for your fabric type and weight.
- Take Your Time: Don’t rush! Especially through the facings and gathering steps.
- Seam Finishes: Finish all raw edges (zigzag stitch on a regular machine or a serger) to prevent fraying and ensure longevity.
Sewing a wrap dress with puff sleeves is a rewarding project that combines classic tailoring with a touch of modern flair. With careful attention to detail and patience, you’ll create a stunning, custom-fit garment that will be a favorite in your wardrobe for years to come. Enjoy the process of bringing your stylish vision to life! Sources