 by
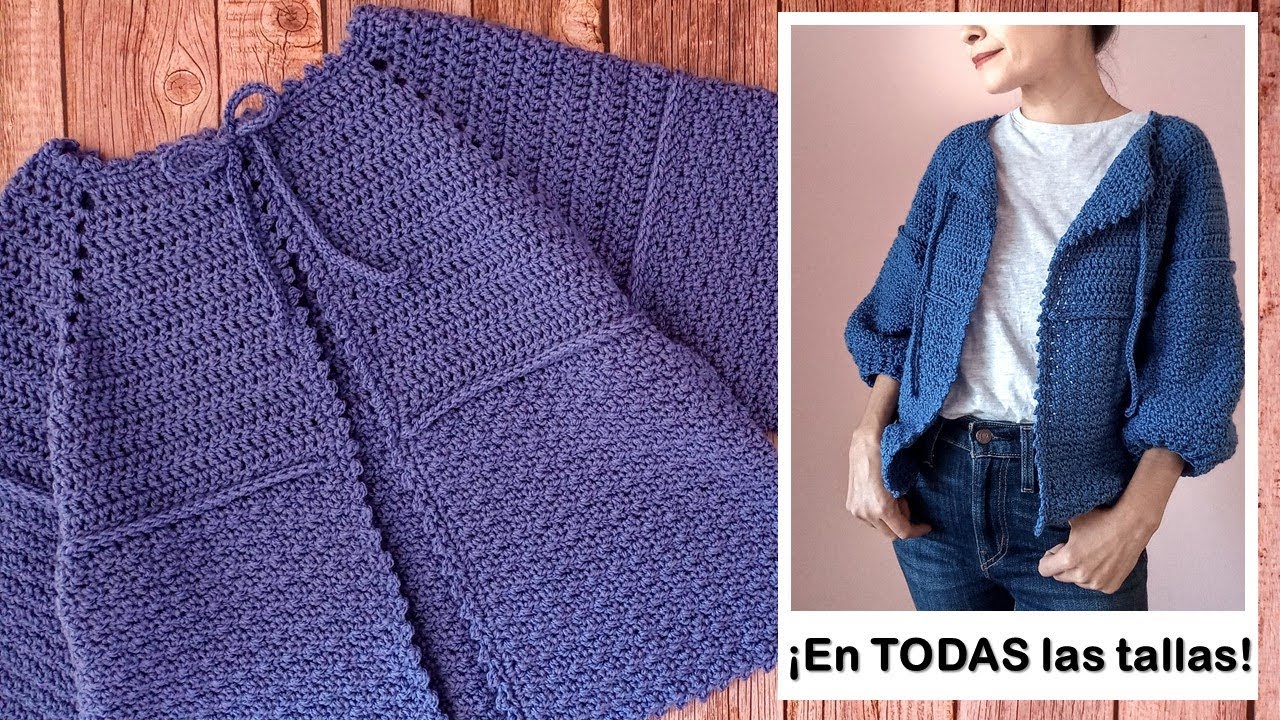
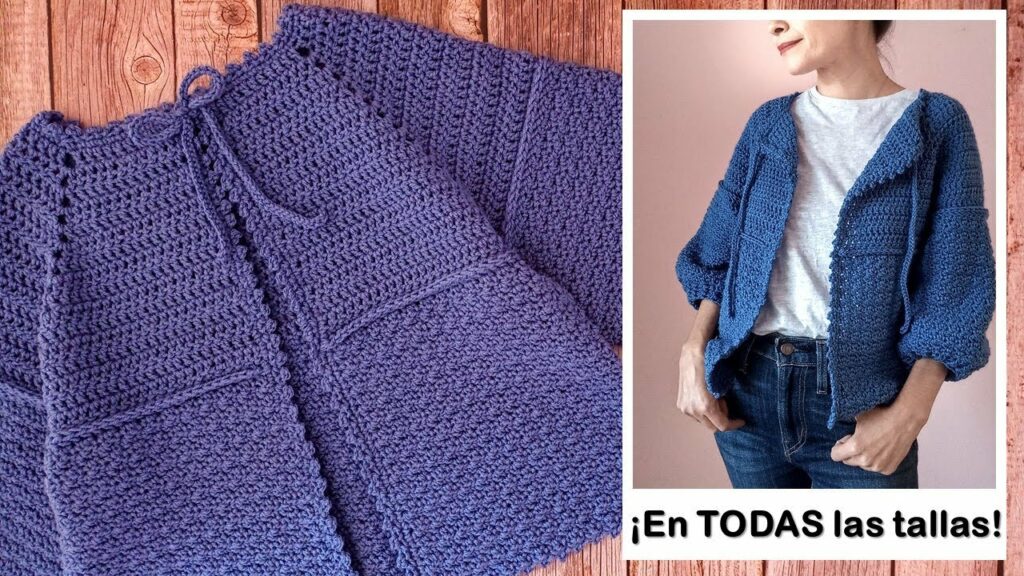
by Crocheting a cardigan is a rewarding experience, and opting for a top-down construction adds an extra layer of magic and practicality to the process. Unlike traditional methods where you crochet separate panels and then seam them together, a top-down cardigan begins at the neckline and grows outwards, resulting in a virtually seamless garment that you can try on as you go.
This detailed article will guide you through the principles, techniques, and steps involved in crocheting a beautiful top-down cardigan.
Why Choose a Top-Down Cardigan?

The top-down method offers several distinct advantages:
- Seamless Construction: This is the biggest draw. No bulky seams means greater comfort, especially for sensitive skin, and a cleaner, more professional finish. It also significantly reduces finishing time.
- Try-On-As-You-Go: As the garment grows, you can easily slip it on to check the fit of the yoke, armholes, and body length. This allows for real-time adjustments, ensuring a perfect custom fit without guessing.
- Effortless Length Adjustment: Want a cropped cardigan? A hip-length one? A duster? You can simply stop crocheting the body when it reaches your desired length.
- Optimal for Variegated Yarns: Since you’re working continuously, variegated or self-striping yarns will flow beautifully without being interrupted by seams.
- Less Yarn Guesswork: You can knit until you run out of yarn (or almost), making it great for using up stash yarn, provided you have enough for the main body and sleeves.
Understanding Top-Down Cardigan Construction
The core of a top-down cardigan lies in how the “yoke” (the upper part that covers shoulders and chest) is shaped.
- The Yoke: This is where you begin. You’ll start with a foundation chain for the back of the neck or a small circle (depending on the pattern) and work in rows (for a cardigan with a front opening) or in the round (for a seamless circular yoke that you then split).
- Increase Methods: As you work the yoke, you’ll strategically add stitches to create the shaping for the shoulders and upper chest. The two most common types of top-down yokes are:
- Raglan Yoke: This is identified by four distinct increase lines that run diagonally from the neckline down towards the underarms. Increases are made on either side of these four points (two for the front panels, two for the back, two for each sleeve section). This creates a more defined shoulder line.
- Circular Yoke: Increases are distributed more evenly around the entire circumference of the yoke. This results in a softer, rounded shoulder line and is often seen in simpler, more relaxed cardigan designs.
- Separation for Body and Sleeves: Once the yoke reaches the appropriate circumference to fit comfortably around the bust (and the sleeves fit around the upper arm), you’ll separate the stitches. The stitches for the sleeves are put on hold (e.g., on stitch holders or waste yarn), and the remaining stitches for the front and back panels are joined to form the body of the cardigan.
Planning Your Top-Down Cardigan Project
Successful garment knitting begins with thorough preparation.
- Size Selection:
- Measure Yourself (or the Recipient): Don’t rely solely on S/M/L labels. Measure your full bust/chest circumference, upper arm circumference, and desired length from the shoulder to the hem.
- Consult the Pattern’s Sizing Chart: Compare your measurements to the pattern’s specific finished garment measurements and choose the size with the closest positive ease (meaning the garment will be slightly larger than your body for comfort).
- Pattern Selection (Essential!):
- For your first top-down cardigan, choose a well-written pattern specifically for top-down construction. Look for clear, step-by-step instructions, schematics, and detailed sizing.
- Popular beginner-friendly top-down patterns often use simple stitches like half double crochet (hdc) or double crochet (dc).
- Yarn & Hook Selection:
- Yarn Weight & Fiber: The pattern will recommend a yarn weight (e.g., DK, Worsted, Bulky) and fiber type. Consider the desired drape, warmth, and ease of care. Acrylics are versatile and easy care, wools offer warmth and elasticity, cottons offer drape and breathability.
- Hook Size: The pattern will suggest a hook size. This is a starting point, as your personal tension will dictate the final hook size.
- Gauge Swatch (ABSOLUTELY CRITICAL!):
- Do not skip this step! Crochet a large swatch (at least 6×6 inches / 15×15 cm) using your chosen yarn and hook in the main stitch pattern of the cardigan.
- Wash and block your swatch exactly as you would the finished cardigan. This accounts for any changes in the fabric (e.g., growth or shrinkage) after washing.
- Measure your stitches and rows per inch/cm accurately. If your gauge doesn’t match the pattern’s, adjust your hook size (go up for fewer stitches per inch, down for more) until it matches. A small difference in gauge can lead to a significant difference in the final garment’s size.
Materials You’ll Need
- Yarn: As specified by your chosen pattern, in your desired colors. Purchase enough to complete the entire project, plus a little extra for swatching.
- Crochet Hook: The size recommended by your pattern, adjusted based on your gauge swatch.
- Stitch Markers: Essential for marking raglan lines, the beginning of rounds, and specific pattern repeats.
- Tapestry Needle: For neatly weaving in yarn ends.
- Scissors.
- Measuring Tape: For checking gauge and garment dimensions.
- Stitch Holders or Waste Yarn: To temporarily hold the sleeve stitches once the body is separated.
- Buttons (Optional): If your cardigan design includes a button closure. Choose buttons appropriate for the yarn weight and garment style.
- Blocking Mats and T-pins (Highly Recommended): For shaping and finishing your cardigan professionally.
Key Crochet Techniques for a Top-Down Cardigan
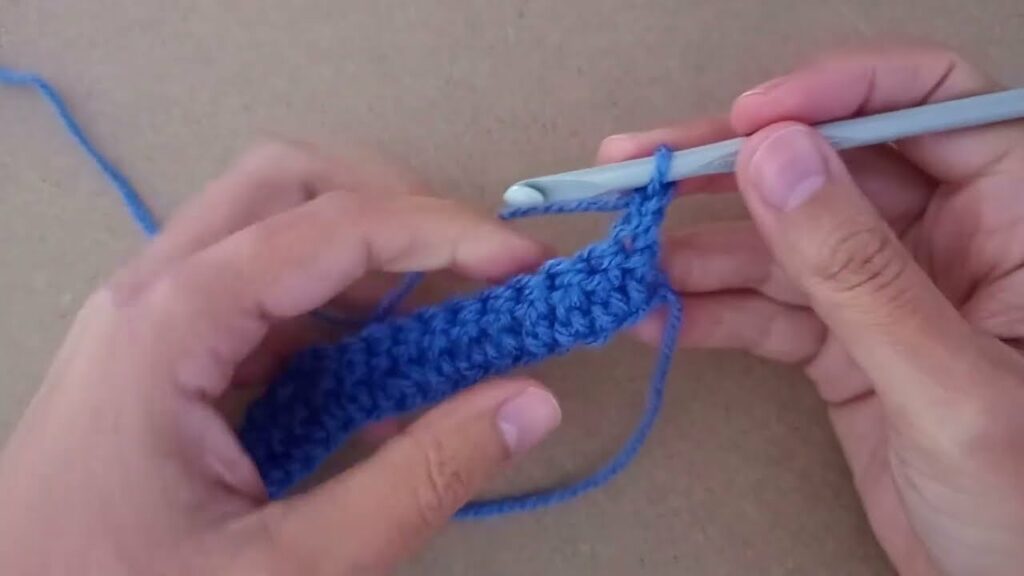
Beyond basic stitches (chain, slip stitch, single crochet, half double crochet, double crochet), you’ll use:
- Foundation Chain/Starting Ring: The very first step of your cardigan.
- Working in Rows: For the yoke and main body of a cardigan with an open front.
- Working in the Round: For circular yokes, and usually for the sleeves once they are separated.
- Increasing Stitches:
- 2 stitches in one stitch: The simplest increase (e.g., 2hdc in next hdc).
- Specific pattern instructions: Many patterns have their own preferred increase methods (e.g., working into a chain space, using a specific stitch combination). Follow your pattern precisely.
- Decreasing Stitches: Less common in simple top-down cardigans (unless shaping sleeves more dramatically), but useful for shaping (e.g.,
hdc2tog– half double crochet two together). - Ribbing: Used for cuffs, bottom hem, and button bands, providing stretch and a neat finish.
- Single Crochet in the Back Loop Only (SC in BLO): Creates a dense, horizontal rib.
- Front Post/Back Post Double Crochet (FPDC/BPDC): Creates a more elastic, knit-like vertical rib.
- Buttonholes:
- Chain-Space Buttonholes: The simplest method. Chain 2-3 stitches (depending on button size), skip the same number of stitches, and then work into the chain space on the next row.
- Picking Up Stitches: If your button bands or neckline edging are added after the main body, you’ll learn to pick up stitches evenly along an edge.

Step-by-Step Flow (Conceptual Guide – Top-Down Raglan Cardigan)
This general flow is common for many top-down cardigan patterns.
- Preparation:
- Read your chosen pattern thoroughly from start to finish.
- Make your gauge swatch! Adjust your hook size if necessary until your gauge matches the pattern.
- Gather all your yarn, hook, stitch markers, and other notions.
- Start the Yoke (Neckline):
- Begin with your pattern’s specified foundation chain or starting method for the neckline. This will form the top edge of the cardigan.
- Place stitch markers according to your pattern to designate the four “raglan points” (where the increases will occur for the front, back, and sleeves).
- Work the Yoke:
- Work the first few rows (or rounds if a circular yoke) following your pattern’s stitch and increase instructions.
- On designated increase rows (often every other row), you’ll add stitches at each of the four raglan points. This causes the yoke to expand outwards, shaping the shoulders and upper body.
- Continue working the yoke until it reaches the specified length from the neckline to the underarm, and the circumference fits comfortably around your bust and upper arm. This is your chance to try it on!
- Separate for Body and Sleeves:
- Once the yoke is complete, the pattern will instruct you to divide the stitches.
- The stitches for the sleeves (the two sections between the raglan points) will be put on hold (e.g., slipped onto stitch holders or waste yarn).
- You will then often chain a few stitches under each arm (these are the underarm chains) to add ease and allow for a comfortable fit.
- Join the remaining stitches for the two front panels and the back panel to form the main body of the cardigan.
- Work the Body:
- Continue working in rows (back and forth for the cardigan’s open front) until the cardigan reaches your desired length from the underarm to the hem.
- If your pattern includes waist shaping, follow those instructions.
- Finish the bottom edge with your chosen ribbing (e.g., a few rows of SC in BLO or FPDC/BPDC).
- Work the Sleeves:
- Join your yarn at the center of one underarm chain.
- Work the sleeve in the round, following your pattern’s instructions for length and any tapering (decreases) towards the wrist.
- Finish the cuff with your chosen ribbing pattern.
- Repeat for the second sleeve.
- Add Button Bands & Neckline Edging:
- Most top-down cardigan patterns integrate the button bands as you go along the front edges of the yoke and body. If not, your pattern will instruct you to pick up stitches along the front opening and neckline.
- Work the button band (usually a few rows of SC or ribbing), creating buttonholes evenly spaced on one side as you go.
- Extend the band around the neckline for a neat finish.
- Finishing Touches:
- Weave in all yarn ends meticulously using your tapestry needle. Secure all ends, especially in a wearable garment.
- Attach Buttons: Sew on the buttons securely, aligning them with your crocheted buttonholes.
- Blocking:
- Gently wash or wet your finished cardigan according to your yarn’s care instructions.
- Lay it flat on blocking mats, gently shaping it to the correct finished dimensions (as per your pattern’s schematic). Use T-pins to hold its shape if necessary, especially for lace or textured stitches.
- Allow it to dry completely. Blocking is crucial for garments as it evens out stitches, enhances drape, and sets the final shape, giving your cardigan a professional, polished look.
Tips for Success
- Consistent Tension: Maintain even tension throughout for a uniform fabric and a professional finish. Practice your chosen stitch.
- Use Stitch Markers! They are invaluable for marking the start of rounds, raglan lines, and increase points. Don’t underestimate their utility.
- Count Your Stitches! Regularly verify your stitch counts at the end of each row or round. This simple habit helps you catch any errors early, saving you from significant unraveling later.
- Choose the Right Yarn: The yarn’s fiber content and weight greatly impact the cardigan’s drape and feel. Follow pattern recommendations or choose similar alternatives carefully.
- Be Patient: Crocheting a garment takes time and attention to detail. Enjoy the process of seeing your fabric grow and transform.
Caring for Your Crocheted Cardigan
Proper care will ensure your handmade cardigan stays beautiful and wears well for years:
- Follow Yarn Label Instructions: Always defer to the specific care instructions on your chosen yarn skein.
- Gentle Washing: Machine wash on a gentle/delicate cycle with cool water (if suitable for your yarn), or hand wash gently with a mild detergent.
- Reshape and Lay Flat to Dry: Gently squeeze out excess water (never wring or twist!). Reshape the cardigan back to its original dimensions (this is where blocking comes in handy for future washes) and lay it flat on a clean towel or a mesh drying rack to air dry completely.
- Never Hang Wet: The weight of a wet crocheted garment will cause it to stretch and distort if hung.
Video Tutorial;
Crocheting a top-down cardigan is a deeply satisfying project that yields a comfortable, custom-fit, and seamless garment. By understanding the principles of top-down construction and following your pattern carefully, you’ll be able to create a cherished addition to your wardrobe. Happy crocheting! Sources