by
by Easy Crochet Poncho: Your Go-To Project for Effortless Style & Warmth
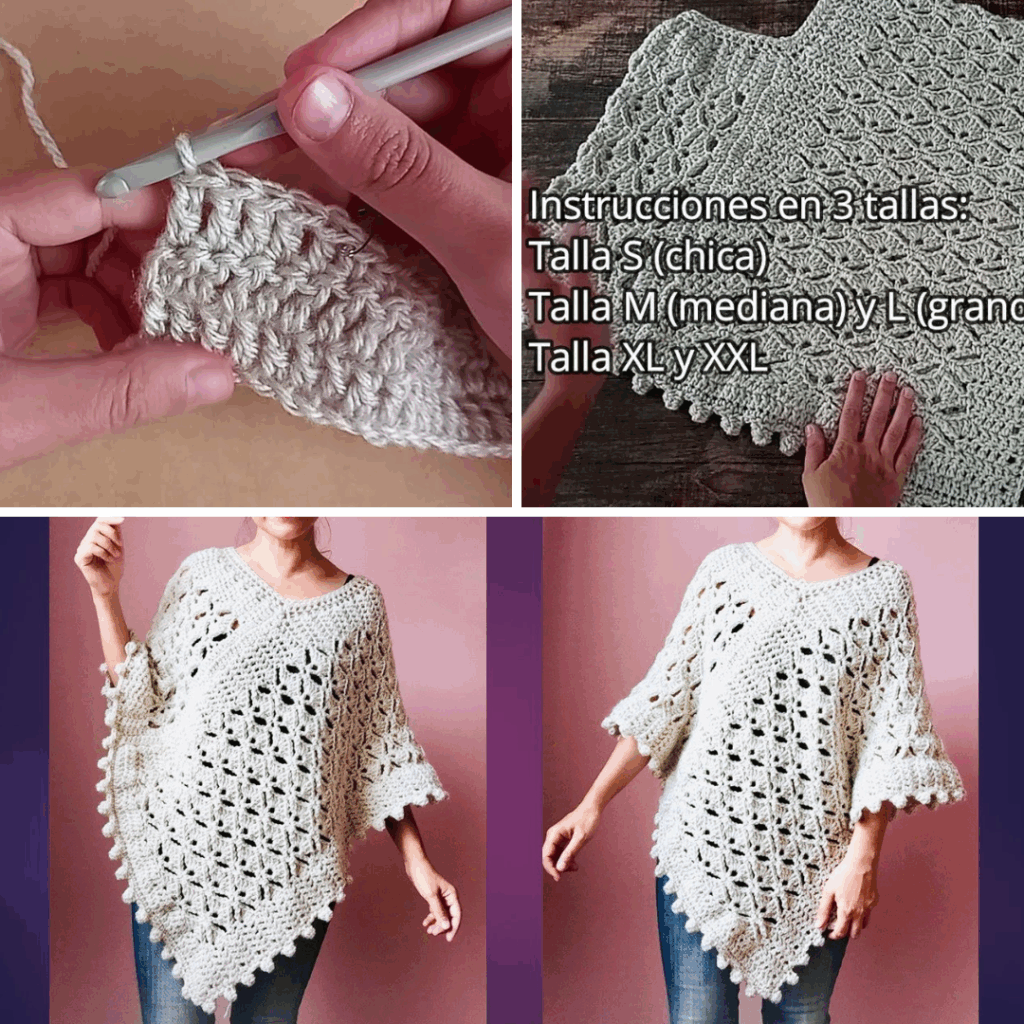
The crochet poncho stands out as a true gem in the world of handmade garments. It’s stylish, comfortable, incredibly versatile, and perhaps best of all, often surprisingly simple to make. For crocheters of all skill levels, from adventurous beginners to seasoned pros looking for a quick and satisfying project, an easy crochet poncho is an absolute winner.
This detailed article will guide you through everything you need to know to create a beautiful, easy crochet poncho, perfect for layering in any season.
Why an Easy Crochet Poncho is a Must-Make
- Simplicity in Design: Many poncho patterns involve straightforward shapes (often just one or two rectangles, or a simple circle/square with increasing stitches), minimizing complex shaping or intricate stitch patterns.
- Minimal Seaming: A significant advantage! Many poncho constructions are seamless (worked in the round) or require very little seaming, drastically reducing finishing time.
- Forgiving Fit: Unlike fitted sweaters, ponchos offer a relaxed, comfortable drape that makes sizing less precise. They’re incredibly adaptable to different body types and allow for ample movement.
- Versatile Layering: Perfect for transitional weather, adding a touch of warmth over a t-shirt or tank top, or layering over a long-sleeved shirt for extra coziness.
- Quick to Make: Due to their simple construction and often larger hook sizes/yarn weights, ponchos can work up surprisingly fast, offering quick gratification.
- Skill-Building for Beginners: It’s an excellent stepping stone for those new to garment making, allowing practice with basic stitches, working in the round or rows, and simple increases.
Understanding the “Easy Poncho” Aesthetic
An easy poncho typically focuses on comfort, simple drape, and effective use of yarn and basic stitches.
- Shape & Construction:
- Simple Rectangle(s): Often, an “easy poncho” is just one large rectangle folded and seamed, or two identical rectangles seamed at the shoulders. This is the simplest approach.
- Top-Down in the Round: Starting at the neckline and increasing stitches evenly in the round to form a growing circle or square. This creates a seamless garment with a natural drape.
- “V” Shape: Some easy ponchos are constructed by working in rows, increasing along a central line to create a V-shape from the neck down.
- Yarn Selection: The Key to Comfort & Drape
- Weight: Worsted (Category 4) or Aran (Category 4/5) are highly recommended for beginners as they are easy to work with and produce a cozy, mid-weight fabric. Chunky (Category 5) or Super Bulky (Category 6) yarns will make your poncho work up even faster for quick gratification.
- Fiber:
- Acrylic: Excellent for ease of care (machine washable and dryable), wide color range, and affordability. Many modern acrylics are incredibly soft.
- Wool/Wool Blends (Superwash): Offer great warmth, elasticity, and drape. Superwash varieties are easier to care for.
- Cotton/Cotton Blends: Ideal for lighter, breathable ponchos for warmer weather. They offer good stitch definition but can be heavier and less elastic.
- Color: The beauty of a simple poncho is that the yarn choice can be the star.
- Solid Colors: Classic and versatile.
- Variegated/Self-Striping Yarns: These yarns do all the color work for you, creating beautiful, effortless color changes without needing to join new skeins frequently.
- Color Blocks/Stripes: Easy to incorporate by simply changing colors at the end of a row or round.
- Stitch Patterns: Focus on Simplicity & Texture
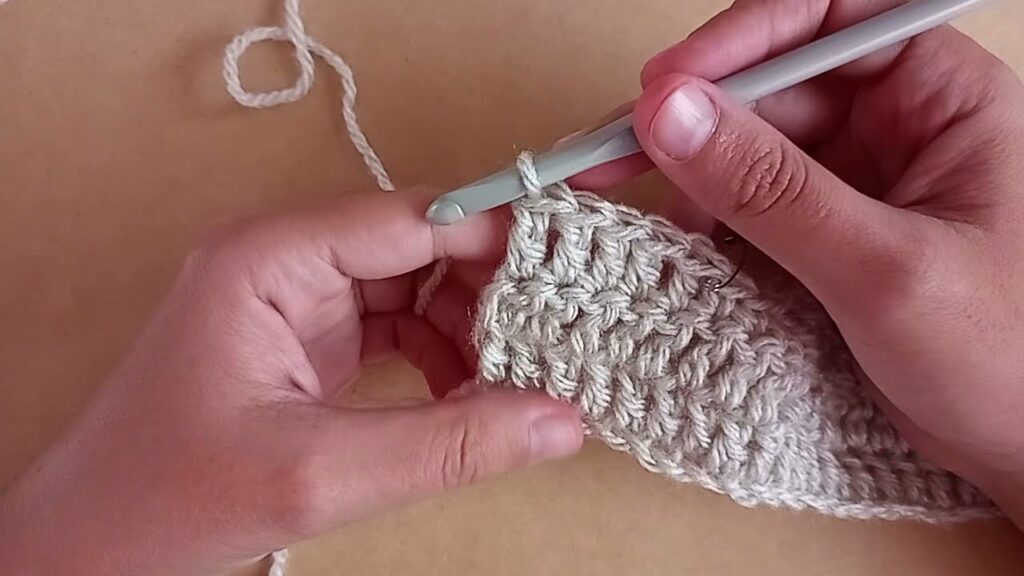
- Half Double Crochet (HDC): A fantastic choice. It works up faster than single crochet, creates a denser fabric than double crochet, and has a lovely drape.
- Double Crochet (DC): Works up very quickly, creating a softer, more open fabric.
- Single Crochet (SC): Creates a very dense, sturdy fabric, good for warmer ponchos or structured designs.
- Moss Stitch (Granite Stitch): A simple combination of SC and chain stitches that creates a beautiful, dense, yet flexible fabric.
- Simple Shell or V-Stitch: Easy to learn and add a touch of decorative openwork without being overly complicated.
- Granny Stitch (modern applications): Can be used for a more open, bohemian style.
Planning Your Easy Poncho Project
Even for an “easy” project, a little planning goes a long way.
- Size Selection:
- Ponchos are very forgiving. Most patterns will offer sizes like “one size fits most adults,” or provide child sizes (e.g., 2-4 years, 5-8 years, 9-12 years).
- Key Measurements:
- Neckline: Ensure it’s wide enough to comfortably slip over the head.
- Overall Length: Measure from the shoulder down to where you want the hem to fall (e.g., hip-length, mid-thigh).
- Width: The width should allow for comfortable drape, usually covering the arms to at least the elbows.
- Tip: If in doubt, err on the side of making it a little larger; ponchos look great with generous drape.
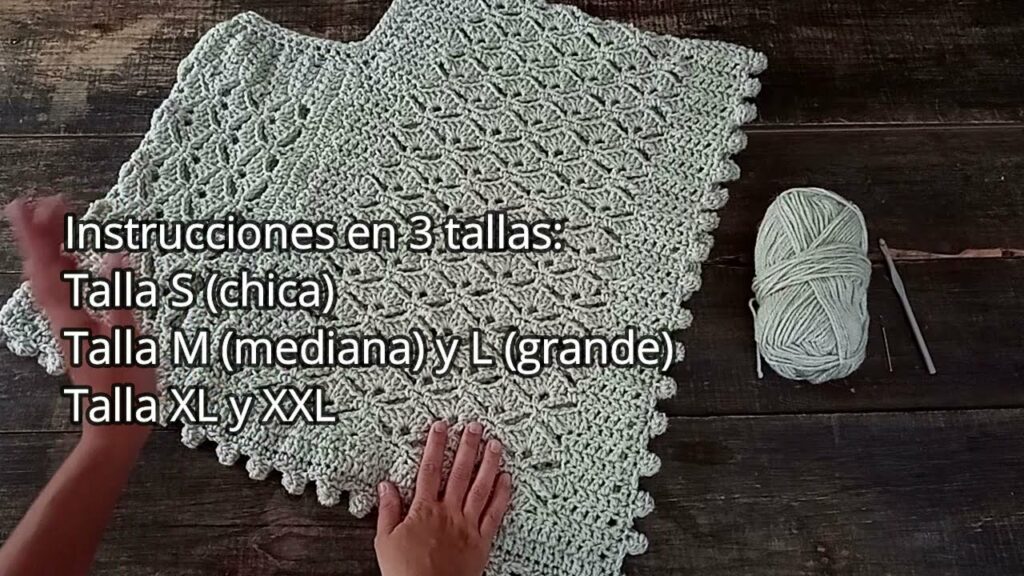
- Pattern Selection (Highly Recommended!):
- For your first easy poncho, always start with a clear, well-written crochet pattern. Look for patterns specifically labeled “easy,” “beginner-friendly,” or “one-rectangle poncho.”
- Look for: Clear instructions, stitch counts, gauge information, and diagrams/photos.
- Gauge Swatch (NON-NEGOTIABLE!):
- This is the most critical step for any wearable item, even a forgiving poncho. Crochet a swatch (at least 4×4 inches / 10×10 cm) using your chosen yarn and hook in the main stitch pattern of your poncho.
- Wash and block your swatch just as you would the finished poncho. Then, measure it precisely.
- If your stitch count or row count per inch/cm doesn’t match the pattern’s gauge, adjust your hook size (go up for fewer stitches per inch, down for more) until it matches. Ignoring gauge is the primary reason finished projects don’t match the pattern’s intended size.
Materials You’ll Need
- Yarn: (As detailed in the “Easy Poncho Aesthetic” section). The quantity will vary based on size and yarn weight, but typically 3-8 skeins for an adult size.
- Crochet Hook: The size recommended by your pattern, adjusted based on your gauge swatch.
- Notions:
- Stitch Markers: Useful for marking the beginning of rounds (if working in the round) or increase points.
- Tapestry Needle: For neatly weaving in all yarn ends and seaming (if applicable).
- Scissors.
- Measuring Tape: For checking gauge and overall dimensions.
- Pompom Maker/Tassel Maker (Optional): For fun embellishments.
- Blocking Mats & T-pins (Optional but Recommended): For a polished finish.
Key Crochet Techniques for an Easy Poncho
You’ll primarily use fundamental stitches and basic shaping methods:
- Basic Stitches: Chain (ch), Slip Stitch (sl st), Single Crochet (sc), Half Double Crochet (hdc), Double Crochet (dc). These are your building blocks.
- Working in Rows: For creating flat panels, where you turn your work at the end of each row.
- Working in the Round: For seamless ponchos, where you join each round with a slip stitch and continue in a continuous circle.
- Increasing Stitches: Essential for expanding the poncho. Your pattern will specify how to do this (e.g., “2 dc in next st,” or more decorative increases).
- Edging/Border: A simple border of single crochet, a neat ribbing (e.g., using SC in BLO), or a decorative shell or picot edge for the neckline and hem.
- Seaming (if applicable): The Mattress Stitch creates neat, almost invisible seams if your poncho is made from joined panels.
Step-by-Step Flow (Conceptual Guide – Common Easy Poncho Constructions)
We’ll cover two popular and easy methods:
Method 1: The Single Rectangle Poncho (Very Beginner Friendly)
This creates a poncho that slips over the head, with arm openings.
- Preparation: Read pattern, make gauge swatch, gather materials.
- Chain Foundation: Chain a length that, when folded in half, will fit comfortably over your head for the neck opening. The total chain length will be the poncho’s finished width.
- Work the Rectangle: Work in rows (e.g., all HDC or DC) until your rectangle reaches the desired length for your poncho (from shoulder to hip/thigh, doubled). For example, if you want a 25-inch long poncho, your rectangle should be about 50 inches long.
- Fold and Seam:
- Fold the finished rectangle in half lengthwise.
- Measure from the folded edge downwards (this will be the shoulder). Seam the two layers together for about 8-12 inches (or as per pattern) from the fold, leaving the center unseamed for the neck opening.
- From the opposite (unfolded) edge, seam upwards for about 8-12 inches (or as per pattern). This creates the “sides” and leaves armholes.
- Add Edging (Optional): Work a simple border (e.g., a few rounds of SC) around the neckline and bottom edges for a polished finish.
- Finishing: Weave in all ends. Block (recommended).
Method 2: Top-Down in the Round (Seamless & Classic)
This creates a circular or square poncho that grows outwards from the neck.
- Preparation: Read pattern, make gauge swatch, gather materials.
- Cast On/Foundation Chain for Neckline:
- Start with a foundation chain for the neckline (or a magic ring if specified).
- Join in the round, being careful not to twist.
- Knit the Neckline Ribbing (Optional but Recommended): Work a few rounds in a simple rib pattern (e.g., SC in BLO, or FPDC/BPDC) for a neat and stretchy neck opening.
- Set Up for Increases (Yoke/Body):
- After the neckline, begin the main body. Your pattern will instruct you on how to set up your stitches and where to place stitch markers for increases (often 2 or 4 points around the circle/square).
- Work the Body & Increases:
- Work in your chosen main stitch pattern (e.g., HDC or DC).
- Continue knitting in the round, incorporating increases as per your pattern in each round (or every other round) to expand the poncho outwards.
- Work until the poncho reaches your desired length from the shoulder to the hem.
- Add Hem Edging (Optional): Finish the bottom edge with a few rounds of ribbing or a simple border for a clean look.
- Bind Off: Bind off all stitches loosely, ensuring a flexible edge.
- Finishing: Weave in all ends. Block (recommended).

Finishing Touches & Embellishments (Optional)
- Pompoms: Create fluffy pompoms and attach them to the corners of the poncho or along the bottom hem for a playful touch.
- Tassels: Make coordinating tassels and attach them to the corners or spaced out along the hem.
- Fringe: Add a classic fringe to the bottom edge for extra movement and style.
- Simple Ribbon: Thread a ribbon through a row of stitches near the neckline for a customizable tie.
Tips for Success
- Read the Pattern Thoroughly: Before you even pick up your hook, read the entire pattern from start to finish.
- Don’t Skip the Gauge Swatch! (Yes, it’s mentioned repeatedly because it’s that important for garments!).
- Use Stitch Markers! They are your best friend for marking the beginning of rounds or increase points.
- Count Your Stitches! Regularly verify your stitch counts at the end of each row or round. This simple habit helps you catch any errors early.
- Choose the Right Yarn: The yarn’s fiber and weight significantly impact the poncho’s drape, warmth, and feel.
- Be Patient: While “easy,” any garment takes time. Enjoy the process and the satisfaction of creating something beautiful with your own hands.
- Blocking is Your Friend: It truly transforms the finished look of your poncho, evening out stitches, enhancing drape, and setting the final shape.
Caring for Your Crocheted Poncho
Proper care will ensure your handmade poncho stays beautiful and comfortable for years:
- Follow Yarn Label Care Instructions Strictly: This is your primary guide.
- Gentle Washing: Machine wash on a gentle/delicate cycle with cool water (if suitable for your yarn) or hand wash gently in cool water with a mild detergent.
- Reshape and Lay Flat to Dry: Gently squeeze out excess water (never wring or twist!). Reshape the poncho back to its original dimensions and lay it flat on a clean towel or a mesh drying rack to air dry completely.
- Never Hang Wet: The weight of a wet crocheted garment will cause it to stretch and distort if hung.
Video Tutorial ;
An easy crochet poncho is a truly gratifying project that results in a versatile, comfortable, and stylish garment. Whether you’re making it for yourself or as a gift, the effortless charm of a handmade poncho makes it a favorite for all seasons. Happy crocheting!