 by
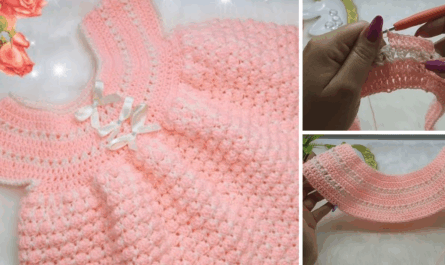
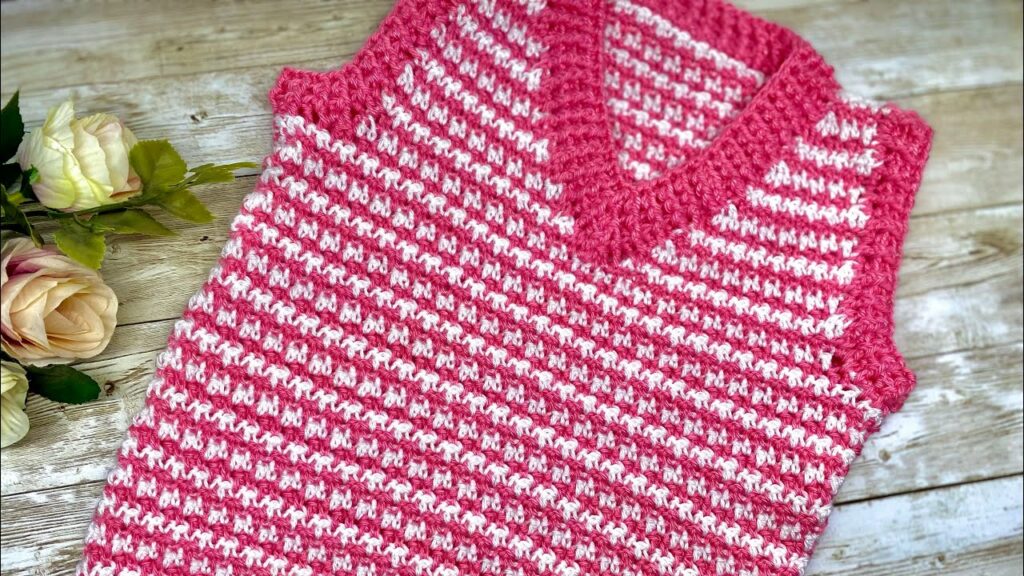
by Few patterns evoke classic sophistication quite like houndstooth. With its distinctive broken checks and abstract four-pointed shapes, it’s a design that effortlessly bridges traditional elegance with modern flair. Crocheting a houndstooth vest allows you to harness this iconic pattern in a versatile garment, creating a unique layering piece that’s both a style statement and a testament to your crochet skills.
This detailed article will guide you through the intricacies of crocheting a houndstooth vest, from understanding the pattern itself to mastering the techniques and finishing touches that will make your handmade garment a truly chic success.
What Exactly is Houndstooth in Crochet?
Houndstooth, traditionally a woven textile pattern originating from the Scottish Lowlands, is characterized by a duotone (usually black and white) pattern of abstract four-pointed shapes or “broken checks.” In crochet, this intricate-looking pattern is surprisingly achievable through a clever manipulation of simple stitches and color changes.
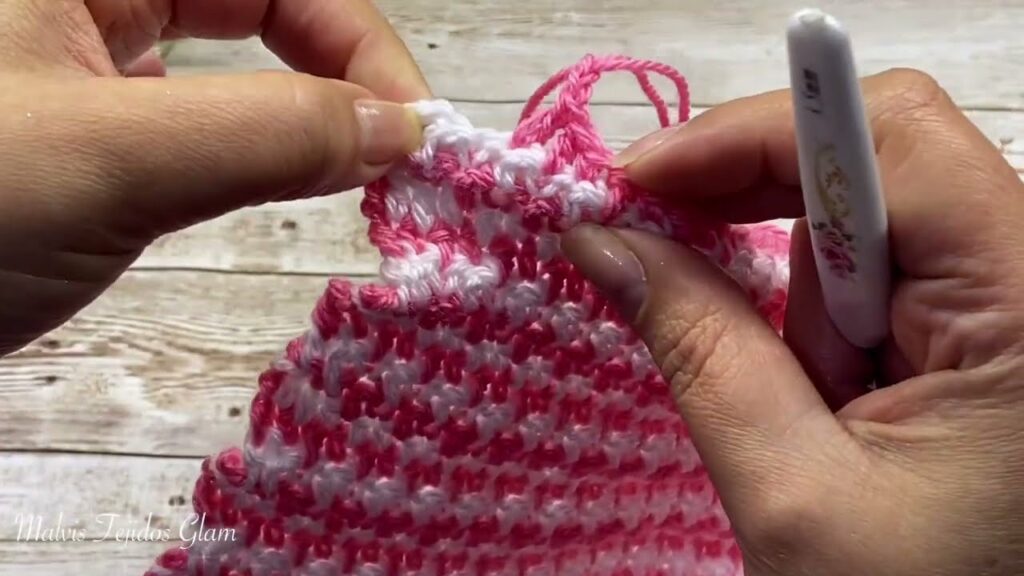
The magic of houndstooth in crochet lies in working with two contrasting colors and changing colors within the stitch, often on the last yarn over. For instance, if working in single crochet (SC), you’d insert your hook into the next stitch, yarn over with your current color, pull up a loop, then yarn over with your new color and pull through both loops on the hook to complete the stitch. This technique creates the distinct “broken” effect of the pattern. You typically alternate colors every stitch or every other stitch, carrying the unused yarn color loosely across the back of your work.
Why Crochet a Houndstooth Vest?
Choosing a houndstooth vest for your next crochet project offers a wealth of benefits:
- Classic & Chic: Houndstooth is a timeless pattern that never goes out of style. A vest in this design instantly elevates any outfit, lending it a sophisticated, polished look.
- Statement Piece: The bold, graphic nature of houndstooth makes it a standout garment. It’s perfect for adding a pop of pattern and texture to a minimalist wardrobe.
- Skill Enhancement: Crocheting houndstooth involves mastering colorwork techniques like tapestry or intarsia crochet, maintaining consistent tension with carried yarn, and often reading pattern charts. It’s a fantastic way to level up your skills.
- Layering Versatility: Vests are incredibly adaptable. A houndstooth vest can be worn over a crisp white shirt for a smart casual look, layered over a thin knit for warmth, or even styled with a t-shirt for a modern, relaxed vibe.
- Customization: While traditionally black and white, you have the freedom to explore modern color combinations – think navy and cream, charcoal and burgundy, or even bold pastels. You can also customize the fit, neckline, and length.
Design Considerations for Your Vest
Before you begin, visualize your ideal houndstooth vest:
- Fit:
- Fitted: Designed to hug the body, creating a more tailored look. Requires precise sizing and gauge.
- Relaxed: Offers more ease, comfortable for layering. Still benefits from accurate sizing.
- Oversized: A trendy, comfortable option that drapes loosely.
- Neckline:
- V-Neck: The most classic and common choice for vests, flattering and easy to layer.
- Crew Neck: A round neckline, offering a more conservative or retro feel.
- Mock Neck/Turtle Neck: For added warmth and a contemporary silhouette.
- Length:
- Cropped: Finishing at or just above the natural waist, popular for high-waisted bottoms.
- Waist-Length: A standard, versatile length.
- Hip-Length: Provides more coverage, often found in tunic-style vests.
- Armholes: Consider whether you want straight armholes or shaped ones that curve gently.
Materials You’ll Need
The success of your houndstooth vest hinges on the right materials.
- Yarn:
- Weight:
- DK (Double Knitting, Category 3) or Light Worsted (Category 3/4): Often preferred for houndstooth, as finer yarns allow the intricate pattern to appear sharper and more defined.
- Worsted (Category 4): Will create a larger, bolder houndstooth pattern and work up faster.
- Fiber:
- Wool or Wool Blends: Offers warmth, excellent stitch definition, and traditional feel. Wool’s elasticity helps maintain shape.
- Acrylic or Acrylic Blends: Affordable, wide color range, easy to care for, and can provide lovely drape. Choose an acrylic with good stitch definition rather than a very fuzzy one.
- Cotton or Cotton Blends: Breathable and great for warmer climates. Provides crisp stitch definition.
- Colors: You will need two contrasting colors. Traditionally black and white, but don’t be afraid to experiment with other pairings like charcoal and cream, navy and light blue, or even bold combinations like forest green and rust. Ensure both skeins are from the same dye lot if possible, especially for your main color.
- Weight:
- Crochet Hook: The size recommended by your pattern. Often, for colorwork like houndstooth, a hook size slightly smaller than recommended for the yarn is chosen to create a denser fabric where the stitches are less likely to pull apart, ensuring the pattern remains crisp.
- Notions:
- Stitch Markers: Essential for marking the beginning of rows, pattern repeats, or shaping points.
- Tapestry Needle (or blunt yarn needle): For weaving in ends and seaming panels.
- Scissors.
- Measuring Tape: For checking gauge and garment dimensions.
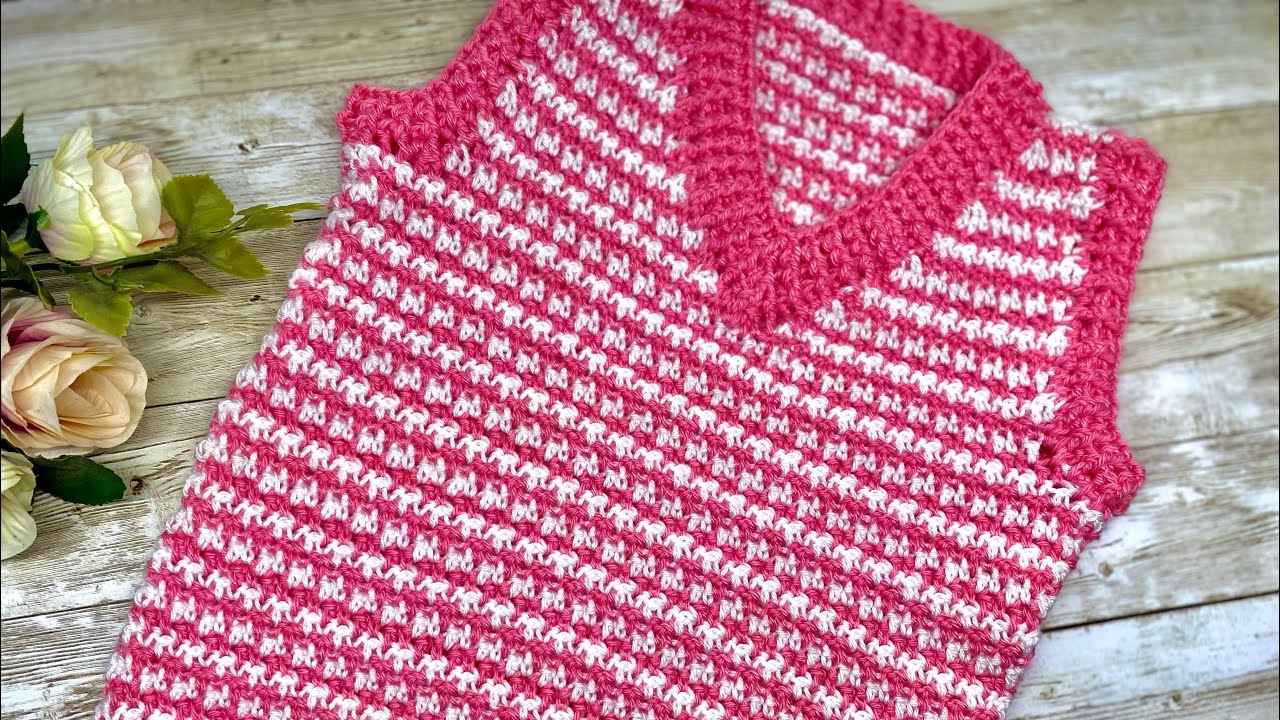
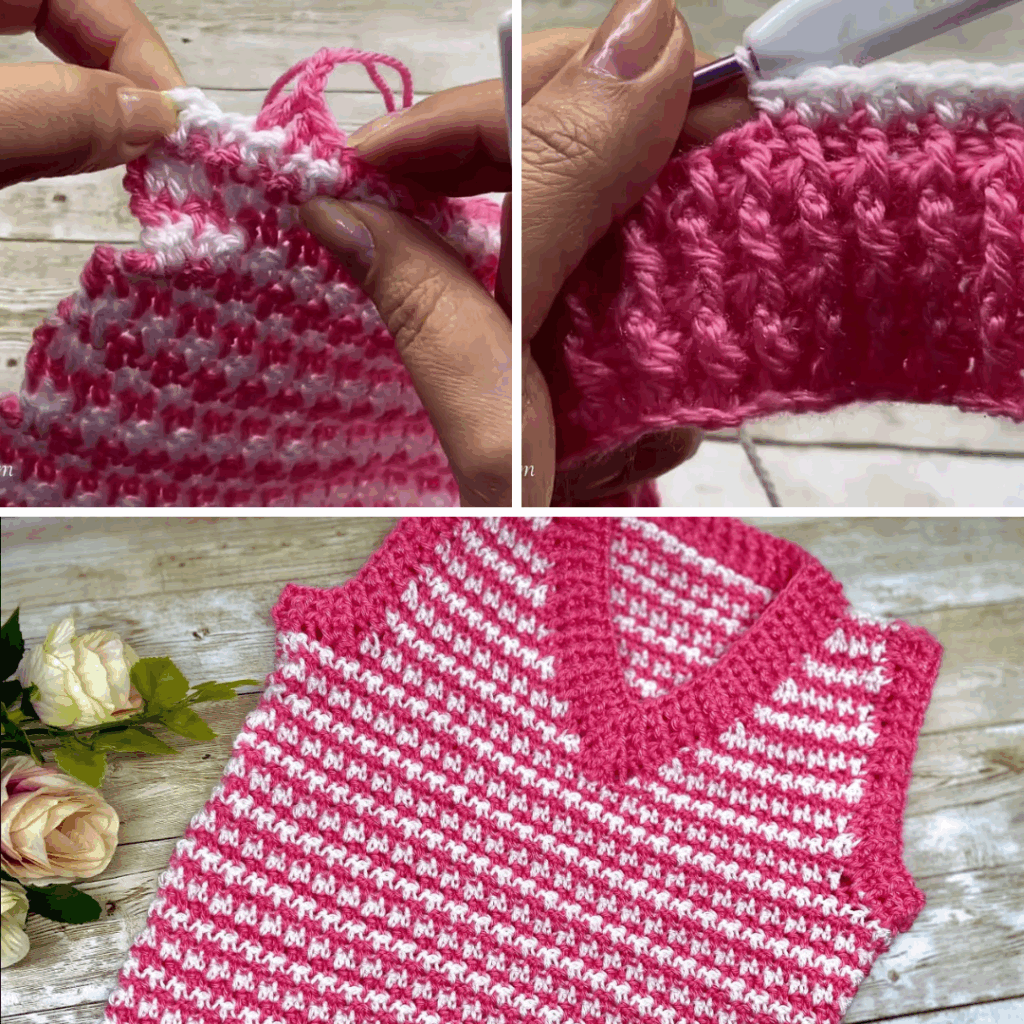
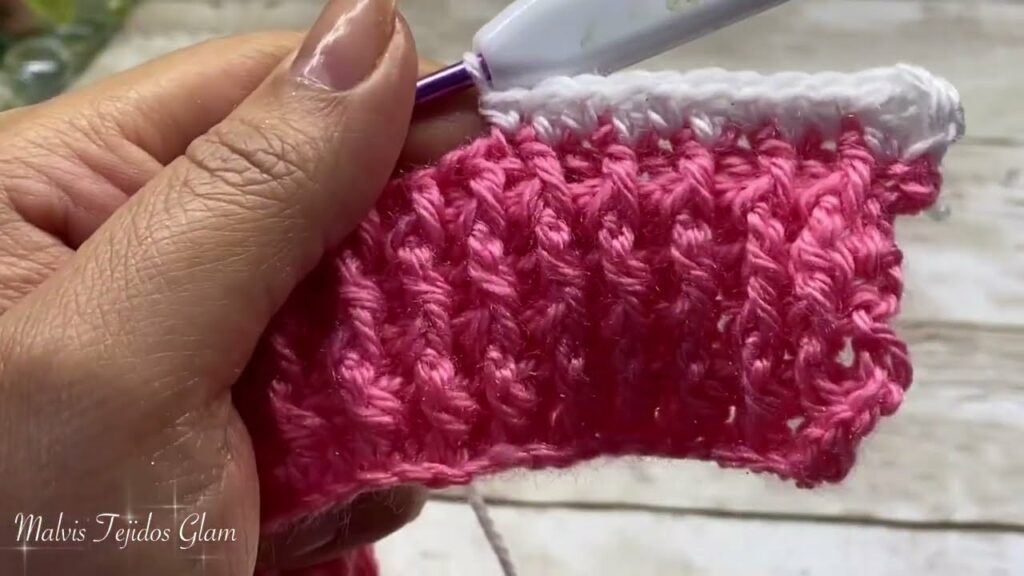
Key Crochet Techniques for a Houndstooth Vest
- Basic Stitches: Chain (ch), Slip Stitch (sl st), Single Crochet (sc), Half Double Crochet (hdc). Houndstooth is most commonly worked using SC or HDC.
- Tapestry or Intarsia Crochet (Colorwork): This is the core technique for creating the houndstooth pattern.
- You’ll be carrying the unused yarn color loosely across the back of your work, encasing it within the stitches of the current color.
- Color Changes: The crucial step is to change colors on the last yarn over of the stitch. For example, when working a SC, insert hook into stitch, yarn over with current color, pull up loop (2 loops on hook), then yarn over with new color and pull through both loops.
- Maintaining Tension: Practice maintaining consistent tension, especially for the carried yarn, to prevent puckering or visible loops on the front.
- Working Flat: Most vests are constructed in separate front and back panels, worked in rows.
- Reading Charts (Highly Recommended): Many houndstooth patterns are presented as charts, showing each stitch’s color. This visual guide is often easier to follow than written instructions for intricate colorwork.
- Shaping:
- Increasing & Decreasing: Essential for shaping armholes, necklines, and shoulders. You’ll need to learn how to seamlessly increase (e.g., 2 stitches in one) and decrease (e.g., SC2tog/HDC2tog) within your chosen stitch pattern while maintaining the houndstooth design.
- Blocking: Critical for setting the shape of your garment and evening out stitches, especially after colorwork.
- Seaming: Learning an invisible seam technique (like the mattress stitch) for joining panels creates a professional finish.
- Edging/Ribbing: Crocheted ribbing (using front post/back post stitches, or working in the back loop only) is often used for the neck, armholes, and hem for a neat, stretchy finish.
Planning Your Houndstooth Vest Project
Meticulous planning is key to a perfectly fitting garment.
- Sizing:
- Take your bust/chest measurement (around the fullest part).
- Decide on your desired ease. Positive ease means the garment will be larger than your body measurements, creating a relaxed fit. Negative ease means it will be smaller, for a fitted look (less common for vests).
- Choose a pattern that offers sizing options close to your measurements.
- Gauge Swatch (ABSOLUTELY CRITICAL!):
- This is the most important step for a successful garment.
- Crochet a substantial swatch (at least 6×6 inches / 15×15 cm) using both your chosen yarns and hook in the actual houndstooth pattern you intend to use.
- Crucial Step: Wash and block your swatch exactly as you plan to wash and block your finished vest. Yarn can change significantly after laundering.
- Measure your stitches and rows per inch/cm accurately. If your gauge doesn’t match your pattern’s, adjust your hook size. (Go up a hook size if you have too many stitches per inch, down if you have too few.)
- Yarn Quantity: The pattern will specify yarn requirements for each color. Ensure you purchase enough from the same dye lot, especially for your main color.
Step-by-Step Construction (Conceptual Guide for Panels)
Most houndstooth vests are constructed by crocheting a front panel and a back panel, then seaming them together.
- Crochet the Back Panel:
- Begin with a foundation chain for the bottom edge of the back panel.
- Work in rows, following your chosen houndstooth pattern (using your two colors and the specific color-changing technique).
- Work straight until you reach the desired height before the armholes.
- Shape the armholes by decreasing stitches at the beginning and end of rows for a few rows.
- Continue working straight up to the shoulder height. Some patterns will shape a back neckline or leave it straight.
- Crochet the Front Panel:
- Similar to the back panel, start with a foundation chain.
- Work in rows in the houndstooth pattern.
- Work straight to the armhole height.
- Shape the armholes, matching the back panel.
- Shape the Neckline: This is the main difference from the back. For a V-neck, you’ll typically divide your stitches and work each side of the ‘V’ separately, decreasing stitches at the neckline edge to form the “V” shape. For a crew neck, you’ll create a wider, shallower opening.
- Seaming:
- Shoulder Seams: Lay the front and back panels flat, right sides facing up. Use a tapestry needle and matching yarn to seam the shoulder edges together using an invisible stitch like the Mattress Stitch.
- Side Seams: Similarly, seam the side edges of the front and back panels from the bottom up to the armhole, leaving the armhole opening unseamed.
- Edging/Finishing:
- Hem: Work a round or two of single crochet, or a crocheted ribbing, around the bottom hem of the vest for a neat finish.
- Armholes: Work rounds of single crochet or crocheted ribbing evenly around each armhole opening.
- Neckline: Work rounds of single crochet or crocheted ribbing evenly around the entire neckline opening.
- Weave in All Ends: Using your tapestry needle, meticulously weave in all remaining yarn tails. Take your time with this; it’s essential for a polished and durable garment.
Tips for Houndstooth Success
- Practice the Pattern: Before starting your vest, crochet a small swatch of the houndstooth pattern to get comfortable with the color changes and carrying the yarn.
- Gauge is Paramount: For a garment that fits and a pattern that looks crisp, gauge is non-negotiable. Swatch, wash, block, and measure!
- Consistent Tension: Maintain even tension, especially when carrying the unused yarn behind your work. Too tight, and it will pull and pucker; too loose, and loops may show through.
- Read the Chart Carefully: If your pattern includes a chart, follow it row by row, stitch by stitch. Use a ruler or sticky note to keep your place.
- Block Your Finished Vest: This is essential for garments, especially those with colorwork. Blocking will relax the stitches, even out any tension inconsistencies, enhance the drape, and help the vest lie perfectly flat and hold its shape.
Styling Your Houndstooth Vest
A houndstooth vest is incredibly versatile:
- Smart Casual: Layer it over a crisp white button-down shirt and pair with tailored trousers or dark-wash jeans.
- Layering Pro: Wear it over a thin long-sleeve top, a turtleneck, or even a simple t-shirt.
- Modern Edge: Style an oversized houndstooth vest over a slip dress or with leather leggings for a contemporary look.
- Seasonal Adaptability: Opt for wool blends for a cozy winter look, or cotton blends for a breathable spring/autumn layer.
Caring for Your Houndstooth Vest
Proper care will ensure your handmade vest remains a cherished wardrobe staple:
- Follow Yarn Label Instructions: Always refer to your specific yarn’s care guidelines.
- Hand Wash Recommended: Even if your yarn is machine washable, hand-washing garments with colorwork helps preserve the stitch definition, shape, and integrity of the pattern. Use cool water and a mild detergent.
- Reshape and Lay Flat to Dry: Never wring or hang a wet crocheted garment, as this will cause it to stretch and distort its shape. Gently squeeze out excess water, reshape the vest back to its original dimensions, and lay it flat on a clean towel or a mesh drying rack to air dry completely.
Conclusion
Crocheting a houndstooth vest is a rewarding project that marries classic design with the tactile beauty of crochet. It challenges your skills, especially in colorwork and garment construction, but the result is a truly chic, versatile, and unique layering piece you’ll be proud to wear for years to come. Embrace the pattern, enjoy the process, and add this timeless statement to your handmade wardrobe! Sources
Video Tutorial ;