by
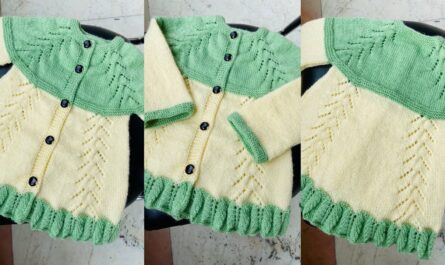
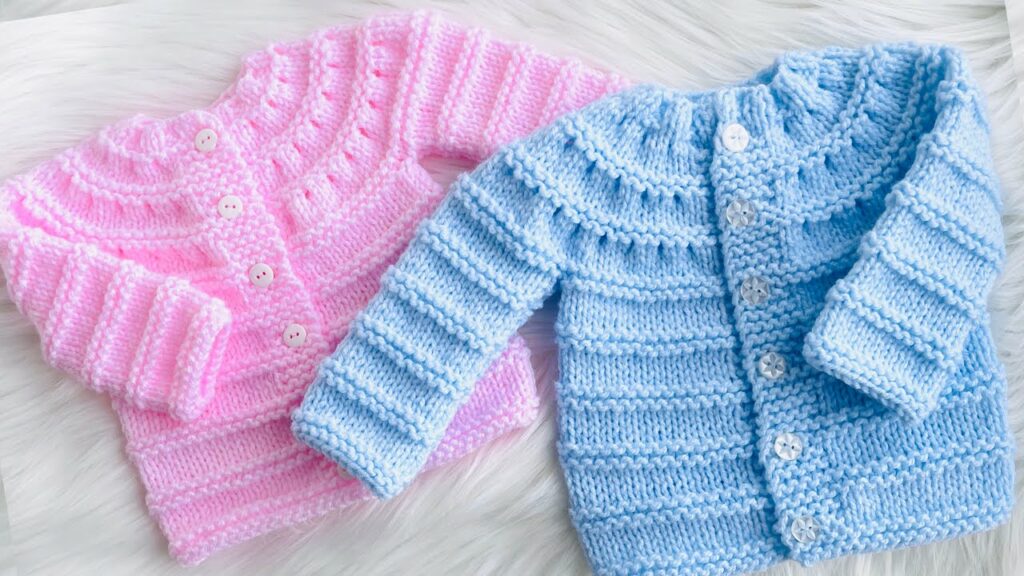
by There’s nothing quite as heartwarming as wrapping a precious baby in something made with your own hands. A knitted cardigan sweater is an absolute staple for any baby’s wardrobe: it’s practical for layering, adorable for special occasions, and offers that irreplaceable touch of handmade love. This guide will walk you through creating an easy baby cardigan, adaptable for sizes from 0-3 months up to 12 months, making it a perfect project for beginners and experienced knitters alike looking for a quick and rewarding craft.
We’ll focus on a top-down, seamless raglan construction, which is widely considered one of the easiest and most efficient ways to knit baby garments. It minimizes seaming, creates a smooth, comfortable fabric, and allows for easy size adjustments as you go.
Why an “Easy Knit” Cardigan?
Our emphasis on “easy” means we’ll prioritize:
- Simple Stitches: Focusing on basic knit and purl combinations.
- Minimal Seaming: Top-down construction eliminates the need to sew separate pieces together, saving time and effort.
- Clear Instructions: Breaking down each step into manageable parts.
- Adaptability: Providing guidance on how to scale the pattern for different baby sizes within the 0-12 month range.
Key Elements of a Baby Cardigan:
- The Yoke: The upper section that includes the neckline and shoulders, where all increases for the raglan shaping occur.
- The Body: The main part of the sweater, worked in one piece after the sleeves are separated.
- The Sleeves: Usually worked in the round from the armholes, or flat and then seamed.
- The Button Bands: Edges along the front opening where buttons and buttonholes are placed.
- The Neckband: A neat finish around the neckline.
Before You Begin: Gathering Your Gentle Tools & Materials
Choosing the right supplies ensures your cardigan is soft, safe, and comfortable for delicate baby skin.
- Yarn (Prioritize Softness & Washability!):
- Fiber:
- Baby-Specific Acrylic: Excellent for softness, durability, hypoallergenic properties, and easy machine wash/dry care.
- Superwash Merino Wool: Luxuriously soft, provides excellent warmth while still being breathable, and is conveniently machine washable.
- Cotton or Cotton Blends: Ideal for warmer climates, highly breathable, absorbent, and offers good stitch definition.
- Weight: DK (Double Knitting) or Worsted Weight (Aran in UK/AU) are highly recommended. They work up quickly for baby sizes and create a lovely, cozy fabric without being too bulky.
- Color: Pastels (blue, pink, mint, yellow, cream), classic neutrals (white, ivory, soft grey), or even a delicate variegated yarn work beautifully.
- Quantity: For a 0-12 month cardigan, you’ll typically need between 250-450 yards (approx. 230-410 meters) of yarn, depending on the exact size and length.
- Fiber:
- Knitting Needles:
- Circular Needles: Highly recommended for top-down, seamless knitting. You’ll need a shorter length (e.g., 16-24 inches / 40-60 cm) for the yoke and potentially longer for the body.
- Double-Pointed Needles (DPNs) or Magic Loop: For knitting the sleeves in the round if you prefer seamless sleeves.
- Needle Size: Your yarn label will suggest a size (e.g., US 6-8 / 4.0-5.0mm for Worsted; US 5-7 / 3.75-4.5mm for DK). Your gauge swatch will be the final determinant.
- Other Notions:
- Stitch Markers: Essential for marking raglan lines and the beginning of rounds. You’ll need at least 4 for the raglan.
- Tapestry Needle: For neatly weaving in ends.
- Scissors.
- Small Buttons: 3-6 small, flat buttons (approx. 0.5-0.75 inch / 1.25-2 cm). Choose ones that complement your yarn.
- Stitch Holders or Scrap Yarn: To hold sleeve stitches while you knit the body.
The Compass of Your Project: Sizing & Gauge (Crucial for Fit!)
Getting the right fit is the most critical part of knitting a baby garment. For a comfortable fit, aim for about 1-2 inches (2.5-5 cm) of positive ease (meaning the cardigan’s finished chest measurement is slightly larger than the baby’s actual chest measurement).
Approximate Finished Chest Measurements & Yoke Depth (Guidelines):
| Size | Approx. Finished Chest Circ. | Approx. Yoke Depth (neckline to underarm) |
|---|---|---|
| 0-3 Months | 18-20 inches (45-50 cm) | 4.5-5 inches (11.5-12.5 cm) |
| 3-6 Months | 20-22 inches (50-55 cm) | 5-5.5 inches (12.5-14 cm) |
| 6-12 Months | 22-24 inches (55-60 cm) | 5.5-6 inches (14-15 cm) |
Export to Sheets
Disclaimer: These are averages. Always refer to a specific knitting pattern for precise stitch counts and measurements for your chosen size.
How to Make a Gauge Swatch (Do NOT Skip This!):
- Cast On: Cast on about 25-30 stitches.
- Work: Knit a square of at least 6×6 inches (15×15 cm) in the main stitch pattern you’ll be using for the cardigan (e.g., Stockinette Stitch: knit one row, purl one row, or Garter Stitch: knit every row). A larger swatch provides a more accurate measurement.
- Wash & Block: Bind off your swatch. Crucially, wash and block your swatch exactly as you plan to treat the finished cardigan. This relaxes the fibers and shows the true stitch size and drape after finishing.
- Measure: Once dry, lay the swatch flat. Place a ruler over the center. Count how many stitches fit within 4 inches (10 cm) and how many rows fit within 4 inches (10 cm).
- Adjust:
- If you have more stitches per inch than your pattern states (your knitting is too tight), go up half a needle size and try again.
- If you have fewer stitches per inch than your pattern states (your knitting is too loose), go down half a needle size and try again.
- Repeat until your gauge precisely matches.
General Stitch Patterns for an Easy Baby Cardigan:
- Main Body:
- Garter Stitch: (Knit every row) – Simplest stitch, lays flat, no curling. Creates a squishy, textured fabric.
- Stockinette Stitch: (Knit right side rows, purl wrong side rows when working flat; Knit every round when working in the round) – Classic smooth look. Edges will curl unless bordered by garter or ribbing.
- Ribbing (for Neckband, Button Bands, Cuffs, Hem):
- 1×1 Rib: (Knit 1, Purl 1) repeating.
- 2×2 Rib: (Knit 2, Purl 2) repeating.
- Both create a stretchy, neat edge.
- Buttonholes (Simple):
- Yarn Over (YO) Buttonhole: On a right side row, when you reach the buttonhole position: (Knit 1, yarn over, knit 2 stitches together). This creates a small hole.
Step-by-Step Construction: Knitting Your Easy Baby Cardigan (Top-Down Raglan)
This outline provides the fundamental steps. For precise stitch counts, specific increase/decrease rates, and unique design elements, you must refer to a detailed knitting pattern for your chosen size.
Abbreviations Used:
- K: Knit
- P: Purl
- CO: Cast On
- BO: Bind Off
- st(s): stitch(es)
- PM: Place Marker
- SM: Slip Marker
- KFB: Knit Front and Back (a simple increase)
- M1L/M1R: Make One Left/Right (invisible increases)
- P2tog: Purl 2 stitches together (decrease)
- K2tog: Knit 2 stitches together (decrease)
- SSK: Slip, Slip, Knit (left-leaning decrease)
- YO: Yarn Over
- WS: Wrong Side
- RS: Right Side
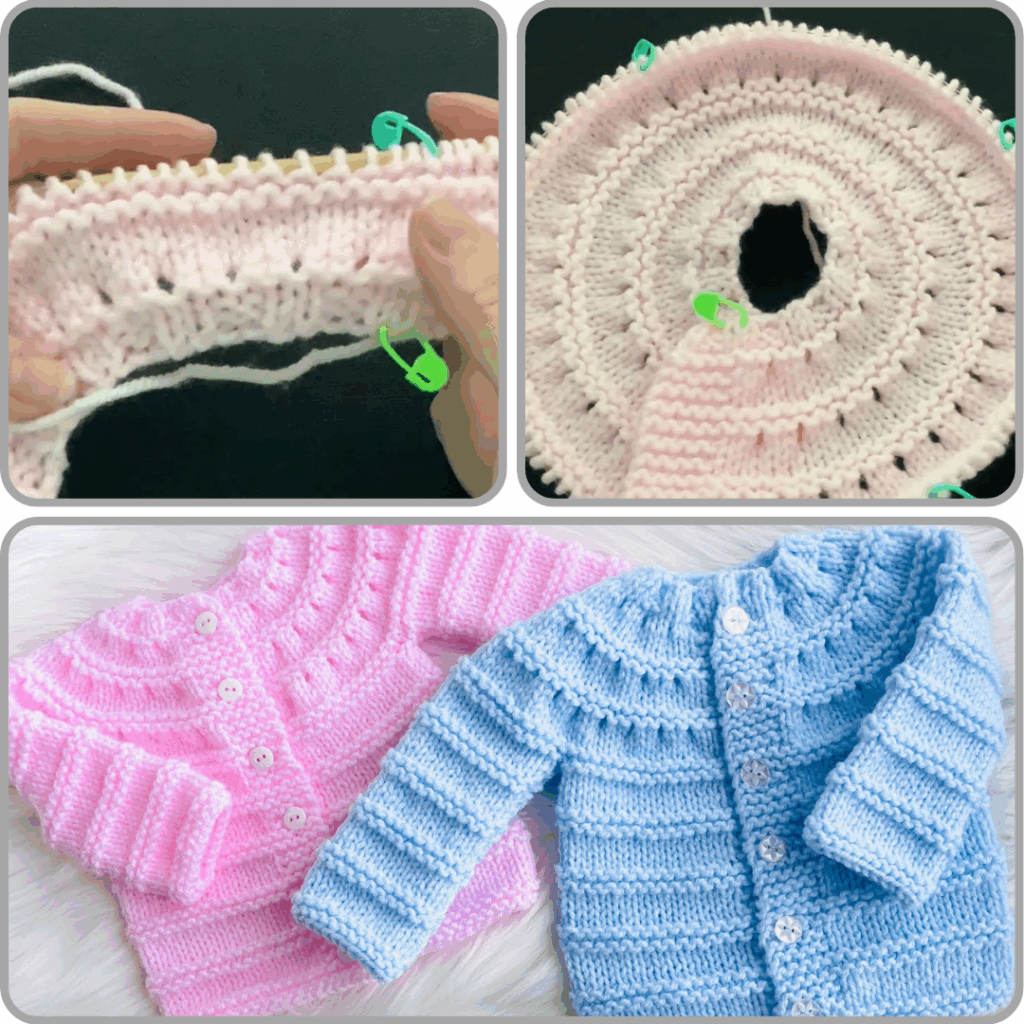
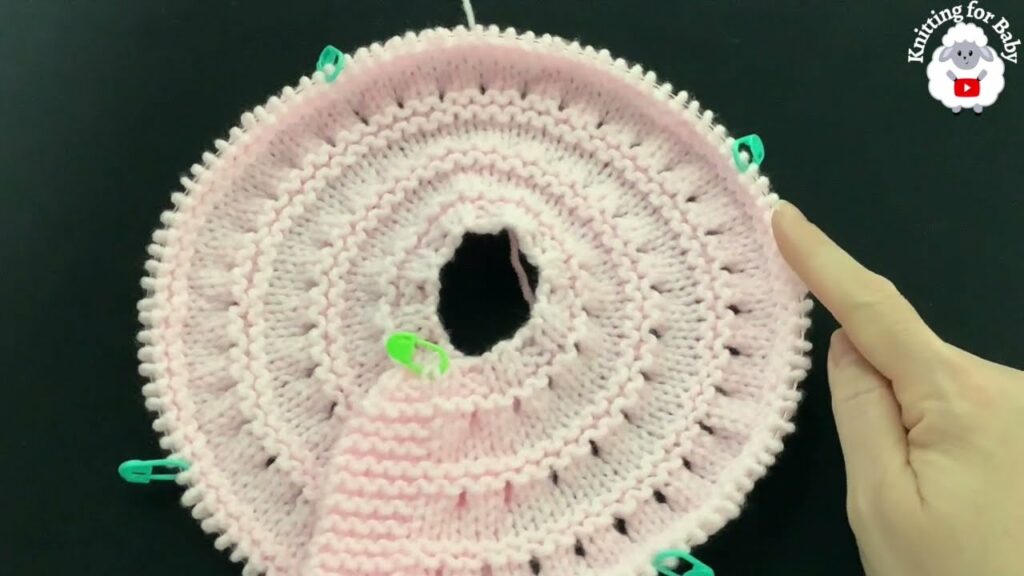
Phase 1: The Yoke (Top-Down Magic!)
The yoke is where the sweater takes shape, worked from the neckline downwards.
- Step 1.1: Casting On & Neckband
- Using your circular needles, CO the specified number of stitches for the neckline (this will be a relatively small number, divided for back, fronts, and sleeves).
- Work in 1×1 or 2×2 rib for 1-2 inches (2.5-5 cm) for a neat, stretchy neckband. On the last row of the neckband, ensure you’re on the RS.
- Step 1.2: Setting Up for Raglan Increases
- Your pattern will guide you on how to divide your stitches for the back, two fronts, and two sleeves, with single “raglan stitches” at the four corners.
- Work your initial stitches for the Right Front, PM.
- Work stitches for the Right Sleeve, PM.
- Work stitches for the Back, PM.
- Work stitches for the Left Sleeve, PM.
- Work stitches for the Left Front.
- You should have 4 stitch markers indicating your raglan lines.
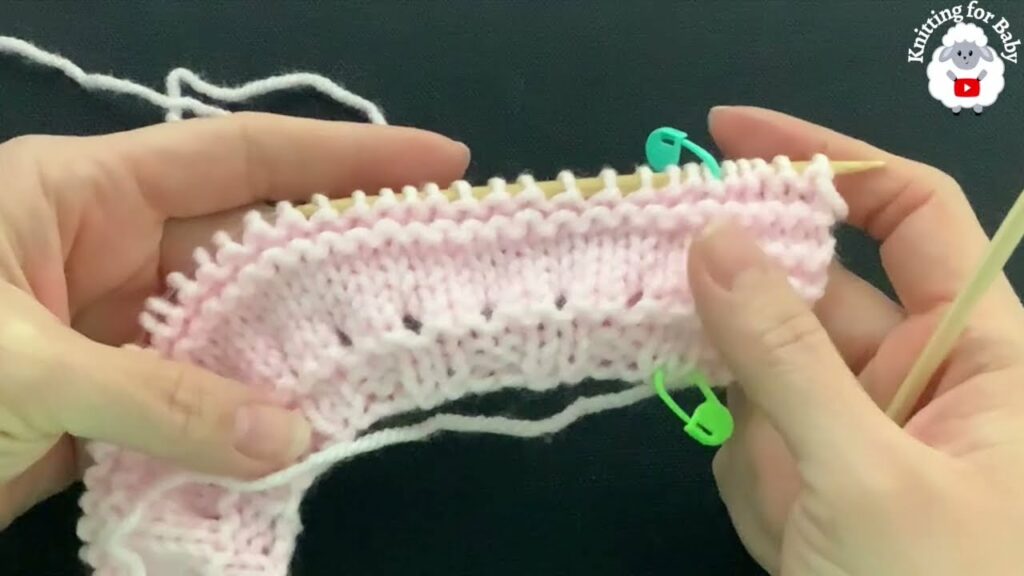
- Step 1.3: Raglan Increases
- Increase Rows: Knit across the row. When you reach a stitch marker, perform your chosen increase (e.g., KFB, or M1L before the marker and M1R after the marker, or YO before/after) on either side of the marker (or the stitch the marker designates). Then, SM.
- Non-Increase Rows: Knit plain (or purl, depending on your stitch pattern) across the row, SM as you reach them.
- Yoke Depth: Repeat increase rows and non-increase rows according to your pattern until the yoke measures the desired depth for your chosen size (refer to chart above). This is the key measurement for a good fit.
Phase 2: Separating Body & Sleeves
Once your yoke is deep enough, you’ll separate the stitches for the body and the sleeves.
- Step 2.1: Separating Row
- Knit the stitches for the Right Front.
- Place the stitches for the Right Sleeve onto a stitch holder or scrap yarn.
- Cast On a few stitches for the underarm (e.g., 2-4 stitches). This creates extra room under the arm and prevents tightness.
- Knit the stitches for the Back.
- Place the stitches for the Left Sleeve onto a stitch holder or scrap yarn.
- Cast On the same number of stitches for the underarm.
- Knit the stitches for the Left Front.
Phase 3: The Body
Now you’ll knit the main body of the cardigan in one piece.
- Step 3.1: Knitting the Body
- You are now knitting across the front, underarm CO stitches, back, underarm CO stitches, and other front.
- Continue knitting in your chosen main stitch pattern (Garter or Stockinette) in rows (knitting back and forth).
- Buttonholes: If you are integrating buttonholes into the front band, ensure you make them evenly spaced on your preferred side (traditionally right front for girls, left for boys, but often reversible for baby cardigans). A simple YO buttonhole (Knit 1, YO, K2tog) on an RS row works well.
- Length: Continue knitting until the body measures the desired length from the underarm to the hem (e.g., 5-7 inches / 12.5-18 cm).
- Step 3.2: The Hem
- Work 1-2 inches (2.5-5 cm) of 1×1 or 2×2 ribbing (or Garter stitch) for the bottom hem.
- BO all stitches loosely in pattern.
Phase 4: The Sleeves (Make 2)
You’ll now knit the sleeves from the held stitches.
- Step 4.1: Placing Stitches & Joining
- Place the held sleeve stitches from one armhole onto your DPNs or use the Magic Loop method with a circular needle.
- Pick up stitches along the cast-on stitches at the underarm (if you cast on).
- Join to knit in the round, placing a stitch marker for the beginning of the round.
- Step 4.2: Knitting the Sleeve
- Knit in your chosen main stitch pattern (Stockinette for a smooth look).
- Decreases (Optional but Recommended): To create a slight taper for a better fit, knit 2 stitches together (K2tog or SSK) every 6-8 rounds (or as specified by a pattern) a few times along the length of the sleeve.
- Length: Continue knitting until the sleeve reaches the desired length from the underarm to the wrist (e.g., 5-7 inches / 12.5-18 cm).
- Step 4.3: The Cuff
- Work 1-1.5 inches (2.5-4 cm) of 1×1 or 2×2 ribbing (or Garter stitch) for the cuff.
- BO all stitches loosely in pattern.
- Step 4.4: Repeat for Second Sleeve.

Phase 5: Button Bands & Neck Edging
Even with a top-down cardigan, it’s often easiest to pick up stitches for these bands after the main body and sleeves are done.
- Step 5.1: Picking Up Stitches
- Using your main needles, pick up and knit stitches evenly along the entire front opening edge (from hem up one front, around the neck, and down the other front to the hem). Aim for roughly 2-3 stitches per row.
- Step 5.2: Knitting the Bands
- Work 1-1.5 inches (2.5-4 cm) of 1×1 or 2×2 ribbing.
- Buttonholes: If you didn’t create buttonholes during the body section, create them on the appropriate band here (e.g., on a RS row: K1, YO, K2tog). Space them evenly.
- BO all stitches loosely in pattern.
Finishing Touches: Bringing Your Cardigan to Life
- Weaving in All Ends: This is paramount for a professional, comfortable finish. Use your tapestry needle to meticulously weave in all loose yarn tails on the inside of the cardigan.
- Blocking (The Magic Step!):
- Gently wash your finished cardigan according to your yarn’s care instructions (often lukewarm water and a gentle soap).
- Gently squeeze out excess water (do not wring or twist).
- Lay the cardigan flat on clean towels or blocking mats. Gently shape it to the correct dimensions for your chosen size, smoothing out any unevenness and opening up your stitch pattern. Use rust-proof pins to hold it in place.
- Allow the cardigan to air dry completely. Blocking is essential for setting the stitches, evening out tension, and enhancing the overall drape and appearance.
- Attaching Buttons: Lay your cardigan flat and mark the positions for your buttons, aligning them with the buttonholes on the opposite band. Securely sew on your chosen small buttons. Ensure they are sewn on very, very tightly with strong thread to prevent any choking hazard for the baby.
Tips for an “Easy & Fast” Knit:
- Choose a Simple Stitch: Garter stitch (knit every row) is incredibly easy and forgiving. Stockinette is also simple but remember its tendency to curl.
- Use DK or Worsted Weight Yarn: These yarn weights work up relatively quickly compared to finer yarns.
- Circular Needles for Top-Down: This eliminates most seaming, which is often the most time-consuming part for beginners.
- Utilize Stitch Markers: They are your best friend for raglan shaping and keeping track of rounds/rows.
- Count Your Stitches: Especially after increase rows, a quick count can save you from having to unravel later.
Video Tutorial :
Safety & Care for Your Baby Cardigan:
- Button Security: This is critical! Stitch buttons on very securely with strong thread. Check them regularly for any looseness.
- No Loose Embellishments: Avoid any small beads, sequins, or tiny detached ornaments that could be choking hazards.
- Washability: Always follow your chosen yarn’s care instructions. For handmade baby items, machine wash on a gentle cycle (in a laundry bag) or hand wash in cool water, then lay flat to dry.
Knitting an easy baby cardigan is a truly rewarding experience. You’ll create a comfortable, cherished garment that will be a testament to your skill and love. Happy knitting!