 by
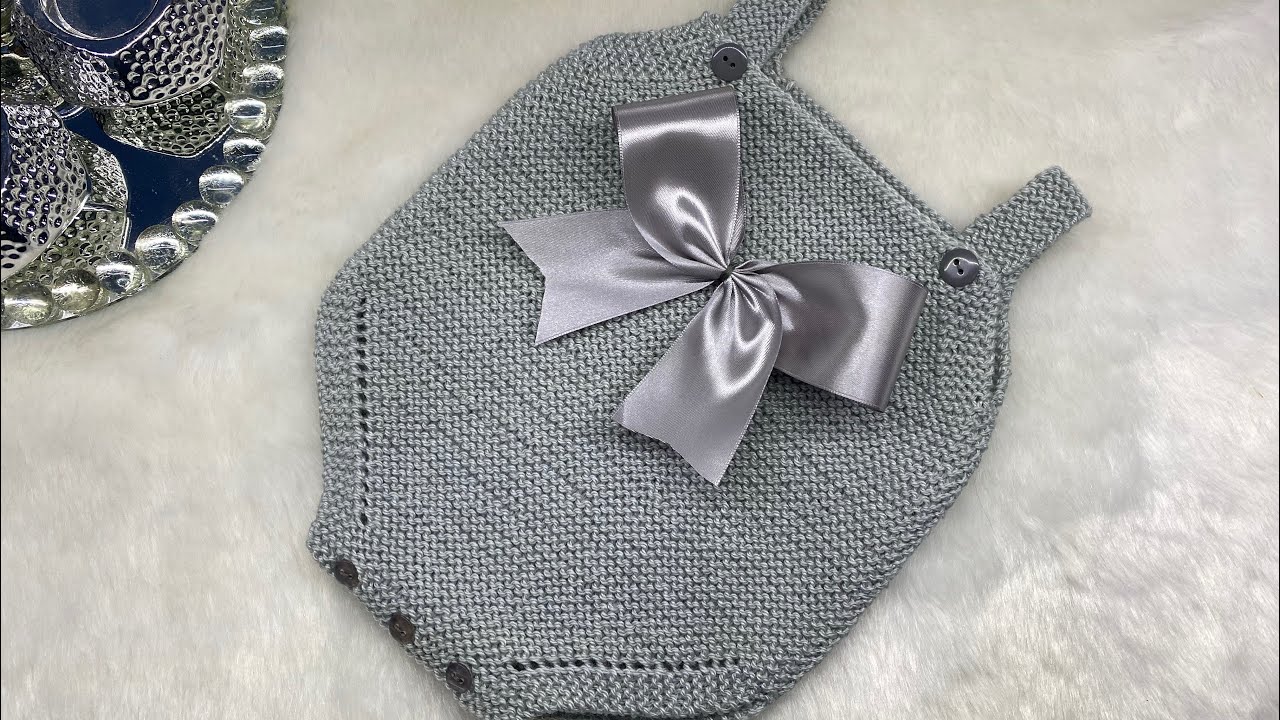
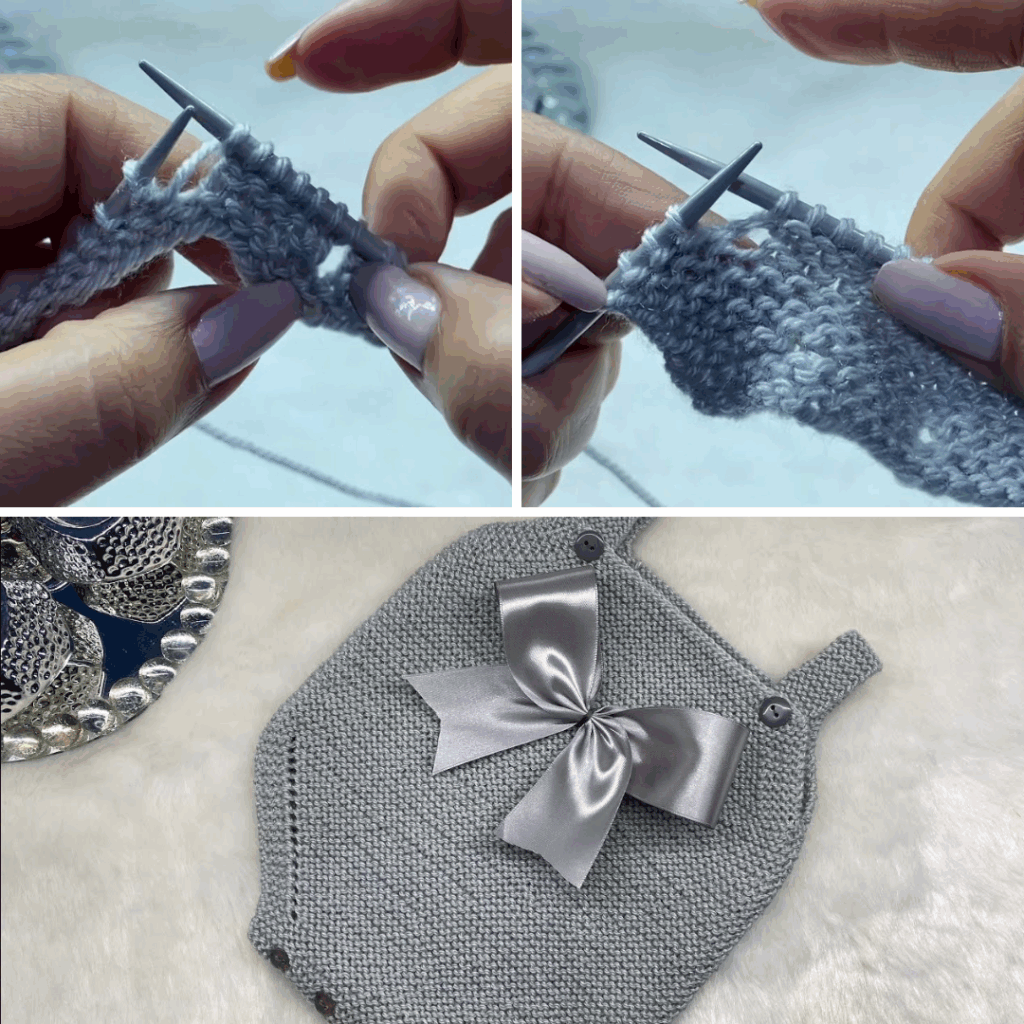
by This detailed article will guide you through the rewarding process of knitting a fundamental baby bodysuit using only two straight needles, celebrating its simple beauty ✨🌾✨ and highly functional design. It’s an ideal project for knitters comfortable with flat work who want to venture into garment creation without the complexities of in-the-round techniques.
Why Knit a Basic Bodysuit on Two Needles?
Opting for two-needle construction offers several compelling advantages:
- Accessibility: Perfect for knitters who primarily work flat and may not yet own or be comfortable with circular needles or double-pointed needles.
- Skill Consolidation: It allows you to focus on fundamental garment techniques like shaping (increases and decreases), creating clean edges, and mastering essential seaming.
- Portability: Working in flat panels can make the project more manageable and easier to carry.
- Controlled Shaping: Shaping is often easier to visualize and execute precisely when working on flat pieces.
- Classic Appeal: A well-seamed, basic knitted bodysuit has a timeless, handmade charm that never goes out of style.
- High Practicality: Bodysuits are indispensable for babies, ensuring warmth and preventing shirts from riding up.
Understanding the Basic Bodysuit ✨🌾✨
The “basic” aspect of this bodysuit refers to its simplicity and focus on core functionality:
- Core Function: Designed to cover the torso and crotch, providing warmth and a smooth layer under clothing. Crucially, it features closures at the crotch for easy diaper access.
- Design Philosophy: Emphasizes comfort, ease of dressing, and durability for frequent washing. It’s not about intricate lace or complex cables, but about a solid, functional piece.
- “Basic” Defined:
- Simple Stitches: Primarily uses foundational stitches like Stockinette stitch (knit on one side, purl on the other), Garter stitch (knit every row), or simple ribbing (K1P1 or K2P2).
- Straightforward Shaping: Increases and decreases are typically placed at the edges of panels for clear armhole, neckline, and crotch shaping.
- Minimal Embellishment: The beauty lies in the quality of the yarn and the neatness of the stitches. The ✨🌾✨ emojis suggest a gentle, perhaps rustic or natural aesthetic, achieved through soft textures and calm colors.
Materials: Gathering Your Essentials
- Yarn:
- Fiber:Soft, breathable, and easily washable are non-negotiable for baby garments.
- Superwash Merino Wool: Excellent for warmth without bulk, incredibly soft, and often machine washable.
- Cotton or Cotton Blends: Breathable, durable, great for warmer climates, and soft.
- High-Quality Baby Acrylics: Hypoallergenic, affordable, and easy-care, but ensure it’s a soft, non-scratchy variety.
- Weight: DK (Double Knitting, Category 3) or Sport (Category 2) are common for baby items, creating a lovely drape and manageable fabric. Worsted (Category 4) can also work for a quicker knit, resulting in a slightly denser garment.
- Quantity: Check your specific pattern for exact yardage. A basic bodysuit typically requires 200-400 yards (180-365 meters), depending on size.
- Fiber:Soft, breathable, and easily washable are non-negotiable for baby garments.
- Straight Knitting Needles: The size recommended by your pattern to achieve gauge.
- Stitch Holders or Waste Yarn: For holding live stitches (e.g., shoulder stitches or for plackets).
- Tapestry Needle (or Blunt Yarn Needle): For seaming pieces together and weaving in ends.
- Scissors.
- Measuring Tape: Crucial for checking gauge and garment dimensions.
- Snaps or Buttons: For the crotch closure and any shoulder/back opening. Choose flat, securely sewn, baby-safe options.
- Blocking Mats & T-pins: Essential for shaping and finishing.
Essential Knitting Techniques
You’ll utilize a combination of fundamental and garment-specific techniques:
- Basic Stitches: Knit (k), Purl (p).
- Cast On & Bind Off: Standard methods for starting and finishing edges.
- Ribbing (K1P1 or K2P2): For hems, cuffs, and necklines, providing stretch and structure.
- Increasing Stitches:
- M1 (Make One): Invisible increase, great for subtle shaping.
- KFB (Knit Front and Back): Visible but easy, often used in places where the increase isn’t meant to be hidden.
- Decreasing Stitches:
- K2tog (Knit Two Together): Decreases leaning right.
- SSK (Slip, Slip, Knit): Decreases leaning left.
- Used for shaping armholes, necklines, and the crotch curve.
- Buttonholes: Creating small openings for buttons (often a yarn over followed by a decrease).
- Picking Up Stitches: For neckbands, armbands, or plackets along raw edges.
- Seaming (Crucial for Two-Needle Knitting):
- Mattress Stitch: The gold standard for virtually invisible vertical seams. Mastering this stitch is key to making your flat-knitted bodysuit look seamless.
- Horizontal Seaming: For shoulders, a basic seam or even grafting (Kitchener stitch) can be used, though a simple bind-off and seam is often sufficient for a basic garment.
- Blocking: Absolutely crucial for evening out stitches, setting the fabric, and ensuring the garment lays beautifully.
Planning Your Project: Laying the Foundation
- Sizing:
- Consult your pattern’s size chart.
- If possible, measure a baby garment that fits well (a bodysuit that the baby currently wears). Key measurements include chest circumference and shoulder-to-crotch length.
- Gauge Swatch (Non-Negotiable!):
- This is the single most important step for garment knitting.
- Knit a swatch at least 6×6 inches (15×15 cm) using your chosen yarn and needles in the main stitch pattern of the bodysuit.
- Crucial Step: Wash and block your swatch exactly as you plan to wash and block the finished garment. Yarn can change significantly after laundering.
- Measure your stitches and rows per inch/cm accurately. If your gauge doesn’t match the pattern’s, adjust your needle size (go up a size if you have too many stitches per inch, down if you have too few) and knit another swatch until it matches.
- Yarn Quantity: Ensure you have enough yarn of the same dye lot.
Construction Journey: Panel by Panel (Conceptual Guide for Two Needles)
A basic bodysuit knitted on two needles is typically constructed in flat panels, then meticulously sewn together.
Part 1: Front Panel
- Cast On: Cast on the required number of stitches for the bottom of the front panel.
- Leg Opening/Lower Body: Work in your chosen stitch pattern, shaping for the inner leg and crotch area with increases and decreases as per the pattern. This section often includes a few rows of ribbing for the leg openings.
- Torso: Once the leg/crotch shaping is complete, work straight up to the armholes, maintaining the stitch count.
- Armhole Shaping: Bind off or decrease stitches at the beginning and end of rows to create the armhole curves.
- Neckline & Shoulder Shaping: As you near the top, bind off or decrease stitches to form the neckline. Simultaneously, shape the shoulders (often with decreases or leaving live stitches on a holder).
- Bind Off: Bind off remaining shoulder stitches, or place them on a holder.
Part 2: Back Panel
- Repeat Steps 1-4 from Front Panel: The back panel’s leg and body shaping will largely mirror the front.
- Neckline & Shoulder/Back Opening Shaping: The back neckline is typically shallower than the front. It might also include a small opening (often a placket with buttons/snaps) at the back neck/shoulder for easier dressing. Shape the back neck and shoulders.
- Bind Off: Bind off remaining shoulder stitches, or place on a holder.
Part 3: Sleeves (Optional)
- Cast On: Cast on stitches for the cuff.
- Work in Rows: Work in your chosen stitch pattern, increasing stitches evenly along the length of the sleeve to create fullness.
- Sleeve Cap Shaping: As you approach the top of the sleeve, decrease stitches to form the rounded sleeve cap, allowing it to fit smoothly into the armhole.
- Bind Off.
Part 4: Assembly & Finishing
- Seaming (The Invisible Touch): This is where your individual panels become a cohesive garment.
- Shoulder Seams: Join the front and back shoulder seams using the Mattress Stitch for an almost invisible join.
- Side Seams: Join the front and back side seams from the armhole down to the beginning of the leg shaping.
- Crotch Seam: Join the front and back crotch pieces.
- Sleeve Seams (if applicable): Seam the long edges of the sleeves.
- Attaching Sleeves: Sew the prepared sleeve into the armhole opening using a Mattress Stitch or similar technique.
- Neckband/Armband/Legband Edgings:
- Pick Up Stitches: Along the raw edges of the neckline, armholes, and leg openings, pick up stitches.
- Knit Ribbing: Work in ribbing (K1P1, K2P2) for a few rows to create a stretchy band.
- Bind Off: Bind off loosely for elasticity.
- Button Bands/Plackets: If your design includes a button placket (e.g., at the shoulder or back), pick up stitches along the opening and knit the bands, creating buttonholes as indicated in your pattern.
- Weave in All Ends: Meticulously weave in every single yarn tail using your tapestry needle. For baby items, double-knot initial slip knots and ensure all ends are completely secured to prevent unraveling and discomfort against delicate skin.
- Blocking: This is essential for baby garments.
- Gently wet the finished garment (or steam it).
- Carefully lay it out flat on blocking mats, shaping it to the correct measurements according to your pattern’s schematic. Use T-pins to hold it in place.
- Allow to dry completely. Blocking evens out stitches, relaxes the fabric, and sets the final shape and drape of your bodysuit.
- Attach Closures: Sew on buttons, or apply snaps, securely following your pattern’s instructions.
Tips for Success
- Don’t Skimp on the Gauge Swatch: This is the single most critical step for a well-fitting garment.
- Master the Mattress Stitch: It will make your flat-knitted garments look professional and seamless. Practice on scrap pieces!
- Choose Soft Yarn: Always prioritize comfort for baby clothes.
- Secure All Closures: For buttons, use strong thread and sew them on firmly. For snaps, ensure they’re well-attached.
- Block Your Finished Garment: It makes a significant difference to the final look and feel.
- Ease of Dressing: Consider how easy the bodysuit will be to put on and take off a wiggling baby.
Customization Ideas ✨🌾✨
Even a basic bodysuit offers room for creativity:
- Subtle Textures: Incorporate a simple repeat of garter stitch or seed stitch panels for gentle texture (capturing the ✨🌾✨).
- Color Play: Add simple stripes, a contrasting collar, or use a variegated yarn.
- Embroidery: Add a small embroidered motif (like a tiny wheat stalk 🌾, a sparkling star ✨, or a delicate flower) once the garment is complete.
- Decorative Buttons: Choose buttons that add a touch of personality.
Caring for Your Hand-Knitted Bodysuit

Proper care ensures your handmade garment lasts:
- Follow Yarn Label Instructions: Always refer to your specific yarn’s care guidelines.
- Machine Wash (if yarn allows): Many baby yarns are superwash and machine washable on a gentle cycle with cool water. Use a mesh laundry bag for extra protection.
- Hand Wash (Recommended for Delicates): For non-superwash wools or very delicate stitches, hand wash gently in cool water with a mild detergent.
- Reshape and Lay Flat to Dry: Never wring, twist, or hang a wet knitted garment. Gently squeeze out excess water, reshape the bodysuit, and lay it flat on a clean towel or a mesh drying rack to air dry completely.
Conclusion
Knitting a basic bodysuit on two needles is a wonderfully accessible and deeply satisfying project. It allows you to create a highly practical and adorable garment for a little one, all while honing your essential knitting skills. The beauty of its simplicity, combined with the love poured into each stitch, makes this handmade bodysuit a cherished piece. So grab your needles, choose your softest yarn, and discover the joy of crafting this indispensable baby wardrobe staple!
Video Tutorial ;